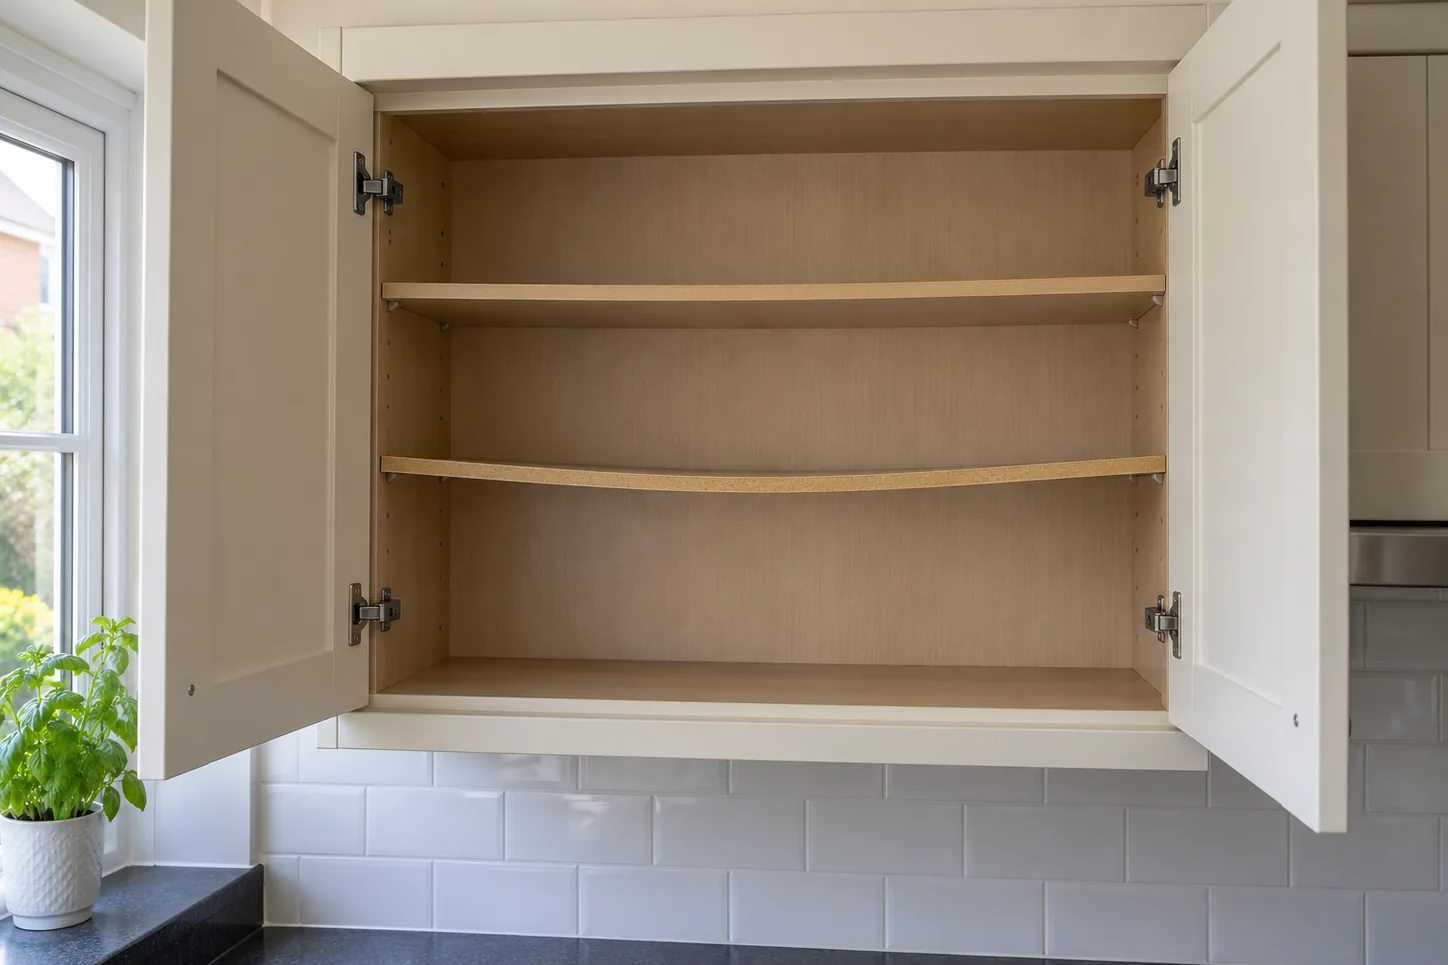
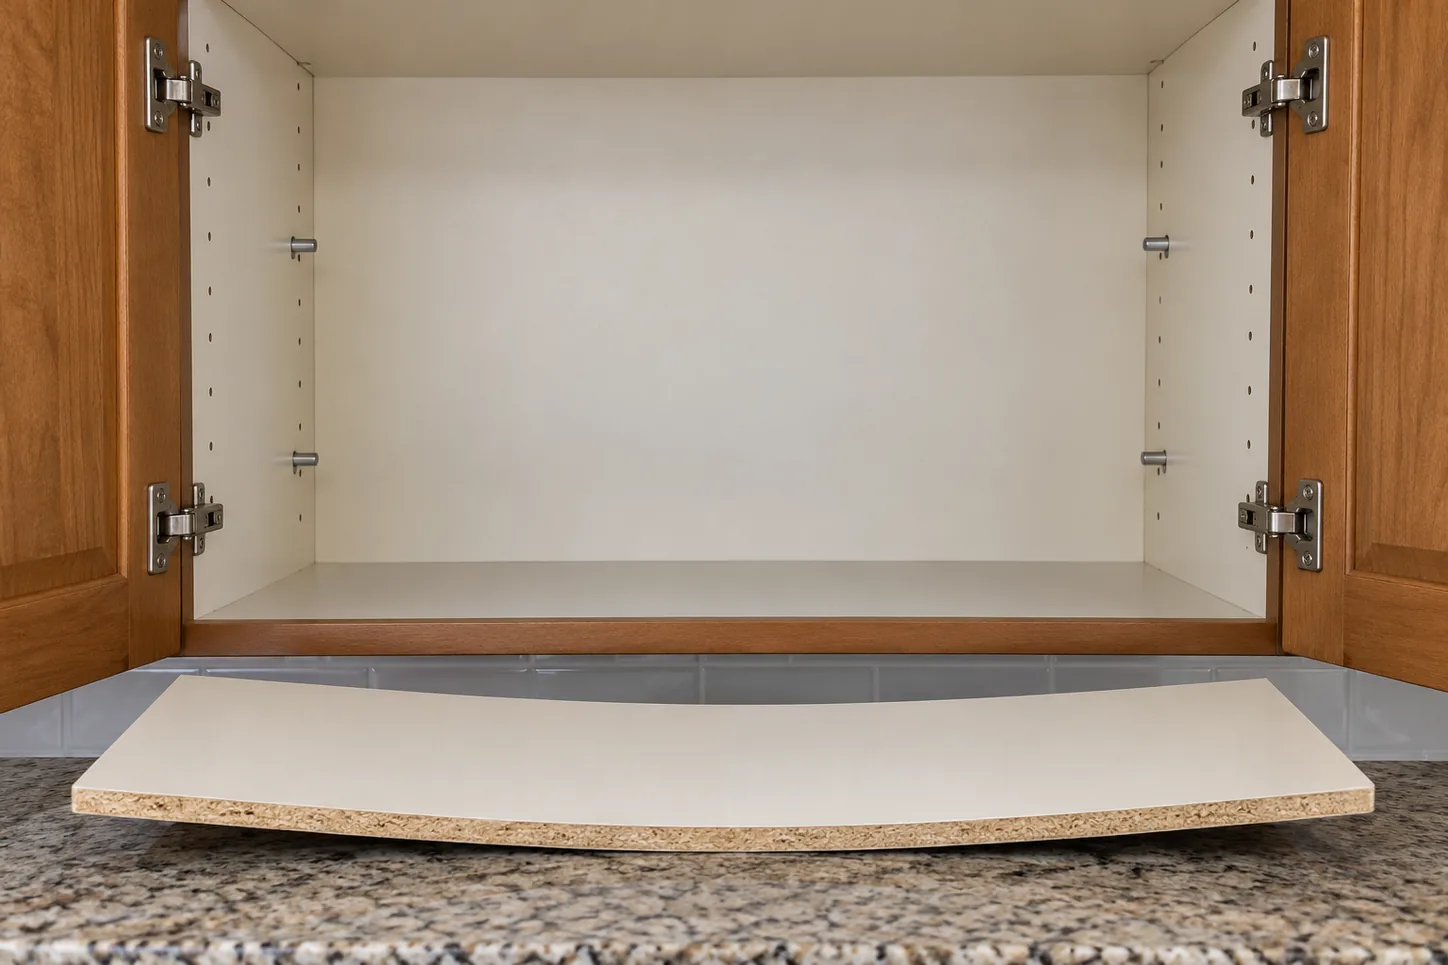
A shelf that dips in the middle is giving an early warning. It may be carrying too much weight for its span, one support pin may have moved, or the board may have weakened after getting damp. Empty it before the shelf drops and damages what is below. Then examine the supports, the board and the cabinet sides separately. Adding another pin or turning the shelf over will not solve every cause.
This guide concerns removable shelves in ordinary kitchen cabinets. A fixed shelf that forms part of the cabinet’s structure needs more care: cutting or moving it could weaken the unit. A wall cupboard that moves at its wall fixings is a different safety issue. Do not reload it until the cabinet itself has been assessed.
Empty the shelf and record how it sits
Take everything off the shelf, including light items. Stack dishes somewhere stable rather than on the floor in a traffic area. Photograph the sag while it is still installed, noting which edge dips and whether one corner has dropped. A shelf bowed smoothly across the centre points towards load and span; one corner markedly lower suggests a missing or badly seated support.
Check whether heavy plates, bottles or tins were concentrated in the middle. The cumulative weight of several modest items can be substantial, especially in a wide wall unit. Move heavy items to a lower, better-supported cabinet while the issue is assessed. A sagging shelf is not simply a cosmetic fault: a pin can pull out or the board can crack without much warning.
Remove the shelf only if it lifts freely from its supports. Some have retaining clips or a small screw to keep them from tipping. Do not wrench a trapped shelf against a cabinet hinge. Lay it on a flat, dry surface and see whether it remains bowed after unloading. A board that stays visibly curved or has cracked edges may need replacement.
Inspect all four support points
Many adjustable shelves rest on four pins inserted into rows of holes in the cabinet sides. Confirm that there are four supports of the same type and that each is fully seated at the same height. A missing pin can let one edge drop while the other three appear intact. Some pins have a flat shelf-bearing surface that must face upward; others have a retaining detail. Match the original system rather than mixing arbitrary hardware.
Look closely at the holes. If the cabinet side has crumbled or enlarged around a pin, simply pushing it back into the same hole is unlikely to hold. Damp chipboard can lose its grip even when the pin itself looks sound. A pin that tilts under a light hand pressure suggests the substrate needs repair. Do not test it by reloading with crockery.
Check for shelf notches or grooves that locate over the pins. A shelf installed backwards may not sit fully on all supports. If the cabinet has adjustable hinges or a door that is out of line, that is a separate issue covered in the guide to adjusting kitchen cupboard doors. Correct shelf seating before considering door clearance.
Look for moisture, not just excess weight
Inspect the shelf edge and cabinet sides for swelling, bubbling laminate, dark staining or a musty smell. A wall unit near a kettle may see persistent steam; a unit below a sink may be exposed to intermittent leaks. Chipboard that has swollen at an exposed edge is structurally different from a dry board that flexed under load. Drying may stop further damage, but it seldom returns the original strength or dimensions.
If water is present, find the source before fitting a new shelf. Keep electrical items clear of wet cabinetry and arrange appropriate help if a leak is active. A replacement board installed in the same damp space can fail again. Do not conceal staining with adhesive film or paint before the area has been inspected and dried.
The edge finish matters too. A chipped or unsealed front edge lets moisture reach the core during cleaning. Even a sound-looking white surface may hide a soft brown edge. Press gently near a suspect area with a blunt object; do not rely on a heavy load test. A soft or crumbling board should be replaced, not merely propped up from beneath.
Decide whether the span needs more support
Shelf material, thickness, depth and unsupported width all affect how much it can hold. A wider shelf of the same board will bend more under the same load. There is no safe universal weight limit for “a kitchen shelf” without knowing the material and cabinet design. Check any manufacturer guidance for the unit. If none exists, distribute lighter items and avoid concentrated loads.
An additional centre support can sometimes help a long shelf, but it must transfer load into a sound part of the cabinet. A small bracket screwed into thin hardboard at the back is not a reliable structural support. Equally, a centre batten may obstruct appliances, doors or stored items. A carpenter can assess whether a stronger replacement board, a suitable front-edge stiffener or a proper centre support best suits the unit.
Turning a bowed shelf upside down is a temporary temptation. It may appear flatter at first, but a damaged board can continue deforming, and the finished faces or locating notches may no longer sit correctly. If it had been heavily overloaded, replacing it with a properly sized and supported board is more dependable. Do not cut a replacement so tightly that it pushes the cabinet sides apart.
Measure a replacement correctly
Measure the clear width between cabinet sides at both front and back; older or adjusted units may not be perfectly square. Record shelf depth, board thickness, edge finish and any notches around hinges or pipes. A removable shelf needs enough clearance to be inserted and lifted out while still resting fully on its supports. Use the existing shelf as a pattern only after checking whether it was originally cut accurately.
Choose a material suited to kitchen use and the intended load. A decorative melamine surface does not, by itself, tell you the strength of the core. Exposed cut edges should be finished appropriately so routine humidity does not reach the board. If the shelf is to carry heavy crockery or small appliances, ask for a load-aware design rather than simply copying a failed thin panel.
Check the support pins against the new board’s thickness and edge profile. A shelf with a shaped front may need to be oriented one way. Seat it evenly on all four points, then apply a light load first and confirm it does not rock or tip. Gradually return items, spreading weight across the shelf and keeping heavier objects closer to the supporting sides where practical.
When the cabinet needs more than a shelf
If support holes are badly worn, side panels are swollen, the cabinet has pulled from the wall or several shelves have bowed, the problem may be the unit rather than one panel. The existing guide to stripped screw holes in flat-pack furniture explains a related material failure, although shelf-pin holes need their own repair decision. A carpentry assessment can identify whether the sides remain sound enough to carry a new shelf. For a straightforward minor fitting job, the site’s handyman and odd-jobs service is relevant.
Describe the cabinet width, the shelf material if known, whether the board remains bowed when unloaded and whether any pin holes are damaged. Photos of the empty cabinet and removed shelf help. A stable repair restores both the load path and the board, then changes how the shelf is used so the same dip does not return.
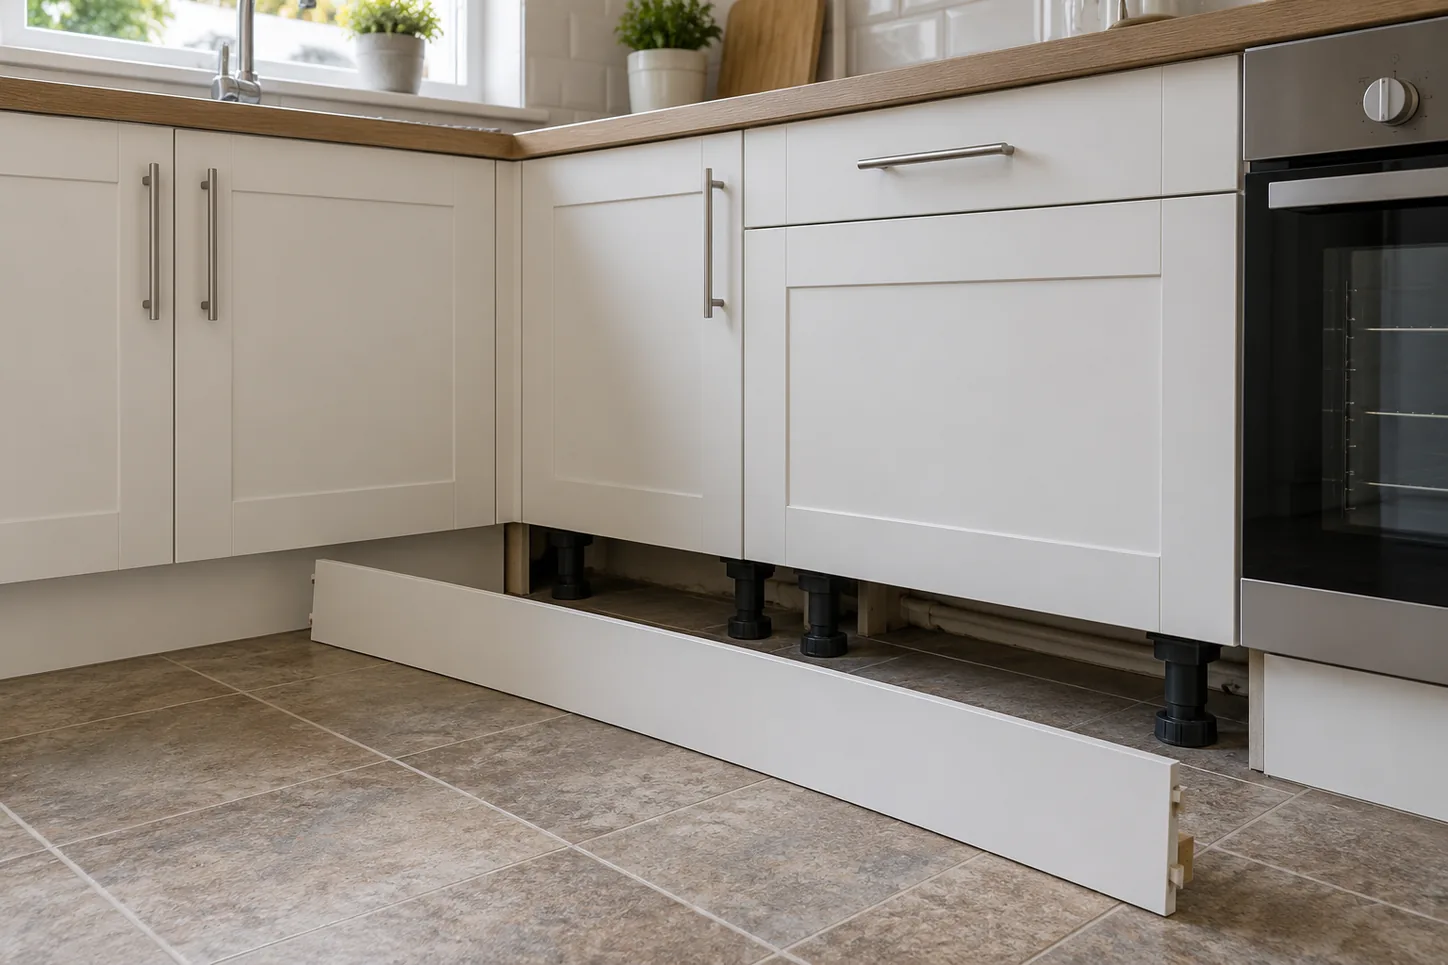
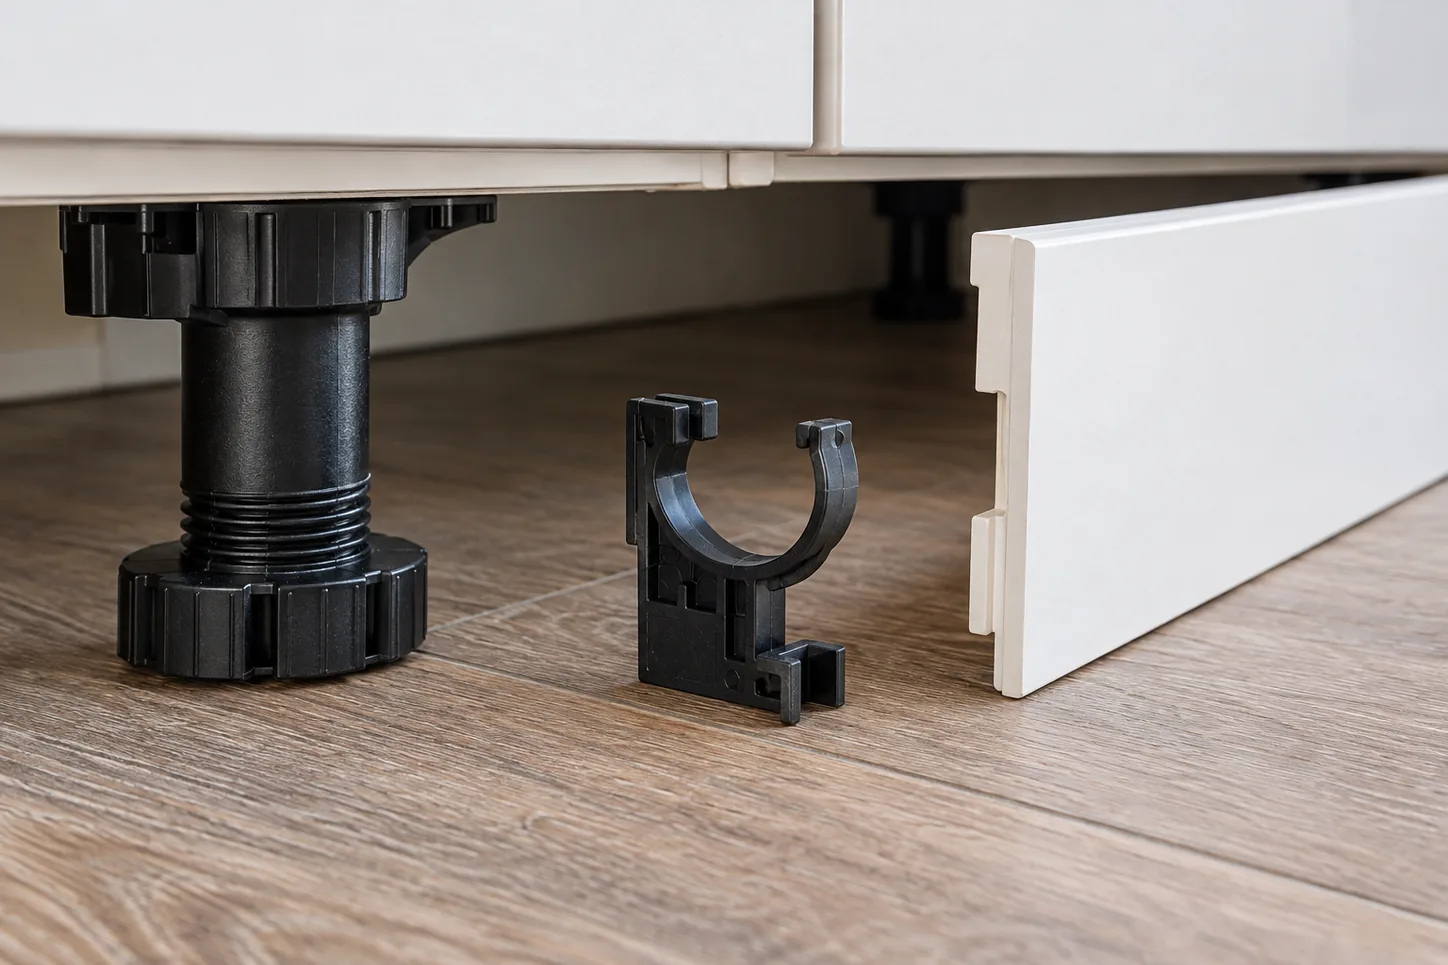
A kitchen plinth, often called a kickboard, covers the gap beneath base units. It usually clips to the adjustable cabinet legs so it can be removed for access. If it keeps falling off, the visible gap is only the symptom. The clips may be broken or misplaced, the board may have swollen, or a cabinet leg may have shifted. Check the space behind it before pressing it back into place: a detached plinth sometimes reveals the first sign of a leak.
This repair is separate from adjusting kitchen cupboard doors or repairing a damaged worktop. The plinth should sit neatly, but its more useful role is to remain removable while protecting the underside of the units from everyday knocks and dirt. Gluing it permanently across the whole run can hide moisture and make later access to pipework or appliance connections difficult.
Remove the loose board without snapping the clips
Clear the floor and photograph how the board currently fits, including corners and any return pieces. Many plinths pull forward from the legs, but systems vary. Look behind an already loose end for a plastic spring clip or bracket before pulling. Support the board along its length so the remaining clips do not take all the bending force. A long chipboard plinth can split at a cut-out if it is twisted.
If a section passes in front of a dishwasher or another appliance, check whether it is attached to the cabinets or to the appliance’s own adjustable panel. Do not force a board that catches on a machine door. Some appliance ventilation grilles must remain clear; replacing them with a plain board can interfere with the manufacturer’s installation requirements.
Place the detached board flat on a clean surface. Keep clips, small screws and any corner connectors together. If one end is fixed firmly and the other end is loose, avoid levering from the fixed end. Release each connection in turn, following the direction its clip opens. If you cannot see how it is secured, a careful inspection is cheaper than replacing a cracked finish panel.
Inspect behind the plinth before refitting
Use a torch to look along the floor and beneath the cabinets. Dry dust is normal. Standing water, dark staining, a musty smell, softened chipboard or swollen flooring needs investigation. A leak may be coming from a sink, appliance hose, waste pipe or something farther away; the plinth gap alone does not identify the source. If water is active, address it before enclosing the area. The site’s article on damage to a kitchen worktop discusses why swollen board needs a different decision from a superficial chip.
Check cabinet legs and floor contact. An adjustable leg may have turned or shifted so its clip no longer meets the position on the board. Do not use the plinth to push an unstable cabinet back into line. A base unit that rocks, carries a heavy worktop or is out of level needs the unit support checked first. The plinth is trim, not a prop.
Look for pests or damaged cables only from a safe distance. Do not reach into an unknown void or disturb electrical fittings. Note the location and arrange the appropriate specialist if there are signs of a wider problem. A removable board is useful precisely because it lets these issues be discovered early.
Diagnose the clips and board condition
Most clip-on plinths have brackets fixed to the back of the board that grip the round cabinet legs. Compare each clip. A cracked jaw, missing screw or bent bracket may explain why one point will not hold. Check whether the screw hole in the board still grips. Replacing a clip with a matching part is preferable to adding a large screw through the visible face.
Measure the diameter of the cabinet leg and the existing bracket before buying replacements. Clips that look alike may suit different legs and board positions. Some allow a little adjustment; others require their mounting point to be moved. Photograph a sound clip as a reference. If every clip has failed after a short period, consider whether the board is too tight against the floor or being hit by a mop, vacuum or cabinet door.
Lay a straightedge along the board. A plinth bowed by moisture or storage pressure may spring away even with new clips. Inspect the bottom edge closely. Chipboard that has expanded into a rough, flaky edge will not reliably return to its original thickness when it dries. Repainting or adding a new clip may hide the damage briefly, but replacement of the affected length can be the better repair once the moisture source has been removed.
Check clearances and ventilation
The board should meet the cabinet line without being wedged hard between the floor and unit. Floors are rarely perfectly level; a long run may need careful fitting so the top edge remains neat while the bottom has appropriate clearance. Do not remove so much material that a large gap admits dirt or looks uneven. If the board has warped because it was cut too tight and repeatedly absorbed mop water, protect the replacement edge as the material supplier recommends.
Some kitchens rely on ventilation through a specific grille, particularly near integrated appliances. Preserve the original opening and use a suitable replacement part if it is damaged. Do not cover a grille because it looks untidy. Check appliance instructions before changing any trim that forms part of its ventilation path. A dishwasher door, for example, may also need room to swing without catching the plinth.
At a corner, the return board may meet the front length with a joining piece or mitred edge. A loose connector can pull the main board off its clips each time someone kicks the corner. Repair the connector rather than forcing the front length tighter. A small gap at a wall can sometimes be finished neatly, but sealant should not turn the entire plinth into a permanently fixed barrier.
Refit in a controlled sequence
Once the void is dry and the clips are sound, align the board in front of the cabinet legs. Start at one end and engage clips sequentially, supporting the plinth close to each fixing. Press near the clip rather than in the middle of a long unsupported span. You should feel a positive engagement, not need to hammer the board. If a clip misses its leg, remove the board and adjust the bracket position rather than bending the board to reach it.
Check the top line against the cabinets and the bottom line against the floor. Open every nearby cabinet door and appliance door to ensure the plinth does not obstruct them. A plinth that springs back at one point may have a missing or displaced leg behind it. Inspect that location; adding pressure elsewhere will not solve it.
Give the board a light, controlled pull at each clip position to confirm it is held but still removable. Avoid tugging so hard that you break new brackets. Clean up dust and note the repair date if there had been moisture. A quick later inspection can reveal whether the void stays dry.
When replacement or professional repair is sensible
Replace the affected length if the board is swollen, split, badly bowed or cannot hold clips in sound material. A carpenter can match its height, finish, return corners and appliance cut-outs. The site’s carpentry service is relevant for a fitted plinth; kitchen refurbishment is the broader route if cabinet bases and several panels are damaged. If the visible issue is instead an uneven cupboard door, use the existing guide to adjusting kitchen cupboard doors.
Describe whether the board fell off once or repeatedly, whether clips remain on it, and whether the space beneath the units is dry. A photo of the board’s reverse side and the exposed cabinet legs helps identify parts before a visit. The durable fix is to correct the cause behind the loose plinth, retain necessary access and leave the trim secure without sealing a hidden problem behind it.
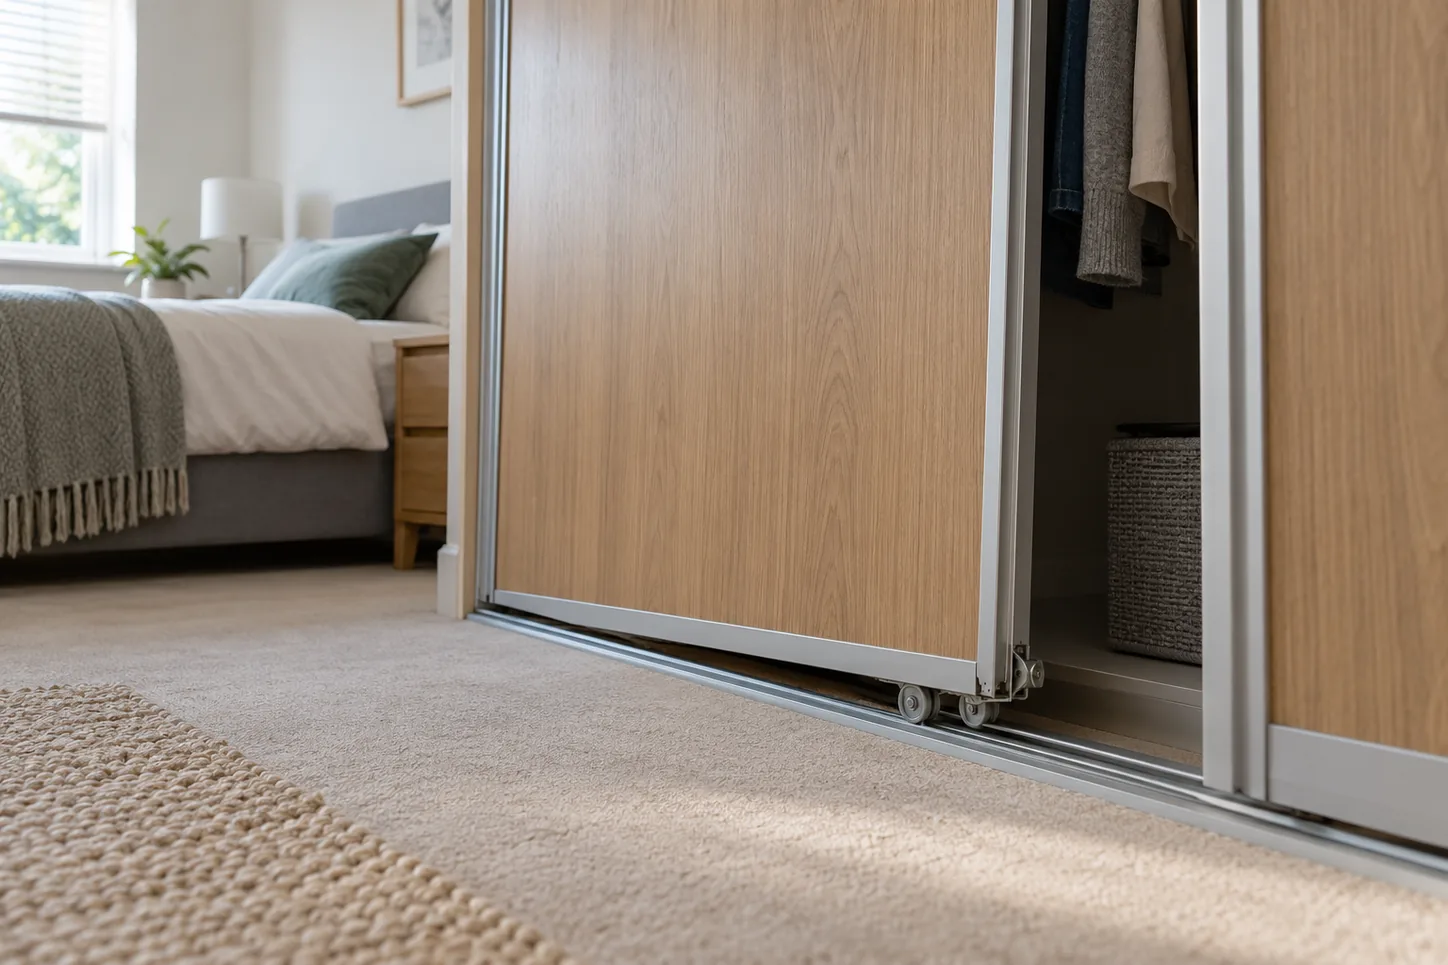
When a sliding wardrobe door jumps its track, stop moving it until you know how the system supports its weight. Some doors hang from an upper rail, others roll on a lower track, and many use both a load-bearing part and a guide. Lifting the panel at the wrong point can release it suddenly. A door that is heavy, mirrored, glazed or taller than you can control comfortably should be handled by two competent people or a fitter.
For a lighter, accessible panel, the first useful checks are simple: look for debris in the track, a roller that has dropped or broken, a guide that has come loose, and a door that is no longer square to the opening. Those observations help you decide whether cleaning, adjustment or a replacement component is required. Forcing the panel back into place without finding the cause usually makes the next derailment more likely.
Identify the track system before lifting anything
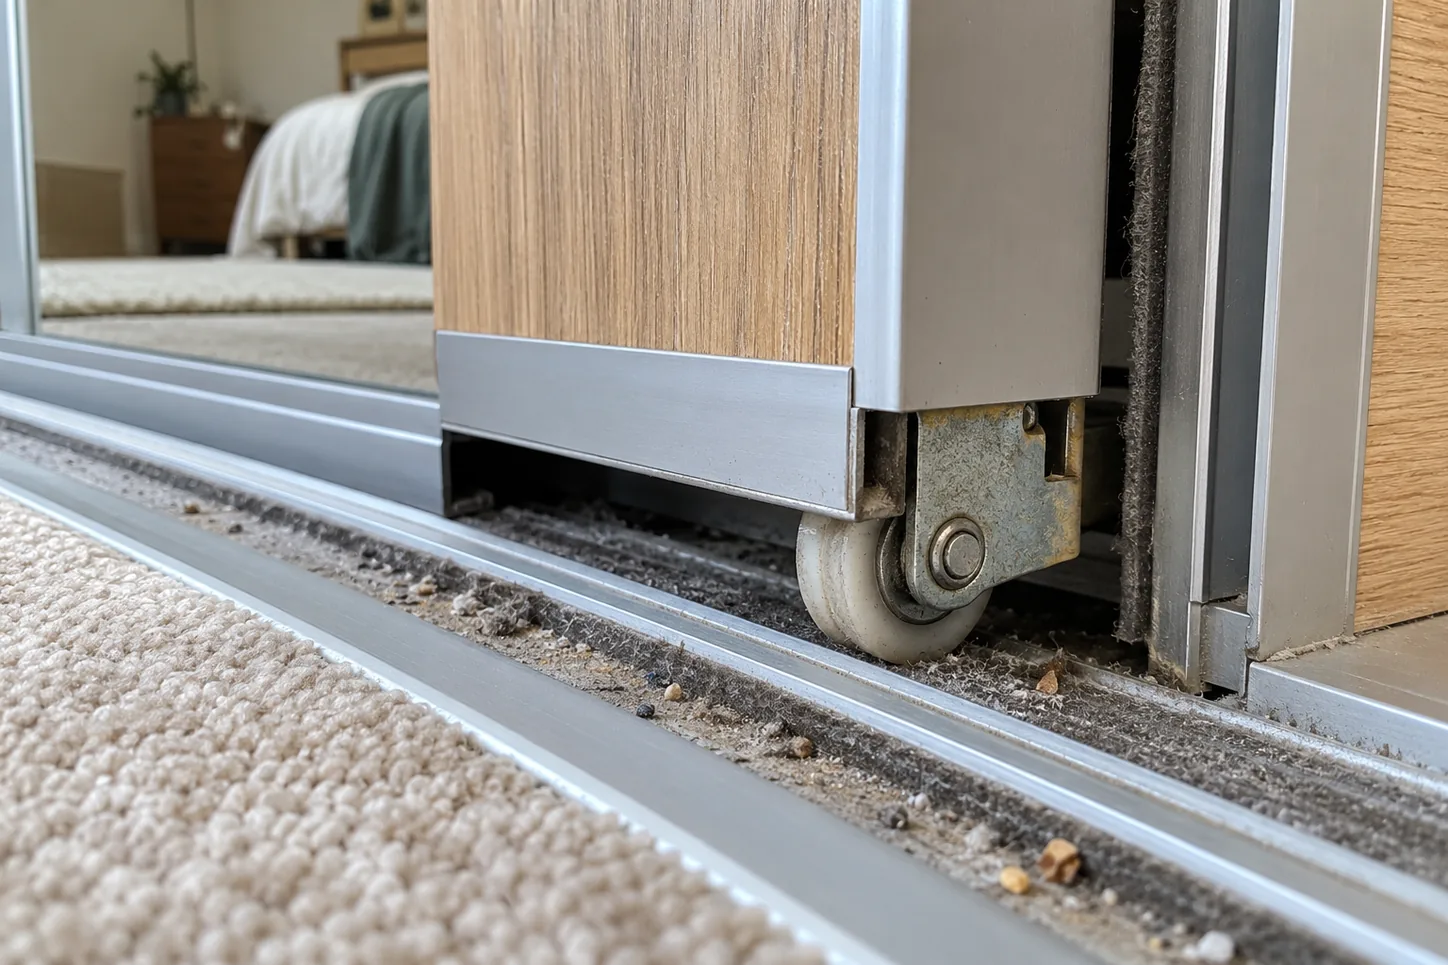
Open the wardrobe as far as it will move smoothly and inspect both the top and bottom edges with a torch. A bottom-rolling system often has visible wheels carrying the panel in a floor track, with a guide above. A top-hung system carries weight at the head and uses a lower guide mainly to stop the panel swinging. Hardware can be concealed behind trim, so do not assume what you see first is the load-bearing part.
Look for a maker’s label or installation instructions inside the wardrobe. Many systems have a particular sequence for releasing and refitting panels. Some rollers are spring-loaded; others use a captive bracket or adjustment screw. The correct method may vary between an ordinary timber-look panel and a heavy mirrored panel. If you cannot identify the system, pause rather than improvising with a screwdriver under the glass or frame.
Check whether the door has actually left the rail. A panel may feel derailed because it drags against a carpet edge, scrapes a side jamb or catches on a screw head. A runner can also make a grinding noise while still seated. Watch the bottom edge from a safe position as the door is moved only a few centimetres; this can distinguish a wheel climbing out of the channel from a panel rubbing beside it.
Inspect the track without dismantling the wardrobe
Dust, grit, small toys and broken plastic fragments can accumulate in a lower channel. A roller encountering a hard object may lift and drop into the wrong groove. Vacuum loose debris with a narrow nozzle, then wipe the track with a dry or lightly damp cloth according to the system’s instructions. Do not flood a chipboard wardrobe base or leave moisture beneath a floor rail.
Look along the rail for dents, loose screws, lifted ends and an uneven joint between track sections. If a screw has backed out, it may catch the wheel repeatedly. Tightening it into sound material may be enough, but a screw that spins in the hole indicates a failed fixing. Do not replace it with an arbitrary long screw; flooring, services or a weak panel core may be beneath the track. A bent metal track or cracked plastic guide may need a matching part rather than more force.
Do not apply thick grease to an open lower track unless the manufacturer specifies it. It can hold grit and make cleaning harder. Some rollers are designed to run dry; some mechanisms have particular lubrication points. The wrong product can damage plastics or collect dust.
Check rollers, guides and door alignment
If you can see the rollers without removing the panel, compare both ends. One wheel may sit lower, wobble or fail to turn freely. A cracked wheel rim can climb the rail. A mounting bracket that has loosened lets the panel tilt, so the opposite end may appear to be the problem even when the damaged part is elsewhere.
Examine the upper guide as well. A missing guide block can allow a bottom-rolling door to lean out; a loose top hanger can let a top-hung panel drop. The adjustment screw, if present, is not a general-purpose cure. Before turning it, note its starting position and check the manufacturer’s directions. Small adjustments can make the door more level, but excessive adjustment may reduce roller engagement or cause the panel to strike the frame.
Stand back and compare the vertical gap between the door and the wardrobe side from top to bottom. If the gap tapers, the panel may be tilted or the wardrobe carcass may be out of square. A new carpet, uneven floor or a wardrobe that has shifted after being moved can affect the track. A fitter may need to correct the base or frame before adjusting the doors. Otherwise the roller will keep climbing the same edge.
The published guide to a drawer that sticks or comes off its runners covers a different mechanism, but shares a useful diagnostic principle: clear the track and check both sides before replacing a component. Sliding wardrobes carry much greater panel weight, so apply a stricter limit to what you attempt alone.
Refit only when the panel is controllable
If the system instructions confirm a safe refitting sequence and the panel is small enough for two people to control, clear the area and remove nearby obstacles. Protect the floor and do not hold a panel solely by a decorative trim or mirror edge. Each person should support the solid frame at a stable point. Follow the maker’s sequence for engaging the load-bearing rail first and then the guide. Do not lever a roller past a retaining lip; that can break its bracket.
Once seated, move the panel through its full travel slowly while someone watches the rollers and guides. It should not jump, grind or scrape. Test both directions, because an issue at one end of the track may only appear when the door is fully open. Check the overlap with the neighbouring panel so handles and trims do not collide.
If the panel will not stay engaged after one careful attempt, stop. Repeated lifting can loosen the hardware and increases the chance of a drop. A mirrored door has additional risk: a crack may not be obvious from the front, and a heavy glazed panel can be difficult to arrest once it tips. A damaged mirror or loose glass requires professional handling.
Repair or replace the failed part?
A clean, intact track and a sound roller that was displaced by a one-off obstruction may need only proper refitting and monitoring. A wheel with a flat spot, seized bearing or broken axle needs a compatible replacement. A bent rail may need replacement as a complete length so the wheel has a consistent path. A cracked guide or missing stopper should be matched to the original system where possible.
Photograph the hardware and any markings before ordering parts. Measure the wheel diameter, bracket shape, track profile and fixing positions only when the parts can be accessed safely. Similar-looking rollers do not necessarily carry the same load or fit the same rail. An unsuitable substitute can run for a few days, then derail again. Keep old parts until the replacement is installed and tested.
If the wardrobe carcass has swollen at the base from water or bowed under load, a new roller will not restore alignment. The underlying furniture may need a broader carpentry repair or replacement. Where the mechanism was assembled incorrectly, the site’s furniture assembly service is relevant. The older article on furniture assembly problems gives wider context for deciding when a fitting job needs help.
Keep the door running smoothly
Once repaired, keep the lower channel free of grit, especially where carpet fibres or pet hair gather at the opening. Do not use the sliding panel as a handle for moving the entire wardrobe. Close it with a steady motion and avoid pushing at its top or bottom corner alone, which can twist the panel. Check that end stops remain secure and that stored items do not press against the back of the sliding doors.
If a door gradually becomes harder to move, investigate early. A small increase in resistance may be the first sign of a failing roller, loose track screw or shifting cabinet. Fixing that cause is usually simpler than recovering a heavy panel after it leaves the rail. The order of work is straightforward: identify the system, clear and inspect the track, check the support hardware, then refit or replace only what the evidence points to.
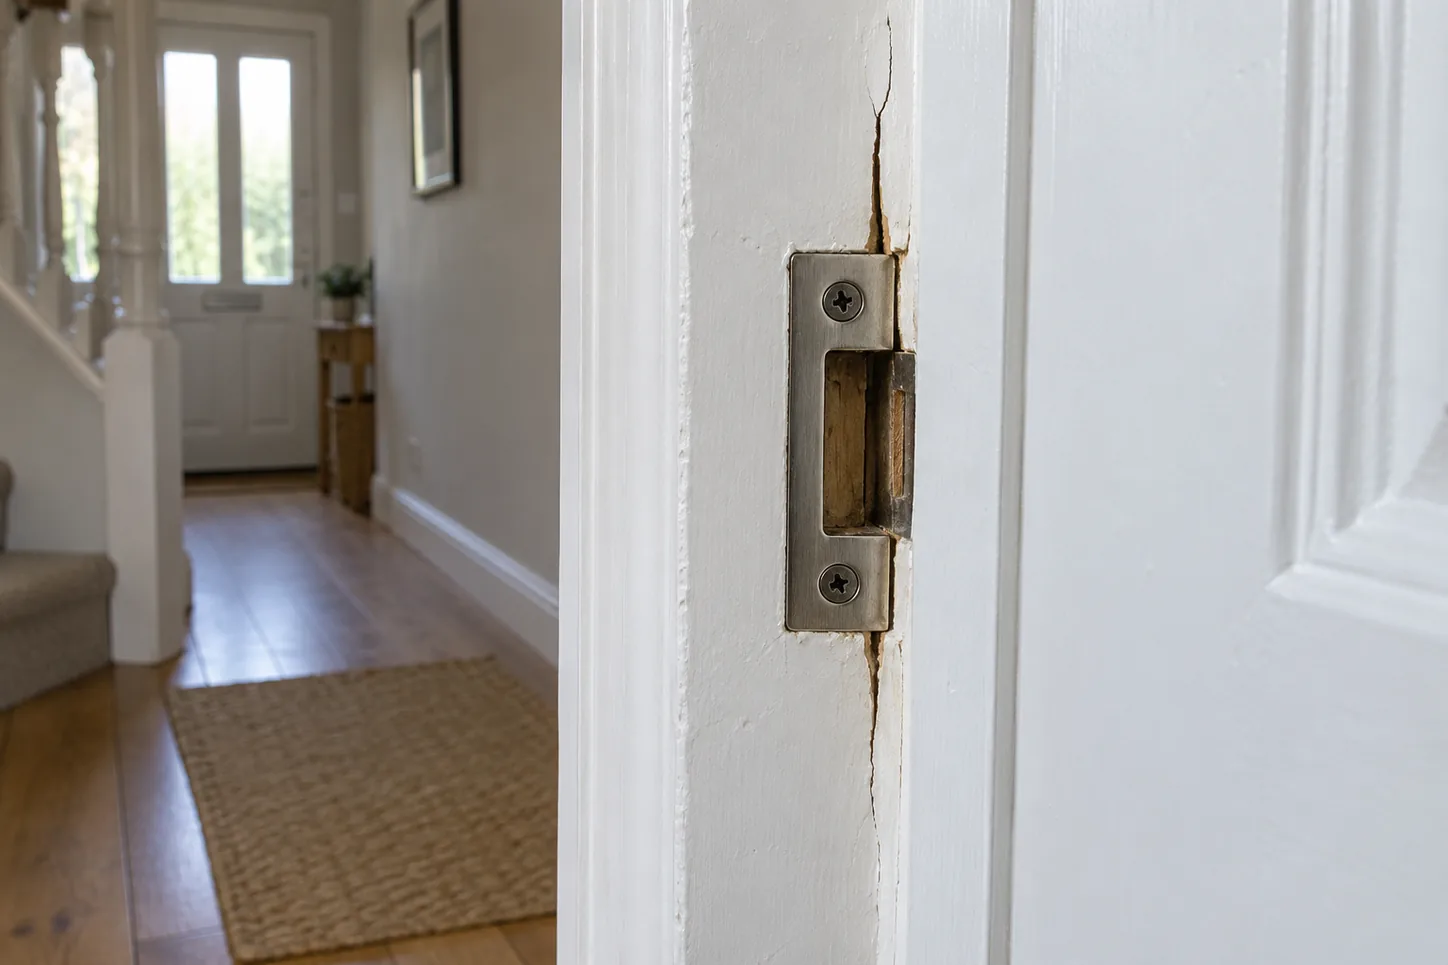
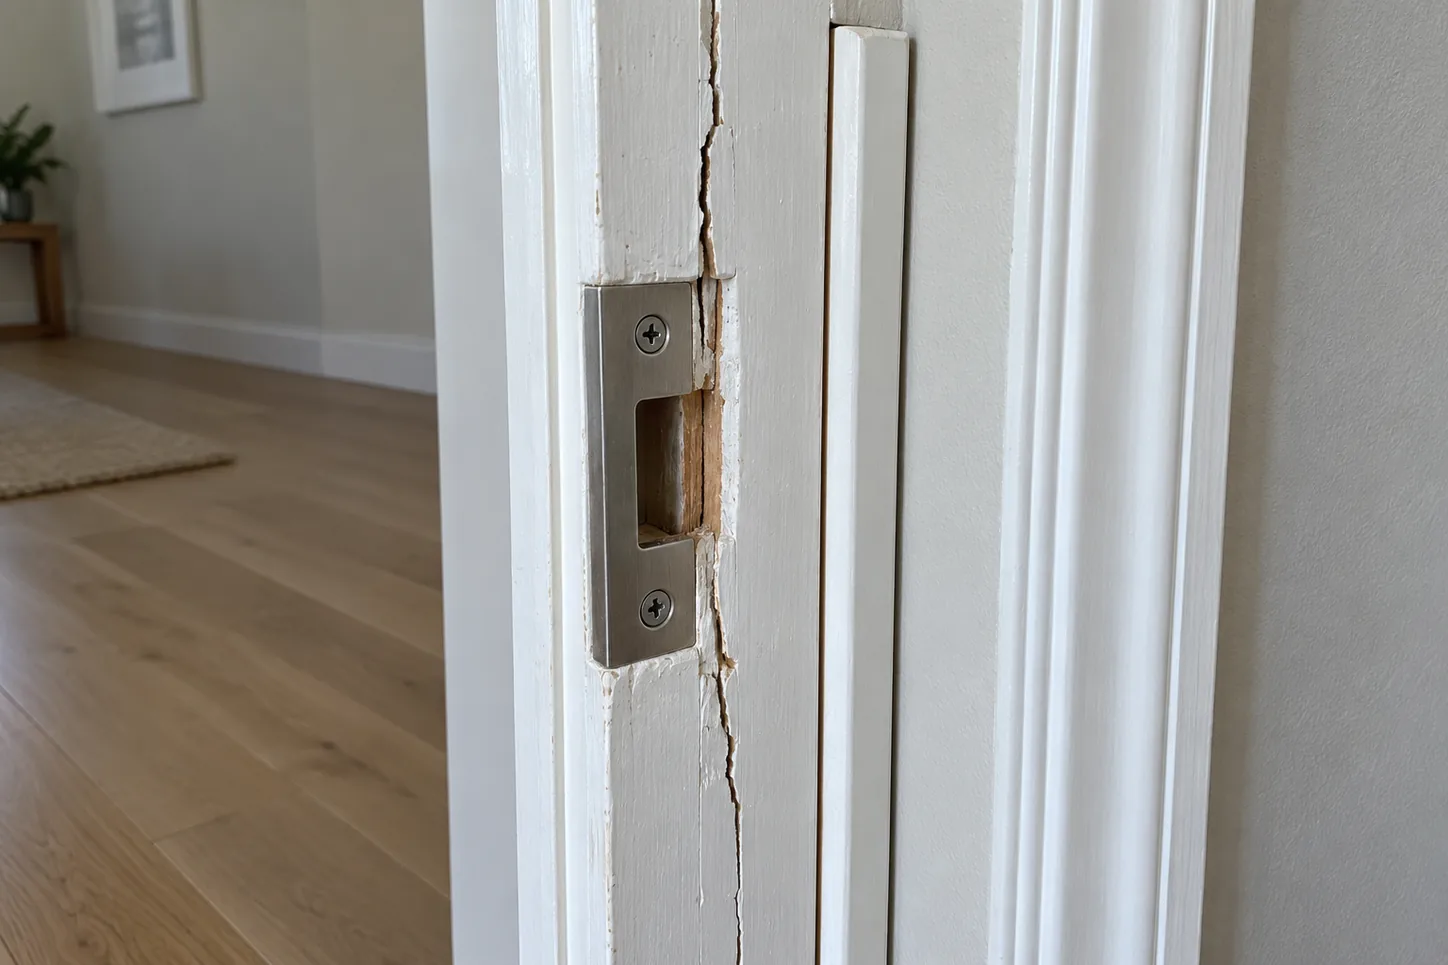
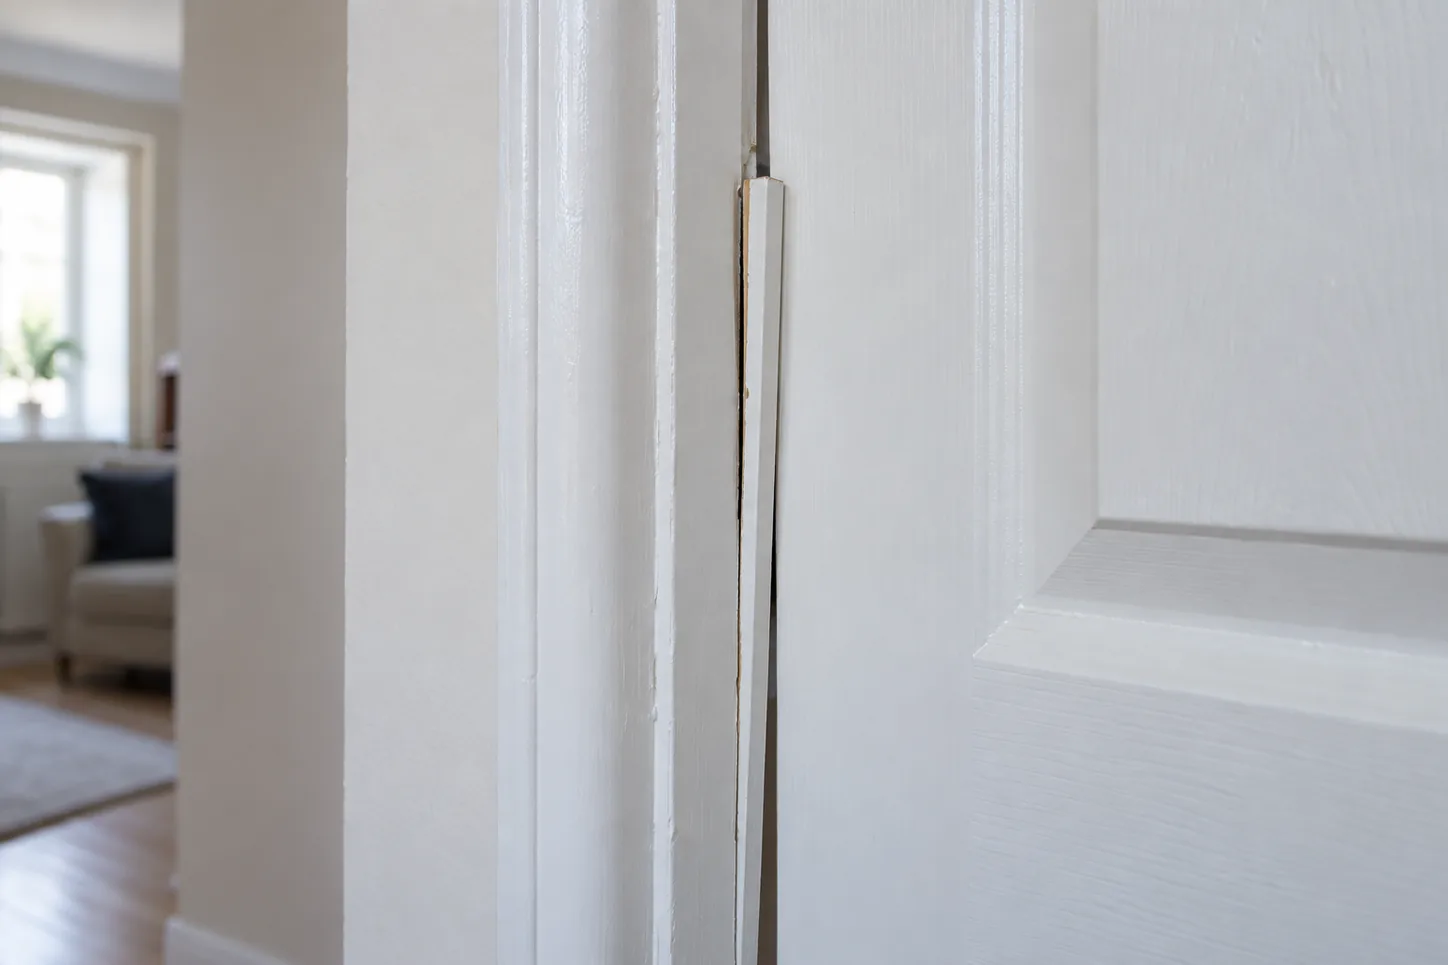
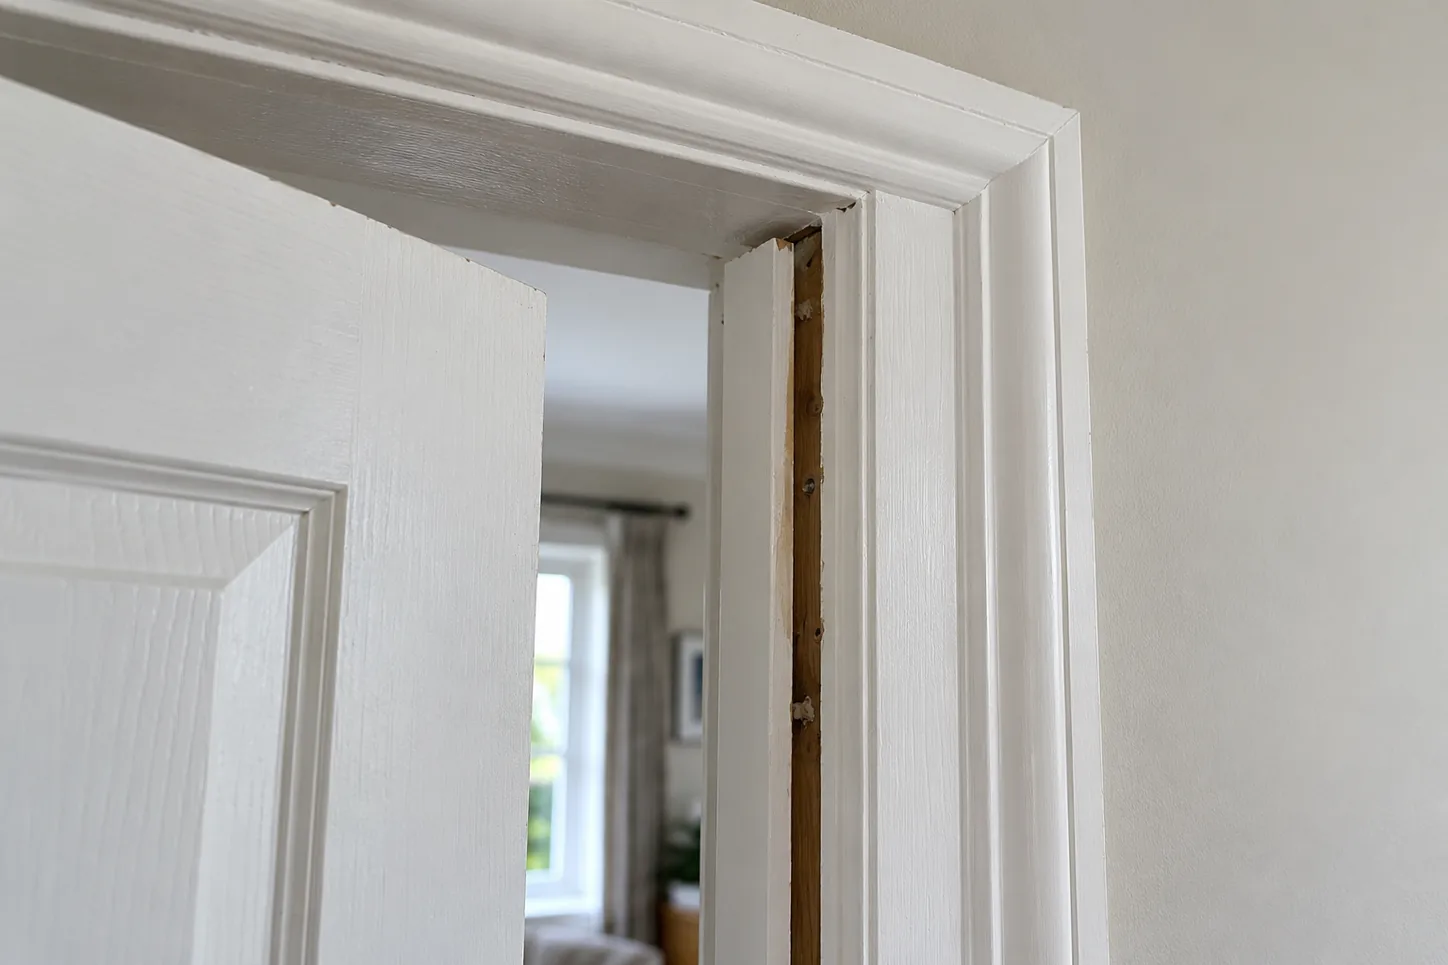
A door jamb can split when a door is forced, caught by a strong draught or struck while furniture is moved. The damage may be a fine crack in the painted surface, or it may run through the timber that holds the latch keep. Those are very different repairs. If the door no longer closes securely, the frame moves when pressed, or sharp timber is exposed, stop relying on the door until the damage has been assessed.
This article focuses on timber around an ordinary internal door. An external entrance door, a fire door, a communal entrance or a frame showing signs of forced entry deserves prompt specialist assessment. Security and fire performance depend on more than how tidy a repair looks. Do not fill and paint over a split simply to make it disappear.
Identify exactly which piece has cracked
Stand on the side of the doorway where you can see the closed door and trace the split. The jamb is the frame member that supports the door and latch. The narrow door stop is the strip the door rests against when shut. The architrave is the decorative trim covering the frame-to-wall joint. A split architrave may be a modest trim repair; a split through the jamb beside the strike plate can weaken the latch fixing.
Look at the crack’s length and direction. A short line in paint that does not open under gentle pressure is less concerning than a gap following the grain past a screw hole. Do not probe a damaged edge with bare fingers. Photograph the area from straight on and from the side before touching hardware; the images help compare movement later and make the fault easier to describe to a repairer.
With the door open, look for a matching mark on the door edge. A latch that has been striking the frame outside its keep may have contributed to the damage over time. A sudden split following one hard impact may indicate a different force. The cause matters because a new timber insert or fastener will not last if the door continues to hit the same point.
Check function without forcing the door
Close the leaf slowly. Watch whether the latch meets the keep, whether the jamb moves and whether the door sits at its normal depth. If it needs a shove to latch, stop the test. Repeated force can extend the split. Try the handle with the door open to separate a sticky latch mechanism from a damaged frame. The published guide on a broken handle or lock addresses mechanism symptoms in more detail.
Inspect the hinges and the reveal around the door. If an upper hinge has pulled loose, the leaf may have dropped and placed extra load on the keep. The existing article on stripped screw holes in a wooden frame explains why screws can stop gripping even before a visible split appears. A sound jamb repair should correct the alignment fault as well as restore the wood.
If the crack widens when the latch engages or you can move the plate by hand, the timber holding it is no longer acting as a secure fixing. Keep the door out of use where practical and arrange repair. On an entrance door, treat a failed keep as a security issue rather than a cosmetic inconvenience.
Why filler alone often fails
Ordinary decorating filler is meant to smooth a stable surface. It cannot restore a split length of timber that takes repeated latch impact or screw load. Even a hard setting filler can crack away if the two sides of the split continue moving. Painting over it may hide the evidence while the keep loosens further.
A narrow cosmetic split in a non-load-bearing piece of trim may be repairable after the trim is securely fixed. A longer crack through sound timber may call for controlled bonding, clamping and new fixing positions, depending on its depth and the material. Where wood fibres have crushed or broken away around the keep, a fitted timber repair or partial jamb replacement may be needed. There is no universal filler or screw size that works for every frame.
The frame construction also changes the options. Some jambs are solid timber; others are engineered or form part of a proprietary door set. A thin veneer over weaker core material cannot always hold a new fixing in the same way as solid wood. Older frames may sit over uneven masonry or hidden packers. Cutting into the jamb without understanding what supports it can loosen the entire opening.
Make the area safe while awaiting repair
Remove loose splinters only if they can be lifted without enlarging the split, and keep children and pets away from a sharp edge. Do not tape over a failed latch and assume the door is secure. If the door serves an essential route or provides privacy, arrange an appropriate temporary measure with the responsible property owner or specialist. Avoid obstructing an escape path.
Do not drive a long screw across a crack as an improvised brace. It may split the wood further, miss sound structure or interfere with a concealed service. Likewise, glue squeezed into a closed painted crack may never reach the damaged fibres. A temporary wedge can hold a light internal door open during inspection, but it should not be left as a substitute for a working door where access, fire separation or safety depends on closure.
Record the event if a single impact caused the damage. A concise note of when it happened, what hit the frame and whether the door worked before can help the repairer find both the immediate break and any pre-existing weakness. In a rented property, report it promptly through the usual route rather than carrying out irreversible work without authority.
How a repairer decides between local repair and replacement
A carpenter will generally assess sound timber on both sides of the split, the position of the keep or hinge, and the load the joint must carry. A short local split with intact surrounding fibres may accept a careful repair once the leaf is aligned. A long crack through several fixing points, widespread rot or repeated previous repairs may justify replacing a jamb section or the frame. The decision is based on the strength needed, not just the visible width of the crack.
They should also check why the door hit hard enough to cause damage. A slamming door, a latch that misses its keep or a closer with excessive final speed may otherwise damage the new work. The strike plate must return to a sound fixing position and the door must latch with normal pressure. A repair that looks neat but needs to be slammed shut is unfinished.
Finishing should wait until the functional test succeeds. Exposed timber may need appropriate priming before paint. Matching an old profile or gloss level can take more than one coat, especially where the architrave and stop also suffered damage. A small variation in finish is easier to accept than a concealed structural weakness around the latch.
When to get help quickly
Arrange prompt door repair if the door cannot latch, the frame flexes, the split crosses the keep or hinge fixings, or the damage followed forced entry. For a sound internal door that needs a fitted timber section or trim replacement, carpentry services are relevant. Explain whether the crack is in the jamb, stop or architrave; photos of the whole doorway and the close damage help clarify it.
Do not assume a small crack is harmless because the door still closes today. Watch for widening, fresh paint fractures, a loose plate or a changing door gap. Those signs mean the frame is continuing to move. Conversely, a stable hairline in decorative trim may need only a modest surface repair once the underlying frame has been confirmed sound.
The useful distinction is between appearance and function. First identify the damaged component, then check whether the latch and fixings still have firm timber behind them. Repair or replace according to that structural condition, and correct the impact or alignment problem that caused the split.
The door stop strip is the narrow length of timber that a closed internal door meets inside its frame. When it lifts, the door may rattle, close too far or catch on a projecting edge. A sound repair begins by checking whether only the strip has loosened. If the frame itself moves or has split around the latch or hinges, simply nailing the strip back will conceal a larger problem.
The name causes confusion. This strip is not a floor-mounted doorstop that prevents the door opening into a wall, and it is not a threshold strip underfoot. It is also different from the wider decorative architrave covering the joint between frame and wall. Identifying the loose part matters because the fixing, load and finishing method differ.
Find the extent of the movement
Open the door and run your eyes along the top and both sides of the stop. Avoid pressing hard on sharp, cracked paint. Note whether the strip lifts at one end, bows along a long section or has separated at a mitred corner. Look for old nail holes, new splits, damp staining and soft timber. If a section is hanging free, keep the doorway clear so it cannot snag clothing or a hand.
Close the door slowly and observe where the leaf touches. A stop set too close can prevent the latch reaching its keep. A strip fixed too far away can leave the door rattling even when the latch engages. Use a pencil to mark the original line only if it appears correct. Old paint shadows are not proof: a previous repair may already have put the stop in the wrong place.
Check the frame near the latch and hinges. If it flexes when the door closes, or if the jamb is split, the stop is unlikely to stay fixed. The published guide to stripped screw holes in a wooden door frame deals with a different but related frame-fixing fault. A loose threshold at floor level is covered separately in the threshold strip repair guide.
Look for the reason it came away
A few old panel pins can lose grip after years of door impact and seasonal timber movement. Paint may bridge the joint while the wood beneath has already separated. A door that is slammed regularly can pull the strip away again. If the strip sits over an uneven frame, it may be under constant tension rather than simply lacking one fixing.
Moisture changes the decision. Dark marks, swelling or crumbly fibres near a bathroom or external wall suggest water or persistent condensation. Refixing to damp or soft wood will fail and can hide damage. Find and address the moisture source, then assess what timber remains sound. Be particularly careful where the stop continues around a glazed or fire-rated door: seals and door performance may depend on its exact position.
If the timber has split lengthwise, decide whether a short local repair can restore strength. Glue alone is rarely suitable for a strip that is moving because the substrate is poor. A badly fractured or warped length may be easier to replace with matching moulding, preserving its depth and profile. In older homes, the profile may not match a standard shop-bought strip; measure before removing sound sections.
Prepare the doorway before refixing
Support the door in a stable open position. Protect the floor and remove loose paint flakes or old adhesive from the back of the stop and the frame. Work carefully around an existing finish; scraping aggressively can gouge the jamb and turn a small repair into a broad repainting job. If old paint may contain lead, avoid uncontrolled dry sanding and seek appropriate advice on safe preparation.
If part of the strip is still fixed, do not pull the entire length away by hand. That can tear sound timber or break a mitre at the head. Identify the existing pins or screws and release only the section needed. A thin broad tool placed against a protective packing piece can help lift it without denting the frame, but stop if the trim starts splitting. Mark each piece’s orientation before removal, particularly when two painted pieces look similar.
Remove old bent pins that would prevent the strip seating flat. Check the rear face with a straightedge; hardened blobs of paint or adhesive can hold it away from the frame. The surface need not be stripped to bare wood everywhere, but it must be clean, dry and able to make firm contact. Vacuum dust from the joint before choosing a fixing method.
Set the stop position with the door, not by eye alone
Offer the strip back to its position and close the door gently. It should meet the door face without pushing the leaf away from the latch. Check contact at the top, middle and bottom, because a slightly bowed door may not be perfectly flat. A narrow, consistent reveal is preferable to forcing the stop hard against one corner. Leave any designed seals or cushions in their intended position rather than compressing them beyond their purpose.
Use temporary low-tack tape or a helper to hold the piece while you check the latch. Open and close the door several times. It should close with ordinary pressure, latch cleanly and sit without a loud rattle. Mark the final line before fixing. This trial fit prevents the familiar result of a neatly repainted stop that has to be moved again because the door will not close.
For a small sound section of timber, fine finishing pins or suitable trim screws may secure the strip, provided they enter sound frame material and their length is appropriate. Pilot holes near a strip end reduce splitting. Set fixings discreetly and fill them only after a successful test. A suitable wood adhesive can supplement a mechanical fixing where both surfaces and the manufacturer’s instructions allow it; do not expect glue to compensate for damp, dust or a moving frame.
Avoid driving a large screw through the narrow face simply because it is available. It can split the strip and leave a prominent head. Do not use nails so long that they pass into an unknown cavity or nearby hidden fitting. In some frames, a cautious repair may need a joiner to select a fixing path and restore damaged timber first.
Finish without gluing the door shut
Once the strip is secure, test the door again before filling or painting. Fill pin holes and local surface damage with a product suited to painted wood, allow it to cure and sand gently within the safe limits of the existing coating. Apply primer to exposed timber if the paint system requires it, then touch in the finish. Keep paint out of the latch keep and off moving seals.
A fine decorative caulk line between the stop and frame can make a neat finish on a stable joint, but it is not a structural fixing. Do not bridge a moving gap with thick caulk and assume the underlying problem has gone. Give fresh paint enough time to harden before keeping the door tightly closed. Otherwise opposing painted faces can stick and tear the finish when the door is reopened.
Check the result after a week of normal use. If the strip begins lifting again, look for an over-forceful closing action, a crooked door or unsound frame material. Repeatedly adding more pins to the same weak area tends to worsen the timber. A professional carpentry repair can replace a damaged length or rebuild the fixing area; the site’s door repair service is relevant if alignment and latching also need attention.
Know when the strip is part of a rated assembly
Some doors have smoke or intumescent seals, closers or identification marks because they serve a fire-safety purpose. A strip that appears decorative may locate a seal or influence how the door closes. Do not remove, relocate or cut these components as a routine DIY adjustment. Ask a competent person familiar with the door assembly to inspect it. The same caution applies to communal entrances and doors on a protected route.
For an ordinary room door, the principle is simpler: retain sound timber, position the stop against the closed leaf, fix it into a stable frame and test before decorating. The repair should leave a door that closes freely and sits quietly, with no proud edge to catch hands or clothing.
A slamming internal door is often blamed on the door itself, but the force may come from airflow through the home, a poorly placed stop, an unsuitable closer or loose hardware. Start by noticing when it slams. A door that swings hard only when a window is open needs a different remedy from one that accelerates every time it is released. The aim is a door that can be opened and closed normally without striking a wall, pulling at its hinges or trapping fingers.
This guide covers ordinary internal doors. Fire doors, smoke-control doors and doors on an escape route may need to close and latch as part of the building’s safety arrangements. Do not wedge one open, remove its closer or change its seals to make it quieter. Ask the building manager or a competent door specialist to assess it.
Observe one ordinary closing cycle
Stand clear of the swing and release the door gently from a small opening. Watch its speed and where it first makes contact. Is the noise the leaf hitting the frame, the handle striking a wall, or the latch snapping into the keep? These are three distinct problems, even though people describe all of them as a door slam. Repeat only if it can be done without risk to fingers, glass or nearby belongings.
Then try the door with nearby windows and other internal doors in their usual positions. A pressure change can pull a door shut suddenly when a window is opened, an extractor fan runs or air moves along a corridor. If the force appears only in that situation, changing the hinge may do little. You need to control the door’s travel or address the airflow pattern, while retaining any required ventilation.
If the leaf falls towards its closed position even in still air, look at its hanging. A door out of plumb can swing under its own weight. Hinge wear, loose screws or a frame that has moved can change the angle. A door that drags across the floor or has an uneven reveal needs alignment checked before a stop is added; the existing guide to a door rubbing on the floor explains that diagnosis.
Decide whether the door or the handle needs stopping
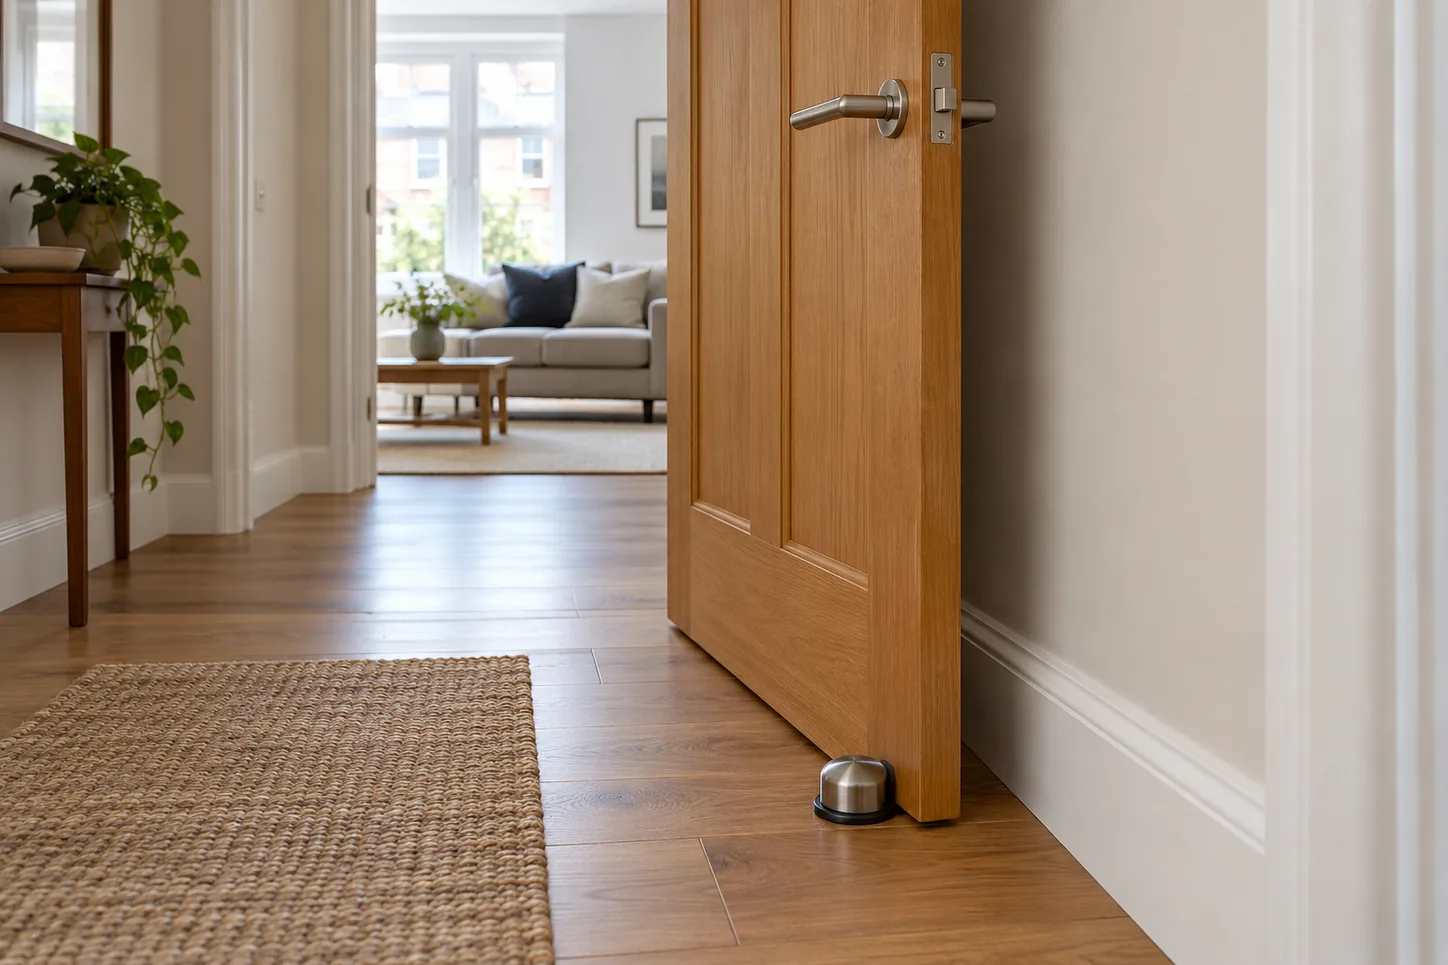
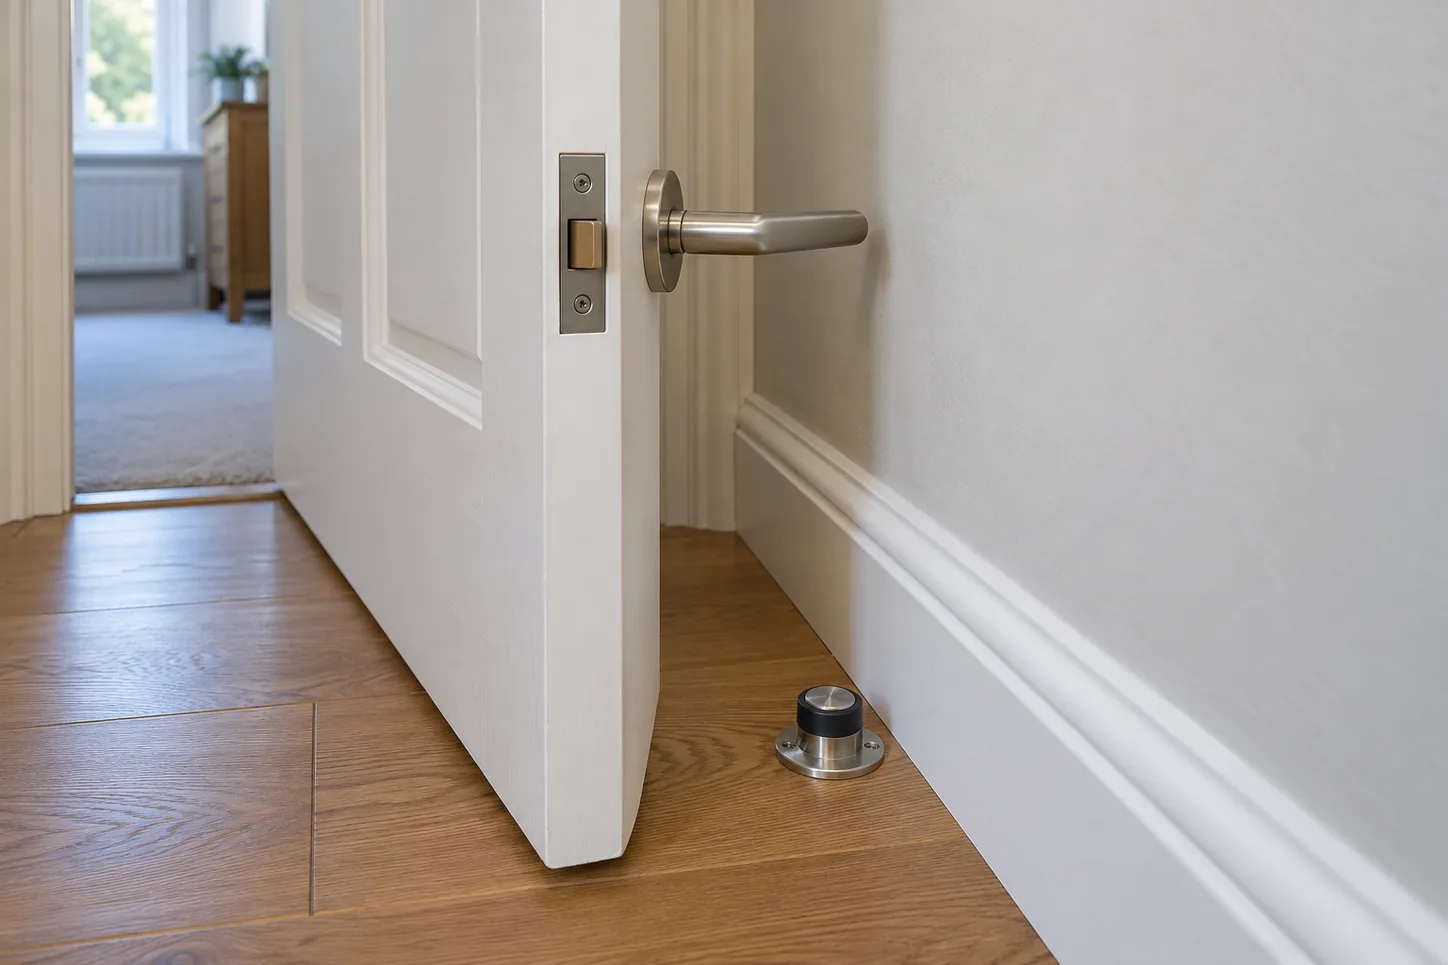
When a door opens into a wall, the handle often reaches the plaster before the door edge does. A small dent behind the handle is a useful clue. Repeated impacts can loosen the handle, crack plaster and pull the hinge side of the frame. A doorstop should intercept the door at a point that leaves the handle clear of the wall, rather than merely hiding the mark with a rubber cap.
Hold the door at the maximum useful opening angle and check the full clearance. Think about furniture, a radiator, skirting, cleaning access and the width needed to carry items through. Mark the proposed stop position temporarily with tape; swing the door slowly to confirm the leaf will meet the stop before any other part contacts the wall. Do not install a fixing through a floor until you know its construction and what may run beneath it. Underfloor heating or hidden services can change the safe installation method.
A floor-mounted stop can be discreet on a suitable solid floor. A wall-mounted stop may make sense where the wall has an appropriate fixing position and the point of contact is sound. A hinge-pin stop is sometimes useful when neither floor nor wall fixing is desirable, but it places load through hinge hardware and may be unsuitable for a heavy door. Follow the product’s door-weight and installation instructions. A soft pad at the point of contact reduces noise, but it does not excuse a weak fixing.
If airflow is the driver, manage the movement
Pressure-driven slamming can be abrupt: the door remains still until a window or another door changes the flow, then moves quickly. Avoid using a loose wedge as a permanent remedy. Wedges can slip, obstruct a route and become a trip hazard. A purpose-made hold-open device may be suitable for an ordinary internal door where its fixing, user access and door type have been checked.
Consider how the room is used. A bedroom door may need to close for privacy, while a utility-room door may be left open during the day. A device that holds the door open but is difficult to release can be as frustrating as the slam. In households with children, choose a solution that also limits finger trapping at the hinge side. Protective strips or guards are only effective when correctly selected and fitted; they are not a substitute for supervising young children around moving doors.
If the door must remain shut, a suitable closer can slow its closing movement. The correct type depends on the leaf, hinges, frame and purpose. Avoid a generic spring device that adds force without control; it may make the latch impact louder. A closer with adjustable sweep and final latching speed needs to be set so the door closes reliably without striking hard. Never assume the same setting applies to a fire door or a communal-door assembly.
Inspect hinges and fixings before fitting more hardware
With the door open, look at the hinge leaves and screws. The metal should sit flat against door and frame, without a visible gap around screw heads. If the upper hinge is loose, the door may move or twist as it swings. A clicking sound can come from a worn hinge pin or a screw working in an enlarged hole. Tighten only screws that still grip firmly; forcing a larger screw into weak timber without understanding the frame can split it further.
The door’s own travel should feel smooth. If it catches at one point, look for paint build-up, a swollen edge or movement in the frame. Do not plane a door merely because it swings quickly. Planing removes material permanently and can create an uneven gap, especially where a change in humidity caused a temporary tight spot.
Check the handle and latch too. A sharp metallic bang at closure may be the tongue striking a misaligned keep. A door that closes softly when the handle is held down but bangs when the latch operates is giving you a useful clue. In that case, adjust or repair the latch relationship instead of adding a heavy stop to the opening side. The site’s broad article on door repair problems places such faults in the wider repair context.
Select a stop for the actual surface
The best-looking stop is not necessarily the safest one. A thin skirting board may not hold a heavy wall stop securely, especially if it is fixed only into plasterboard. A floating floor may need movement allowance that a through-fixed stop would interfere with. In a bathroom, drilling an unknown tiled floor can risk waterproofing or pipes. Where the construction is uncertain, ask a fitter to identify a suitable method.
Check door weight and likely impact. A light hollow-core bedroom door and a heavy solid-core door impose different loads. A product fixed too close to the hinge may concentrate force; one fixed too far away may snag feet or cleaning tools. Follow the stop maker’s positioning guidance and test with slow movements before normal use. The contact should be broad and cushioned enough to avoid leaving a mark on the door face.
Adhesive bumpers can help with a light contact point but have limits. Dust, paint condition, cleaning products and temperature changes affect adhesion. An adhesive pad stuck over damaged plaster will often peel away with the surface. Repair the substrate first and do not rely on a small pad to stop a heavy door moving at speed.
When to ask for a door repair
Arrange a door repair assessment if the door swings by itself in still air, the hinges move in the timber, the frame has cracks, or the latch bangs despite a gentle closing motion. A technician can check the hanging and hardware before choosing a restraint. For a straightforward stop or minor fitting in an ordinary room, the site’s handyman and odd-jobs service is another relevant route.
Describe the conditions: which direction the door moves, whether a window or extractor is on, what it hits, and whether it has a closer. A short video made from a safe position may show the problem more clearly than a still photo. Do not film a door repeatedly slamming into glass or a person simply to document it.
A good remedy controls the movement at its source and protects the surfaces around it. Observe the airflow and door hang, decide what actually makes the noise, then place any stop or closer for that specific door. That sequence prevents a small nuisance from becoming a damaged handle, loose hinge or cracked frame.
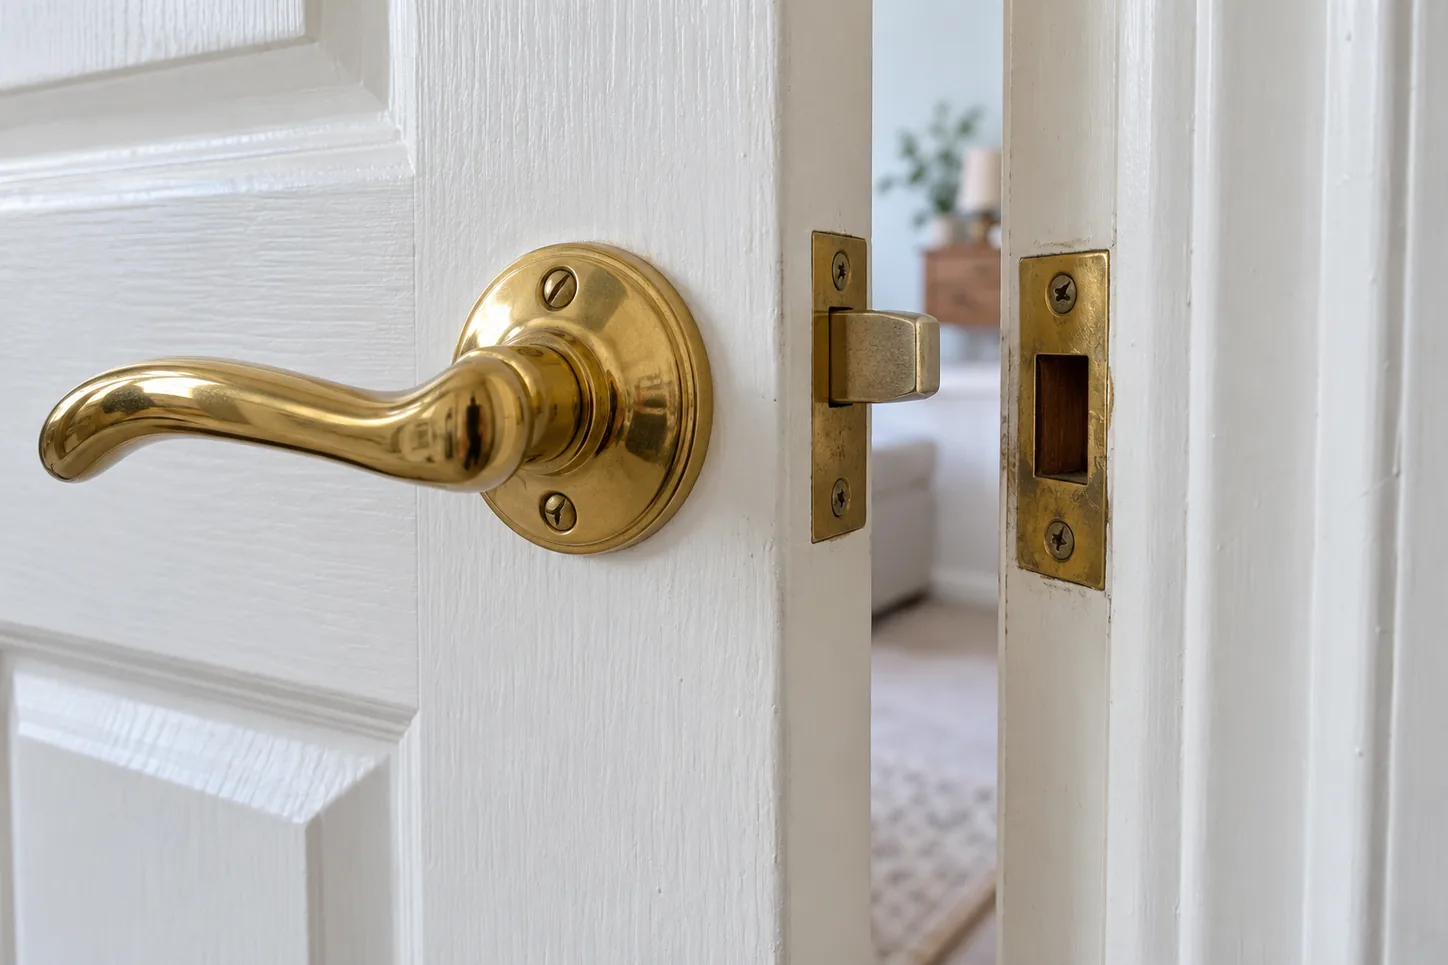
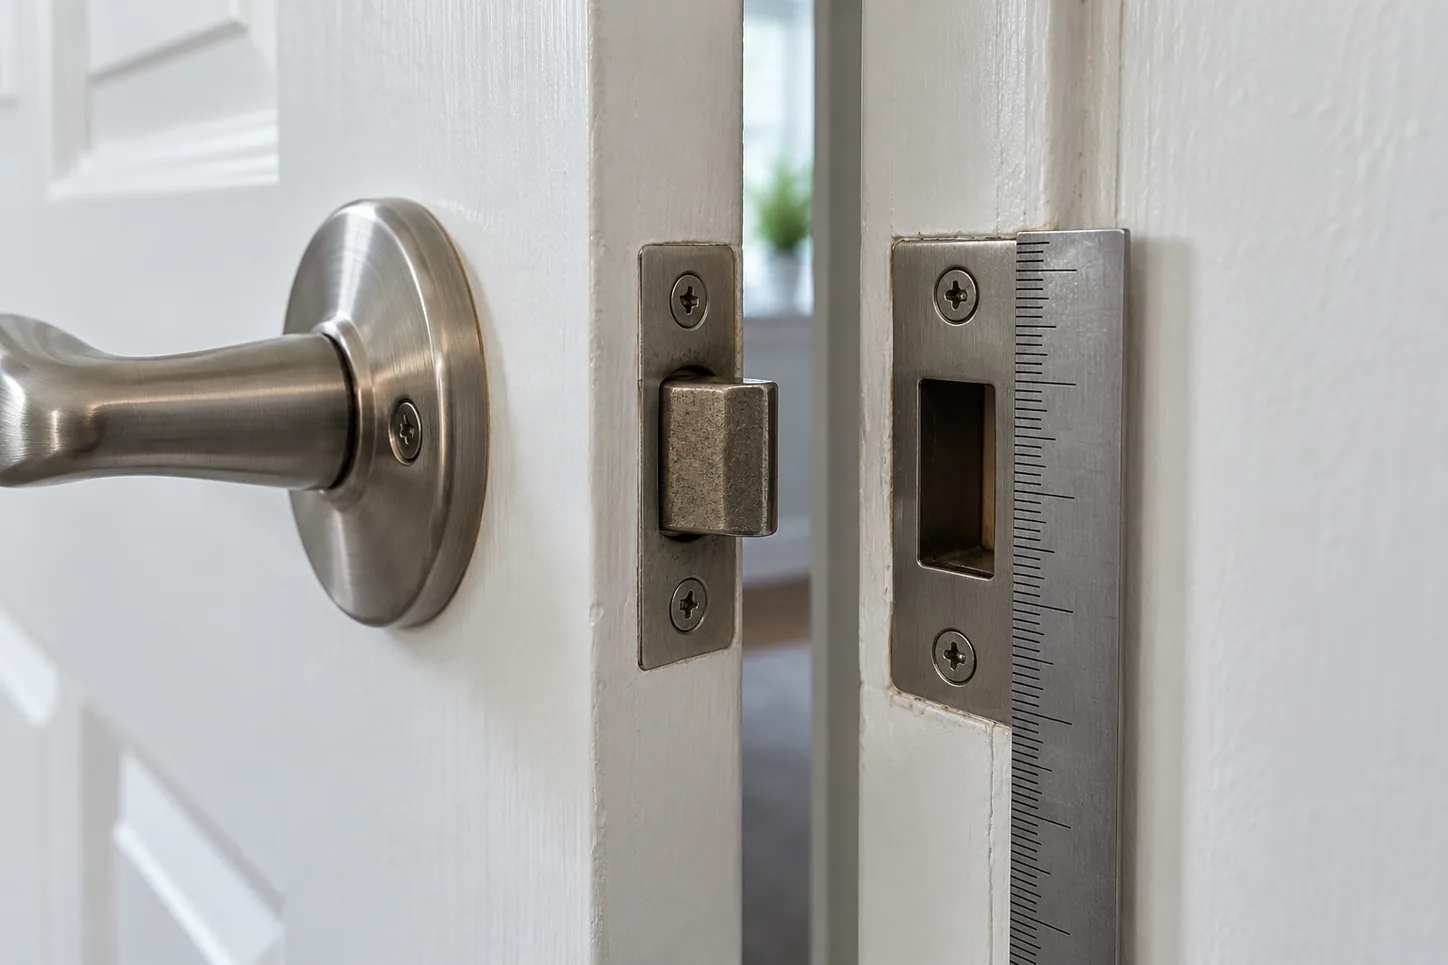
If an internal door closes against its frame but springs open again, start with the latch and the metal plate it enters. The latch tongue may miss the opening in the strike plate, fail to extend fully, or reach an opening that is too shallow. A few observations can usually tell you which fault you have before you move any hardware or cut into the frame.
This guide concerns an ordinary internal door with a spring latch operated by a lever handle. A fire door, an entrance door, a door in a managed escape route or one fitted with a specialist lock calls for a different approach. Do not alter its latch or closer without advice appropriate to that door.
First, identify what “will not catch” means
Close the door slowly while watching the edge from the handle side. Do not put fingers between the leaf and frame. Does the latch tongue touch the strike plate above or below its opening? Does it hit the near edge of the plate? Does it enter the opening, then bounce back? Or does the tongue remain inside the door even when the handle is released?
These symptoms point to different repairs. A visible height mismatch suggests the door has moved relative to the frame or the keep was fitted in the wrong position. A horizontal mismatch may come from loose hinges, an uneven reveal or a keep set too far from the door. A latch that barely protrudes may have a stiff or failing spring mechanism. A tongue that enters but will not hold may be meeting timber behind a shallow recess, or the door may be rebounding from a tight seal or stop strip.
Try the same close while gently lifting the door by the handle, without forcing it. If it catches only when lifted, inspect the hinges and the top-to-bottom gap before touching the strike plate. The related guide to a door rubbing on the floor covers a dropped door in more detail. Here, the key question is whether the latch mechanism itself works and whether its position matches the keep.
Check the latch with the door open
With the door safely open, press the latch tongue back with a thumb and release it. It should travel smoothly and spring out fully. Turn the lever several times. The handle should retract the tongue and return without being forced. Compare its behaviour with another similar door if one is available, but remember that different latch designs feel different.
Look for paint build-up, dirt or a loose faceplate around the latch. A newly painted door can have a thick edge that catches the tongue. Wipe visible dirt away and check that faceplate screws are snug. Do not overtighten them into soft timber. Avoid spraying an unknown oil into the mechanism; it may attract dirt or conflict with the maker’s care instructions. If the tongue sticks even with the door open, alignment at the frame is not the primary fault.
If a lever droops, turns without reliably retracting the latch, or the spindle feels loose, inspect the handle fixing and latch as a separate hardware problem. The existing guide to a broken door handle or lock is the closer reference for that situation. Repositioning the strike plate will not repair a failed return spring.
Compare the tongue with the strike-plate opening
The strike plate, often called the keep, is the metal plate on the frame with an opening for the latch. Close the door until the tongue just meets it. A torch can help in a dim hallway. Look at the tongue from a slight angle, keeping your hand clear, and note whether it is high, low, too far towards the room or too far towards the stop.
For a less awkward check, place a small strip of low-tack masking tape beside the plate and make a light pencil mark at the tongue’s centre line while the door is almost shut. Open the door and compare the mark with the centre of the opening. Remove the tape afterwards. This simple check is more reliable than guessing from wear marks alone, particularly where old paint conceals the plate edges.
The door should have a reasonably even gap around it when almost closed. Look at the top corners and the handle side. A tapering gap or a door that needs to be pushed sideways suggests movement in the hinges or frame. If the hinges are loose, address that cause first. Moving the keep to compensate for a door that is continuing to drop merely postpones the problem and can leave an enlarged, untidy recess.
Inspect hinges before adjusting the keep
Open the door part way and look at each hinge leaf. Screws should sit firmly and the metal leaf should lie flat. A screw that turns without tightening may have lost its grip in the timber. Do not insert a much longer screw blindly: services, glass or other hidden details may be close to the frame, and the right repair depends on the construction. The published article on stripped screw holes in a wooden door frame explains the timber-fixing problem.
Also check for a hinge pin that has worked upwards or a bent hinge leaf. Do not remove a hinge while the door is unsupported. If the door is heavy, glazed, unusually wide or difficult to control, have it assessed rather than trying to lift and adjust it alone. A sound hinge repair can bring the latch back into line without altering the strike plate.
Seasonal movement is another possibility. Timber doors and frames can swell in damp conditions and shrink when the air is dry. This can change the reveal slightly, especially where an edge is unsealed or a bathroom is often humid. If the door previously latched and now meets the frame tightly, note where it rubs and look for moisture damage before shaving any timber. Removing material on the basis of one damp week may create an excessive gap later.
When a small keep adjustment is reasonable
If the hinges are firm, the door hangs squarely, the latch springs out fully and the misalignment is only slight, a careful strike-plate adjustment may solve it. Remove one screw at a time and see whether the plate has useful movement within its existing recess. Some keeps have a bendable lip or an adjustable opening, but designs vary. Follow the hardware maker’s instructions where available rather than treating every plate alike.
Mark the original position before moving anything. Make one small change, refit securely and test the door several times from both sides. A latch should engage with an ordinary closing motion, without a hard shove. If a plate must be moved enough to expose the old screw holes or leave it unsupported, the frame needs a proper carpentry repair. Cutting a large opening with a chisel to make the latch “find” it can weaken the fixing and spoil the door’s appearance.
Sometimes the tongue lines up but strikes solid timber behind the plate. Remove the plate only if you can do so without damaging the painted frame and inspect the pocket. A small amount of paint or debris may be enough to block full engagement. More substantial recess work calls for controlled cutting and a sound plate fixing; it is easy to remove too much timber. If the frame is split, soft or moving, repair that first.
Check the stop and any seals
The stop is the narrow strip that the closed door rests against. If it has shifted towards the door, the leaf may meet it before the latch reaches the keep. A thick draught seal or a recently fitted bumper can cause the same spring-back. Close the door gently while watching where contact occurs. The answer is to restore the correct relationship between the door, stop and latch, not to slam the door harder.
Where an internal door has a required smoke or fire seal, do not remove or trim it as a quick fix. The door assembly may need a competent inspection. Likewise, a door that closes a protected stairwell should not be held open or modified casually. For an ordinary room door, a loose stop or an ill-placed bumper may be a straightforward timber or fitting repair, but identify the component before altering it.
Common mistakes that make latching worse
The most common mistake is moving the keep before checking whether the door has dropped. That can leave two faults: a loose hinge and a plate in the wrong place once the hinge is repaired. Another is enlarging the metal opening with an unsuitable tool while the plate remains on the frame; the plate may distort and hold less securely.
Repeatedly forcing the door is also unhelpful. It can bend the latch, loosen handle screws and split timber around the keep. A spray of lubricant is no substitute for a spring that no longer returns properly. Finally, avoid filling old screw holes with ordinary wall filler and immediately driving screws back into them. Wall filler is not a reliable structural fixing in a timber jamb.
If the fault recurs after an adjustment, ask why the relative positions keep changing. Loose hinge fixings, movement in the frame, swelling from moisture or an unsuitable door stop are more plausible explanations than an opening that mysteriously needs to be widened again.
When to arrange a repair
A small, stable mismatch on a sound internal door can be assessed with patience. Arrange door repair if the hinges pull away, the jamb is split, the door is heavy or glazed, the latch needs replacing, or the keep requires a new timber fixing position. A carpentry repair may be appropriate where the frame, stop or surrounding timber is damaged. For an ordinary collection of minor fitting issues, the site’s handyman repairs page provides another relevant route.
Explain the symptom when seeking help: whether the latch fails with the door open, where it strikes the plate, whether lifting the door changes the result, and whether the problem began after painting or during damp weather. A clear photo of the latch and keep from the side can be useful. Those observations make it easier to distinguish a simple adjustment from a mechanism or frame repair.
A door that catches cleanly needs three things at once: a latch that extends and retracts properly, a door that hangs consistently, and a keep positioned to receive the tongue. Check them in that order. It is usually faster than filing the plate on instinct, and it leaves the door working as intended.
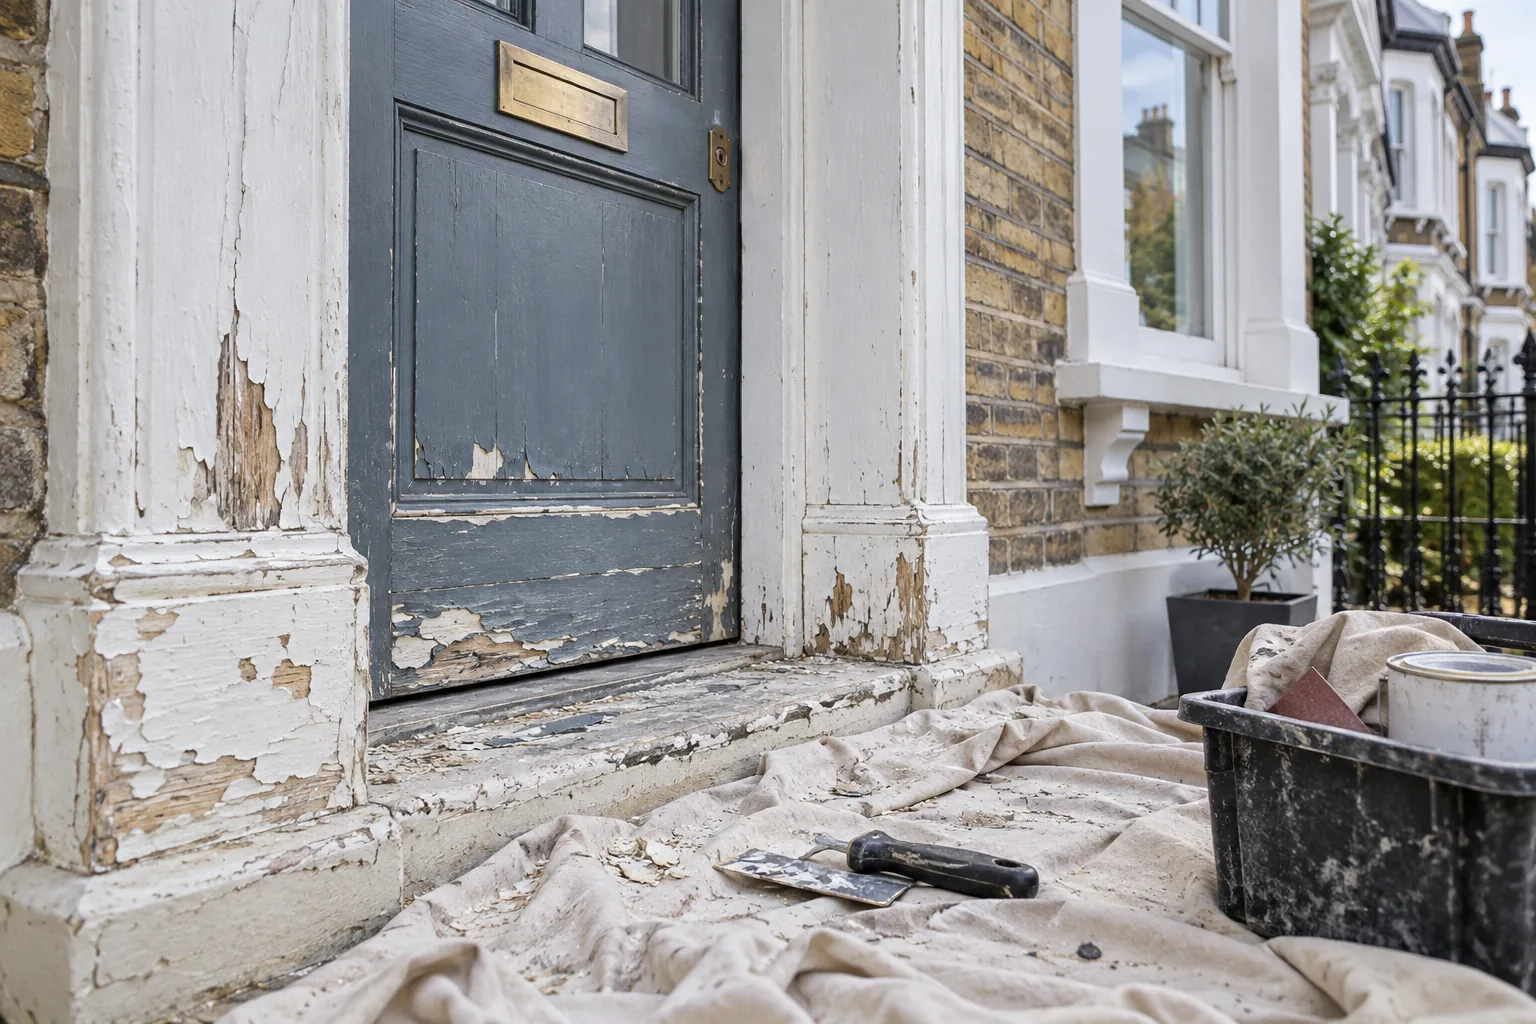
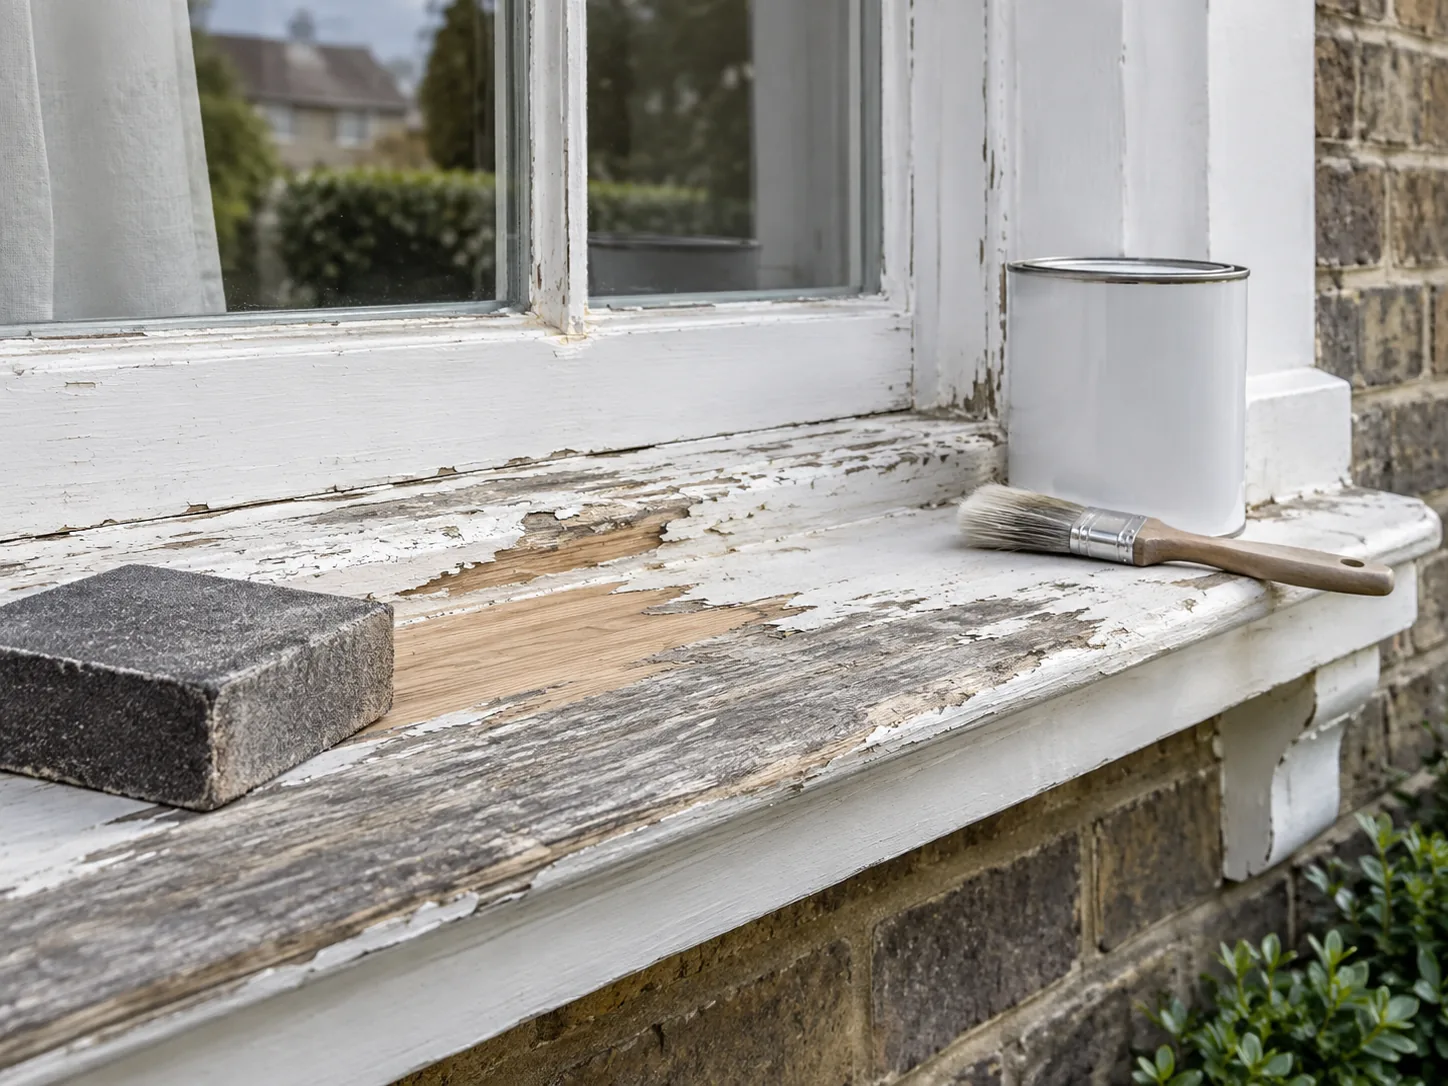
Exterior paint fails from the wood outward as often as it fails from the weather side. Water entering an open joint, a rotten sill end or damp masonry can push a new coating off within months. Preparation therefore begins with moisture and timber condition, not choosing a colour or sanding every surface smooth.
Inspect on a dry day
Walk around the item in good light. Look at horizontal sills, lower door rails, glazing beads, end grain, joints and places where timber meets masonry. Mark peeling, cracking, grey bare wood, open mitres, rust staining and soft areas. Check whether gutters, drips or failed sealant direct water onto it.
Press suspect timber gently with a blunt probe. Sound wood resists and retains a clear surface; decayed fibres feel soft or crumble. Do not dig into sound historic joinery. Extensive decay, loose glazing or structural movement needs carpentry repair before decoration.
Identify why the coating failed
Peeling only at the bottom can indicate standing water or unsealed end grain. Blistering over broad areas may come from trapped moisture, poor adhesion or painting in strong sun. Fine surface chalking is normal ageing, while cracks following joints suggest timber movement.
Check internal faces for condensation, damp staining or failed seals. Painting the outside cannot correct a persistent leak. Repair gutters, flashing and plumbing, and allow the wood to dry.
Check the old coating and work safely
Older paint may contain lead. In the UK, assume caution on pre-1960s joinery and use an appropriate test or specialist advice. Avoid uncontrolled dry sanding, burning or hot-air stripping of suspect coatings. Keep children, pets and neighbours away from debris and follow current hazardous-waste guidance.
Use stable access equipment. Do not lean from a ladder while scraping or work above doors in use. High-level windows, rotten supports and areas close to overhead services belong with professional exterior painting.
Choose a workable weather window
Read every product’s temperature, humidity and rain-free requirements. The surface must be dry, not merely rain-free at the moment. Avoid direct hot sun, frost, heavy dew and wind that carries dust. Plan enough time for primer, undercoat and topcoats to cure before overnight moisture.
Tools and materials
Dust sheets secured against wind
Scrapers with sharp controlled edges
Abrasive paper and sanding blocks
Vacuum and suitable dust extraction
Exterior-grade timber repair system
Compatible knotting solution if required
Primer, undercoat and topcoat from a compatible system
Quality brushes, mixing sticks and paint kettle
Personal protection specified by product data
Step 1: protect the area and remove hardware
Cover paths, brickwork and plants without sealing vegetation under plastic in sun. Remove door furniture, catches and weather strips where practical, label screws and store them safely. Mask glass only after cleaning; do not rely on tape to protect loose glazing putty.
Step 2: clean before scraping
Wash away dirt, salts, algae and grease with a cleaner suitable for the coating and nearby materials. Rinse as directed and let timber dry thoroughly. Sanding dirt into the surface reduces adhesion and can spread biological growth.
Step 3: remove failed paint, not every sound layer
Scrape back all loose, flaking and hollow-sounding coating to a firm edge. Work with the grain and keep the scraper flat so it does not gouge soft wood. Sound compatible paint can remain if it is well bonded, clean and feathered smoothly.
Collect chips continuously. Where lead is possible, use the containment and protective method recommended by competent guidance or employ a specialist.
Step 4: sand and feather edges
Use a block on flat faces and finer abrasive to blend the step between bare timber and retained paint. Round no crisp joinery details unnecessarily. Vacuum dust from profiles and joints, then wipe as the coating manufacturer directs. Avoid leaving water on freshly exposed wood.
Step 5: repair timber and open joints
Cut out decay only to the extent required by the chosen repair system. Small local defects may accept an exterior two-part timber repair after the source of moisture is corrected. Large rotten sections, failed tenons and loose sills need spliced timber or replacement, not a deep plug of filler.
Use flexible exterior sealant only in joints designed to be sealed and confirm paint compatibility. Do not block drainage holes, glazing channels or the underside drip groove.
Step 6: prime bare and repaired areas promptly
Apply the specified primer to dry bare wood, repair compounds and end grain. Work it into profiles without leaving runs. Treat resinous knots only with a product compatible with the paint system. Spot-priming may be sufficient where most old paint remains sound; extensive bare timber may need a full prime coat.
Step 7: build the coating system
Apply undercoat and topcoats at the stated spreading rate and recoat interval. Thin only if instructions permit. Brush along the grain, maintain a wet edge and inspect lower edges for runs. Several correct coats outperform one thick coat that skins over while remaining soft beneath.
Paint glazing lines neatly onto the glass by the small amount required by the glazing system to shed water. Keep sash edges, hinges, locks, drainage paths and flexible weather seals free unless instructions state otherwise.
Step 8: cure and refit hardware
Allow the final coat to reach the stated hardness before closing a door tightly or refitting seals. Fresh paint can bond opposing faces. Replace corroded screws with suitable compatible fixings and adjust hardware without cutting through the new coating unnecessarily.
Common mistakes
Painting damp timber after one dry afternoon.
Filling rot without removing its moisture source.
Sanding suspected lead paint without containment.
Leaving sharp ridges around retained paint.
Mixing incompatible primer and topcoat systems.
Applying one very thick coat.
Painting over drainage holes and moving hardware.
Maintenance after repainting
Inspect each spring and autumn, especially horizontal surfaces and lower joints. Clean dirt that holds moisture, touch in a small chip before water enters and keep gutters clear. A quick local repair to sound paint is far easier than another full strip after decay begins.
Where preparation reveals loose frames, failed beads or several small joinery defects, combine them into planned handyman repairs before the final coating schedule begins.
Record the product names, colours and date. Future compatibility is easier to judge when the coating system is known.
Durability comes from correcting water paths, removing failed material and following one compatible coating system under suitable weather. Treat rot as a timber repair and lead as a hazard, not preparation inconveniences. When the substrate is stable, careful thin coats can protect exterior joinery for years and make later maintenance manageable.
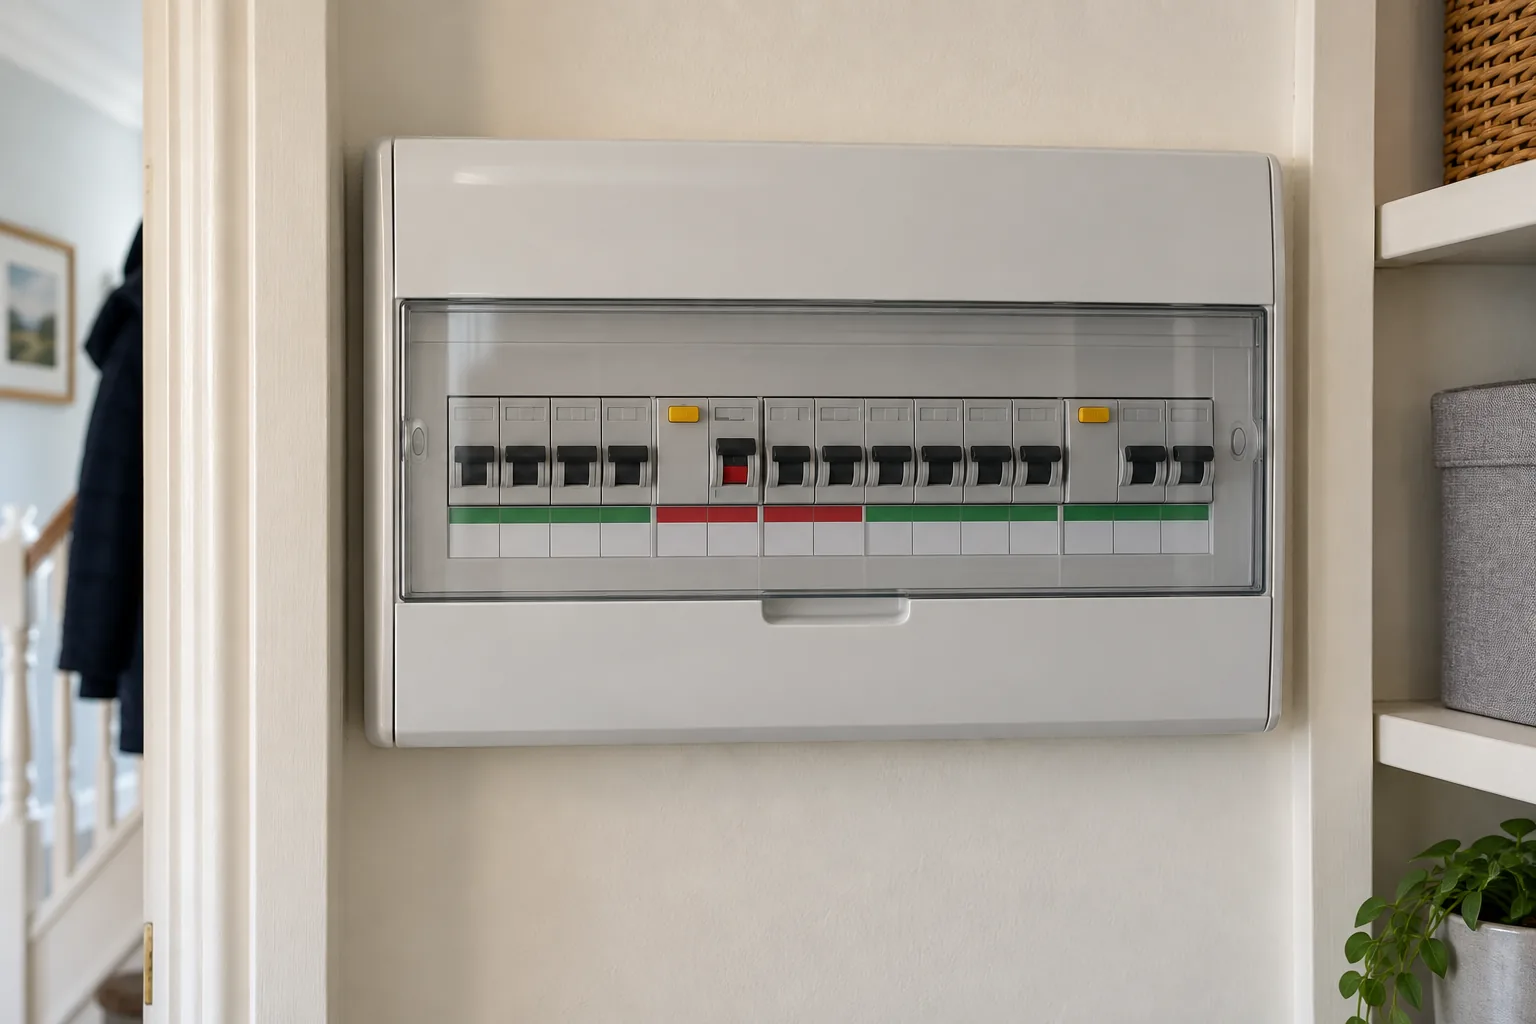
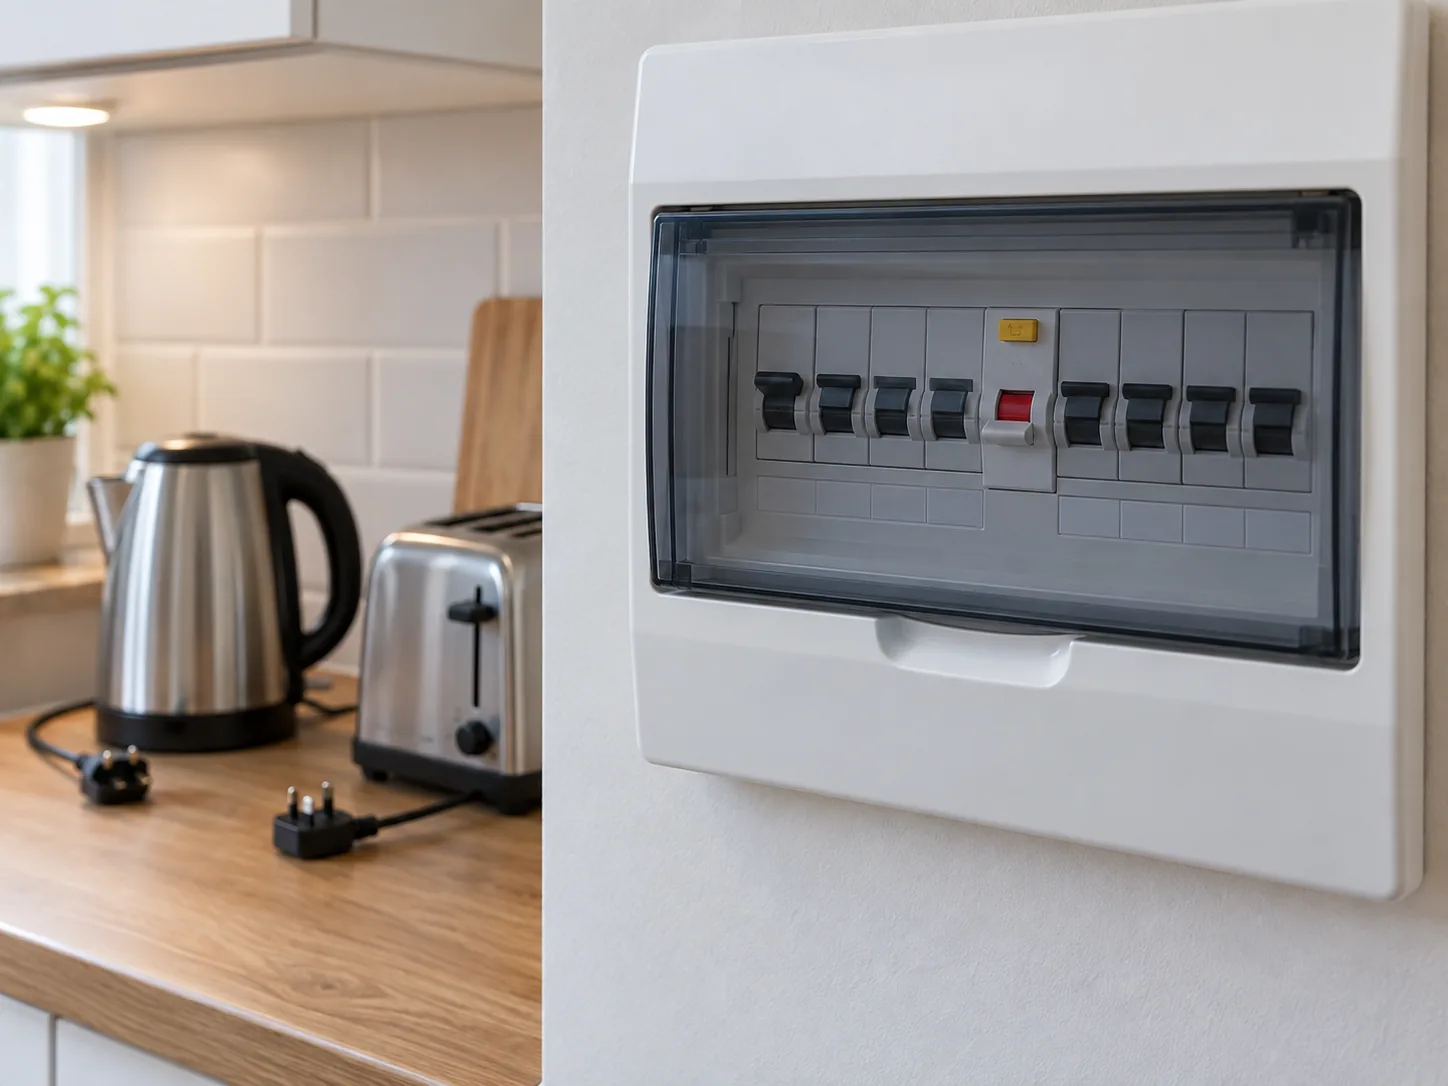
An RCD trips because it detects current flowing along an unintended path. That protective action may be caused by a faulty appliance, moisture, damaged wiring or several small leakages adding together. A homeowner can record what happened and unplug portable appliances, but should never remove the consumer-unit cover, touch wiring or repeatedly force the RCD back on.
Know when not to investigate
Keep away and call a qualified electrician urgently if there is smoke, burning smell, buzzing, visible scorching, water near electrical equipment, a shock or tingling sensation, or a damaged consumer unit. Do not touch wet appliances or stand in water to reach a switch. If there is fire, leave the property and call the emergency services.
A trip that occurs every time you reset, or an RCD that will not latch with circuits switched off, is not a DIY fault-finding exercise. Use emergency electrical support.
RCD, RCBO or circuit breaker?
A traditional RCD may protect several circuit breakers and often has a test button. An RCBO combines residual-current and overcurrent protection for one circuit. A circuit breaker without RCD protection responds to overloads and short circuits. Labelling and layout vary, so read the schedule beside the closed unit rather than guessing.
Do not remove covers to identify a device. If labels are missing or confusing, photograph the closed board and ask a registered electrician to explain and update them.
Record what happened before touching switches
Time and weather, including recent heavy rain
Which lights and sockets lost power
Which appliance had just started or finished
Whether a shower, boiler, outside light or garden equipment was operating
Any recent leak, decorating, drilling or appliance move
The exact switch position and any indicator visible through the closed cover
This evidence helps an electrician reproduce an intermittent fault. Do not erase it by resetting repeatedly.
Prepare for a safe external check
Use dry hands, wear shoes and provide torchlight independent of the affected circuit. Keep children and pets away. Shut down computers and delicate equipment where possible. Do not rely on a phone torch while also operating switches in a cramped cupboard.
Only touch the normal external toggle controls through the consumer unit’s closed front access. Never use tools, press internal parts or defeat a device that will not stay on.
Step 1: unplug portable appliances on the affected circuits
Switch off at the socket and unplug accessible portable equipment such as kettles, toasters, washing machines, lamps and extension leads. Pull the plug, not the flex. Do not move hard-wired appliances, remove fused-spur covers or reach behind wet equipment.
Outdoor extension leads and damp garden tools are common clues after rain. Leave wet items disconnected and do not test them indoors. A plug-in appliance with heat damage, split cable or moisture needs repair or replacement.
Step 2: make one controlled reset attempt
If there are no danger signs and the consumer-unit instructions are clear, move the RCD fully to the off position before returning it to on. Some devices rest in a middle tripped position and will not reset until moved fully off. Do this once.
If it trips immediately, will not latch, makes noise or feels abnormally warm, stop. Do not hold the toggle up. Arrange qualified electrical testing.
Step 3: observe before reconnecting anything
If power remains on, check from a distance for unusual smell, sound or heat. Confirm essential equipment such as freezers has restarted, but do not rush to reconnect everything. Write down that the RCD stayed on with portable loads removed.
Step 4: reconnect portable appliances one at a time
Reconnect only dry, undamaged plug-in appliances, allowing time between each. Operate them normally while remaining nearby. If the RCD trips after one item is connected or when its heater or motor starts, leave that appliance unplugged and label it so nobody retries it.
Do not assume the appliance is conclusively at fault: the circuit may already have background leakage and the extra load merely reveals it. An electrician or appliance technician must test it.
Step 5: stop once a pattern is found
Give the electrician the device labels, affected rooms, timing and suspect appliance. Keep that item disconnected. Do not repeat the trip to demonstrate it, and do not transfer a suspect appliance to another circuit using an extension lead.
Intermittent trips with no obvious appliance
Trips during rain can involve outside lights, sockets, pumps or damaged external cables. Trips during heating cycles may involve immersion heaters, ovens or washing appliances. Night-time events may coincide with timed equipment. These clues are useful, but testing insulation resistance and earth leakage requires suitable instruments and competence.
Moisture after a plumbing leak needs coordinated water-damage assessment and electrical checks before affected circuits return to service.
Do not make these dangerous mistakes
Removing the consumer-unit cover.
Holding a protective device in the on position.
Resetting repeatedly to see whether it eventually stays on.
Bypassing an RCD or using an unprotected extension route.
Opening plugs or hard-wired appliances while fault finding.
Testing wet outdoor equipment inside the home.
Assuming that one successful reset proves the installation is safe.
What about the test button?
The test button is for periodic functional testing according to the device and installation instructions, not for diagnosing an active unexplained trip. If the supply is already unstable, leave further operation to the electrician. If routine testing fails to trip the device or it will not reset afterwards, arrange prompt inspection.
When the electrician attends
Provide photographs, your written sequence and access to relevant appliances. Mention all recent work, even if it seems unrelated. Do not conceal that a leak occurred or that a device was dropped. Accurate history shortens diagnosis and helps distinguish appliance leakage from a circuit or RCD fault.
Treat the trip as evidence
If the first trip followed work around entertainment equipment, review the separation and access principles in the guide to hiding TV cables safely. Do not use that as a reason to open sockets or fixed wiring.
An RCD is a safety device, not an inconvenience to defeat. External observation and careful unplugging can identify a useful pattern, but the safe limit is clear: one reset, no exposed parts and no repeated experiments. When the trip persists or any danger sign appears, leave the protective device off and use a qualified electrician.
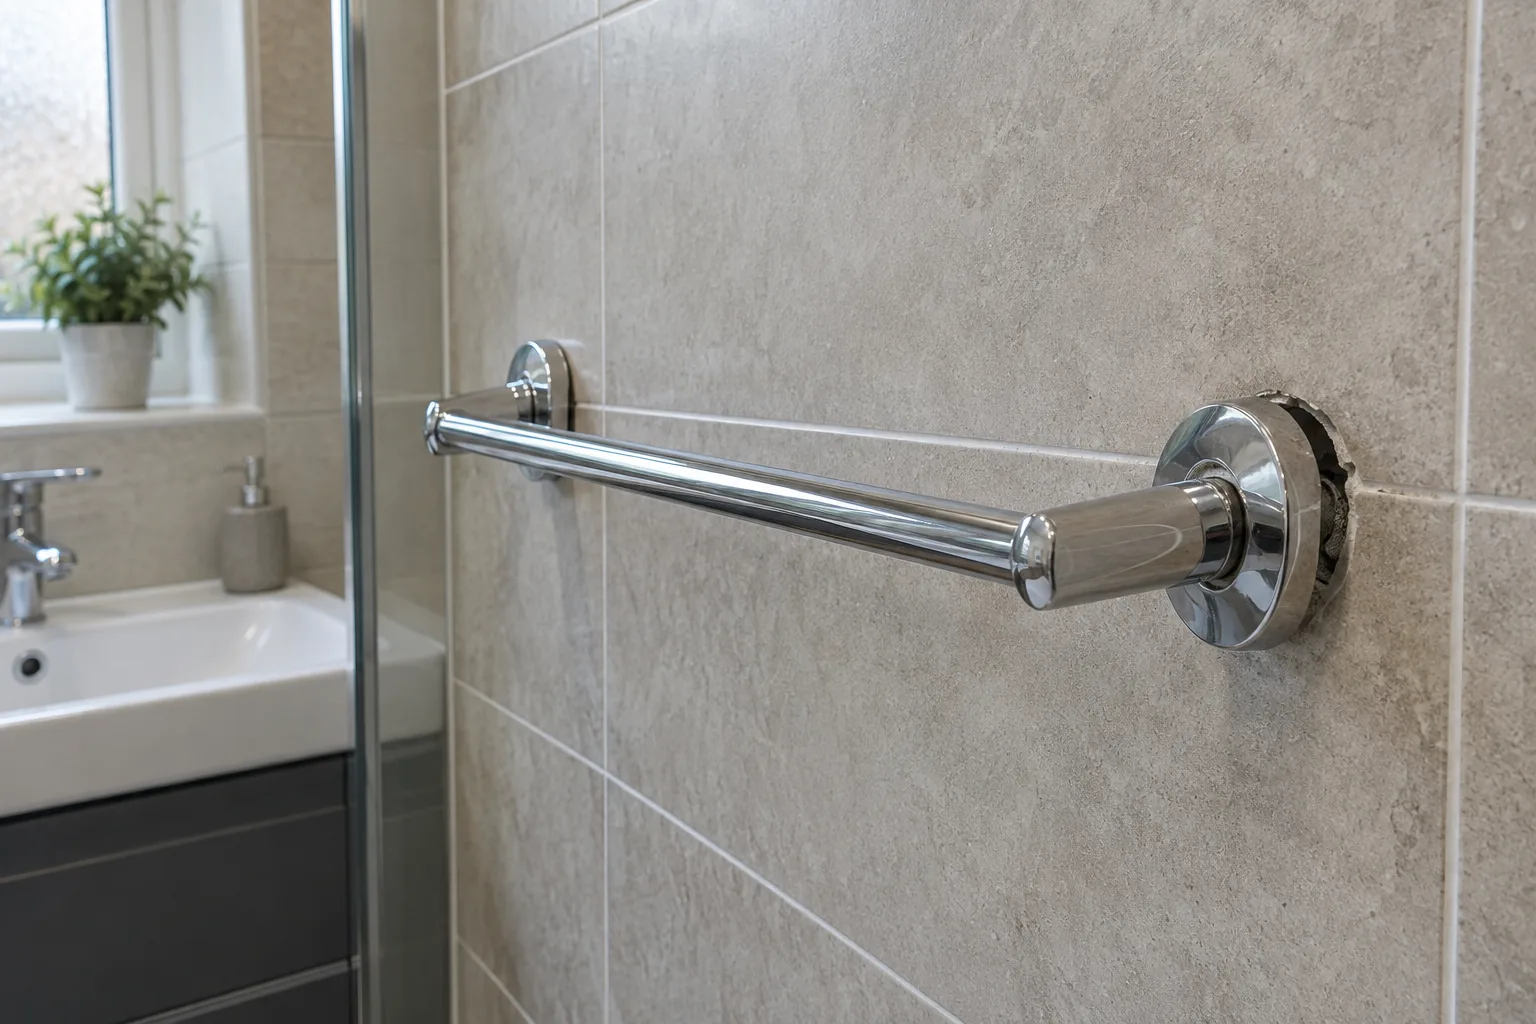
A towel rail that rotates or pulls away is usually loose at the concealed wall plate, not at the visible bar. Tightening the small grub screw may hide movement for a day while the fixing behind continues to enlarge its hole. Remove the load, identify which part moves and repair the wall connection without cracking the tile or puncturing waterproofing.
Work out where the movement occurs
Remove all towels and press each bracket gently. If the round cover moves with the wall plate, the fixing is loose in the wall. If the plate stays firm but the rail moves, the grub screw, locating tab or rail connection may be loose. A cracked tile, damp grout or soft wall needs broader investigation.
Check whether the item is a simple towel rail or a heated rail containing water or electricity. Do not loosen a plumbed or electrically heated rail. Those require isolation and appropriate plumbing or electrical expertise.
Find the bracket’s release method
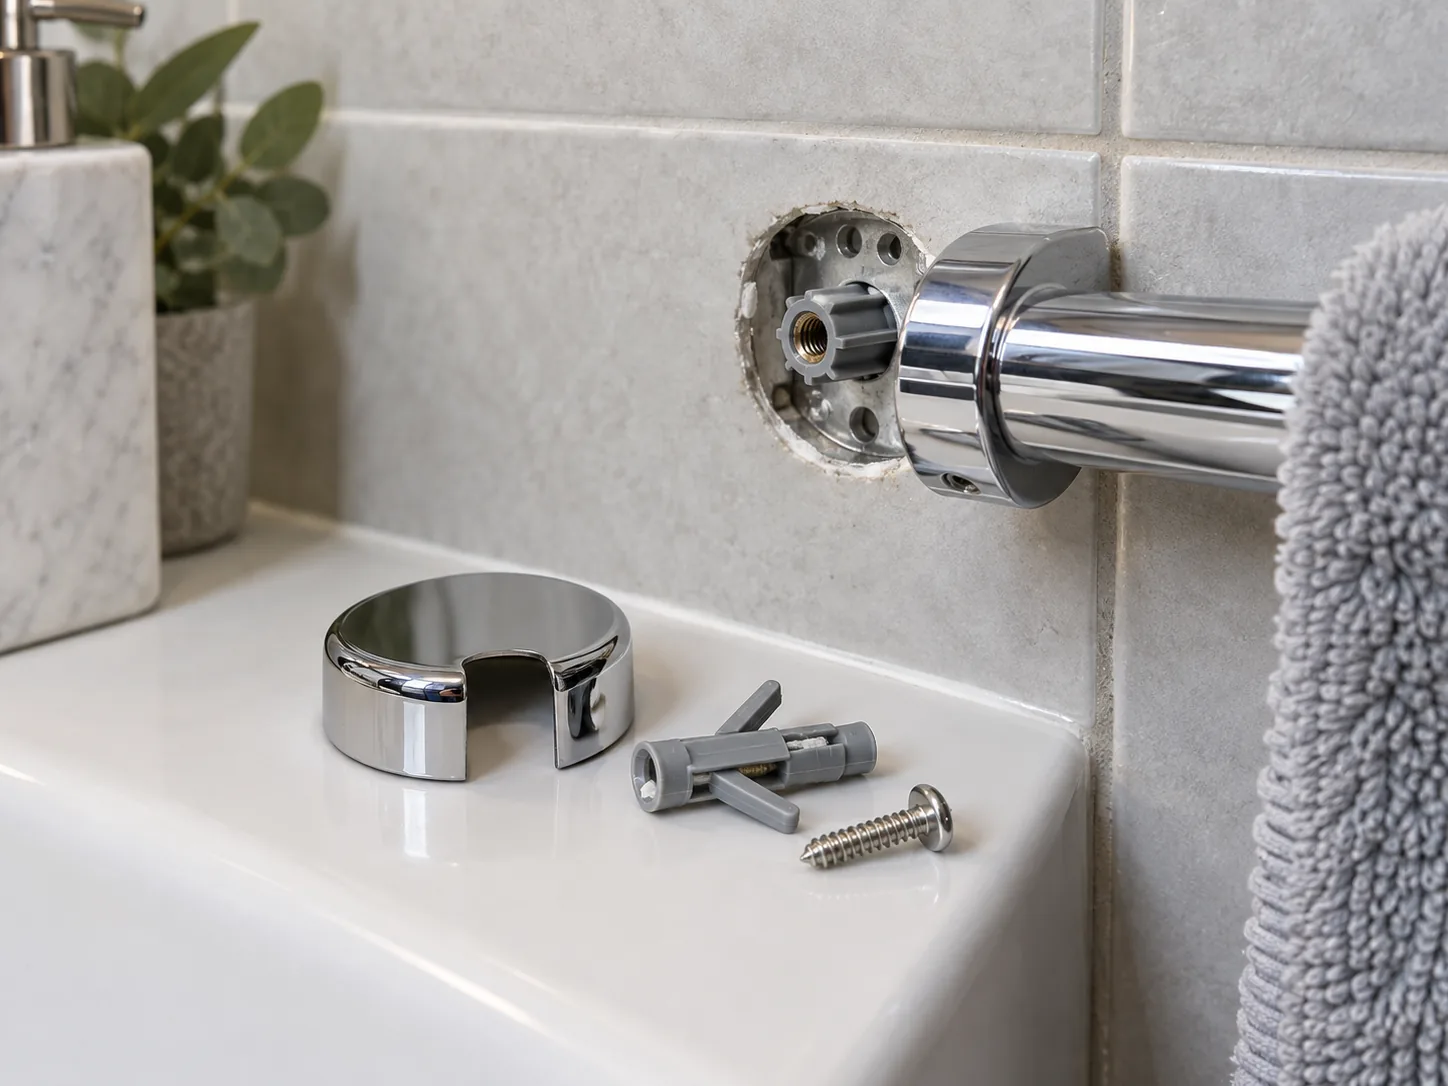
Most accessory covers are held by a small underside grub screw, a spring clip or a twist fitting. Use the correct hex key or screwdriver while supporting the bar. Place a towel over the basin or bath so a dropped screw cannot chip enamel or enter a waste.
Photograph the assembly as it comes apart. Do not lever a cover against tile glaze; look for the release point or product instructions.
Inspect the wall plate and holes
Remove the plate only after noting its orientation. A screw that spins with the plug, pulls out with powder, or sits at an angle reveals the failure type. Check for corrosion, broken plastic and a deformed plate. Press the surrounding tile edges lightly; clicking or movement suggests failed adhesion.
Moisture, dark dust, swollen board or a musty smell can indicate water behind the finish. Stop and arrange water-damage assessment rather than sealing evidence inside the bracket.
Identify the backing material
The fixing may enter masonry, timber, plasterboard or a hollow metal stud beyond the tile and adhesive. Examine the hole with a torch and use building information or a suitable detector. Do not probe deeply with wire: pipes and cables can be close behind bathroom walls.
A cavity anchor that works in bare plasterboard may not span tile, adhesive and board correctly. A masonry plug must reach sound masonry rather than expand in tile. The fixing’s grip range and load rating need to match the complete wall build-up.
Tools and materials
Correct hex keys and screwdrivers
Safety glasses, torch and vacuum
Detector suited to likely pipes, cables and studs
Fixings rated for the confirmed substrate and thickness
Drill bits suitable for ceramic tile and backing
Depth stop and masking tape
Bathroom-compatible sealant where the system requires hole sealing
Option 1: the wall plate is firm
Clean the rail’s locating surfaces, refit it fully onto the plate and tighten the grub screw until secure. Do not use thread-locking compound unless the manufacturer specifies it. If the grub screw is stripped or missing, replace it with the exact thread and length; an oversized screw can crack the cover or fail to seat.
Option 2: a masonry plug has loosened
Remove the screw and plug without enlarging the tile hole. Vacuum dust and assess the masonry depth. If the existing hole is sound and services are excluded, fit a compatible plug that passes through the tile and anchors in masonry. The tiled hole may need careful enlargement using the method in the ceramic-tile drilling guide.
Do not hammer a plug against the glaze. Seal the penetration only as required by the waterproofing or accessory manufacturer, then tighten the plate evenly.
Option 3: the fixing has failed in a cavity wall
Choose a metal or proprietary cavity fixing whose grip range includes tile, adhesive and board, and whose head fits the plate. It needs enough clear cavity to open without hitting a pipe or stud. Installation may require a setting tool and precise hole diameter.
If the board is crushed or the hole is close to a tile edge, do not keep increasing anchor size. A timber pattress or professional board repair offers a stronger base but can require access from the other side.
Option 4: relocate the rail
Relocation can reach a stud or sound masonry, but new holes create new waterproofing penetrations and the old holes must be repaired properly. Confirm the new position with the rail level, avoid tile edges and scan for services. In a shower or bath splash zone, ask a bathroom professional to preserve the waterproofing system.
Refit and test gradually
Secure the wall plate flat without bending it. Refit covers and the rail, then press gently downward at the centre while watching both brackets. Add one dry towel, wait and recheck. A domestic towel rail is not a grab rail and must never be used for body support.
Common mistakes
Tightening only the visible grub screw.
Using a longer screw without checking for pipes or cables.
Expanding a plug inside the tile.
Reusing a spinning cavity anchor.
Applying silicone over a moving bracket.
Ignoring damp or a loose tile.
Treating a towel rail as a safety handhold.
When replacement is better
Replace a bent plate, cracked cover, corroded rail or accessory whose fixings no longer suit the wall. Choose a model with a broader base and a fixing pattern that can reach sound material without approaching services. Do not select only by whether it covers the old holes.
Recheck after normal bathroom use
Leave small removable pencil marks at the cover edges and inspect them after a week of damp towels being added and removed. The covers should remain tight to the tile with no fresh grout cracking, brown staining or movement. Dry the brackets after bathing so a tiny seep or corrosion mark remains visible rather than being mistaken for normal condensation.
If movement returns, remove the load immediately. Repeated failure shows that the backing, fixing choice or rail alignment remains wrong; another turn of the screw will only enlarge the damaged area.
The wall, not the tile, holds the rail
A lasting repair begins behind the decorative surface. Separate a loose rail connection from a failed wall fixing, identify the backing and protect the waterproofed area. If the backing is damaged or the route of services is uncertain, opening and repairing the wall properly is safer than fitting an ever-larger anchor.
To provide the best experiences, we use technologies like cookies to store and/or access device information. Consenting to these technologies will allow us to process data such as browsing behaviour or unique IDs on this site. Not consenting or withdrawing consent, may adversely affect certain features and functions.
Functional
Always active
The technical storage or access is strictly necessary for the legitimate purpose of enabling the use of a specific service explicitly requested by the subscriber or user, or for the sole purpose of carrying out the transmission of a communication over an electronic communications network.
Preferences
The technical storage or access is necessary for the legitimate purpose of storing preferences that are not requested by the subscriber or user.
Statistics
The technical storage or access that is used exclusively for statistical purposes.The technical storage or access that is used exclusively for anonymous statistical purposes. Without a subpoena, voluntary compliance on the part of your Internet Service Provider, or additional records from a third party, information stored or retrieved for this purpose alone cannot usually be used to identify you.
Marketing
The technical storage or access is required to create user profiles to send advertising, or to track the user on a website or across several websites for similar marketing purposes.