A fridge gasket does not need to look perfect to work, and condensation near the door is not proof that the rubber has failed. Food packaging, overloaded door shelves, dirty contact surfaces, loose hinges and a cabinet leaning forward can all prevent closure. Testing the seal section by section separates a replaceable gasket fault from an alignment or temperature problem.
Begin with the symptoms
Look for persistent moisture on one edge, frost close to the door, a compressor that runs much longer than usual, or a door that rebounds after closing. Check the displayed or measured temperature according to the manufacturer. Warm food with a fully closed door may indicate a cooling-system fault, not just air leakage.
Remove any packet, drawer or bottle that touches the door. Clean crumbs from the threshold and make sure door bins are correctly seated. A surprisingly small obstruction can imitate a weak seal.
Inspect the gasket without pulling it off
With the appliance switched on and the door open briefly, examine the full perimeter under good light. Look for splits, hardened glossy areas, flattened corners, detached magnetic strips and sections pulled from their retaining channel. Gently flex the lip; sound rubber should return to shape rather than remain folded.
Check the cabinet contact face as well. Dried spills and grease stop the soft lip conforming. Rust, a dented cabinet or damaged liner needs assessment before ordering a gasket.
Clean before testing
Use warm water with a small amount of mild washing-up liquid and a soft cloth. Clean inside each fold without stretching it, then wipe the cabinet face and dry both surfaces. Avoid bleach, solvents, abrasive pads and excessive oil unless the manufacturer explicitly approves them; they can harden or swell the material.
The paper test
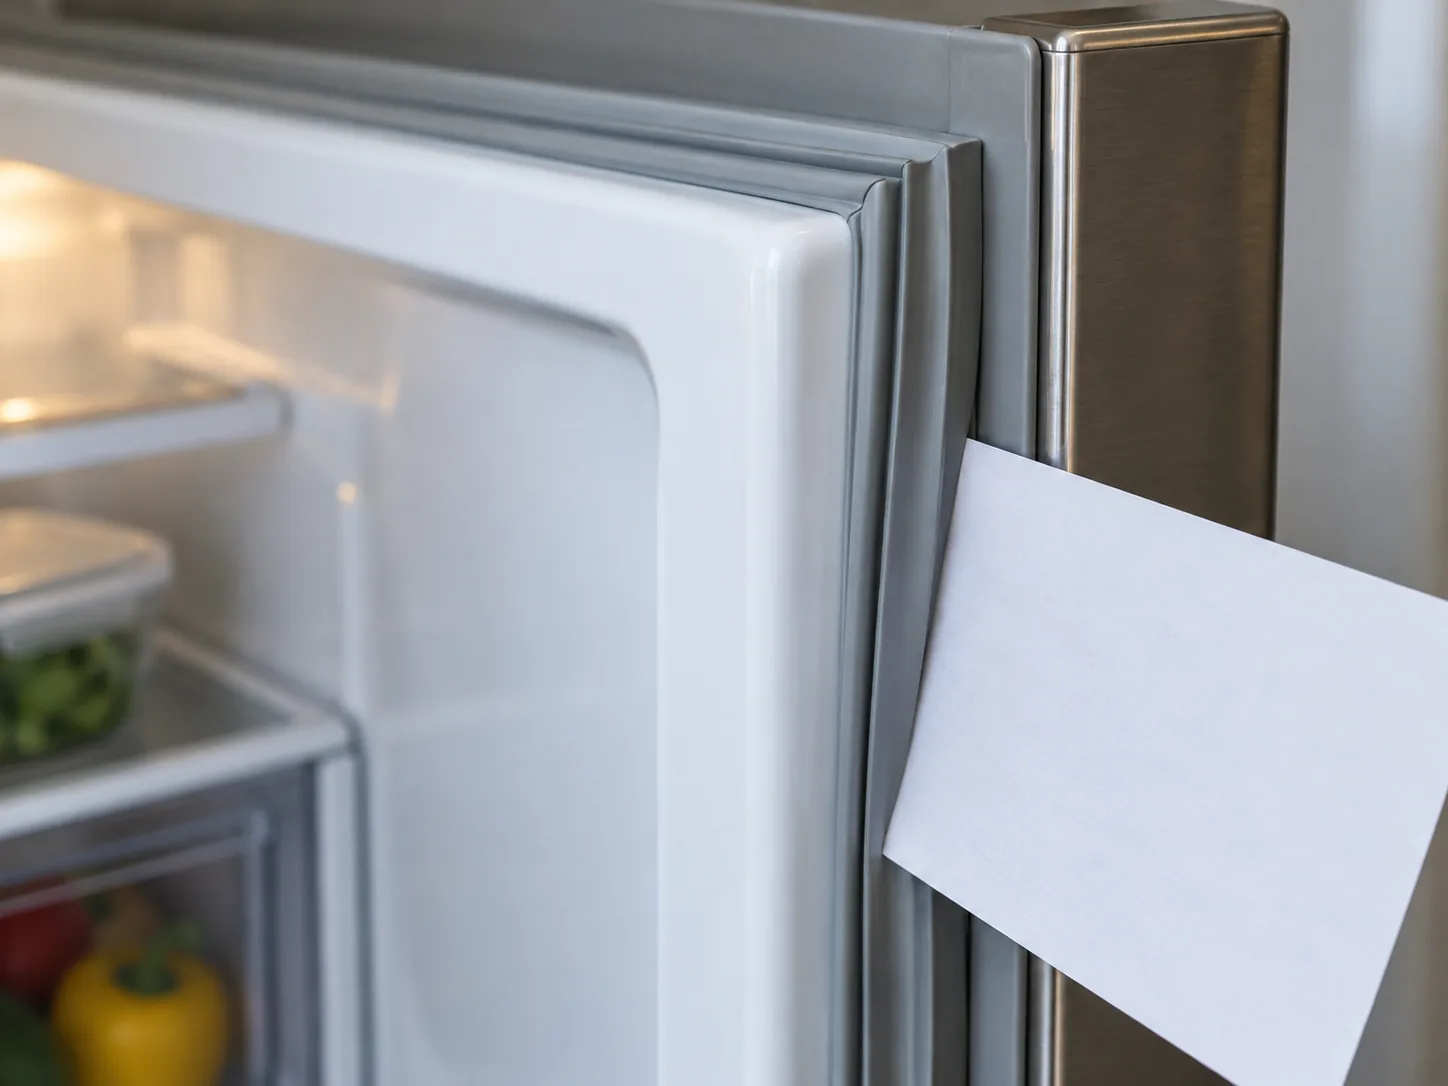
Place a strip of ordinary paper across the gasket and close the door. Pull steadily. You should feel clear resistance. Repeat every 10–15 centimetres around all four sides, including both corners. Compare weak areas with strong ones rather than relying on one test at the handle side.
If paper slides freely along a continuous vertical edge, alignment is more likely than several simultaneous gasket failures. One isolated loose point beside a split or permanent kink points towards the seal itself. Do not use bank cards or thick cardboard, which give misleading results.
Check door and cabinet alignment
Stand back and compare gaps around the door. It should not sag at the handle corner. Lift the open door very gently; obvious play can mean worn or loose hinges. Do not adjust a loaded door—remove heavy items first and follow the appliance instructions.
Place a spirit level on a suitable flat cabinet surface. Many fridges are intended to lean very slightly backwards so the door closes under its own weight, but use the manufacturer’s specification. If the appliance rocks, correct the feet rather than packing it with cardboard. Similar principles are covered in the guide to levelling a washing machine, though fridge instructions take priority.
Can a distorted seal be reshaped?
A newly unpacked replacement or a soft gasket folded in storage may relax after cleaning and warming to room temperature. Some manufacturers permit gentle warming with a hairdryer on the lowest setting from a safe distance. Keep it moving, protect plastic liners and stop before the rubber becomes hot. Never use boiling water or a heat gun.
Close the door for several hours after reshaping, then repeat the paper test. Heat cannot repair a tear, missing magnetic insert or hardened rubber.
Identify the exact replacement
Record the full model and serial number from the rating plate inside the cabinet. Similar models use different gasket dimensions, corner profiles and fixing methods. Confirm whether the seal pushes into a channel, screws beneath an inner panel or is bonded into the door.
A push-in gasket can be a reasonable DIY replacement when the instructions are clear. A seal retained behind a brittle liner, a warped door or hinge damage is better handled by fridge repair. Do not drill, glue or screw a universal strip onto an appliance door.
Replacing a push-in gasket
Unplug the fridge and keep food cold elsewhere.
Photograph corner orientation and note where the old joint sits.
Pull a short section from the retaining channel to confirm the method.
Clean and dry the channel without sharp tools.
Start the new gasket at the corners, then seat the straight runs evenly.
Check for twists and close the door gently.
Restore power and repeat the paper test after the material settles.
Common mistakes
Ordering by fridge width instead of the exact model number.
Testing before cleaning the gasket and contact face.
Replacing a seal when a shelf or bottle obstructs closure.
Heating one spot aggressively.
Adjusting hinges while the door is heavily loaded.
Stretching the replacement, which leaves short or distorted corners.
Ignoring a warped cabinet or damaged door liner.
When the seal is not the main fault
Arrange appliance diagnosis if temperatures remain unsafe, the compressor runs continuously after a proven seal repair, frost forms away from the door, or fans make unusual noise. Keep the door closed and follow food-safety guidance if cooling is unreliable.
Recheck after fitting a new gasket
Give the rubber the settling period stated by the manufacturer, then repeat the paper test around the complete perimeter. Watch each corner while closing the door; the lip should roll into contact rather than folding underneath itself. Clean away packing residue and make sure the replacement has not been stretched along one edge.
Monitor cabinet temperature and compressor behaviour over the next day without repeatedly opening the door. A small temporary condensation change can follow installation, but a warm compartment, heavy frost or a motor that never cycles off needs prompt investigation. Keep the old gasket and packaging until the fit and part number are confirmed.
If only the hinge-side corner remains weak, check that the gasket is fully seated and the door clears adjacent cabinets. Do not add adhesive, foam tape or extra magnets; these prevent proper seating and make later repair harder.
A useful diagnosis combines a clean contact surface, repeated paper tests and an alignment check. Replace the gasket when the weakness follows damaged rubber; correct hinges, loading or levelling when the pattern follows the door. That avoids buying a seal that cannot cure the real gap.
A blocked pump filter can leave water in the drum, interrupt a programme or make the drain pump sound strained. Cleaning it is straightforward only when the appliance has an accessible user-serviceable filter and the remaining water is controlled. Unscrewing the cap without preparation can release several litres across the floor.
Confirm that your model has a serviceable filter
Check the manual or model-specific instructions before opening a panel. Many front-loading machines have a filter behind a low flap, but some designs are accessed elsewhere or are not intended for routine owner removal. Do not prise off a fixed cover or remove cabinet screws.
A drain error can also be caused by a kinked waste hose, blocked sink connection, failed pump or control fault. If the appliance is under warranty, follow the manufacturer’s service procedure.
When not to open the filter
Stop if the machine contains very hot water, there is a burning smell, the floor or plug is wet, or the filter housing is cracked. Do not work on an energised appliance. If water has reached electrical fittings, keep clear and seek qualified help.
If the drum is full and the door remains locked, do not force it. Use the manual’s emergency-drain method. A wet load can be extremely heavy, and opening the door prematurely may flood the room.
Tools and preparation
Several absorbent towels
Very shallow tray or baking sheet
Low-sided containers for repeated draining
Gloves and a torch
Soft brush and warm water
The appliance manual
Switch off at the socket, unplug with dry hands and close the water inlet valves. Let hot water cool. Pull the machine forward only if this can be done without straining hoses; use the safe positioning checks from the guide to levelling a washing machine.
Step 1: protect the floor
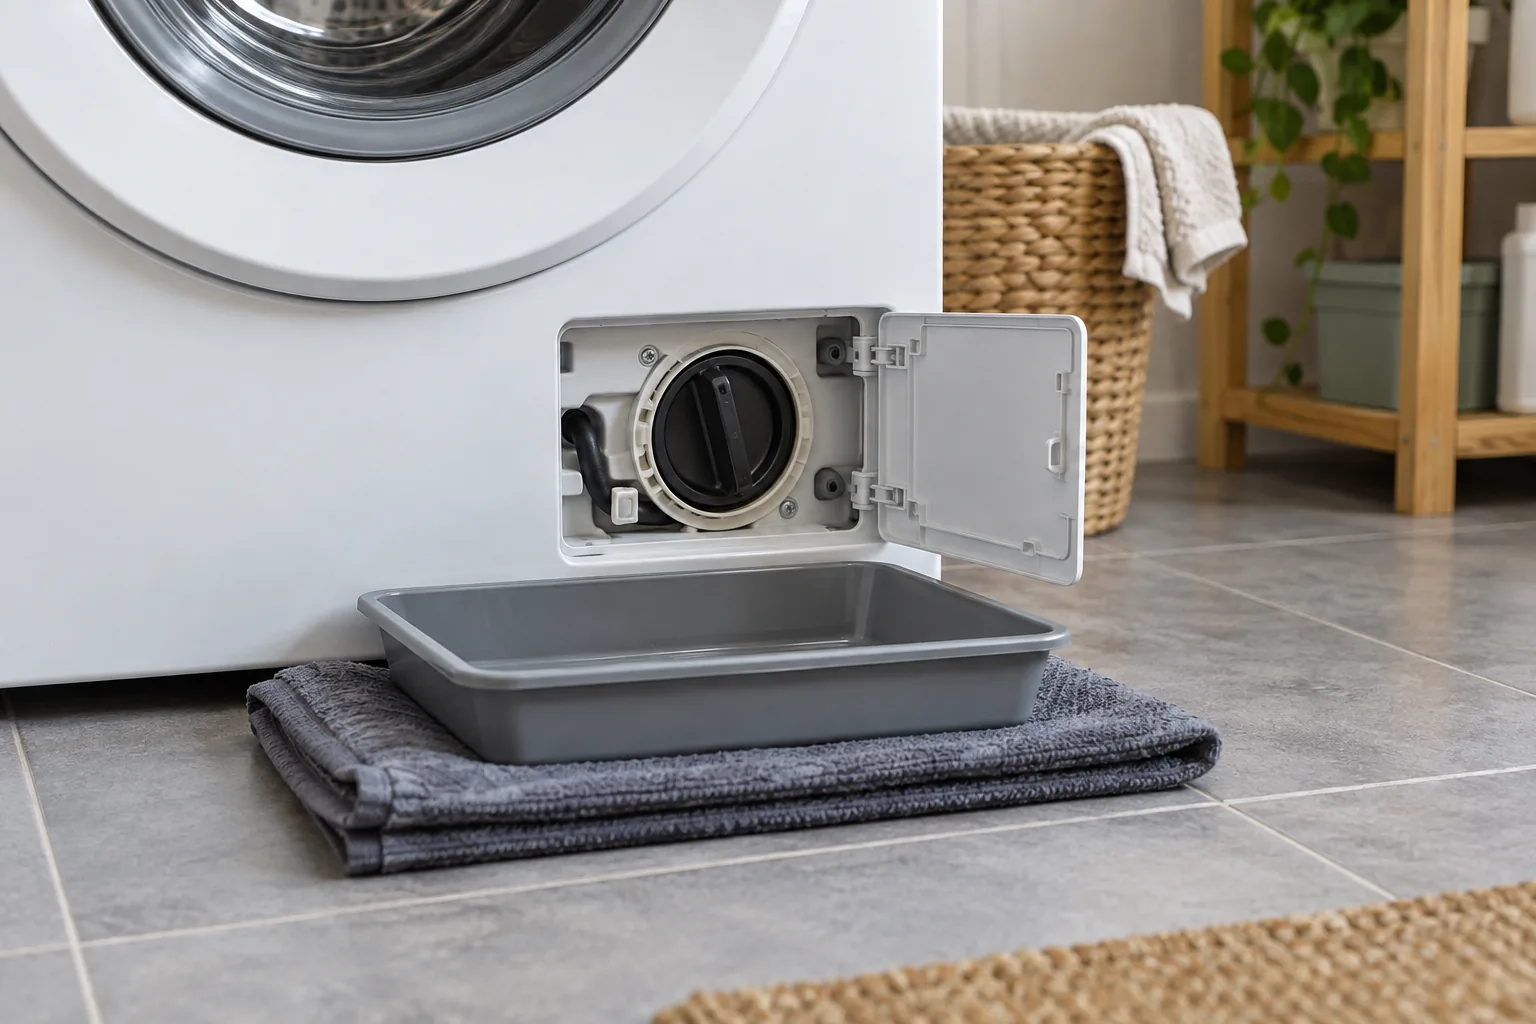
Lay towels flat around the front feet and slide the shallow tray below the filter flap. Laminate and timber joints can swell quickly, so have a second person ready to exchange containers. Do not tilt a heavy machine merely to fit a deeper bowl beneath it.
Step 2: use the emergency drain hose if provided
Some machines have a small capped hose beside the filter. Pull out only the length specified, hold the end low over the tray and remove its cap. Drain in stages, refitting the cap before emptying the tray. Keep the hose supported so it cannot spring free.
If there is no hose, loosen the filter cap a fraction until water begins to trickle. Tighten it again whenever the tray fills. Repeat patiently until the flow stops. Never remove the cap in one movement while water remains in the drum.
Step 3: remove the filter without forcing it
Turn the cap in the direction shown by the manual, usually anticlockwise. Expect another small release of water. If the cap turns partly and jams, an object may be caught behind it. Rocking or levering the cap can break the housing; arrange washing-machine repair instead.
Step 4: inspect what the filter caught
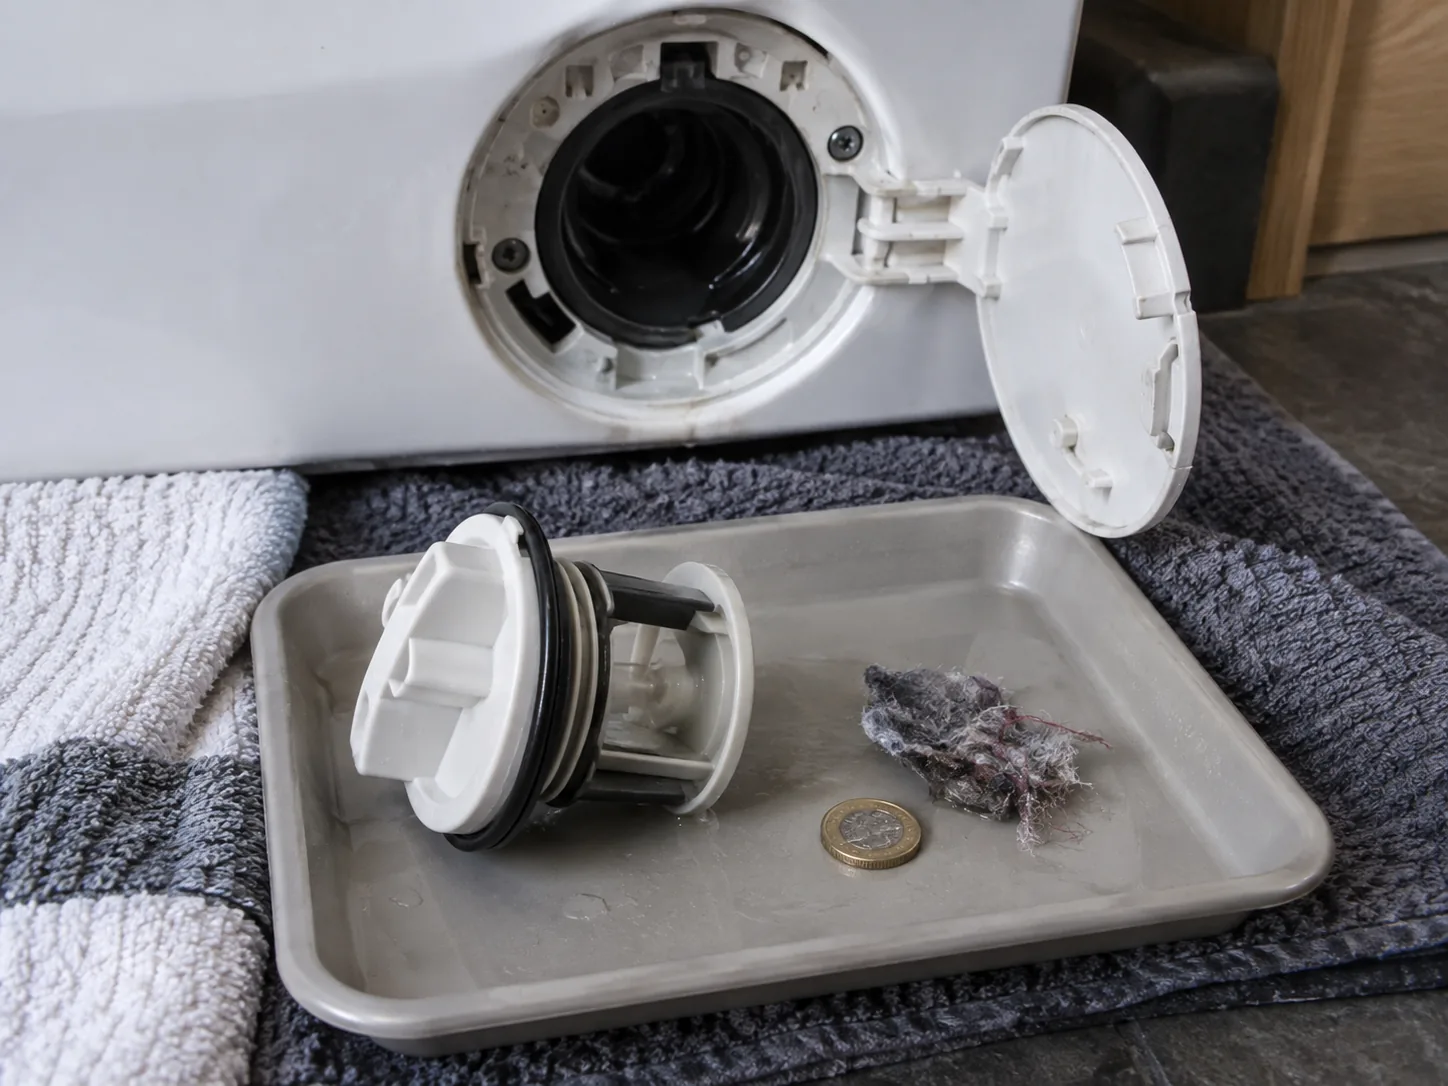
Remove lint, hair, buttons, coins and other debris. Check the rubber seal for cuts, distortion and embedded grit. Wash the filter with warm water and a soft brush. Do not use boiling water, solvents or sharp tools that damage plastic or seals.
Use a torch to inspect the housing. The pump impeller may be visible behind the filter and often moves in small magnetic steps, but do not push fingers into the opening. Remove only loose objects that are clearly accessible with the machine unplugged.
Step 5: clean the housing and refit
Wipe the seating surface so no thread, grit or hair crosses the seal. Insert the filter squarely and turn it by hand until secure. Cross-threading is a common cause of leaks. Tight is enough; grips can crack the cap or make the next service impossible.
Refit the emergency hose cap and return it to its clip. Close the flap only after the leak test so the housing remains visible.
Step 6: test for drainage and leaks
Open the inlet valves, reconnect power and run the manufacturer-recommended drain or short rinse programme. Stay beside the machine. Watch the filter cap and press dry tissue around it during filling and draining. Stop immediately if water appears.
Listen to the pump. A brief hum as it primes can be normal; prolonged buzzing with no discharge, grinding or repeated drain errors indicates that cleaning has not solved the fault.
Troubleshooting after cleaning
The cap now leaks
Unplug, close the valves and drain again. Check for a trapped fibre, damaged O-ring or crooked thread. Replace the exact seal or filter assembly rather than adding tape or silicone.
The filter was clean but water remains
Inspect the external waste hose for crushing and check the sink spigot or standpipe. If other fixtures drain slowly, follow the guide to diagnosing a slow sink. Do not insert wire into the pump path.
The filter blocks repeatedly
Empty pockets, use laundry bags for small items and check deteriorating fabrics. Recurring rubber fragments, metal swarf or unusual noise need technician assessment.
Common mistakes
Opening the cap before cooling and draining the water.
Using one deep bucket that will not fit below the flap.
Tilting the appliance alone.
Forcing a jammed cap with grips.
Leaving grit on the O-ring or cross-threading the filter.
Closing the flap before a full leak test.
Assuming every drain error is caused by the filter.
How often should the filter be checked?
Use the manufacturer’s interval rather than an arbitrary monthly routine. Homes that wash pet bedding or heavily soiled workwear may need more frequent inspection. A sudden change in drain time, unusual pump sound or unexplained wet laundry is a better prompt than repeatedly opening a clean filter.
A safe clean ends with a wet test
A blocked standpipe, leaking trap or damaged waste connection is a plumbing fault rather than filter maintenance; use a plumbing service. If the machine still fails to drain with a clean filter and clear external hose, book appliance diagnosis rather than opening the pump housing.
The job is complete only when the cap is correctly seated, the pump discharges normally and the housing stays dry through a test programme. Controlled draining at the start and careful inspection at the end protect both the appliance and the floor.
A washing machine that creeps across the floor during spin is not always simply “out of level”. Transit bolts left in a new appliance, a rocking floor, an unbalanced load, trapped hoses or worn internal suspension can produce similar symptoms. Check those possibilities in order before repeatedly turning the feet.
Stop if the movement is violent
Pause the cycle, switch the machine off and let the drum stop. Do not try to hold a moving appliance. If there is burning smell, grinding, a leaking hose, exposed wiring or a drum that strikes the cabinet, unplug it only if the socket is dry and safely accessible, then arrange appliance repair.
Rule out the load first
One heavy absorbent item can settle on one side of the drum. Redistribute towels or bedding and remove part of an overloaded wash. Very small loads can also fail to balance. Run the manufacturer’s recommended test cycle only after the machine stands firmly.
If vibration happens on every programme and with an empty-drum test, look at installation. If it began suddenly after years of quiet operation, inspect the floor and consider worn suspension, bearings or counterweight fixings rather than assuming the feet moved.
Check transit bolts on a recent installation
New front-loading machines are transported with bolts that lock the drum. They must be removed exactly as the manual describes and the supplied blanking caps fitted. Operating the machine with them installed can cause severe vibration and damage. Do not guess from appearance; compare the rear panel with the installation diagram and keep the bolts for a future move.
Tools and preparation
Short spirit level
Correct open-ended spanner for the feet and locknuts
Torch and dry cloth
Thin non-slip protective sheet if the manual permits one
Another adult to steady the appliance
Unplug the machine and close its water valves before moving it. Do not strain the cable, inlet hose or waste hose. A washing machine is heavy; never tip it alone or place hands beneath an unsupported cabinet.
Inspect the floor and clearances
Press each top corner in turn. A click or rocking motion confirms that one or more feet are not carrying weight. Check for cracked tiles, loose boards, deep grout lines and a soft or sloping floor. All four feet need firm contact; cardboard, folded fabric and random timber wedges compress or creep.
Pull the machine forward only far enough to inspect hoses. They should curve freely and must not be crushed against the wall. The cabinet must not touch a worktop, side unit or skirting during spin. If surrounding joinery needs adjustment, use an appropriate handyman service rather than forcing the machine into a tight opening.
Step 1: return the feet to a sensible starting position
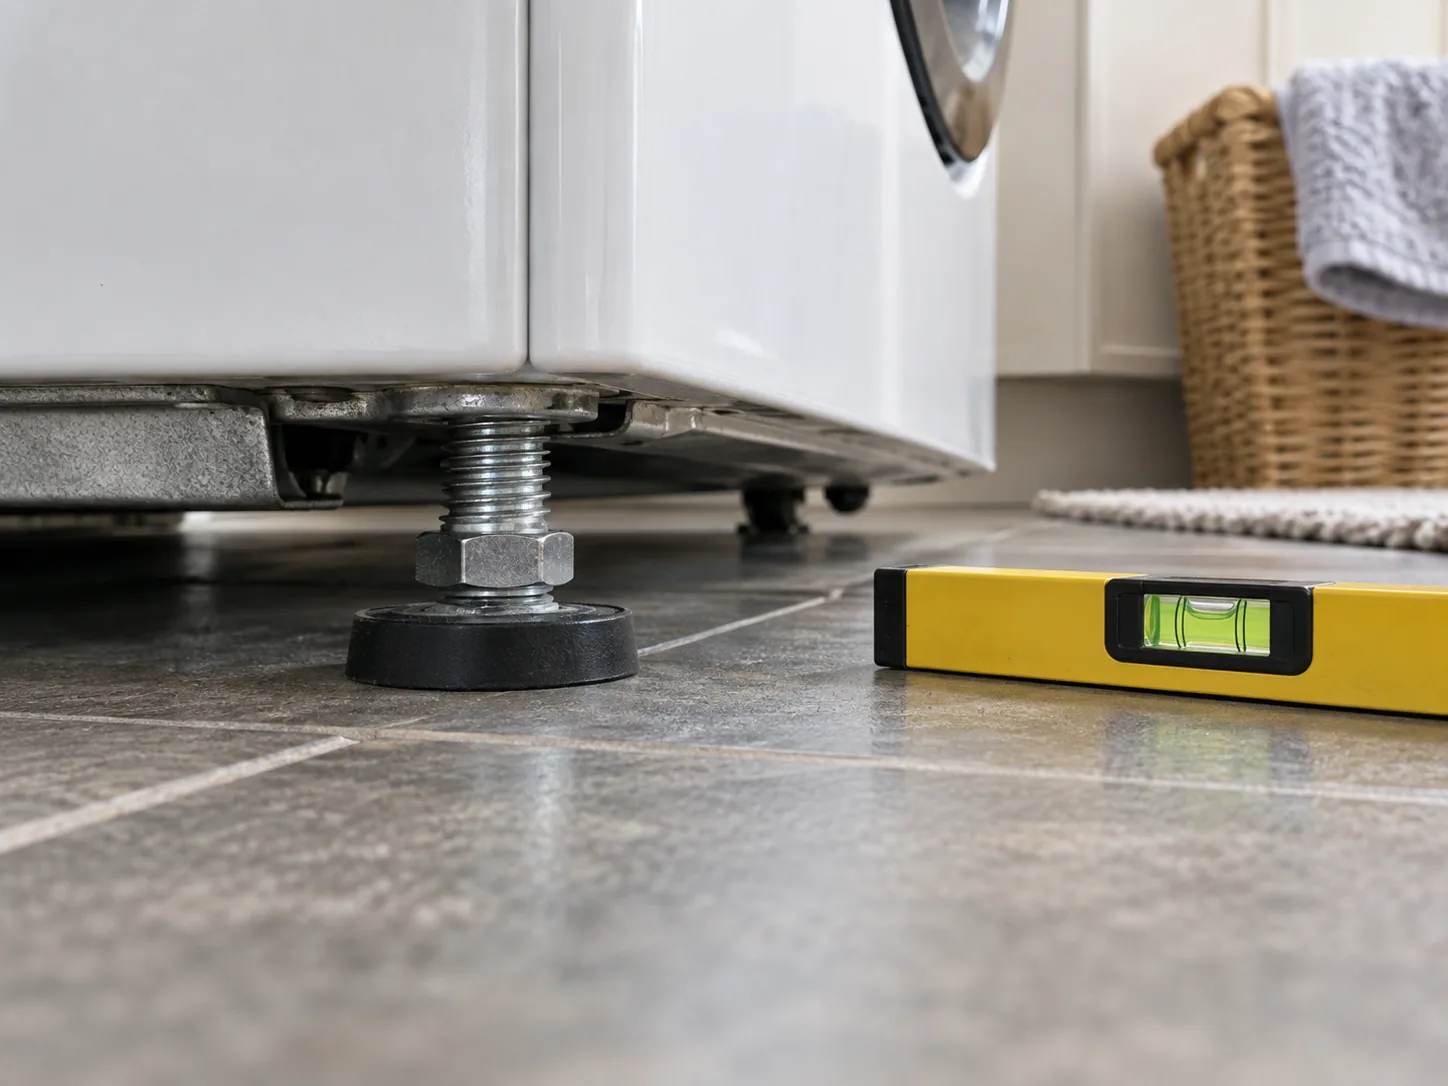
Follow the manual because some machines have two adjustable front feet and others have four. Loosen each locknut while supporting the appliance. Keep threaded feet engaged by several full turns; extending them excessively reduces stability. Start with the cabinet as low as the uneven floor allows.
Step 2: level from side to side
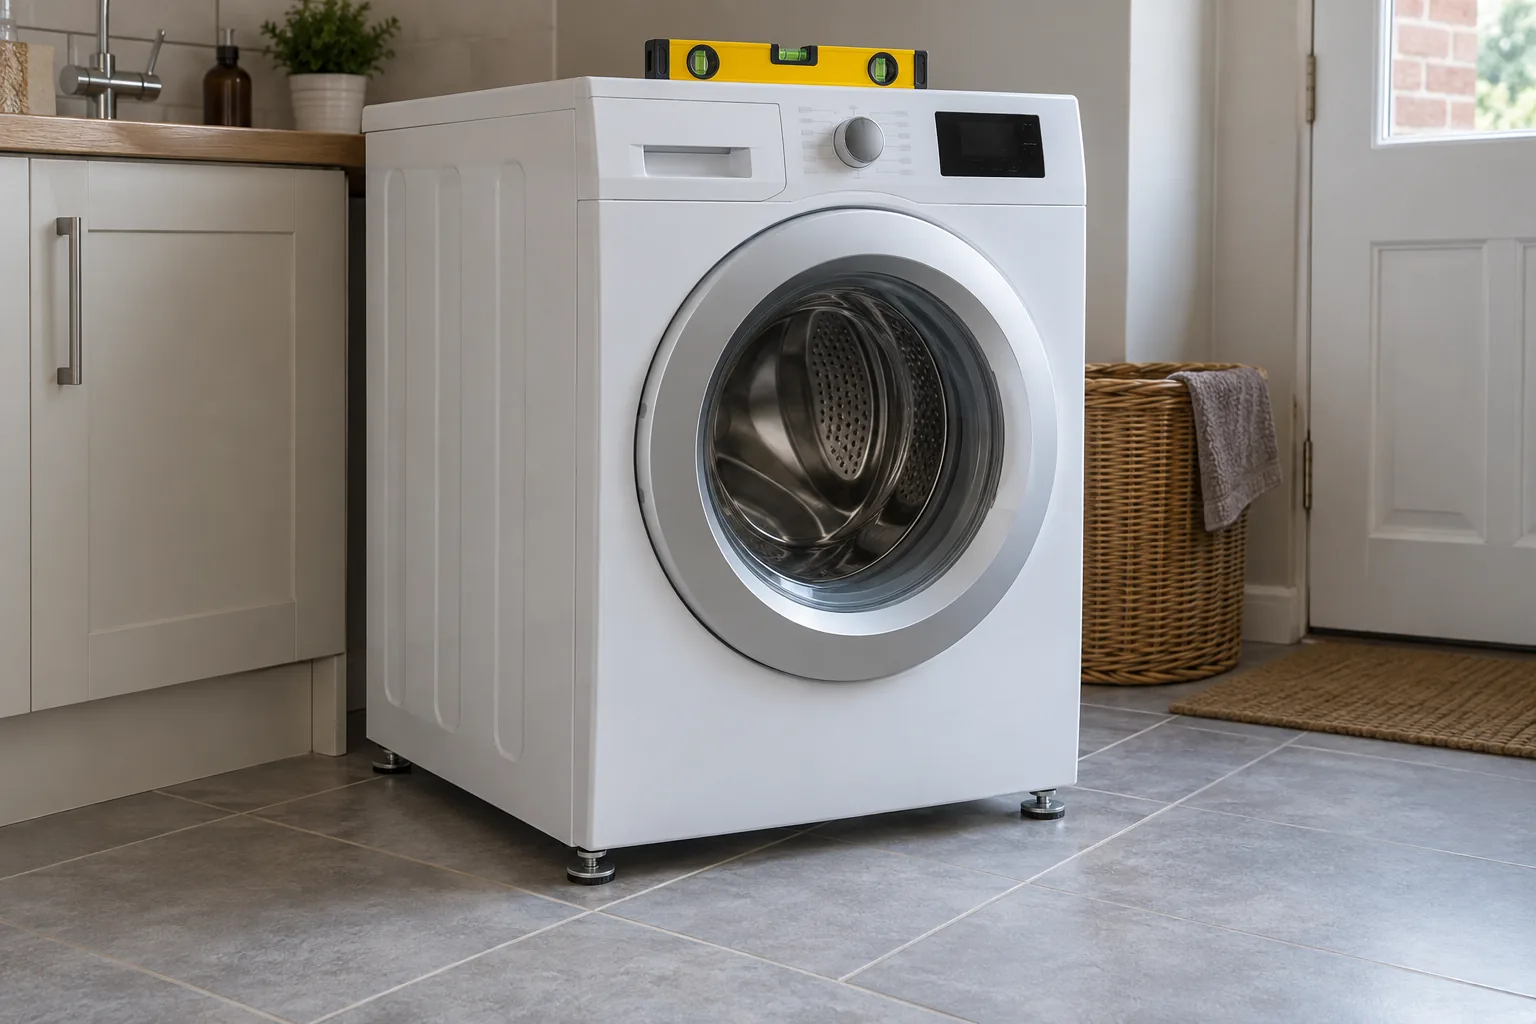
Place the spirit level on a clean, flat part of the top, not across a raised control panel. Adjust the relevant foot in small increments, lower the machine and recheck. Read the level from directly above. The objective is a centred bubble and firm contact, not matching the visible gap below adjacent worktops.
Step 3: level from front to back
Turn the level through 90 degrees and repeat. After every adjustment, press opposite corners to find residual rocking. A machine can be visually level while one foot hangs fractionally above a hollow tile, so the corner test is as important as the bubble.
Step 4: lock the adjustment
When all four feet bear weight, hold each foot so it cannot rotate and tighten its locknut firmly against the cabinet base as the manual specifies. An unlocked foot gradually turns during spin. Recheck both directions after tightening because the setting can shift.
Step 5: reconnect and test progressively
Check that inlet and waste hoses remain correctly routed, reopen the water valves and inspect for leaks. Run a short rinse or manufacturer test with the machine empty, then try a balanced medium load. Stay nearby during the first high-speed spin. Some normal vibration is expected, but the feet should remain planted and the cabinet should not travel.
Common mistakes
Levelling before removing transit bolts.
Adjusting only the two feet that are easiest to reach.
Leaving locknuts loose.
Using soft packing that compresses when wet.
Pushing the appliance back onto a hose or cable.
Testing first with one bath mat or another unbalanced item.
Assuming a level cabinet proves the internal suspension is sound.
When the floor is the problem
Loose floorboards or a flexible suspended timber floor can amplify a normal spin. Do not screw through boards without checking for pipes and cables. The guide to preparing floorboards explains safe inspection principles, while structural movement requires a competent flooring or building professional. Appliance mats cannot correct a weak base.
Signs the machine needs repair
Call a technician if the drum has excessive up-and-down play, makes a rumbling bearing noise, sits visibly off-centre, strikes the door seal, or the cabinet still jumps when empty and correctly installed. Also stop if a concrete counterweight appears loose. These are internal faults, not levelling tasks.
Recheck after the machine has settled
Mark the foot positions lightly with removable tape and check them after five normal washes. A locknut that was not fully tightened may leave a visible change. Look for fresh scuffs, dampness below the inlet connection and contact marks on nearby units. If the machine has moved, repeat the corner test before adjusting anything; the evidence will show whether a foot rotated, the floor shifted or the vibration has another cause.
Also check the appliance after it is pulled out for filter cleaning or plumbing work. A small change in position can place one foot on a grout line or trap the waste hose, undoing an otherwise correct installation.
If the appliance is level but the finished surface flexes or has broken joints, arrange a flooring inspection before repeated spin cycles enlarge the damage.
A stable result has three tests
The bubble should centre in both directions, diagonal corners should not rock, and a balanced test load should spin without the appliance walking. Meeting all three is more reliable than judging the machine by eye or hiding movement with thicker padding.
A burst connector is the wrong moment to discover that nobody knows where the mains water turns off. Finding the internal stopcock in advance, checking that it is accessible and learning how it moves can limit water damage without turning a simple valve test into a leak. The aim is not to dismantle the valve, but to identify it confidently and operate it gently.
What an internal stopcock controls
The main internal stopcock normally isolates the incoming cold-water supply to the property. It may not stop water already stored in a cold-water cistern or hot-water cylinder, and communal blocks or converted buildings can have unusual arrangements. Appliance isolators and small service valves only control one branch; they are not substitutes for the main valve.
In an emergency involving electrics, do not step into standing water or touch wet electrical equipment. Keep people away and call the appropriate emergency service or qualified tradesperson. Water near a consumer unit, sockets or light fittings requires particular caution and electrical assessment.
Start where the mains pipe is likely to enter
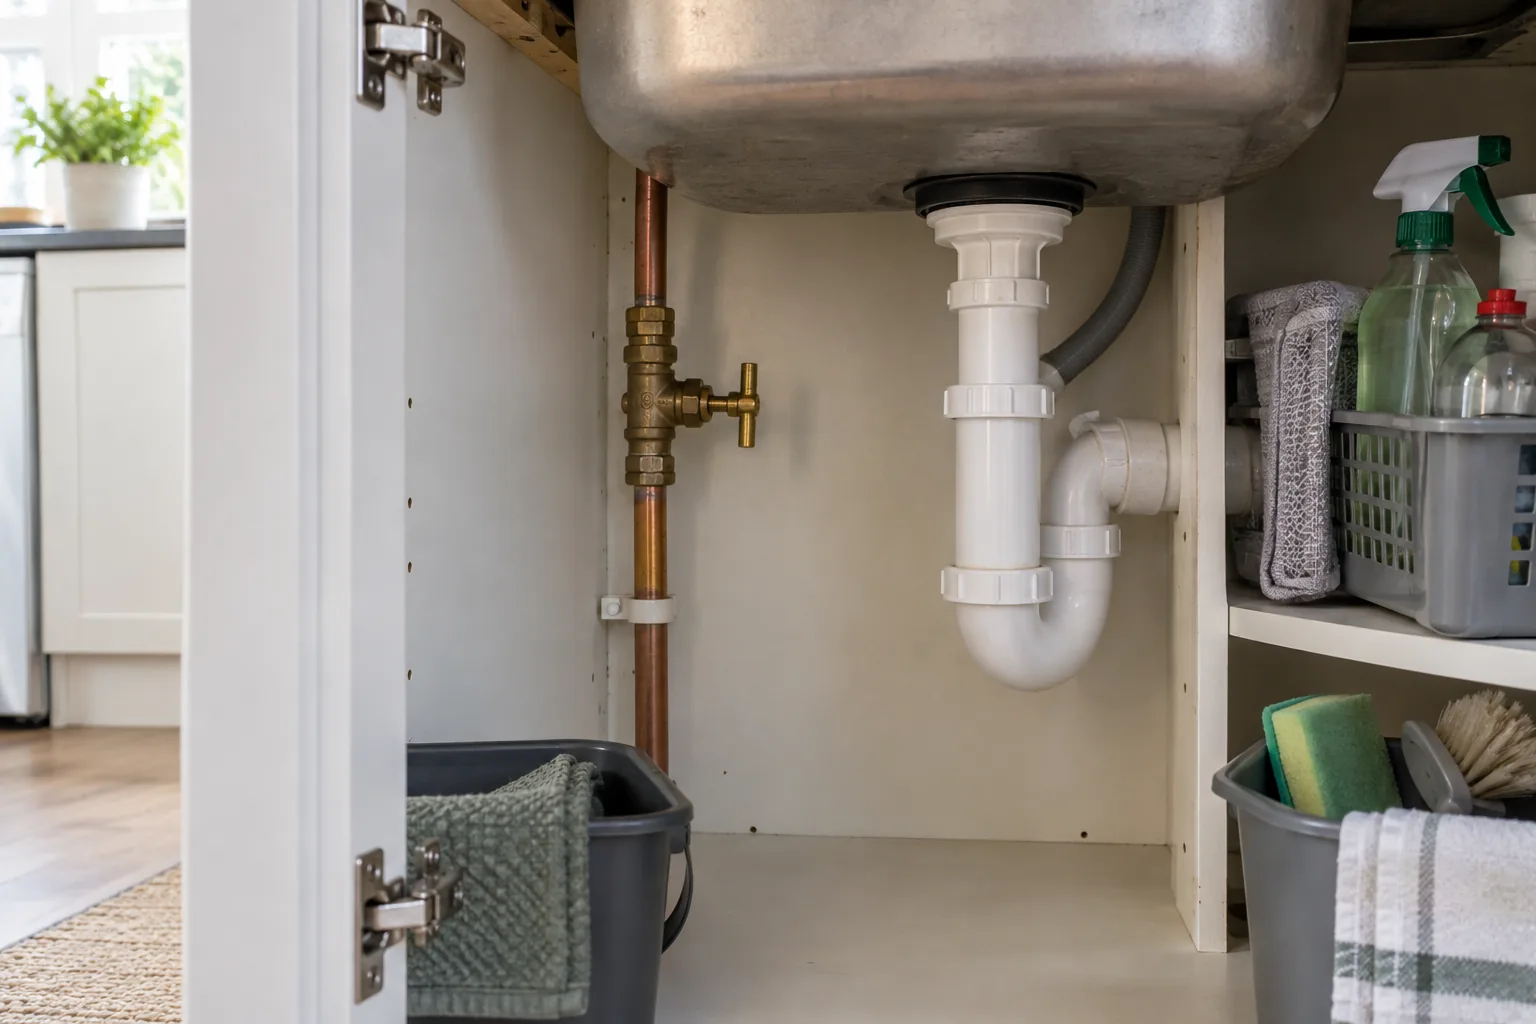
In many British homes the supply enters near the front elevation, then runs towards the kitchen. Check beneath the kitchen sink, inside the adjacent base unit, in a utility cupboard, under the stairs and near the front door. Flats may have a valve in a service cupboard, bathroom boxing or communal riser.
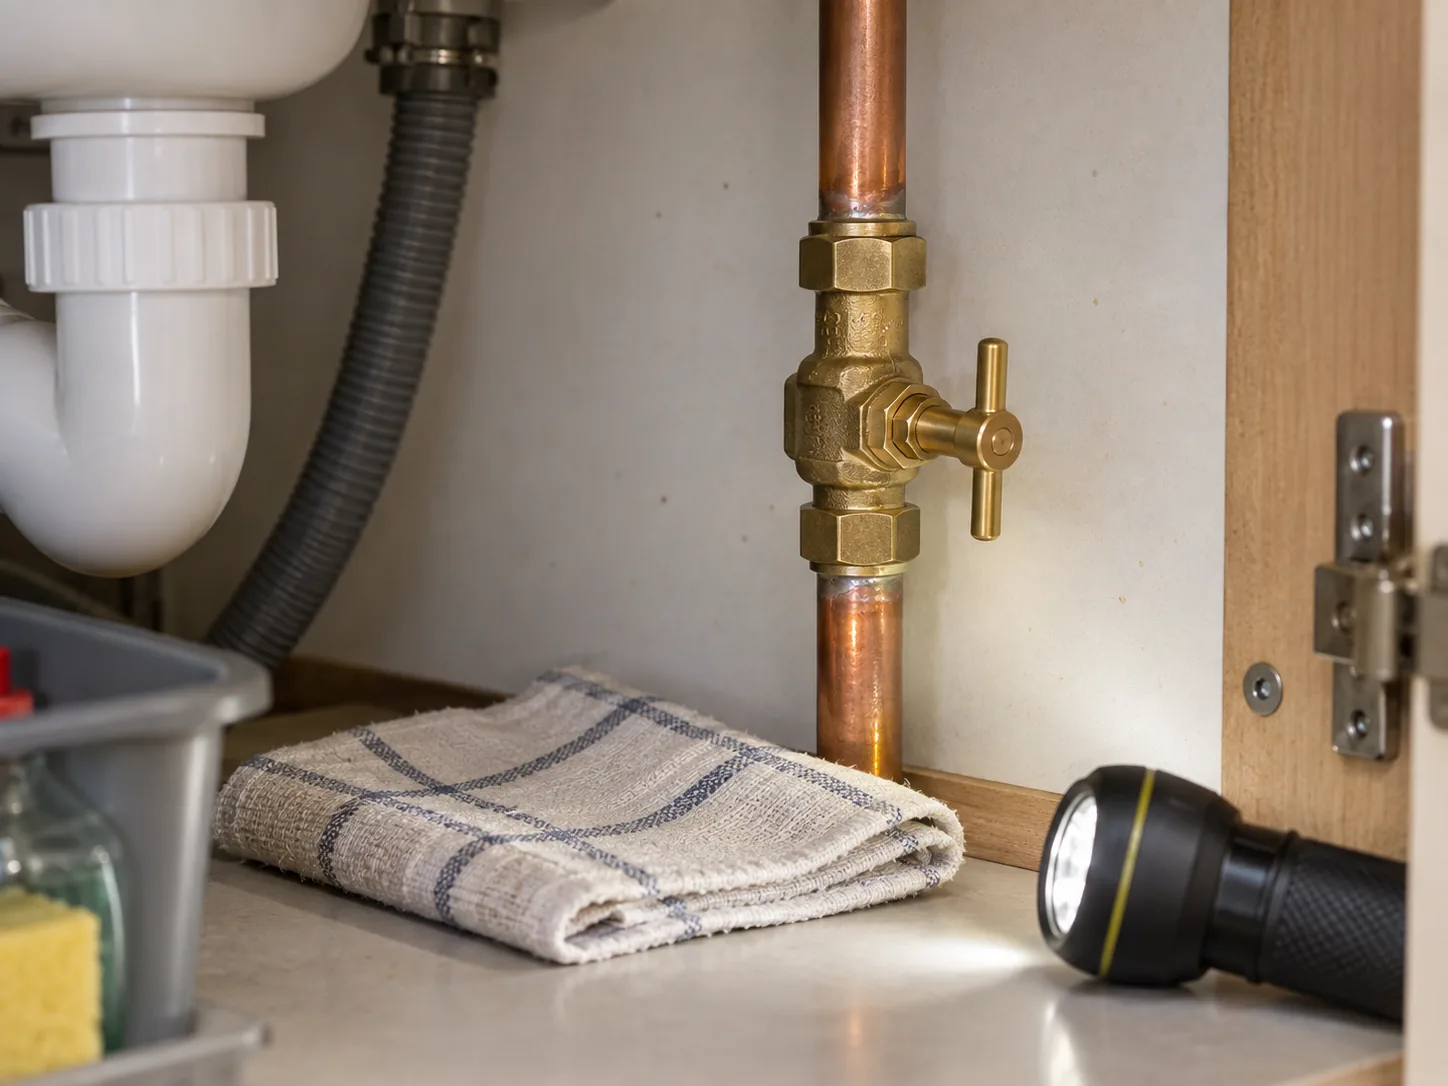
Look for a brass valve fitted directly in copper or plastic incoming pipe. Traditional stopcocks have a small crutch or T-shaped handle; modern installations may use a lever valve. Trace the pipe rather than choosing a valve purely by appearance. The main valve is usually before branches to taps and appliances.
Beside the water meter where one is fitted indoors
In an airing cupboard at low level
Near a boiler, but not on gas pipework
Within a labelled landlord or building-services cupboard
Do not unscrew fixed boxing or drill exploratory holes without checking for pipes and cables. Ask the previous owner, landlord, managing agent or water company if the route is unclear. A plumber can trace and label it.
How to distinguish water from gas
Never turn a valve simply because it resembles a stopcock. Gas pipework and meters have their own emergency controls and must be treated separately. Follow the pipe: a water main supplies cold taps and typically enters below ground level. If there is any doubt, leave it alone and contact a competent professional. Do not paint, conceal or hang items from any service pipe.
Prepare before testing the valve
Clear the cupboard fully and provide good lighting.
Place a dry cloth below the spindle and compression joints.
Photograph the valve and surrounding pipework.
Tell other occupants that water will briefly stop.
Choose a cold tap at the lowest practical point for verification.
Check for green staining, corrosion, dampness or a badly unsupported pipe. If the valve already weeps, is buried in plaster, or the pipe moves when lightly touched, do not test it. Arrange repair while the situation is controlled.
Step 1: turn clockwise with your hand only
A traditional stopcock closes clockwise when viewed from the handle end. Apply steady hand pressure and count the turns. Do not use grips, a wrench or an extension bar on a seized handle: excessive leverage can snap the spindle or disturb old joints. If it will not move with moderate hand force, stop.
Step 2: verify that the supply has stopped
Open the selected cold tap. Flow should reduce and stop after the short section of pipe empties. A loft tank-fed tap may continue, so test a mains-fed kitchen cold tap where possible. If flow only reduces, the stopcock may not be closing fully or you may have found a branch valve.
Do not leave a stiff valve forced hard against its seat. Once closed, use tissue around the spindle and joints to check for a new seep. A leak that starts during operation needs prompt emergency plumbing support.
Step 3: reopen it slowly
Turn anticlockwise gradually. Sudden flow can create water hammer and stress old fittings. When fully open, turn it back a fraction of a turn so it is not jammed against the end stop. Run the cold tap until air clears, then recheck the valve and nearby joints with dry tissue.
If the stopcock is seized
Do not soak it with an unidentified spray in a food-storage cupboard or apply heat. Do not strike the handle. The external boundary stop tap may isolate the property, but it can belong to the water company or serve more than one home. Confirm ownership and access rules before using it.
A plumber can isolate upstream, service or replace the valve and install a more accessible control where appropriate. This planned job is far safer than discovering the failure during a burst.
If the valve closes but water continues
Allow for water stored in pipework and tanks, then identify which outlets continue. A kitchen mains tap that runs at normal pressure suggests the wrong valve, a bypass or incomplete closure. A bathroom tap supplied from a cistern may run until stored water falls. Do not assume the property is isolated until the relevant flow is proven to have stopped.
Label and keep access clear
Attach a simple waterproof label and record a photo in the household maintenance file. Show adult occupants where the valve is and which direction closes it. Do not pack the cupboard tightly around the handle. If a removable panel hides it, make the opening obvious and tool-free where practical.
Test the stopcock gently every six months and inspect for seepage afterwards. Landlords should ensure occupants know the location without implying they should repair plumbing themselves; include it in the property’s maintenance information.
Emergency sequence for a serious leak
Keep clear of electrical hazards and warn occupants.
Close the confirmed internal stopcock by hand.
Open a safe cold tap to relieve pressure.
Contain water only where this can be done safely.
Call the relevant plumber, insurer or building manager.
A stopcock is useful only when it is recognisable, operable and reachable. Find it in calm conditions, prove what it controls, reopen it carefully and deal with stiffness or corrosion before an emergency. That short test turns an uncertain fitting in a dark cupboard into a reliable first response.
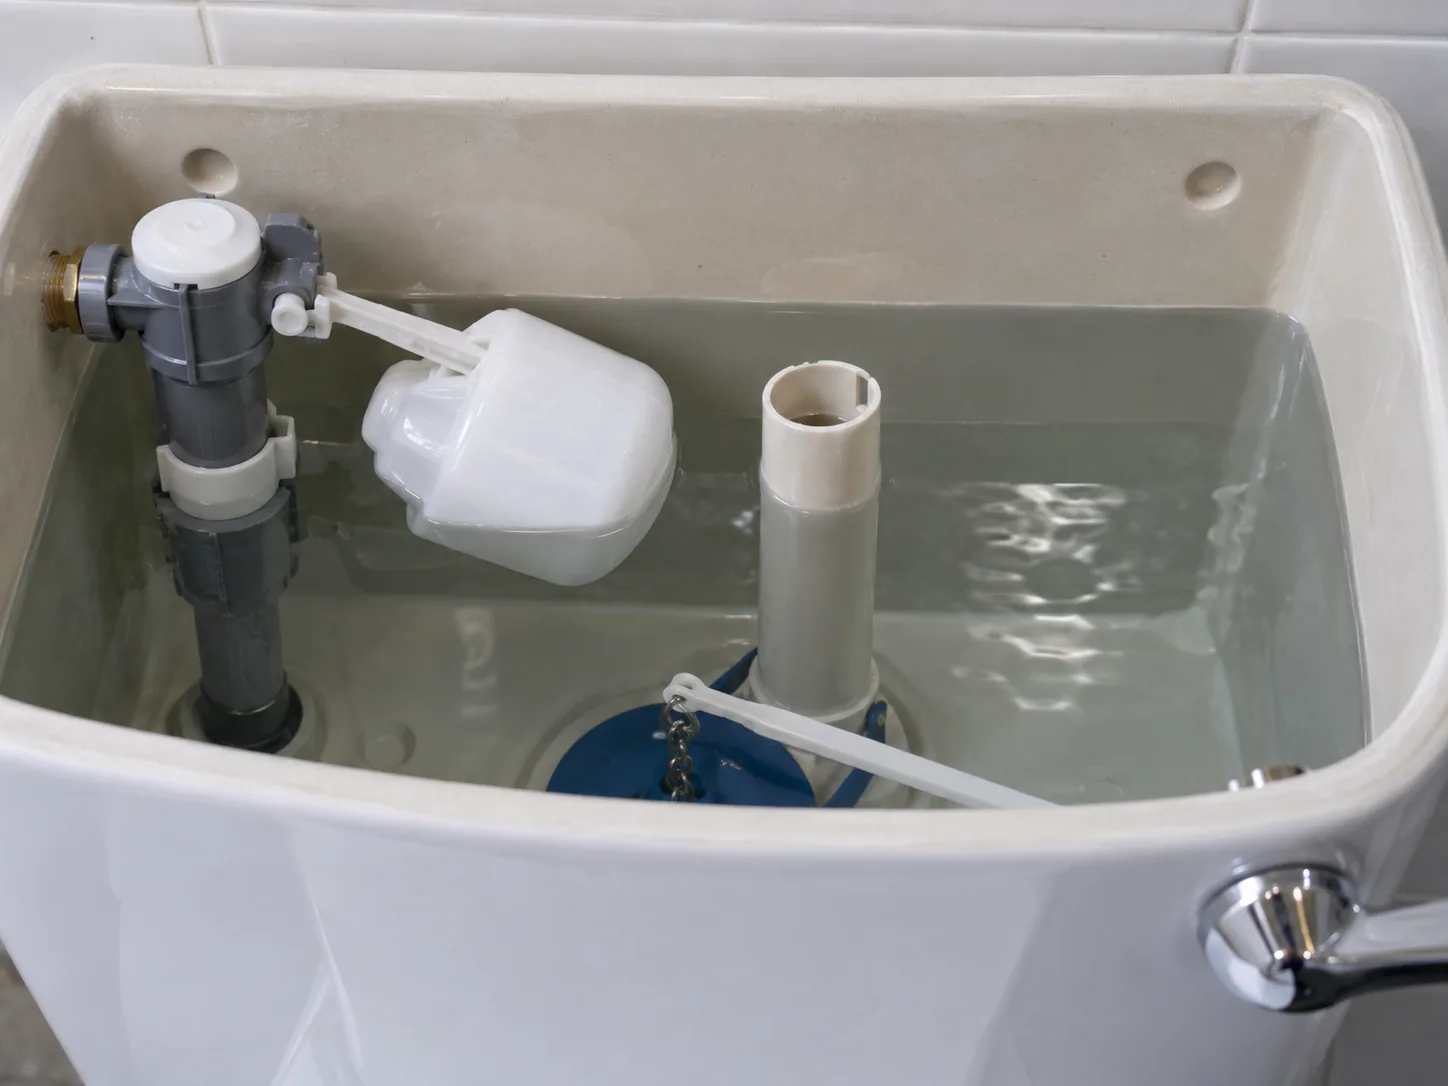
A toilet that continues to hiss or send a thin stream into the pan is wasting water and signalling that the cistern has not completed its cycle. The fault is usually on the fill side, which controls the incoming water, or the flush side, which should seal the outlet. You can identify which system is responsible without dismantling valves or reaching into moving parts.
First confirm that water is moving
Dry the back of the pan with tissue and wait without flushing. A fresh wet line, ripples or a faint sound confirms flow. In a concealed-cistern toilet, listen behind the access plate. Condensation on a cold pan is different: it forms droplets over a broad surface rather than a defined stream from the rim.
Add a few drops of food colouring to cistern water, keeping it away from bleach products. Do not flush for 20 minutes. Colour appearing in the pan indicates leakage through the flush valve or seal. Clear water running through the internal overflow points more strongly to the fill valve or water-level adjustment.
Know the parts you are looking at
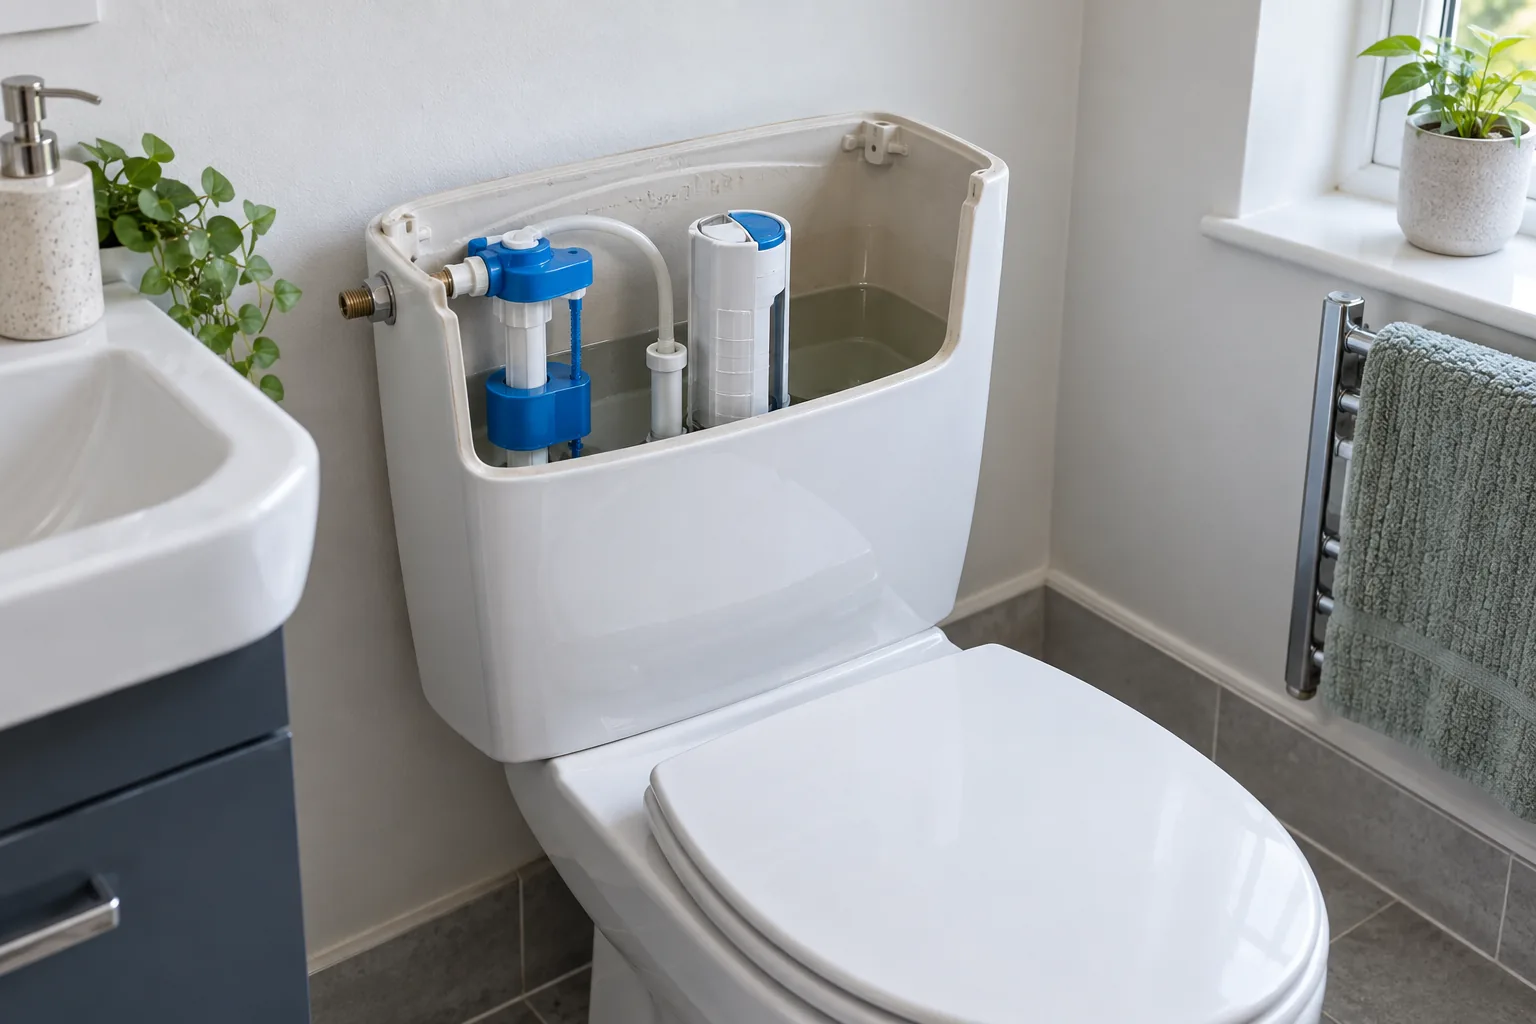
A modern cistern normally contains a fill valve with a float, a central flush valve, and an overflow route incorporated into the flush tower. Older toilets may use a ball float on an arm and a separate overflow pipe. Photograph the arrangement before touching anything and find the model marking if visible.
Do not remove a heavy ceramic lid unless you can place it flat on a padded surface. Dual-flush buttons may unscrew or release in a specific way; forcing them can break the linkage. For a concealed cistern, use only the intended service opening.
Tools and safe preparation
Torch, dry tissue and a small mirror
Food colouring for a leak test
Old towel and shallow container
Manufacturer’s instructions or a clear photograph of the mechanism
Gloves for cleaning accessible components
Locate the toilet isolation valve before starting. It is commonly on the small supply pipe beside the cistern. If it is seized, damaged or begins to leak, do not force it. Make sure you also know the location of the property’s main stopcock by following the guide to finding and using an indoor stopcock.
Step 1: watch one complete refill
Flush once with the lid removed and keep hands clear. The float should fall, water should enter, and the float should rise smoothly until flow stops. The final water level should remain below the top of the overflow route and usually align with a moulded level mark.
If water reaches the overflow, gently lift the float. Flow that stops suggests adjustment or a float that is catching. Flow that continues despite the float being fully raised suggests debris or wear in the fill valve. Do not bend plastic arms or improvise weights.
Step 2: check whether the float is obstructed
Look for the float rubbing against the cistern wall, flush tower or cable. A loose valve can rotate and create interference. Also check whether the float has filled with water, which prevents it rising. Restore only adjustments described for that exact valve. If the body is loose at the cistern entry, isolate the supply and arrange repair rather than twisting it from inside, which can disturb the external seal.
Step 3: inspect the flush control
A button, lever or cable that does not return fully can hold the flush valve slightly open. Operate it slowly and confirm there is free play after release. Make sure the cistern lid is seated correctly; an incorrectly fitted lid can press on a button assembly.
If the control returns but the dye test shows leakage, the flush seal may have scale, grit, a blister or distortion. Some towers release with a short twist after the supply is isolated and the cistern is emptied, but designs differ. Follow the manufacturer’s instructions. Never force a brittle fitting.
Step 4: clean only serviceable parts
Where the flush valve is designed for removal, rinse the rubber seal and its seating surface with clean water. Remove loose scale with a soft cloth; sharp tools create a permanent leak path. Replace a swollen, split or hardened seal with the exact part rather than applying grease or sealant.
Fill valves may contain a small diaphragm and filter, but opening them without the correct sequence can release parts or cause a flood when the supply returns. If the instructions are unavailable, replacement or toilet repair is safer than trial-and-error dismantling.
Step 5: restore water and verify the repair
Reassemble the mechanism, ensure the lid controls do not bind, and open the isolation valve slowly. Watch the cistern fill twice. Dry the supply connection and press tissue around it to reveal a seep. Repeat the dye test after the water settles.
Common mistakes
Turning a seized isolation valve with excessive force.
Adjusting the float to hide a worn fill valve.
Using a universal seal without matching its diameter and profile.
Dropping cistern-cleaning blocks where they obstruct moving parts.
Overtightening plastic nuts or ceramic fixings.
Assuming every sound comes from the toilet rather than nearby pipework.
Leaving a concealed leak unmonitored after replacing the access plate.
When a plumber is the sensible option
Arrange professional plumbing support if the isolator will not close, the supply connector leaks, the cistern is cracked, fixings are corroded, or the mechanism is inaccessible. An intermittently running toilet in a rented property should be reported promptly rather than left to increase the bill or cause hidden damp.
If the toilet shares a boxed-in supply with other fittings, do not remove panels blindly. Screws can be hidden beneath finishes and pipes or cables may sit directly behind them. A small planned access repair is preferable to damaging tiles or creating an uncontrolled leak while trying to reach a low-cost valve.
Where the pan, concealed frame or surrounding finish also needs work, coordinate the repair through a bathroom refurbishment service so the plumbing can be tested before panels and tiles are reinstated.
Finish with evidence, not silence
A quiet cistern immediately after adjustment is not enough. Confirm the water stops below the overflow, the control returns freely, the pan remains dry and all external connections pass a tissue test. Those four checks separate a genuine repair from a fault that has merely paused.
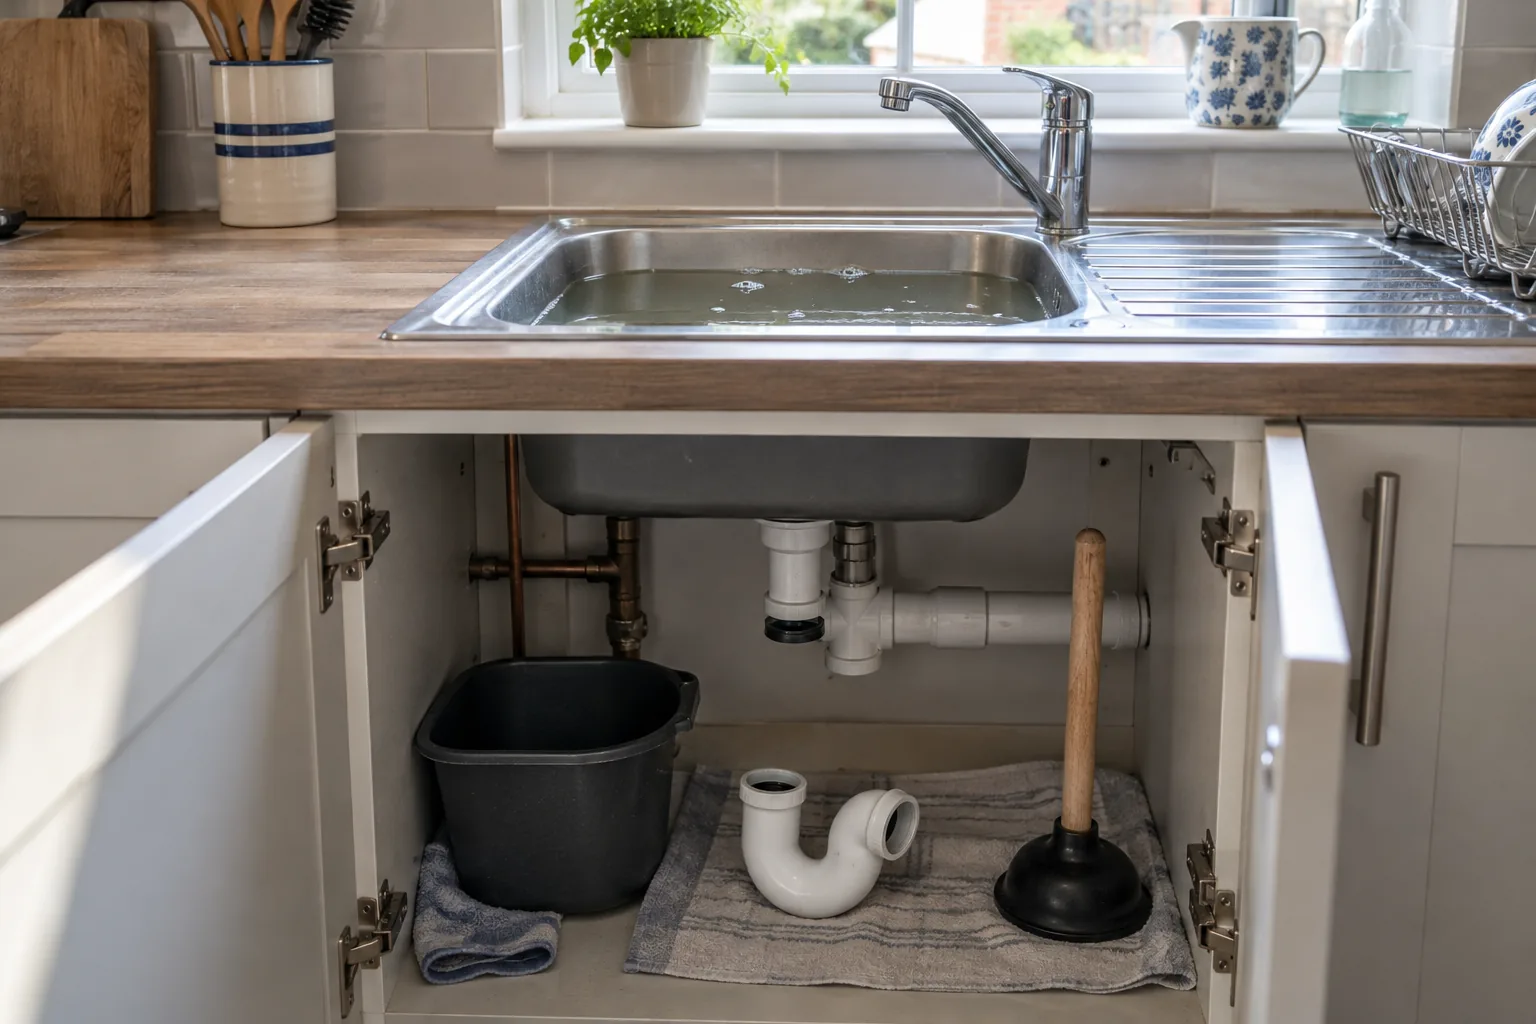
A sink that takes a minute to empty usually has a restriction close to the plughole or trap, but the pattern matters. One slow basin points to hair, soap or grease in that branch. Several fixtures gurgling or backing up together suggest a problem farther along the waste system. Starting with the least aggressive checks protects seals and pipework and often clears the fault without corrosive chemicals.
Read the symptoms before taking anything apart
Run a small amount of water and note when it slows. If water pools immediately, inspect the plug mechanism and opening. If it drains normally at first and then rises, the restriction is likely downstream. Gurgling from another fixture, sewage odour or water returning into a bath or shower is a reason to stop and seek plumbing help.
Ask what has gone down recently. Cooking fat and food debris commonly affect kitchens; hair, shaving residue and soap affect bathrooms. A dropped cap or piece of jewellery calls for careful trap removal rather than pushing it deeper.
Safety and materials
Rubber gloves and eye protection
Bucket, old towels and a shallow tray
Plughole brush or plastic drain-cleaning strip
Sink plunger with a flat cup
Adjustable grips only if plastic nuts cannot be moved by hand
Old toothbrush and mild washing-up liquid
Replacement trap washers of the correct size if needed
Do not dismantle a trap after using chemical drain cleaner: liquid retained in it can cause serious burns. Never mix bleach, acids, caustic soda or proprietary unblockers. If chemicals are already present, keep people away, ventilate and tell any plumber exactly what was used.
Step 1: clean the visible plug assembly
Remove a lift-out strainer or stopper and pull away debris with a plastic tool. Pop-up plugs may unscrew or release from a pivot rod below; photograph the arrangement first. Avoid metal hooks that scratch finishes or puncture flexible pipe.
Clean the narrow space around the plug body, then flush with a kettleful of hot tap water, not boiling water. Boiling water can soften some plastic waste fittings and damage certain sinks. For grease, a little washing-up liquid helps emulsify residue but will not clear a solid obstruction.
Step 2: use a plunger correctly
Block the overflow with a damp cloth so pressure acts on the waste. Add enough water to cover the plunger lip, centre it over the plughole and make several controlled strokes. The aim is alternating pressure, not maximum force. Release and see whether the water forms a clean vortex.
Do not plunge a sink connected to a delicate, loose or leaking trap. Double sinks need the other plughole sealed. Stop if joints move under the basin.
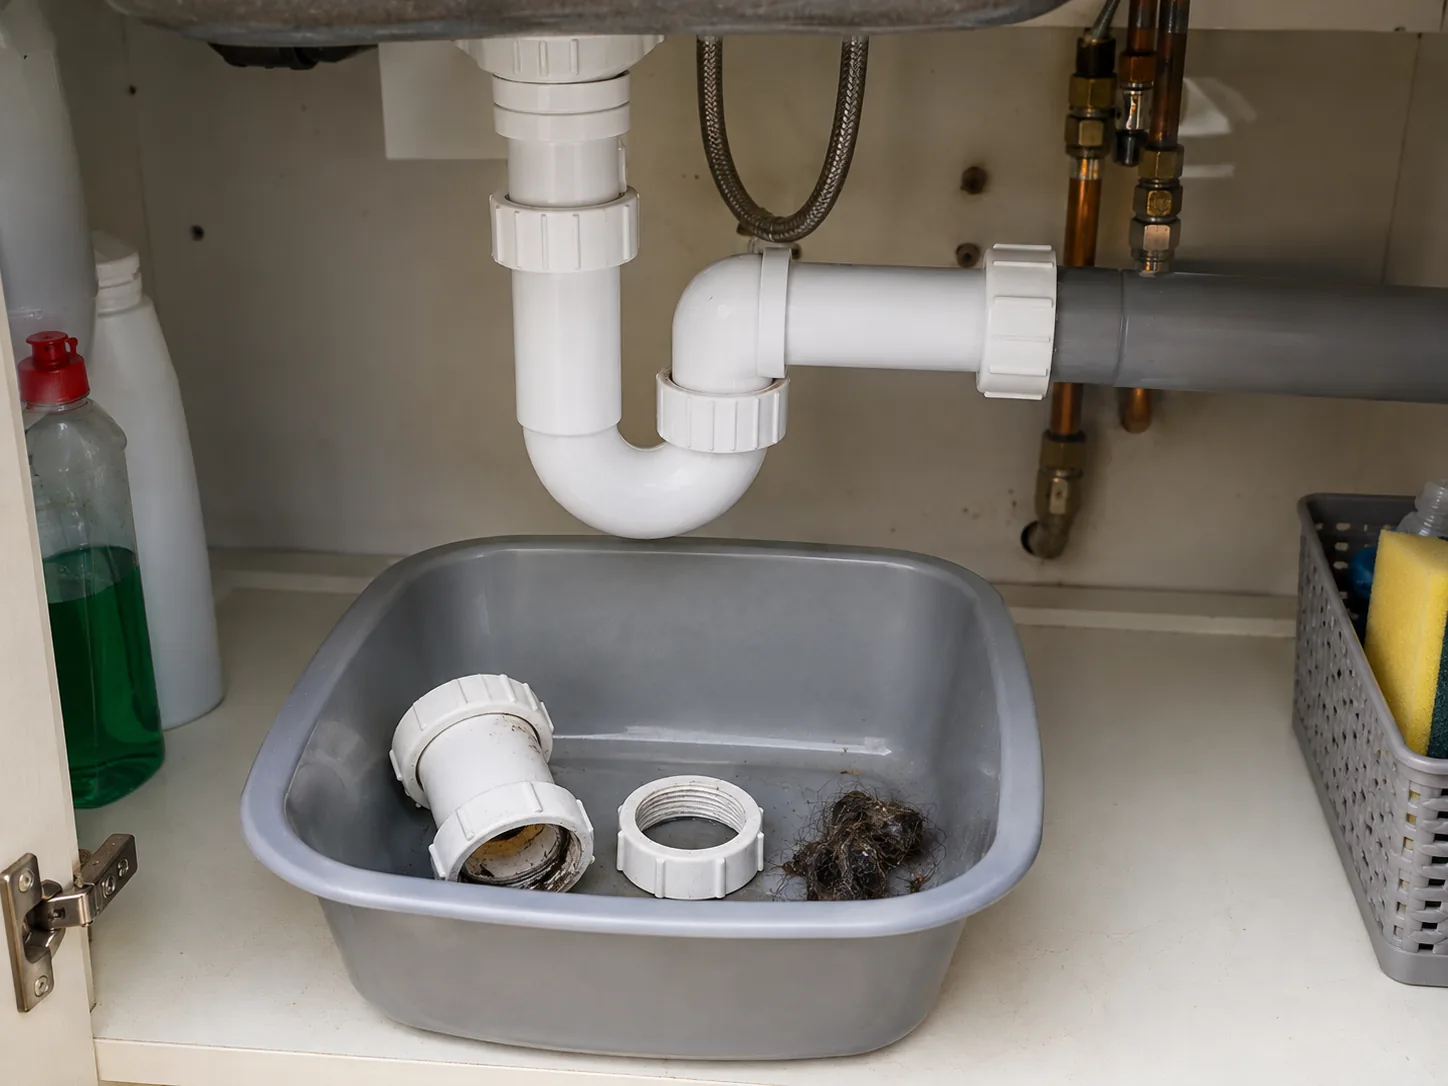
Step 3: remove and clean an accessible trap
Empty the cupboard and place a bucket directly beneath the trap. Photograph the pipe positions and check that the waste arm is supported. Unscrew plastic slip nuts by hand, holding the trap so it cannot twist the rest of the pipework. Tip the contents into the bucket rather than the sink.
Remove grease and debris with a brush. Check washers for flattening, splits and correct orientation. A bottle trap may have a removable lower cup; a tubular P-trap normally releases at two nuts. Do not force old metal fittings or glued joints.
Step 4: reassemble without overtightening
Clean mating surfaces and position every washer exactly as it came off. Align pipes without strain, start the threads by hand and tighten until snug. Plastic nuts seal by compressing washers; extreme force distorts them and cracks fittings.
Wipe everything dry. Run a cup of water while watching each joint, then half-fill and release the basin to test full flow. Press dry tissue around the nuts; even a small seep shows immediately. Retighten only a fraction if necessary. Persistent leakage needs a new washer or correctly sized trap, not sealant wrapped around the outside.
Step 5: decide whether the blockage is farther away
If the clean trap drains slowly, the branch pipe may be restricted. A small hand auger can be appropriate where the pipe route and material are known, but forcing it around tight plastic bends can separate hidden joints. Do not use a powered machine through domestic fittings without the right equipment and experience.
Recurring kitchen blockages may come from a long, poorly graded or grease-lined run. Multiple affected fixtures can indicate a soil or external drain problem. A blocked-drain service can locate and clear the restriction without repeated chemical treatment.
If an old joint or trap begins leaking during inspection and damages the cupboard, stop using the sink and arrange suitable kitchen repair after the plumbing fault is made watertight.
Troubleshooting after reassembly
The sink drains but now smells
Confirm the trap holds water and has not been fitted at an angle that allows it to siphon. Clean the overflow channel, which can retain organic residue. A smell shared by several fixtures deserves professional investigation.
A slip nut drips
Turn off the tap, place the bucket back and reseat the washer. Check that the pipe enters squarely and far enough. Replace a hardened or damaged seal with the exact type.
The blockage returns within days
Do not repeat the same short-term treatment. The branch may still contain grease or scale, or the pipe gradient may be poor. Record which fixtures are affected and when gurgling occurs; that helps diagnosis.
Habits that reduce future blockages
Scrape plates and collect cooking fat rather than pouring it away.
Use a removable hair catcher in bathroom basins.
Clean stoppers and strainers before flow noticeably slows.
Keep the cupboard clear so early drips remain visible.
Never treat wipes, coffee grounds or paint residue as drain-safe.
Once a month, fill the basin with warm water and release it in one go while checking the cupboard below. The larger flow carries light residue through and doubles as an early leak test. It is safer and more informative than routinely pouring strong chemicals into a drain that is still working.
Know when to stop
If the restriction appears alongside an unreliable isolation valve, first read the guide to finding and checking the indoor stopcock. A separate toilet that continues filling is a different fault; use the running-cistern checks rather than treating it as a drain blockage.
A visible plughole obstruction or serviceable trap is a manageable DIY job. Stop when fittings are corroded, pipework moves in the wall, contaminated water is backing up, chemicals are present, or more than one fixture is affected. The safest repair clears the restriction while leaving sound pipes and watertight joints behind.
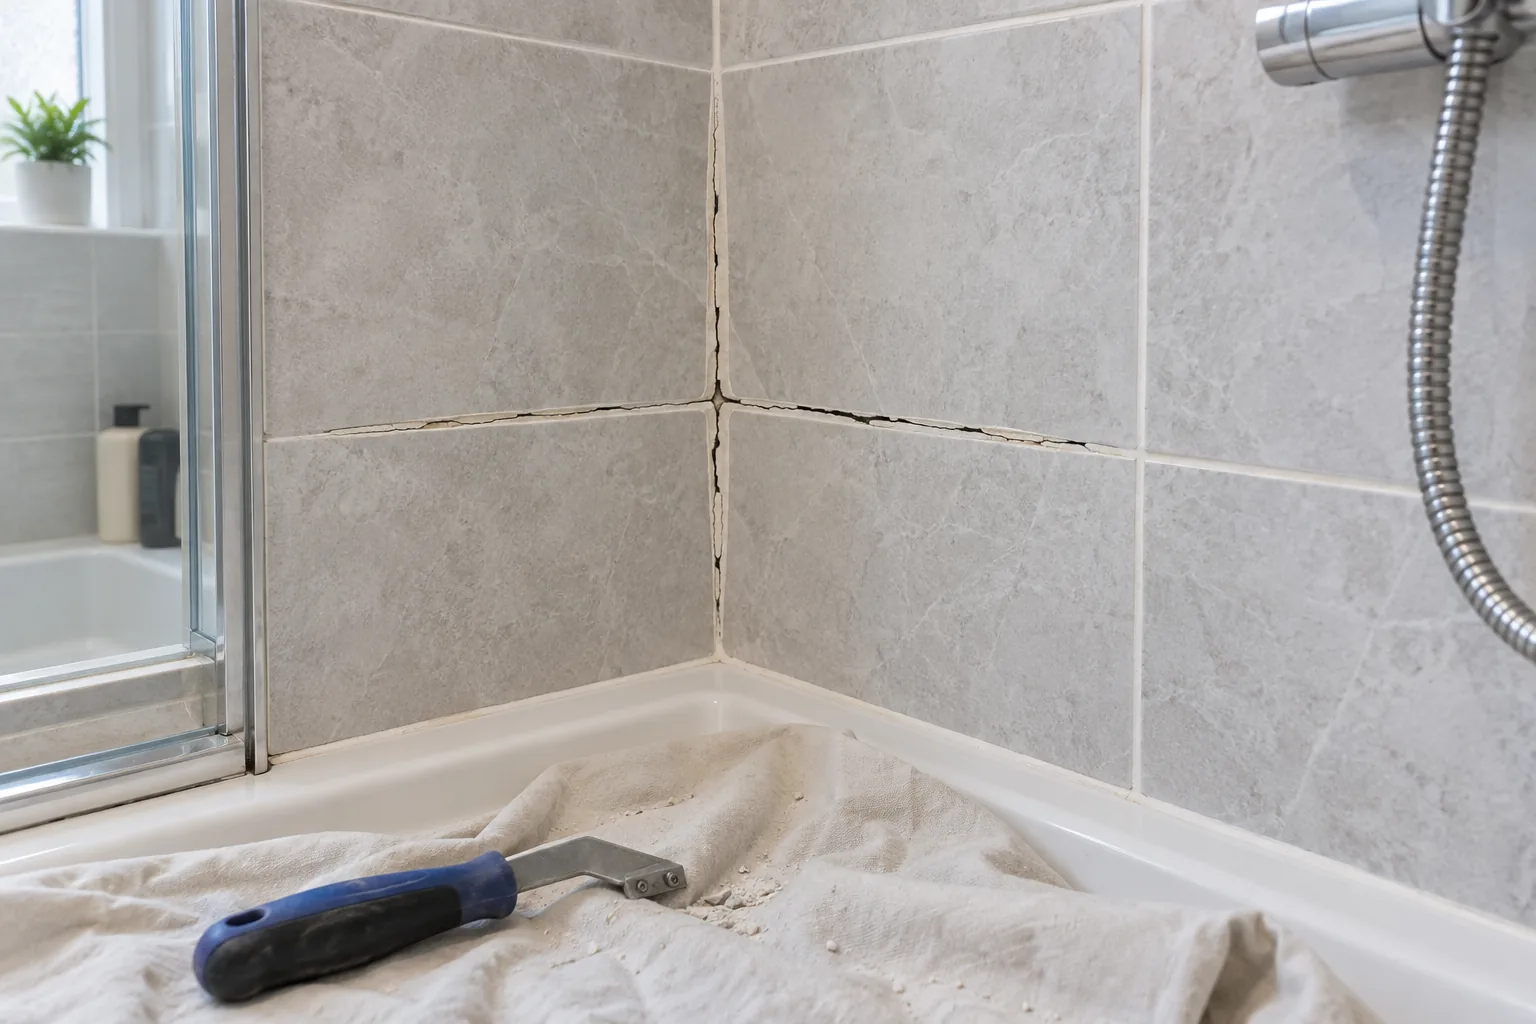
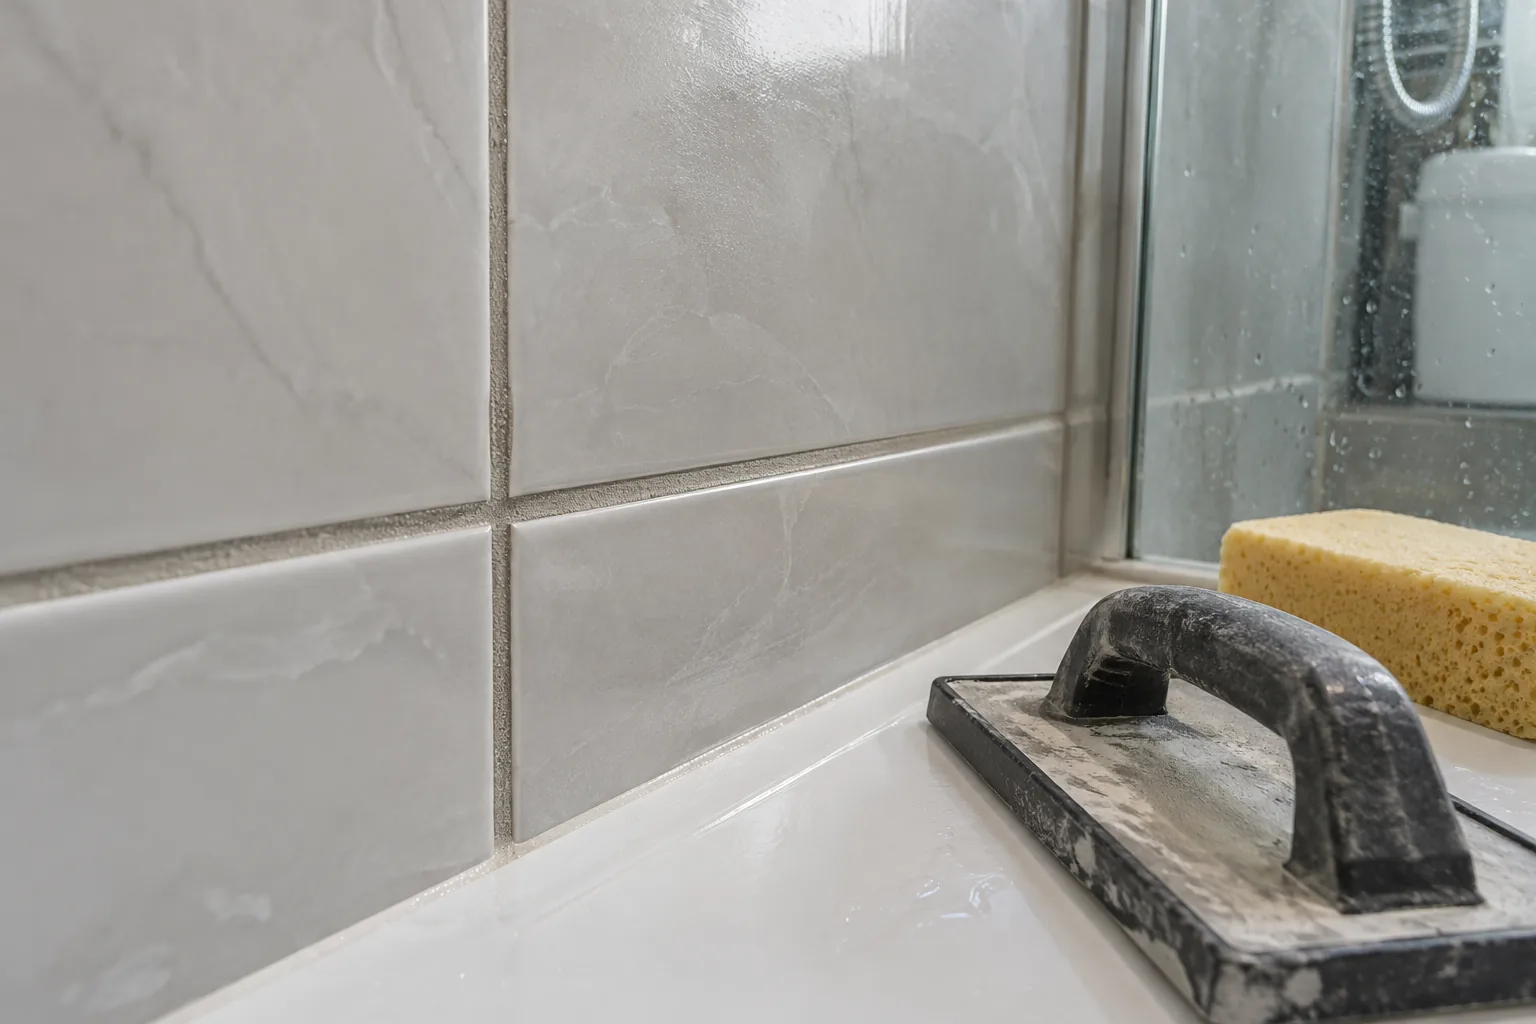
A hairline break in shower grout can look cosmetic, but the right repair depends on where it is and why it opened. Rigid grout belongs between tiles on the same stable surface. Corners, tray edges and joints between different materials normally need a flexible sanitary sealant. Filling every crack with more grout can therefore recreate the failure and may hide movement or damp behind the tiles.
This guide explains how to assess a small localised defect, remove weak grout and make a sound repair. Loose tiles, widespread cracking, a flexible wall or water damage outside the enclosure need investigation before regrouting.
Decide whether the joint should be grout or silicone
Look at the position before choosing a product. Straight joints between tiles on one flat wall are generally grouted. Internal corners, the line above a shower tray, and junctions around glass profiles are movement joints and should normally use suitable flexible sealant. Check the tile and enclosure manufacturer’s instructions because details vary.
Press each tile gently with fingertips, never with a tool. A hollow sound alone does not prove failure, but a tile that moves, rocks or clicks must not simply be regrouted. Inspect the wall on the other side and the ceiling below for staining, swelling or peeling paint. A musty smell, soft board or recurring dark patch suggests moisture has travelled farther than the visible crack.
One short crack caused by an impact is a reasonable DIY repair. Repeated horizontal cracks, several loose tiles, or a joint that reopens quickly point to substrate movement. Arrange bathroom repair or water-damage assessment before covering it.
Tools and materials
Grout rake or oscillating multi-tool with a grout blade
Eye protection, gloves and a suitable dust mask
Vacuum with a narrow nozzle and clean sponge
Compatible mould-resistant grout in the correct colour
Small mixing container, margin trowel and grout float
Two buckets of clean water and lint-free cloths
Flexible sanitary sealant if the repair includes a movement joint
Match cementitious, epoxy or ready-mixed grout to the existing installation. Do not mix product families in one joint without checking compatibility. Read the stated water ratio, working time and cure time rather than judging by appearance.
Step 1: let the shower dry completely
Stop using the shower long enough for the joint to dry; a full day is a sensible minimum for a superficial repair, and longer may be needed in a cool room. Improve ventilation but do not blast a damp wall with intense heat. Grout placed over retained moisture may discolour or fail to bond.
Step 2: remove all loose grout
Protect the tray and glass from falling grit. Work along the centre of the joint with a hand rake, keeping the blade away from tile edges. Remove grout to a consistent useful depth, not just the powder at the surface. Stop if a tile begins to move or the backing looks wet or degraded.
A powered grout blade is faster but can chip glaze in seconds. Use low speed, steady lighting and two-handed control. At corners and close to metal profiles, switch to a hand tool. Never cut into waterproofing behind the tile.
Step 3: clean and inspect the open joint
Vacuum the channel, brush it and wipe the tile faces. The joint must be free of dust, soap and old sealant. Do not leave chemical mould cleaner in it; rinse as directed and allow it to dry. Confirm that the sides of the tiles are firm and the gap has adequate depth for the new grout.
Step 4: mix only what you can use
Measure powder and water according to the bag. Adding extra water makes spreading easier but weakens cement grout and increases colour variation. Mix thoroughly, allow any specified slaking time, then remix without adding water. Discard material after its working time; do not revive it in the bucket.
Step 5: pack the joint, then clean in stages
Use the float diagonally across the tiles so it presses material into the gap instead of dragging it out. Make several passes and remove most residue with the float edge. When the grout begins to firm, wipe diagonally with a well-wrung sponge. Rinse often and avoid washing the joint hollow.
After the specified initial set, polish haze with a dry cloth. Persistent residue is easier to remove promptly than after full curing, but aggressive scrubbing too soon will damage the surface.
Step 6: cure before exposing it to water
Keep the repaired area dry for the product’s full stated period. Ventilate the room without directing a fan that dries only the surface. Apply a sealer only if the grout manufacturer recommends one, and only after the stated cure time. Epoxy and many ready-mixed products have different rules.
Common repair mistakes
Smearing new grout over a crack without removing weak material.
Using rigid grout in a corner or tray joint that needs flexibility.
Adding too much water or repeatedly wetting the sponge.
Reusing grout after it has started to set.
Showering before curing is complete.
Ignoring movement, loose tiles or damp backing board.
Using harsh acid cleaners that damage grout and metal finishes.
What to do if the crack returns
Mark the ends with removable tape and note the date. A crack that lengthens, widens or follows several joints is evidence of movement, not a mixing problem. Check nearby flexible seals, tray stability and any plumbing leak. Do not keep layering material onto the same line.
Keep a photograph of the open joint and the product batch details. If a professional later needs to investigate, these show the depth removed, the material used and how quickly the defect returned. They are more useful than a freshly covered crack with no history.
Where the damage is limited but access or removal is awkward, a tiling repair service can cut out the failed joint without chipping the tile faces. A general handyman may also be appropriate for small, non-structural finishing repairs once leaks and movement have been ruled out.
For a small stable joint, careful removal and correct curing give the repair its best chance. For movement or moisture behind the surface, the lasting solution is to expose and correct the cause, then rebuild the joint with the appropriate rigid or flexible material.
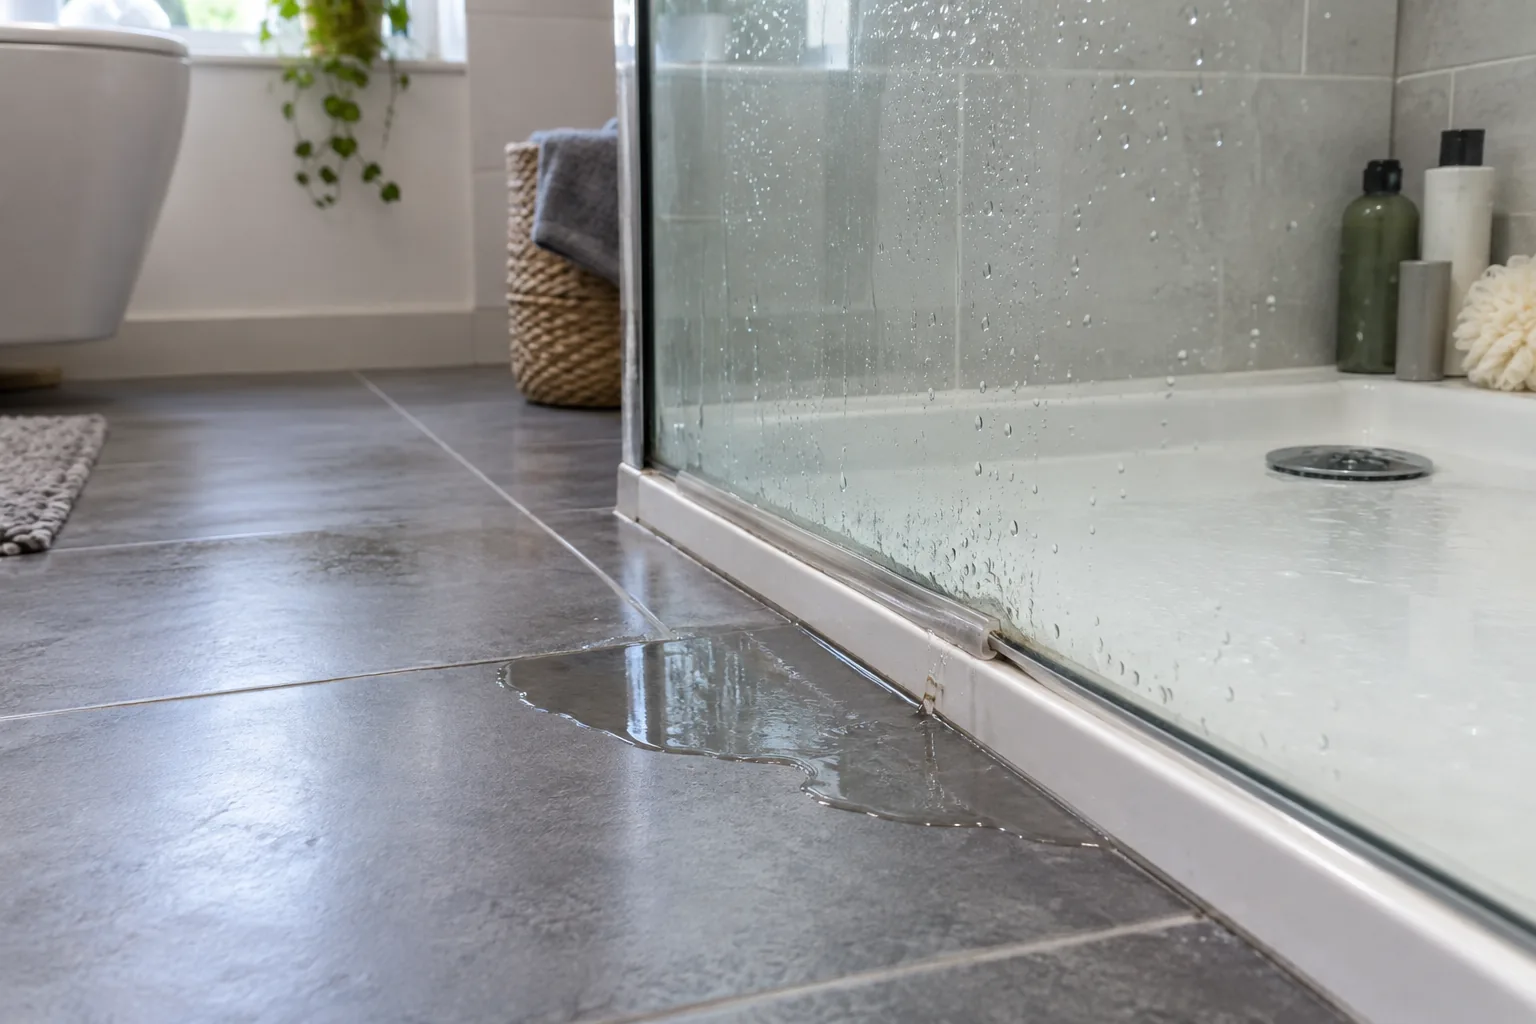
Water outside a shower screen does not automatically mean the whole enclosure needs resealing. It may be passing beneath a worn bottom seal, escaping at the hinge end, overflowing a blocked drainage channel or being directed through a gap by the shower spray. Applying silicone everywhere can trap water inside the frame and make the leak harder to trace.
The practical repair begins with a controlled test. This guide covers common bath screens and framed or semi-frameless enclosures in UK bathrooms. Cracked glass, unstable trays, concealed pipe leaks and extensive water damage require professional attention.
Dry the area and map the water path
Do not test while the floor and frame are already wet. Dry the glass, tray, seals and surrounding tiles. Place strips of dry tissue at the bottom corners, hinge side and outer frame. Run the shower at modest flow, directing water at one section at a time. Start low and work upwards.
Note which tissue becomes wet first. Water can travel along a frame before dripping far from the entry point. Repeat the test with nobody in the shower, then consider whether a user’s body or spray direction changes the result. A screen may be sound but too short or poorly positioned for a powerful shower head.
Check these common leak points
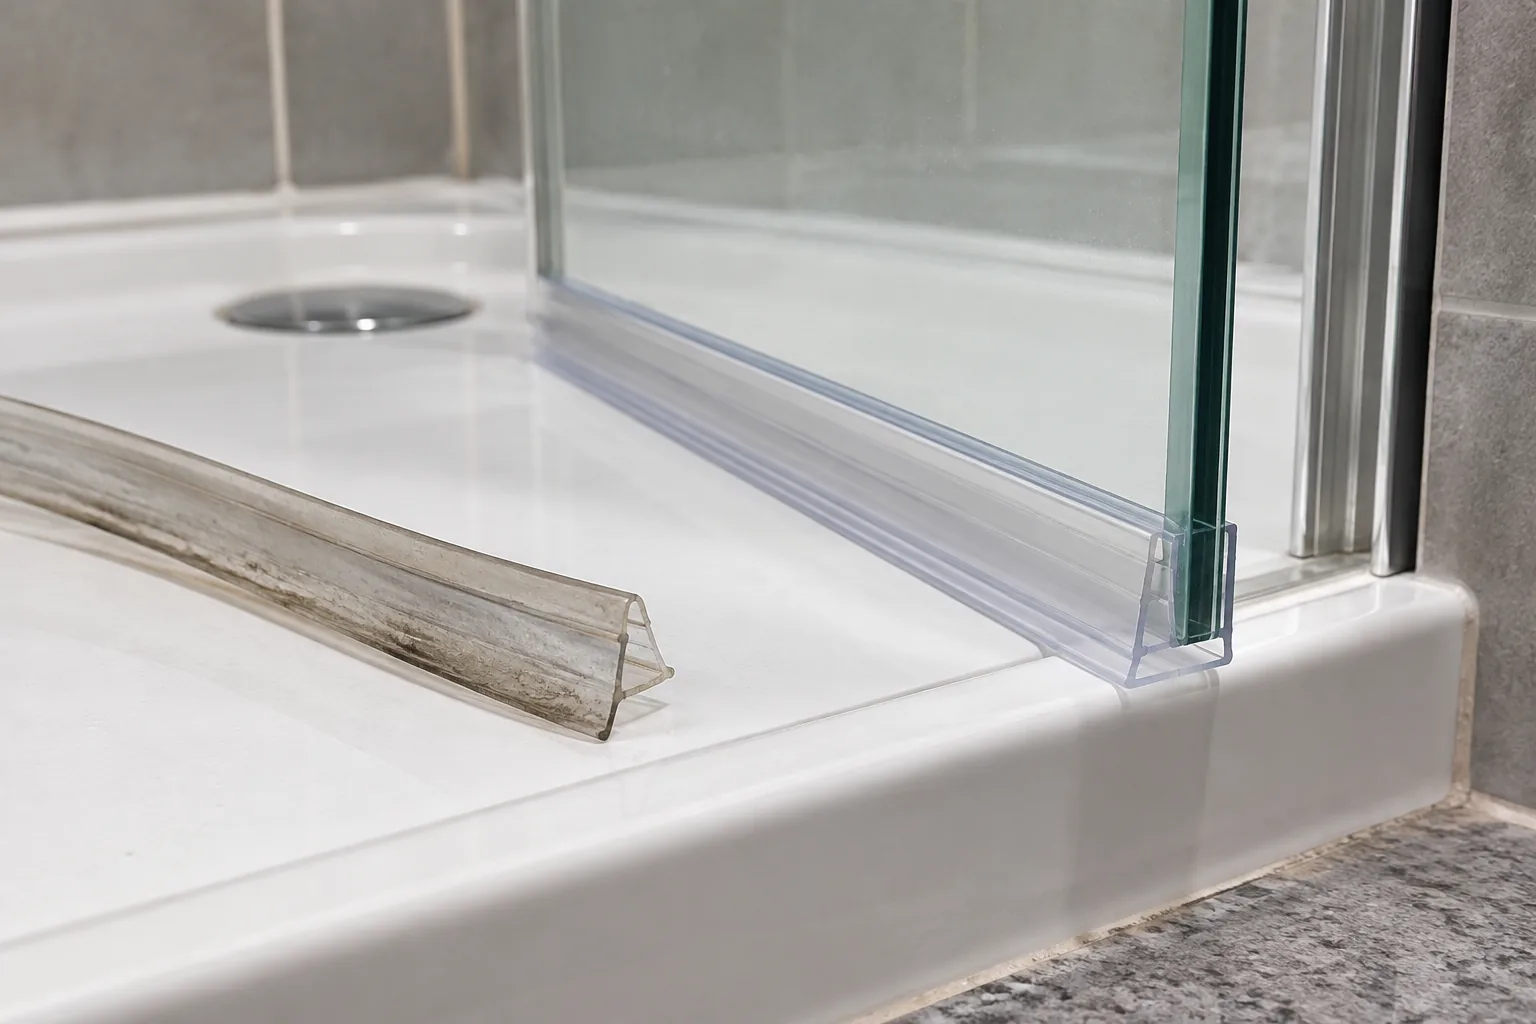
Split, hardened or shrunken bottom sweep seal
Gap between the vertical seal and bottom seal
Blocked weep holes or frame drainage channels
Failed external silicone where the wall profile meets tiles
Loose hinge or screen alignment
Tray movement opening the wall joint
Spray passing around the free edge rather than through a failed seal
Also run water into the tray without wetting the screen. If water still appears outside, investigate the tray, waste and plumbing rather than the glass seal.
Tools and materials
White cloths and tissue for testing
Soft brush, non-scratch pad and bathroom cleaner
Plastic scraper and sealant-removal tool
Replacement seal matched to glass thickness and profile
Sanitary silicone where the manufacturer specifies it
Tape measure and sharp seal-cutting tool
Gloves and eye protection
Toughened glass must not be drilled, cut or heavily struck. If the panel is chipped at an edge, cracked or loose, stop using it and arrange specialist replacement.
Step 1: clean seals and drainage routes
Soap scale and hair can hold a flexible seal away from the tray. Remove detachable seals where the design permits and clean their grooves. Use a soft brush on frame channels and locate any weep holes that let water return to the shower side. Do not block them with silicone.
Rinse and dry everything before retesting. Cleaning alone can restore a seal that was distorted by debris, and it provides a clear view of splits and permanent flattening.
Step 2: inspect screen alignment
Close the screen slowly. The bottom seal should meet the bath or tray consistently without folding under itself. The free edge should meet a magnetic or vertical seal evenly. If the gap tapers, the panel or wall profile may be out of alignment.
Some screens allow minor hinge adjustment, but glass is heavy and unforgiving. Support the panel and follow the manufacturer’s instructions. Do not loosen several hinge fasteners at once. A loose wall profile, cracked tile fixing or sagging bath needs broader bathroom repair.
Step 3: replace a worn bottom seal
Measure the glass thickness accurately and photograph the old seal profile before buying a replacement. Similar-looking seals have different fins, drip rails and gripping channels. Remove the old seal in the direction recommended for the screen; avoid twisting against the glass edge.
Clean and dry the glass. Cut the new seal to length with a square end or the profile required at the hinge. Push it on evenly without tools that could chip the glass. At the free end, the drip fin should direct water inward and must not catch the tray as the screen opens.
Step 4: deal with failed silicone selectively
Most framed enclosures are sealed on the exterior of wall profiles so water entering the frame can drain back inside. Sealing internal edges or drainage holes can trap water. Check the screen instructions before removing silicone.
Where an approved exterior joint has failed, remove all old silicone, clean and dry the surfaces, then apply a continuous sanitary bead. The preparation principles are the same as replacing bath silicone. Let it cure fully before testing.
Step 5: test in controlled stages
Begin with water directed only at the tray-to-screen junction. Then test the vertical frame, hinges and free edge separately. Keep tissue outside each point. This staged method confirms the repair and avoids mistaking splash from another area for a seal failure.
Finally test normal use, including the usual shower-head position. If water passes around the open edge, a different seal profile, deflector or screen arrangement may be needed rather than more silicone.
Check again after the first few showers
Leave a dry cloth outside the enclosure for the next two or three uses and inspect the repaired joint afterwards. A slow leak may only appear when warm water, movement and a longer shower combine. If the same area becomes damp again, stop adding sealant and revisit the alignment, drainage and tray movement checks.
Common mistakes
Sealing internal frame joints and blocking drainage.
Buying a seal without measuring glass thickness or profile.
Testing before silicone has cured.
Assuming water near the screen cannot come from the waste.
Adjusting unsupported glass or overtightening hinges.
Ignoring movement in the bath or shower tray.
Using harsh abrasive cleaners that scratch clear seals and finishes.
When it is not a screen-seal repair
Water appearing when the screen remains dry suggests plumbing, grout or tray failure. Cracked grout can admit moisture behind tiles and should be addressed using the guide to repairing shower grout. A waste leak is a job for plumbing support.
Replace rather than adjust glass with chipped edges, cracks or loose safety hardware. Extensive staining below the bathroom, swollen flooring or soft wall material may need water damage assessment.
Trace first, seal second
A dry staged test is more valuable than a cartridge of silicone. Identify the first wet point, restore drainage, replace the seal with the correct profile and reseal only the joints intended by the screen design. That keeps water on the shower side without blocking the routes designed to carry it there.
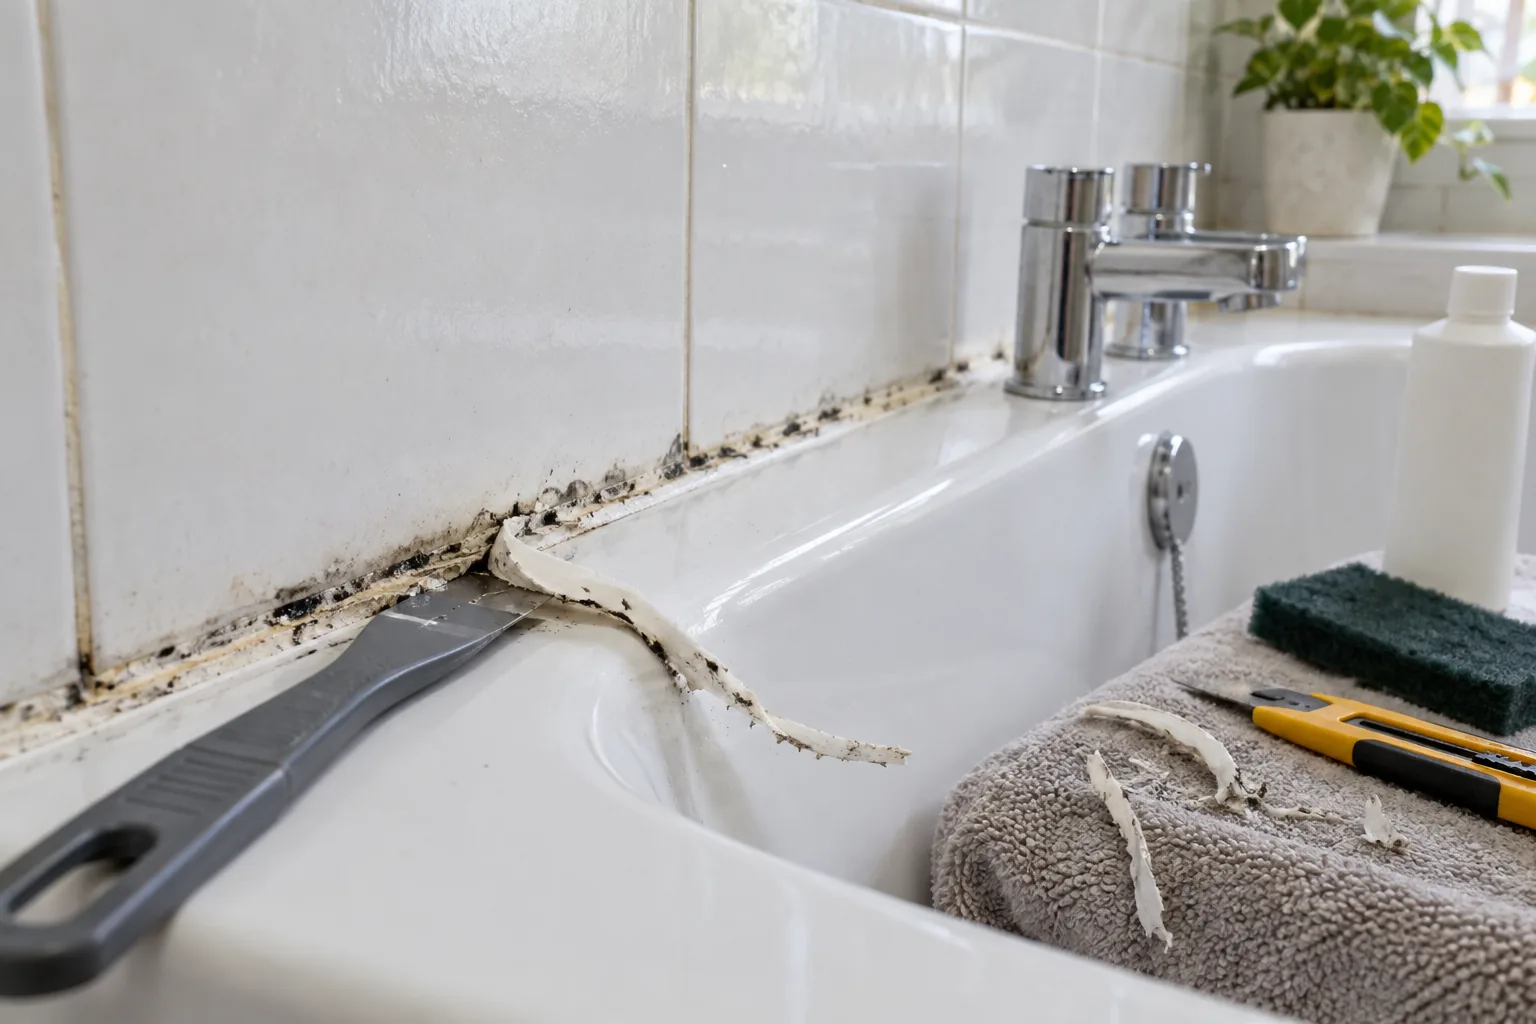
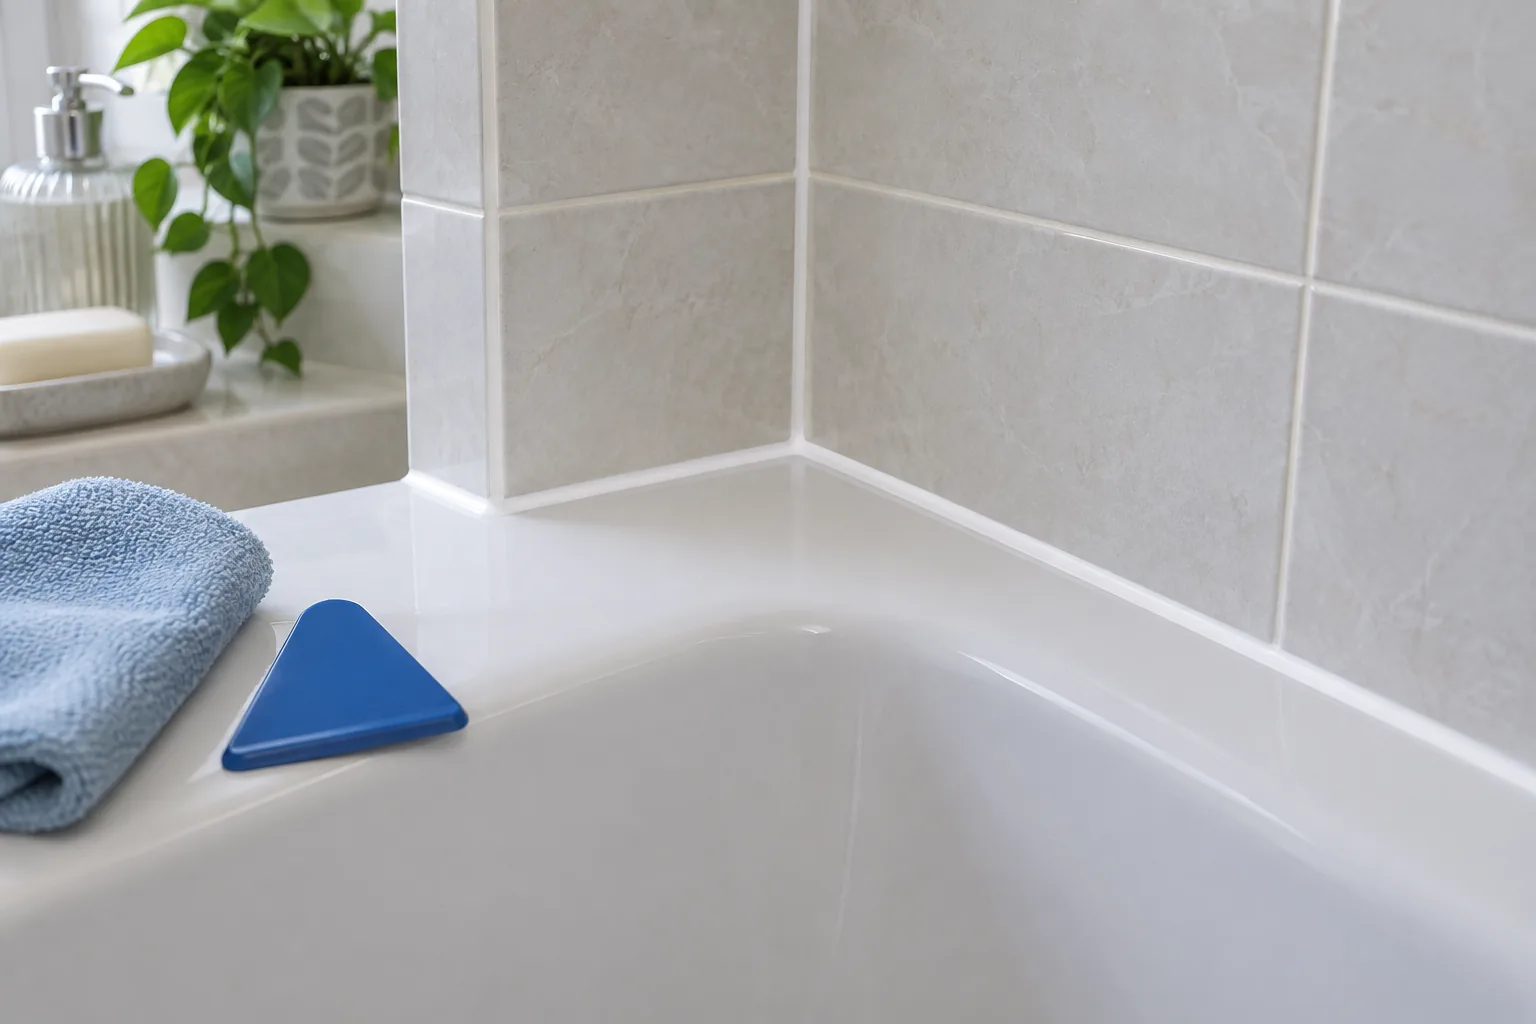
Black spots on bath silicone are not always a surface-cleaning problem. Once mould penetrates the sealant or the bead separates from the bath, cleaning cannot restore adhesion. Water can then pass behind the joint and damage the wall, bath panel or floor. A durable reseal depends more on removal, drying and movement control than on drawing a perfect-looking bead.
This guide covers the flexible joint between a bath and tiled or solid wall. It does not replace repairs to loose tiles, leaking pipework or a bath that moves because its frame is insecure.
Work out why the old seal failed
Inspect the full perimeter before cutting anything. Mould concentrated in one cold corner may relate to poor ventilation. A split that opens when someone stands in the bath indicates movement. Wet staining below the bath can mean water is travelling from taps, waste fittings or pipework rather than the wall joint.
Press the bath rim gently. It should not drop away from the tiles. If it moves, check the feet, wall brackets and supporting frame where safely accessible. Resealing a flexible bath in its unloaded position creates a bead that tears the first time it is used. Significant movement belongs with bathroom repair or refurbishment work.
Tools and materials
Plastic sealant-removal tool and sharp utility knife
Silicone-remover product compatible with the surfaces
Non-scratch pads, white cloths and vacuum
Isopropyl alcohol or cleaner approved by the silicone maker
Good-quality sanitary silicone for bathrooms
Cartridge gun and profiling tool
Low-tack masking tape if desired
Gloves, ventilation and eye protection
Never mix cleaning chemicals. In particular, do not combine bleach with acidic products. Follow the silicone and remover instructions, protect acrylic baths from sharp metal tools and keep the room ventilated.
Step 1: stop using the bath and dry the area
Allow the joint and surrounding wall to dry before removal. If water is trapped behind the bead, cutting it open may release moisture. Place towels or a protective sheet below the work area. Keep the bath out of service until the new silicone has fully cured, not merely until it feels dry on the surface.
Step 2: cut and peel away the old silicone
Score along the upper and lower edges without cutting into grout, wall panels or the bath. Lift an end with a plastic tool and pull slowly at a low angle. Long strips are easier to control than many chopped fragments. Work around taps and corners patiently, where sealant is often thicker.
Remove every attached ridge. New silicone does not bond reliably to cured silicone, so leaving a thin transparent film is enough to cause early peeling.
Step 3: remove residue without damaging the finish
Apply a compatible silicone remover only where needed and leave it for the specified time. Use a non-scratch tool to lift softened residue, then clean as directed. On porous grout or natural stone, test first because solvents can stain. Acrylic and enamel surfaces also have different chemical tolerances.
Vacuum particles and wipe the joint with a clean lint-free cloth. Repeat until the wall and bath edges feel clean rather than rubbery.
Step 4: treat mould and investigate hidden damp
Clean surface mould with a product intended for the substrate, following its safety guidance. Mouldy plasterboard, softened timber or staining that extends behind tiles cannot be solved by a new bead. Allow wet materials to dry and replace anything that has lost strength.
If water continues to appear with the joint open and the bath unused, check plumbing sources. Bob’s leak-fixing service can distinguish failed sealant from waste, supply or overflow leaks.
Step 5: load the bath before sealing
Where the bath manufacturer and installation allow, fill the bath with water to represent normal loading. This opens the joint to its working position. Do not do this if the bath support is suspect or a plumbing leak is present. Keep water away from the prepared rim and make sure the surface remains completely dry.
Some rigidly installed baths or specialist materials have different requirements, so follow the installation guidance. The principle is to seal at the position in which the joint must perform.
Step 6: mask and apply one continuous bead
Masking tape can define the edges, but leave a bead wide enough to contact both surfaces. Cut the nozzle slightly narrower than the intended finished bead and at roughly 45 degrees. Push the gun steadily so silicone fills the joint rather than sitting as a hollow bridge.
Work in manageable continuous lengths. Starting and stopping repeatedly creates weak overlaps. Keep pressure and speed consistent, especially through internal corners.
Step 7: profile once and remove tape promptly
Use a clean profiling tool to create a shallow concave bead that sheds water. Remove excess from the tool between passes. Avoid repeated smoothing as the surface begins to skin, which drags and wrinkles the silicone.
Pull masking tape away before the sealant cures, following the product guidance, then make only a minimal final touch at the edge if necessary. Do not use saliva as a smoothing agent; it is unhygienic and can contaminate the joint.
Step 8: respect the full curing time
Leave the bath loaded if that is part of the chosen method until the sealant has cured as directed. Keep the area dry and ventilated. Curing time depends on bead size, product, temperature and humidity. A skin on the surface does not mean the centre is ready for shower spray or bath movement.
Common reasons a new bath seal fails
Silicone residue remained on one surface.
The joint was damp or contaminated with cleaner.
The bath moved because its support was loose.
The bead bridged the gap without contacting both sides.
Decorators’ caulk or non-sanitary sealant was used.
The bath was used before full cure.
Hidden leakage continued behind the joint.
When to call a professional
Stop if tiles are loose, the wall is soft, the bath frame moves, or water has damaged the floor below. Cracked grout in the same area may need the separate method in repairing shower grout. Complex screens and bath panels can obstruct the joint and require careful removal.
A plumber should deal with leaking wastes, taps and supply pipework. Making good after prolonged water entry may involve water damage repairs rather than sealant alone.
The clean bead is the last step, not the repair itself
A reliable bath seal starts with a stable bath, clean dry surfaces and no hidden leak. Remove every trace of failed silicone, let the background recover, apply the new bead in the bath’s working position and protect it for the full cure. Those unseen details determine whether it lasts.
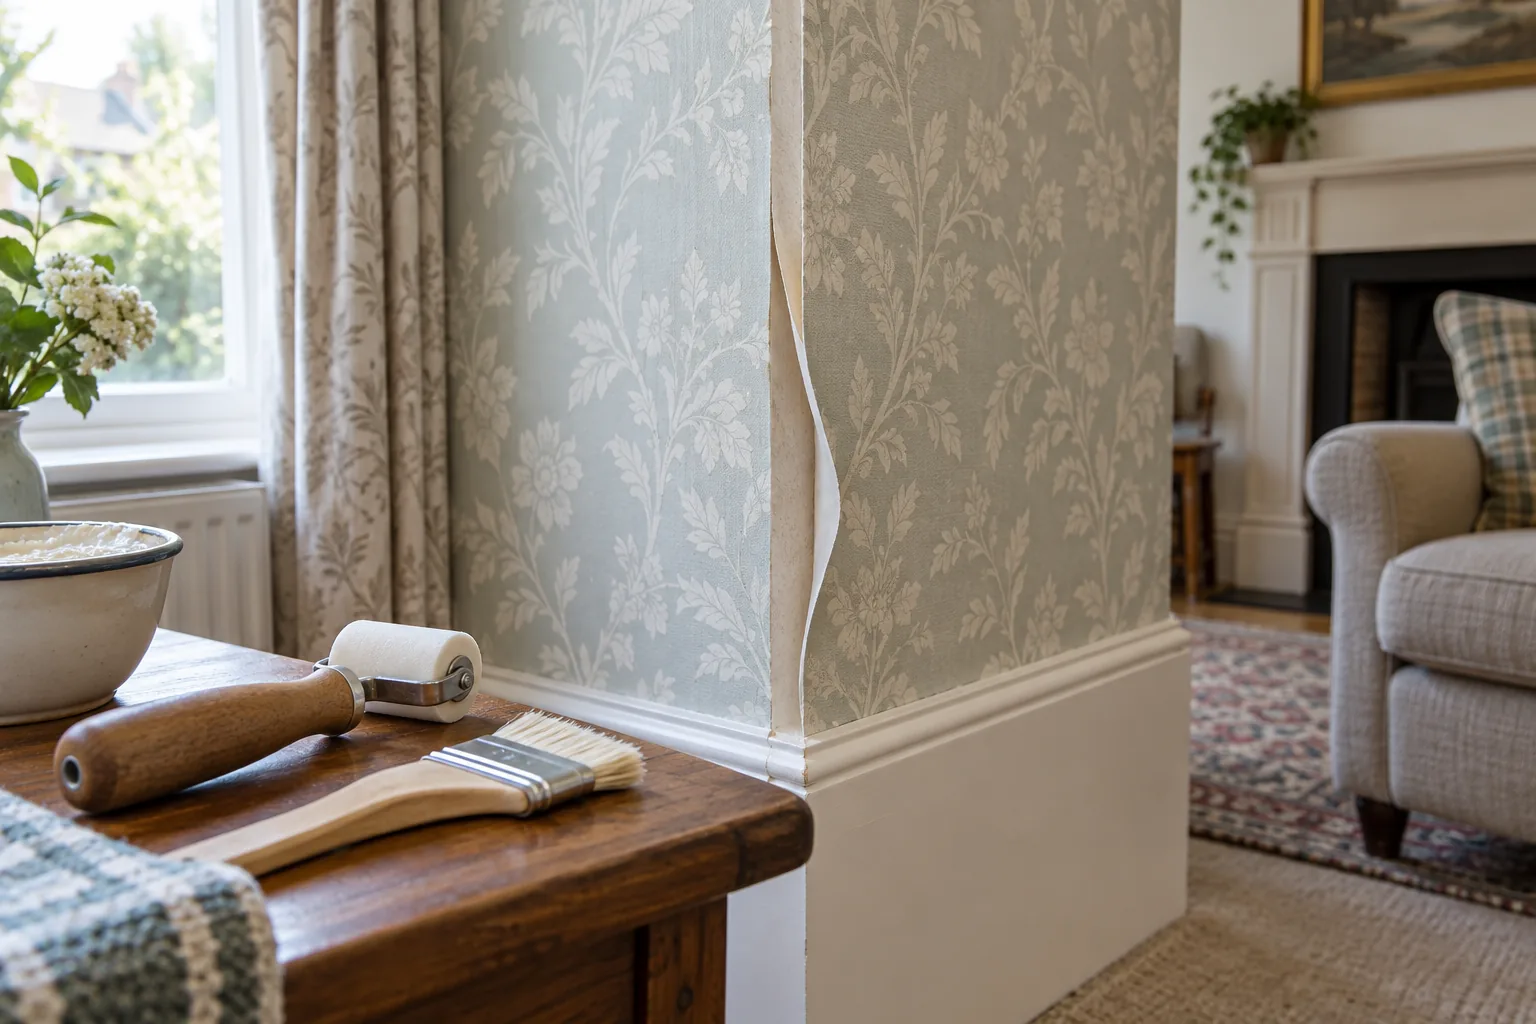
A lifted wallpaper seam can often be repaired without replacing a full drop, but only if the paper and wall beneath it remain sound. Pushing the edge flat with ordinary paste rarely lasts when dried adhesive, dust or a painted non-porous surface prevents contact. Too much adhesive creates a different problem: a shiny stain or swollen seam that catches the light.
The repair depends on the covering. Vinyl, washable paper, traditional paper and non-woven wallpaper tolerate moisture differently. Check spare material or manufacturer information where available, and always test cleaning and adhesive on an inconspicuous offcut.
Find out why the seam lifted
Short dry sections commonly follow insufficient paste or an edge that dried before hanging. Repeated lifting beside a radiator can result from heat and rapid drying. Corners move slightly and put tension on wallpaper wrapped too tightly around them. Widespread peeling, staining or a cold damp wall points to moisture rather than a local adhesive failure.
Run a clean finger beside the seam. A firm flat background is repairable. Powder, loose paint or softened plaster must be stabilised first. If the paper has shrunk and left a visible gap, rebonding cannot restore missing width; the seam may need a narrow colour-matched touch-up or replacement drop.
Gather delicate tools, not decorating force
Wallpaper seam adhesive compatible with the covering
Small artist’s brush or fine nozzle
Plastic seam smoother or clean seam roller
Damp white sponge and several clean cloths
Low-tack masking tape where suitable
Small vacuum brush
Sharp blade only for removing loose debris, not trimming patterns
A metal roller can mark embossed paper and force adhesive out. Coloured cloths may transfer dye to a pale covering. Keep water away from electrical accessories and avoid soaking paper edges.
Step 1: lift only the already loose edge
Do not pull the seam further to create working space. Support the paper and lift the detached portion just enough to see behind it. Vacuum loose dust with a soft brush. Remove obvious dried lumps carefully; a hard fragment left beneath the paper creates a permanent bump.
If old paint comes away with the paper, the failure lies in the wall coating. Stop and stabilise that small area with a compatible primer, allowing it to dry fully. Adhesive applied to loose paint will merely glue the wallpaper to material that is no longer attached to the wall.
Step 2: test the wallpaper face
Dampen a hidden edge of spare paper or a concealed area and blot it. Check for colour transfer, darkening, swelling or loss of texture. Uncoated papers require especially careful cleaning. If the face is fragile, use the least adhesive possible and protect the visible surface while working.
Step 3: apply seam adhesive sparingly
Use a fine brush or nozzle to place a thin, even film behind the loose edge. Reach the full detached area without flooding beyond it. Avoid coating the printed face. Where both edges of a butt joint are loose, work on one side at a time so the pattern remains aligned.
Allow any short open time specified by the adhesive. Some products need immediate pressure; others bond better after a brief wait. Do not substitute general PVA unless the wallpaper manufacturer explicitly permits it. PVA can dry shiny, stiffen the seam and make later removal difficult.
Step 4: align the pattern before applying pressure
Start where the existing paper is still firmly attached and work towards the loose end. Match printed lines and maintain the original butt joint. Smooth with light strokes from the body of the paper towards the seam, pushing air out without stretching the damp edge.
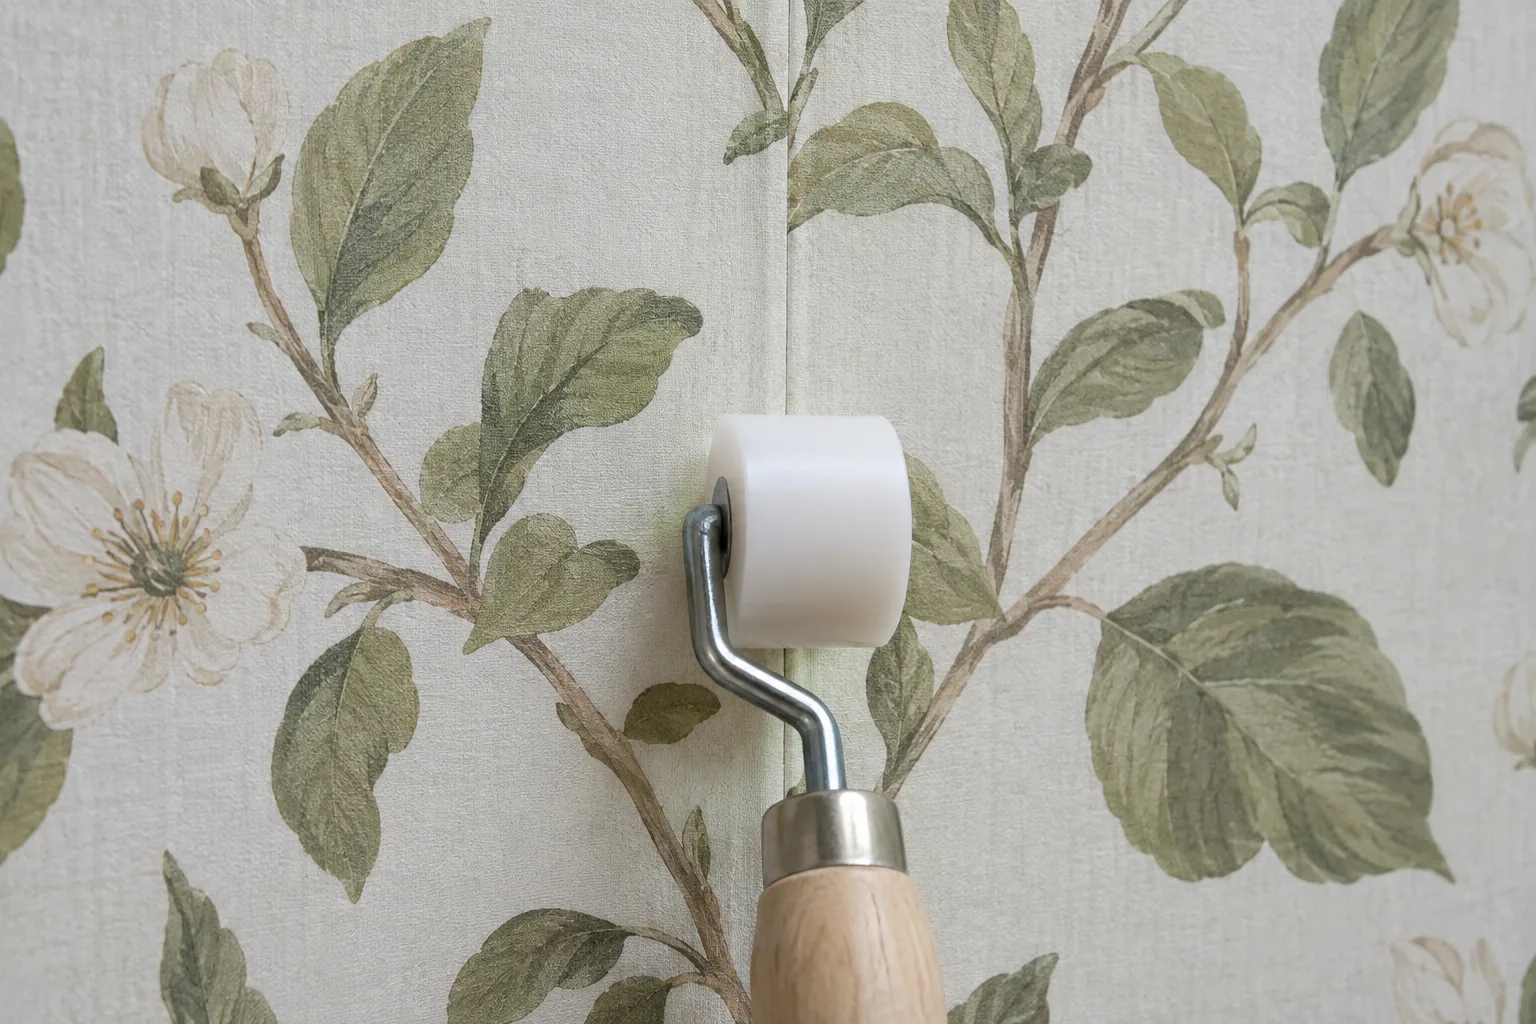
Use a clean seam roller only if the paper surface can accept it. One or two gentle passes are enough. Excessive rolling squeezes out adhesive and can polish, flatten or stretch the design.
Step 5: remove adhesive while it is workable
Blot squeezed adhesive with a barely damp white sponge, turning to a clean face each time. Do not scrub across the seam. Follow with a dry lint-free cloth and inspect from the side. Adhesive allowed to dry on washable vinyl may still leave a shiny patch, while attempts to remove it from delicate paper can take off the print.
If the edge tries to curl while drying, low-tack tape can hold it only after testing that the tape will not lift the surface. Place it across the seam with minimal tension and remove it slowly at the recommended time.
Repairing an internal or external corner
Wallpaper wrapped around an uneven internal corner can pull away because the next wall is not plumb. Pressing it back may work for a small local lift, but a long tight bridge can keep returning. Professional hanging usually allows an overlap or cut appropriate to the covering and pattern.
External corners receive knocks and are less forgiving. If the edge is torn or the corner bead beneath is damaged, a patch may remain visible. Wider damage often needs replacement paper after the substrate is repaired by a decorator.
Why repaired seams fail again
Dried paste and dust were left behind.
The underlying paint or plaster is loose.
Too little adhesive failed to wet the whole detached area.
Too much adhesive stained the face and encouraged movement.
The seam was rolled aggressively or shifted out of pattern.
A hot radiator or persistent damp continues to affect the area.
The paper has shrunk, so the original joint cannot close.
When peeling wallpaper is a symptom
Investigate if several seams lift on the same cold wall, paper darkens near a window, or mould appears beneath an edge. Condensation, penetration and plumbing leaks need different remedies. Do not trap moisture with more adhesive. Once the cause is corrected, the wall may need the preparation described in preparing walls after wallpaper removal.
Large failed areas, valuable wallpaper and complex pattern matching are sensible reasons to use professional decorating support. Small local seams can be included with other handyman tasks.
A nearly invisible repair uses very little of everything
Minimal lifting, a thin adhesive film, gentle alignment and immediate blotting produce the cleanest result. The repair should not announce itself through a ridge, flattened pattern or glossy residue. If the substrate is unstable or damp, pause the cosmetic work and correct that cause first.
To provide the best experiences, we use technologies like cookies to store and/or access device information. Consenting to these technologies will allow us to process data such as browsing behaviour or unique IDs on this site. Not consenting or withdrawing consent, may adversely affect certain features and functions.
Functional
Always active
The technical storage or access is strictly necessary for the legitimate purpose of enabling the use of a specific service explicitly requested by the subscriber or user, or for the sole purpose of carrying out the transmission of a communication over an electronic communications network.
Preferences
The technical storage or access is necessary for the legitimate purpose of storing preferences that are not requested by the subscriber or user.
Statistics
The technical storage or access that is used exclusively for statistical purposes.The technical storage or access that is used exclusively for anonymous statistical purposes. Without a subpoena, voluntary compliance on the part of your Internet Service Provider, or additional records from a third party, information stored or retrieved for this purpose alone cannot usually be used to identify you.
Marketing
The technical storage or access is required to create user profiles to send advertising, or to track the user on a website or across several websites for similar marketing purposes.