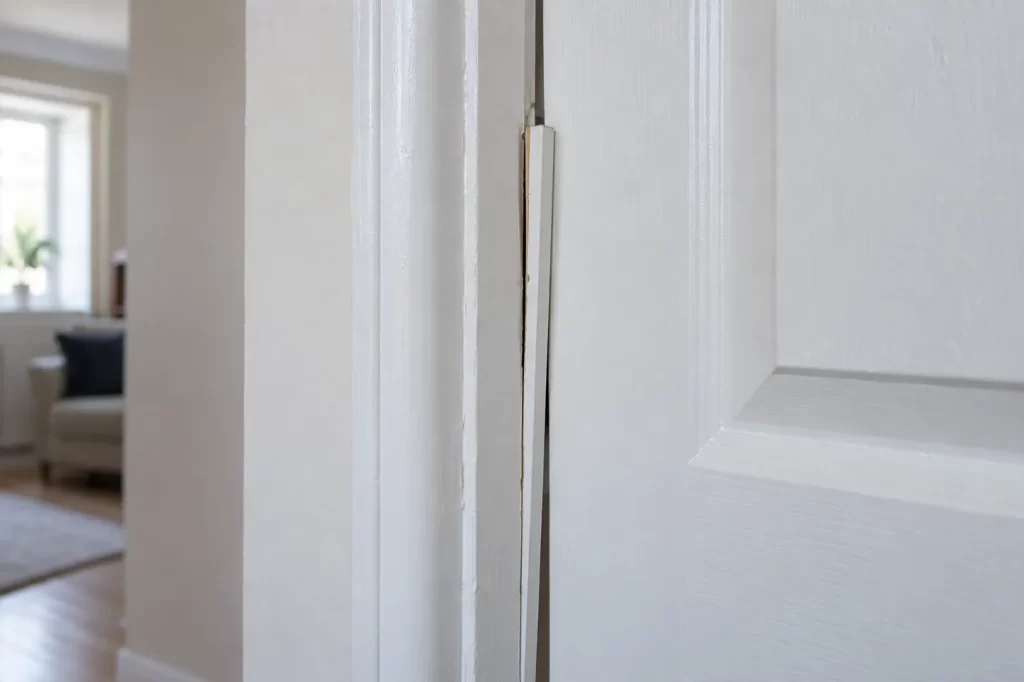
The door stop strip is the narrow length of timber that a closed internal door meets inside its frame. When it lifts, the door may rattle, close too far or catch on a projecting edge. A sound repair begins by checking whether only the strip has loosened. If the frame itself moves or has split around the latch or hinges, simply nailing the strip back will conceal a larger problem.
The name causes confusion. This strip is not a floor-mounted doorstop that prevents the door opening into a wall, and it is not a threshold strip underfoot. It is also different from the wider decorative architrave covering the joint between frame and wall. Identifying the loose part matters because the fixing, load and finishing method differ.
Find the extent of the movement
Open the door and run your eyes along the top and both sides of the stop. Avoid pressing hard on sharp, cracked paint. Note whether the strip lifts at one end, bows along a long section or has separated at a mitred corner. Look for old nail holes, new splits, damp staining and soft timber. If a section is hanging free, keep the doorway clear so it cannot snag clothing or a hand.
Close the door slowly and observe where the leaf touches. A stop set too close can prevent the latch reaching its keep. A strip fixed too far away can leave the door rattling even when the latch engages. Use a pencil to mark the original line only if it appears correct. Old paint shadows are not proof: a previous repair may already have put the stop in the wrong place.
Check the frame near the latch and hinges. If it flexes when the door closes, or if the jamb is split, the stop is unlikely to stay fixed. The published guide to stripped screw holes in a wooden door frame deals with a different but related frame-fixing fault. A loose threshold at floor level is covered separately in the threshold strip repair guide.
Look for the reason it came away
A few old panel pins can lose grip after years of door impact and seasonal timber movement. Paint may bridge the joint while the wood beneath has already separated. A door that is slammed regularly can pull the strip away again. If the strip sits over an uneven frame, it may be under constant tension rather than simply lacking one fixing.
Moisture changes the decision. Dark marks, swelling or crumbly fibres near a bathroom or external wall suggest water or persistent condensation. Refixing to damp or soft wood will fail and can hide damage. Find and address the moisture source, then assess what timber remains sound. Be particularly careful where the stop continues around a glazed or fire-rated door: seals and door performance may depend on its exact position.
If the timber has split lengthwise, decide whether a short local repair can restore strength. Glue alone is rarely suitable for a strip that is moving because the substrate is poor. A badly fractured or warped length may be easier to replace with matching moulding, preserving its depth and profile. In older homes, the profile may not match a standard shop-bought strip; measure before removing sound sections.
Prepare the doorway before refixing
Support the door in a stable open position. Protect the floor and remove loose paint flakes or old adhesive from the back of the stop and the frame. Work carefully around an existing finish; scraping aggressively can gouge the jamb and turn a small repair into a broad repainting job. If old paint may contain lead, avoid uncontrolled dry sanding and seek appropriate advice on safe preparation.
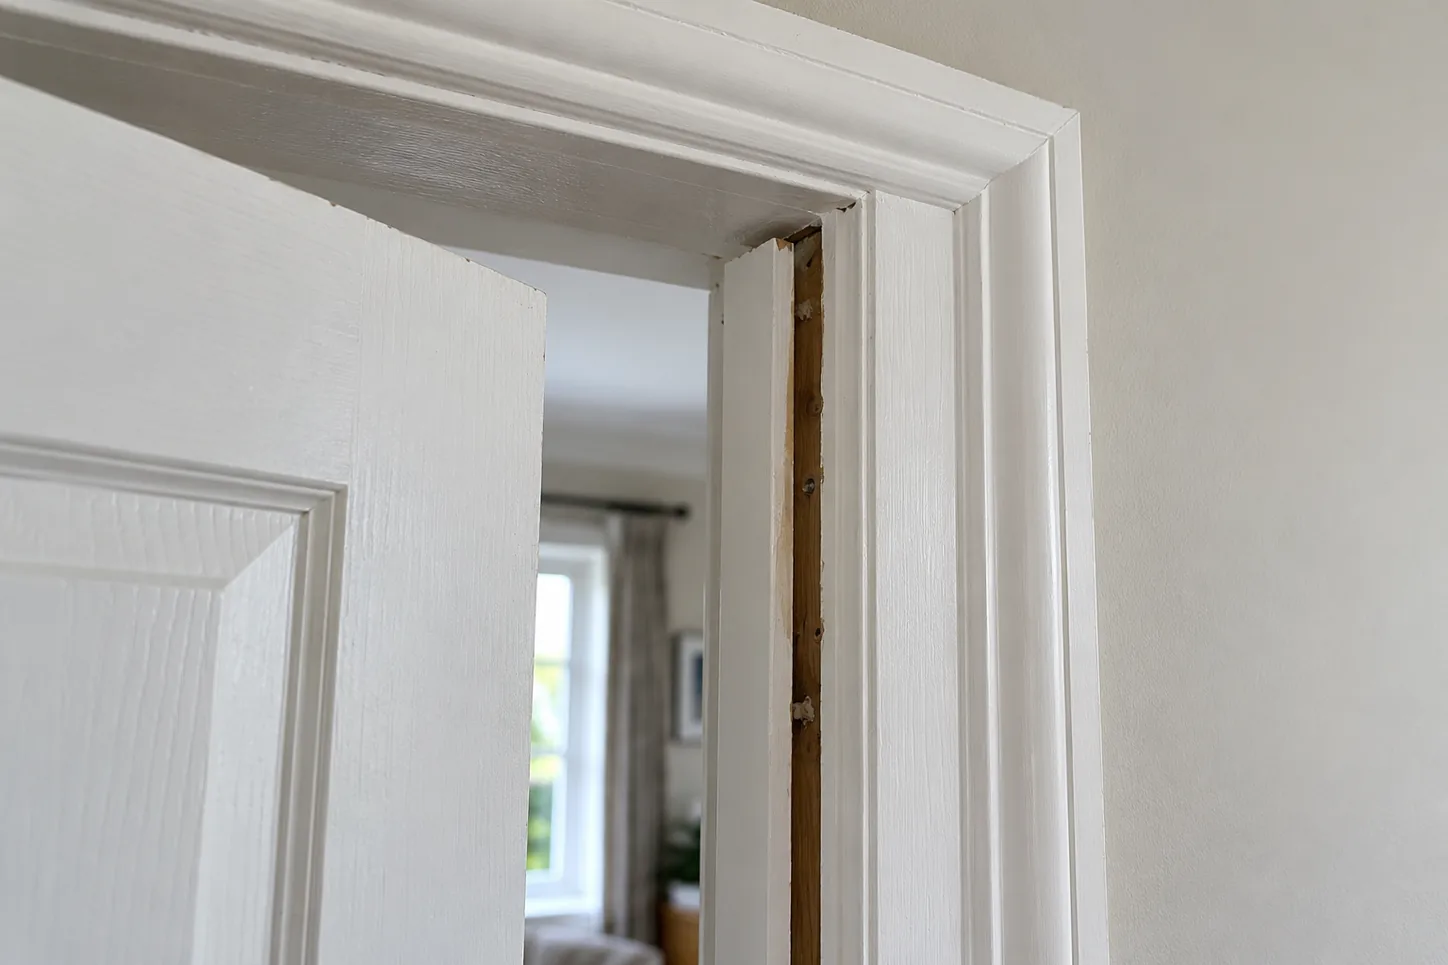
If part of the strip is still fixed, do not pull the entire length away by hand. That can tear sound timber or break a mitre at the head. Identify the existing pins or screws and release only the section needed. A thin broad tool placed against a protective packing piece can help lift it without denting the frame, but stop if the trim starts splitting. Mark each piece’s orientation before removal, particularly when two painted pieces look similar.
Remove old bent pins that would prevent the strip seating flat. Check the rear face with a straightedge; hardened blobs of paint or adhesive can hold it away from the frame. The surface need not be stripped to bare wood everywhere, but it must be clean, dry and able to make firm contact. Vacuum dust from the joint before choosing a fixing method.
Set the stop position with the door, not by eye alone
Offer the strip back to its position and close the door gently. It should meet the door face without pushing the leaf away from the latch. Check contact at the top, middle and bottom, because a slightly bowed door may not be perfectly flat. A narrow, consistent reveal is preferable to forcing the stop hard against one corner. Leave any designed seals or cushions in their intended position rather than compressing them beyond their purpose.
Use temporary low-tack tape or a helper to hold the piece while you check the latch. Open and close the door several times. It should close with ordinary pressure, latch cleanly and sit without a loud rattle. Mark the final line before fixing. This trial fit prevents the familiar result of a neatly repainted stop that has to be moved again because the door will not close.
For a small sound section of timber, fine finishing pins or suitable trim screws may secure the strip, provided they enter sound frame material and their length is appropriate. Pilot holes near a strip end reduce splitting. Set fixings discreetly and fill them only after a successful test. A suitable wood adhesive can supplement a mechanical fixing where both surfaces and the manufacturer’s instructions allow it; do not expect glue to compensate for damp, dust or a moving frame.
Avoid driving a large screw through the narrow face simply because it is available. It can split the strip and leave a prominent head. Do not use nails so long that they pass into an unknown cavity or nearby hidden fitting. In some frames, a cautious repair may need a joiner to select a fixing path and restore damaged timber first.
Finish without gluing the door shut
Once the strip is secure, test the door again before filling or painting. Fill pin holes and local surface damage with a product suited to painted wood, allow it to cure and sand gently within the safe limits of the existing coating. Apply primer to exposed timber if the paint system requires it, then touch in the finish. Keep paint out of the latch keep and off moving seals.
A fine decorative caulk line between the stop and frame can make a neat finish on a stable joint, but it is not a structural fixing. Do not bridge a moving gap with thick caulk and assume the underlying problem has gone. Give fresh paint enough time to harden before keeping the door tightly closed. Otherwise opposing painted faces can stick and tear the finish when the door is reopened.
Check the result after a week of normal use. If the strip begins lifting again, look for an over-forceful closing action, a crooked door or unsound frame material. Repeatedly adding more pins to the same weak area tends to worsen the timber. A professional carpentry repair can replace a damaged length or rebuild the fixing area; the site’s door repair service is relevant if alignment and latching also need attention.
Know when the strip is part of a rated assembly
Some doors have smoke or intumescent seals, closers or identification marks because they serve a fire-safety purpose. A strip that appears decorative may locate a seal or influence how the door closes. Do not remove, relocate or cut these components as a routine DIY adjustment. Ask a competent person familiar with the door assembly to inspect it. The same caution applies to communal entrances and doors on a protected route.
For an ordinary room door, the principle is simpler: retain sound timber, position the stop against the closed leaf, fix it into a stable frame and test before decorating. The repair should leave a door that closes freely and sits quietly, with no proud edge to catch hands or clothing.