

A drawer that sticks can be caused by a crumb in the track, a swollen wooden edge, a loose screw or two runners mounted at different heights. A drawer that comes off its slides may have a broken stop or incompatible replacement part. Diagnosis starts by unloading and identifying the runner rather than applying oil to everything that moves.
Make the drawer safe to remove
Empty it completely, including removable organisers. Support the front with both hands and extend slowly. Wide or heavy drawers need another adult. Do not let the drawer hang from one runner; this bends metal slides and tears screws from chipboard.
Side-mounted ball-bearing slides often have release levers, one lifting and one pressing down. Undermount runners may release with clips beneath the front. Wooden runners may simply pull to a stop and lift. Find the manufacturer’s method or inspect with a torch before forcing it.
Identify the failure pattern
- Sticks at the same point: debris, bent runner or protruding screw
- Front sits crooked: one runner loose or height adjustment changed
- Drawer drops when opened: failed stop, clip or rear bracket
- Moves in humid weather: timber swelling or tight clearance
- Opens by itself: cabinet not level or slides misaligned
- Scrapes the drawer below: overloaded base or loose front
Take photos of both sides while the drawer is still fitted. Compare screw positions, gaps and how far each slide extends.
Tools and materials
- Correct screwdrivers and small socket set if required
- Spirit level, combination square and tape measure
- Vacuum and soft brush
- Manufacturer-approved dry lubricant
- Matching screws, no longer than the cabinet material safely allows
- Timber dowel and wood adhesive for suitable solid-wood repairs
- Replacement runner pair of the same type and length if damaged
Step 1: remove and clean
Place the drawer on a blanket. Vacuum crumbs from tracks and wipe metal slides with a dry cloth. Remove sticky grease with a mild compatible cleaner and dry it fully. Do not flush ball-bearing runners with water or pack them with household oil, which attracts grit.
For traditional timber runners, look for a polished high spot where wood rubs. Do not plane it immediately; first confirm that the cabinet is square and the runner has not moved.
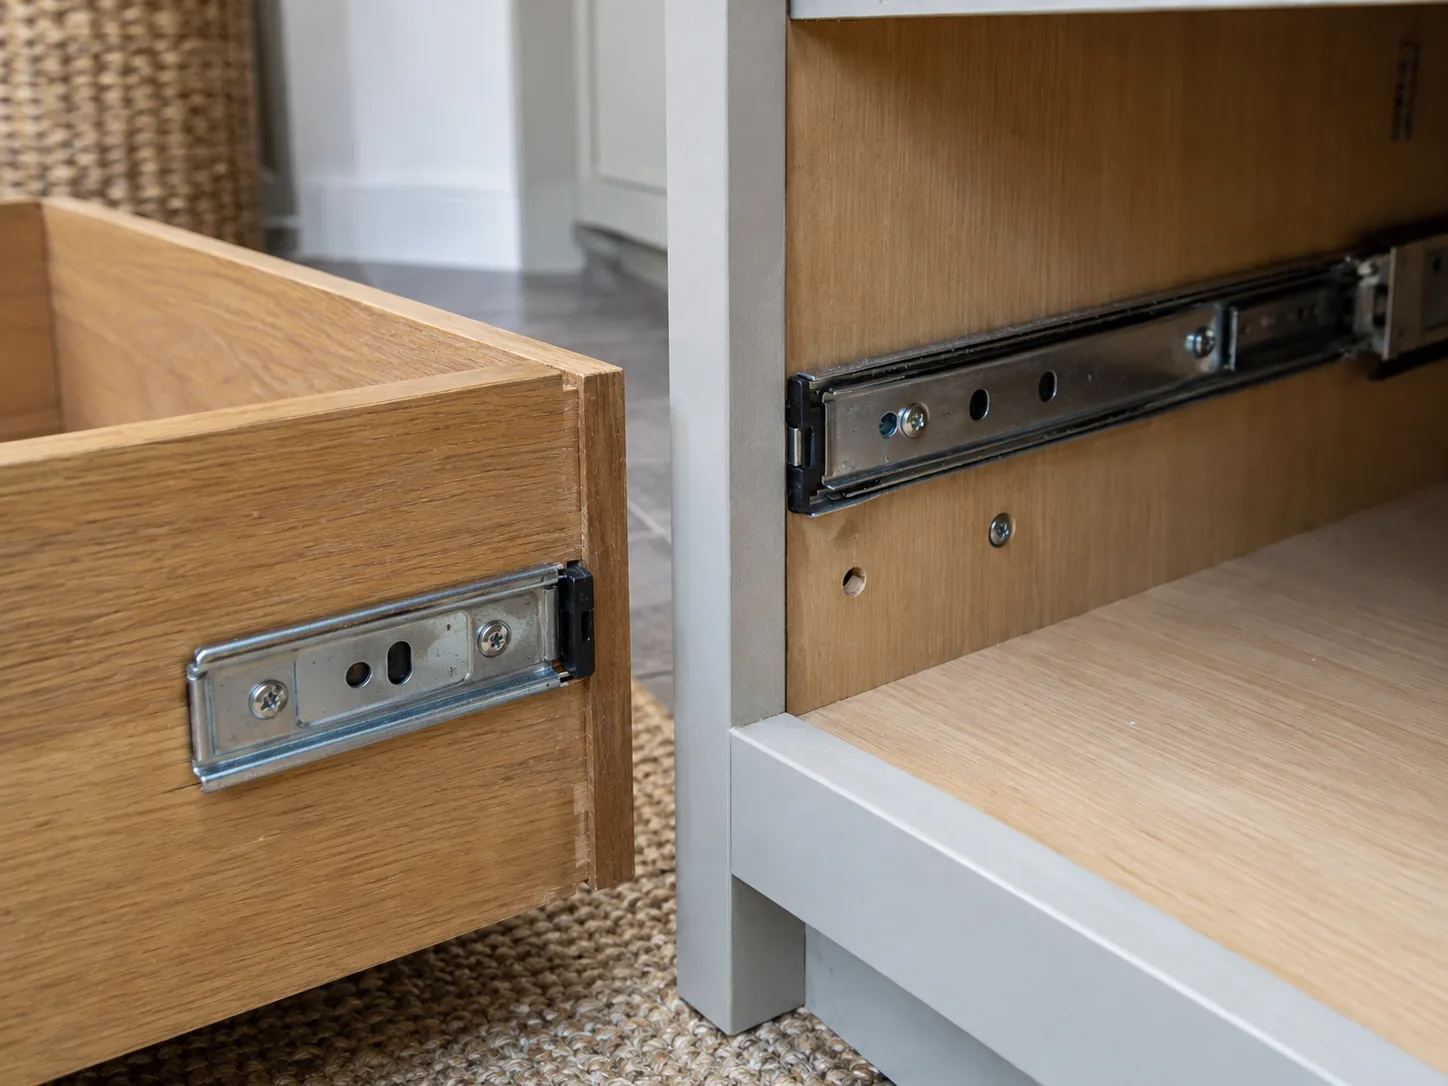
Step 2: inspect the drawer box
Check that the bottom remains in its grooves and the four corners are square. A bowed base can drag or overload the runners. Tighten accessible assembly screws by hand, but stop if they spin. Split timber, a separating front or loose dovetails need furniture repair before the drawer is reloaded.
Step 3: inspect runners and cabinet fixings
Extend each runner independently. It should move through the same stages without grinding, missing bearings or side-to-side looseness. Confirm that every mounting screw is flush; a proud head can catch the moving member. Check rear brackets for cracks.
Measure from a fixed cabinet reference, not the floor, to the front and rear of each runner. They should be parallel, level with one another and set back equally. Use slotted mounting holes for small adjustments before drilling anything new.
Step 4: repair a loose screw hole appropriately
In sound solid wood, an enlarged hole can often be drilled cleanly and glued with a close-fitting hardwood dowel. After full curing, trim flush and make a pilot hole for the correct screw. Do not rely on toothpicks for a heavily loaded runner.
Chipboard needs a purpose-made repair insert, a suitable larger fixing within the safe material depth, or relocation to an unused runner hole. A screw that is too long can pierce the cabinet side. If several holes have broken away, reinforce or replace the panel through carpentry work.
Step 5: realign before fully tightening
Loosen runner screws only enough for movement. Set both slides parallel and at matching heights, then tighten one front and one rear fixing on each side. Refit the empty drawer and test. Adjust in millimetres until the front gaps are even, then secure the remaining holes specified by the runner manufacturer.
Step 6: replace damaged slides as a pair
Match runner length, extension, load rating, side clearance and fixing pattern. Replacing only one worn slide can create unequal resistance. Mark the original reference lines, fit cabinet members square and attach drawer members at identical positions.
Soft-close mechanisms often need an exact compatible pair. Do not bend catches or remove damping parts to make a mismatched runner fit.
Traditional wooden drawers
After alignment and cleaning, a small amount of plain candle wax or a furniture-approved dry lubricant can reduce friction on bare wooden runners. Keep wax away from surfaces due to be painted or glued. If timber has swollen from damp, correct the humidity source and allow it to stabilise before shaving an edge.
Plane only a clearly identified high spot, taking very fine cuts and testing often. Removing too much creates a drawer that rattles in dry weather.
Reinstall and test progressively
Engage both runners at the same time and push until release catches lock. Open and close the empty drawer ten times, checking the front gap and listening for contact. Add half the normal load and repeat before fully loading it. Heavy pans and tools may exceed a domestic runner’s rating even when the drawer fits.
Common mistakes
- Lubricating dirt instead of cleaning the track.
- Supporting a drawer on one extended runner.
- Using longer screws without checking panel thickness.
- Adjusting one slide without measuring the other.
- Replacing only one runner from a matched pair.
- Planing swollen timber before the room dries.
- Testing immediately with the full load.
When the cabinet is the problem
Several drawers drifting open, uneven gaps across the whole unit or runners repeatedly loosening can indicate an unlevel cabinet or failed carcase joint. Check that wall and floor units are securely installed. Do not remove structural cabinet fixings or disturb nearby plumbing to chase drawer alignment.
For a newly built unit, revisit the assembly sequence before altering parts; a correctly completed furniture assembly should leave the carcase square and both runners on matching references.
A smooth drawer is square before it is lubricated
The alignment method is closely related to adjusting cupboard doors, while damaged particleboard fixings need the approach in the guide to repairing flat-pack screw holes.
Clean first, compare both sides and repair the supporting material rather than simply tightening a spinning screw. When runners are sound, parallel and correctly loaded, the drawer should travel evenly and remain captured through its full extension.

