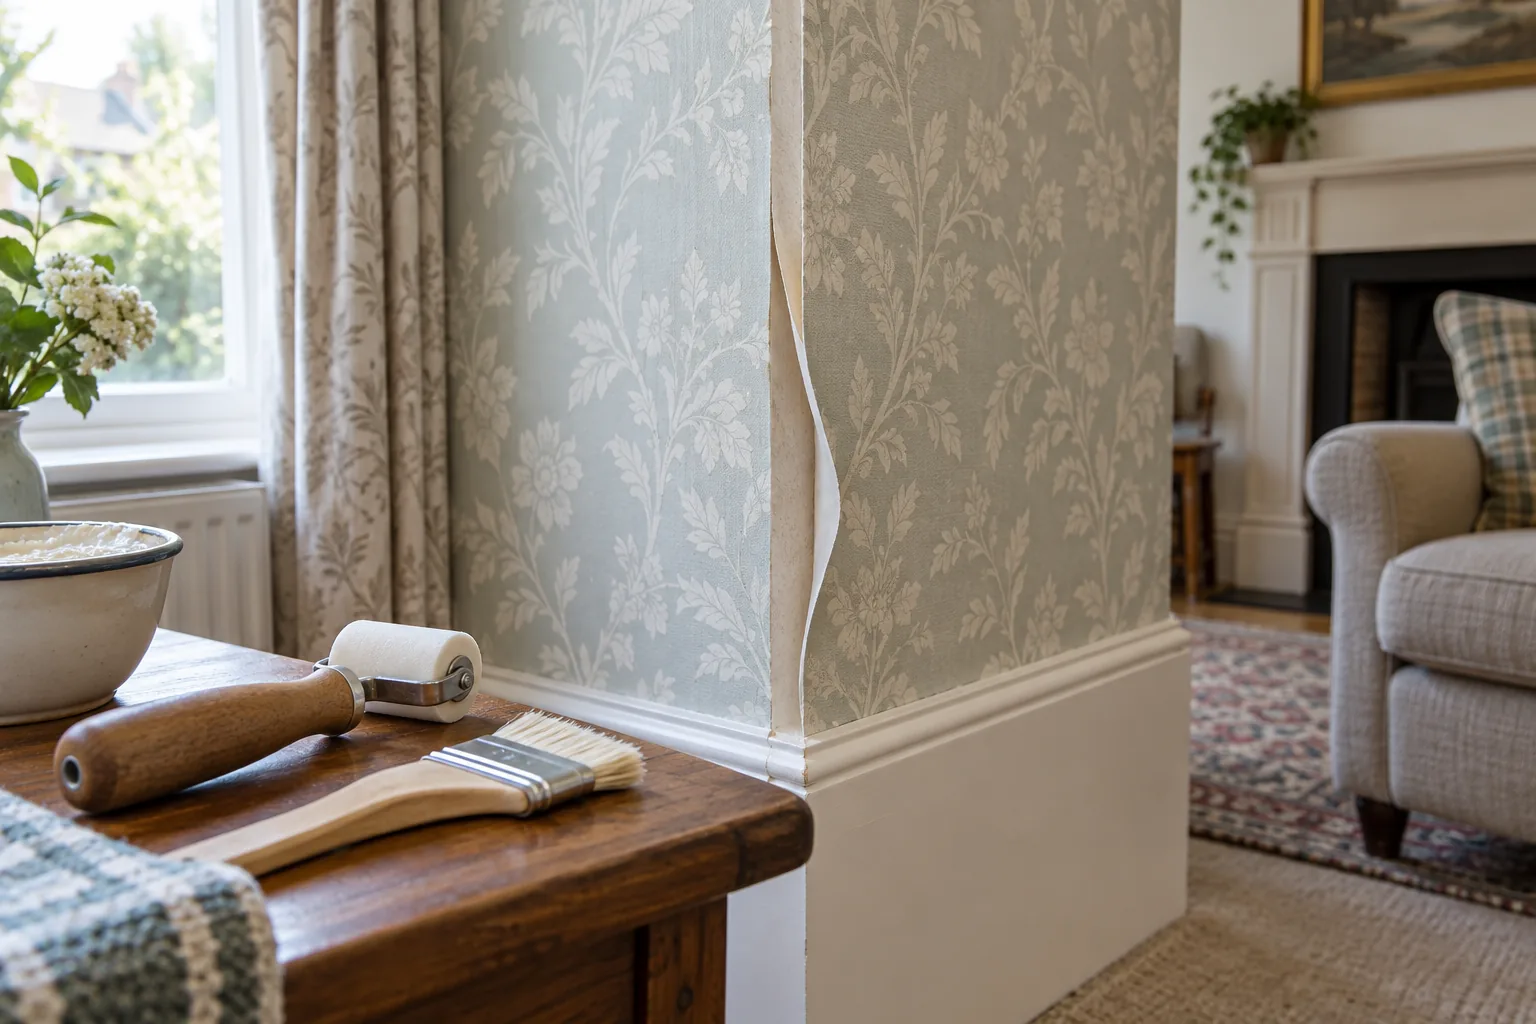
A lifted wallpaper seam can often be repaired without replacing a full drop, but only if the paper and wall beneath it remain sound. Pushing the edge flat with ordinary paste rarely lasts when dried adhesive, dust or a painted non-porous surface prevents contact. Too much adhesive creates a different problem: a shiny stain or swollen seam that catches the light.
The repair depends on the covering. Vinyl, washable paper, traditional paper and non-woven wallpaper tolerate moisture differently. Check spare material or manufacturer information where available, and always test cleaning and adhesive on an inconspicuous offcut.
Find out why the seam lifted
Short dry sections commonly follow insufficient paste or an edge that dried before hanging. Repeated lifting beside a radiator can result from heat and rapid drying. Corners move slightly and put tension on wallpaper wrapped too tightly around them. Widespread peeling, staining or a cold damp wall points to moisture rather than a local adhesive failure.
Run a clean finger beside the seam. A firm flat background is repairable. Powder, loose paint or softened plaster must be stabilised first. If the paper has shrunk and left a visible gap, rebonding cannot restore missing width; the seam may need a narrow colour-matched touch-up or replacement drop.
Gather delicate tools, not decorating force
Wallpaper seam adhesive compatible with the covering
Small artist’s brush or fine nozzle
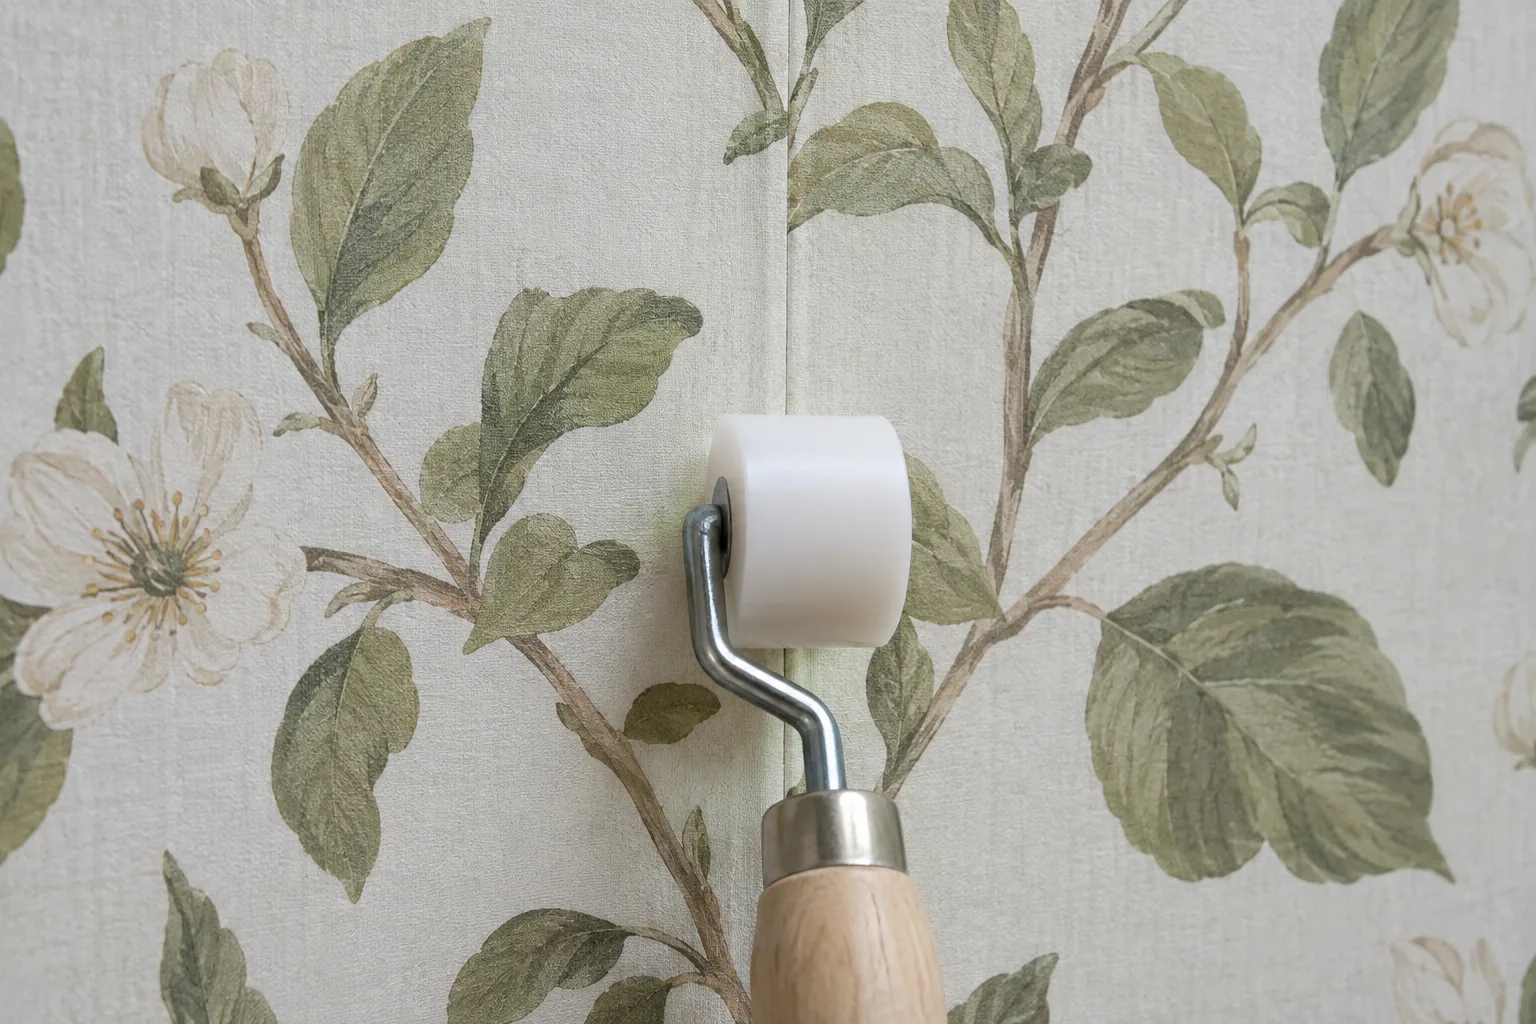
Plastic seam smoother or clean seam roller
Damp white sponge and several clean cloths
Low-tack masking tape where suitable
Small vacuum brush
Sharp blade only for removing loose debris, not trimming patterns
A metal roller can mark embossed paper and force adhesive out. Coloured cloths may transfer dye to a pale covering. Keep water away from electrical accessories and avoid soaking paper edges.
Step 1: lift only the already loose edge
Do not pull the seam further to create working space. Support the paper and lift the detached portion just enough to see behind it. Vacuum loose dust with a soft brush. Remove obvious dried lumps carefully; a hard fragment left beneath the paper creates a permanent bump.
If old paint comes away with the paper, the failure lies in the wall coating. Stop and stabilise that small area with a compatible primer, allowing it to dry fully. Adhesive applied to loose paint will merely glue the wallpaper to material that is no longer attached to the wall.
Step 2: test the wallpaper face
Dampen a hidden edge of spare paper or a concealed area and blot it. Check for colour transfer, darkening, swelling or loss of texture. Uncoated papers require especially careful cleaning. If the face is fragile, use the least adhesive possible and protect the visible surface while working.
Step 3: apply seam adhesive sparingly
Use a fine brush or nozzle to place a thin, even film behind the loose edge. Reach the full detached area without flooding beyond it. Avoid coating the printed face. Where both edges of a butt joint are loose, work on one side at a time so the pattern remains aligned.
Allow any short open time specified by the adhesive. Some products need immediate pressure; others bond better after a brief wait. Do not substitute general PVA unless the wallpaper manufacturer explicitly permits it. PVA can dry shiny, stiffen the seam and make later removal difficult.
Step 4: align the pattern before applying pressure
Start where the existing paper is still firmly attached and work towards the loose end. Match printed lines and maintain the original butt joint. Smooth with light strokes from the body of the paper towards the seam, pushing air out without stretching the damp edge.
Use a clean seam roller only if the paper surface can accept it. One or two gentle passes are enough. Excessive rolling squeezes out adhesive and can polish, flatten or stretch the design.
Step 5: remove adhesive while it is workable
Blot squeezed adhesive with a barely damp white sponge, turning to a clean face each time. Do not scrub across the seam. Follow with a dry lint-free cloth and inspect from the side. Adhesive allowed to dry on washable vinyl may still leave a shiny patch, while attempts to remove it from delicate paper can take off the print.
If the edge tries to curl while drying, low-tack tape can hold it only after testing that the tape will not lift the surface. Place it across the seam with minimal tension and remove it slowly at the recommended time.
Repairing an internal or external corner
Wallpaper wrapped around an uneven internal corner can pull away because the next wall is not plumb. Pressing it back may work for a small local lift, but a long tight bridge can keep returning. Professional hanging usually allows an overlap or cut appropriate to the covering and pattern.
External corners receive knocks and are less forgiving. If the edge is torn or the corner bead beneath is damaged, a patch may remain visible. Wider damage often needs replacement paper after the substrate is repaired by a decorator.
Why repaired seams fail again
Dried paste and dust were left behind.
The underlying paint or plaster is loose.
Too little adhesive failed to wet the whole detached area.
Too much adhesive stained the face and encouraged movement.
The seam was rolled aggressively or shifted out of pattern.
A hot radiator or persistent damp continues to affect the area.
The paper has shrunk, so the original joint cannot close.
When peeling wallpaper is a symptom
Investigate if several seams lift on the same cold wall, paper darkens near a window, or mould appears beneath an edge. Condensation, penetration and plumbing leaks need different remedies. Do not trap moisture with more adhesive. Once the cause is corrected, the wall may need the preparation described in preparing walls after wallpaper removal.
Large failed areas, valuable wallpaper and complex pattern matching are sensible reasons to use professional decorating support. Small local seams can be included with other handyman tasks.
A nearly invisible repair uses very little of everything
Minimal lifting, a thin adhesive film, gentle alignment and immediate blotting produce the cleanest result. The repair should not announce itself through a ridge, flattened pattern or glossy residue. If the substrate is unstable or damp, pause the cosmetic work and correct that cause first.
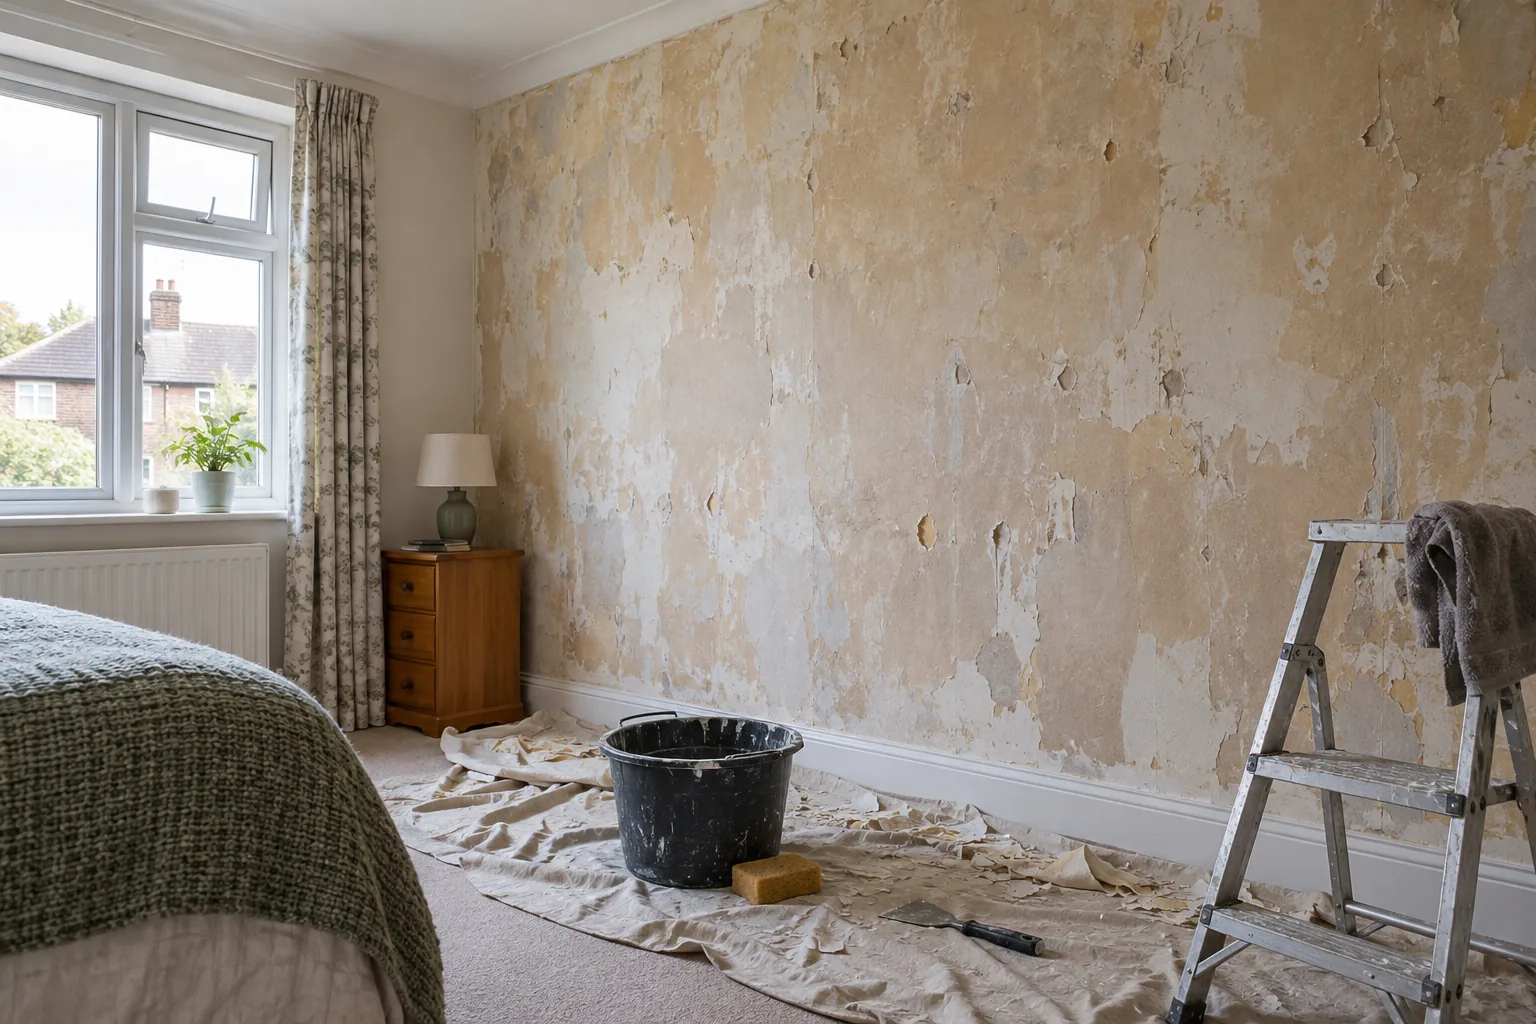
Removing wallpaper reveals the surface that the previous covering concealed. Even when the paper comes away cleanly, the wall can retain paste, torn lining paper, shallow gouges and glossy paint patches. Painting straight over that mixture produces flashing, poor adhesion and rough marks that become more obvious in daylight.
Preparation is a sequence rather than a single coat of filler. First identify the wall, remove adhesive without saturating it, stabilise exposed paper, repair defects, then prime for the next finish. This guide covers sound internal plaster and plasterboard. Damp, loose plaster and extensive mould need attention before decorating.
Let the stripped wall tell you what it needs
Use a work light held close to the surface. Paste often appears as glossy streaks and feels tacky when lightly dampened. Torn plasterboard face paper has fuzzy brown edges. Solid plaster may show old distemper, powdery filler or small areas pulled away by the paper. Circle defects with pencil rather than trying to remember them.
Check the corners, wall-to-ceiling line and areas behind radiators. Dark staining, salts or soft plaster can indicate moisture. Do not seal those beneath primer. If the wall was damaged by an escape of water, investigate the source and consider water damage repair.
Tools and materials
Dust sheets and masking materials
Warm water, sponge and clean buckets
Wallpaper adhesive remover if plain water is ineffective
Plastic scraper and broad filling knives
Suitable filler or joint compound
Sealer for torn plasterboard paper or unstable porous areas
Fine abrasive block, vacuum and work light
Primer selected for the wall and intended finish
Wear eye protection when scraping overhead and a suitable mask when sanding. Older coatings and textured finishes may require testing before disturbance. Isolate nearby electrical accessories before introducing water, and never flood the wall around sockets or switches.
Step 1: remove every scrap without digging into the wall
Lift remaining paper and backing with a plastic scraper held at a shallow angle. Soften stubborn patches in small areas and give moisture time to work. Forceful scraping leaves deep tracks that take longer to repair than the paper took to remove. Around edges and accessories, cut the covering cleanly rather than pulling it through old paint.
On plasterboard, limit water and steam. The face paper can swell, detach or tear when saturated. If the surface becomes soft, stop and let it dry before continuing.
Step 2: wash off wallpaper paste
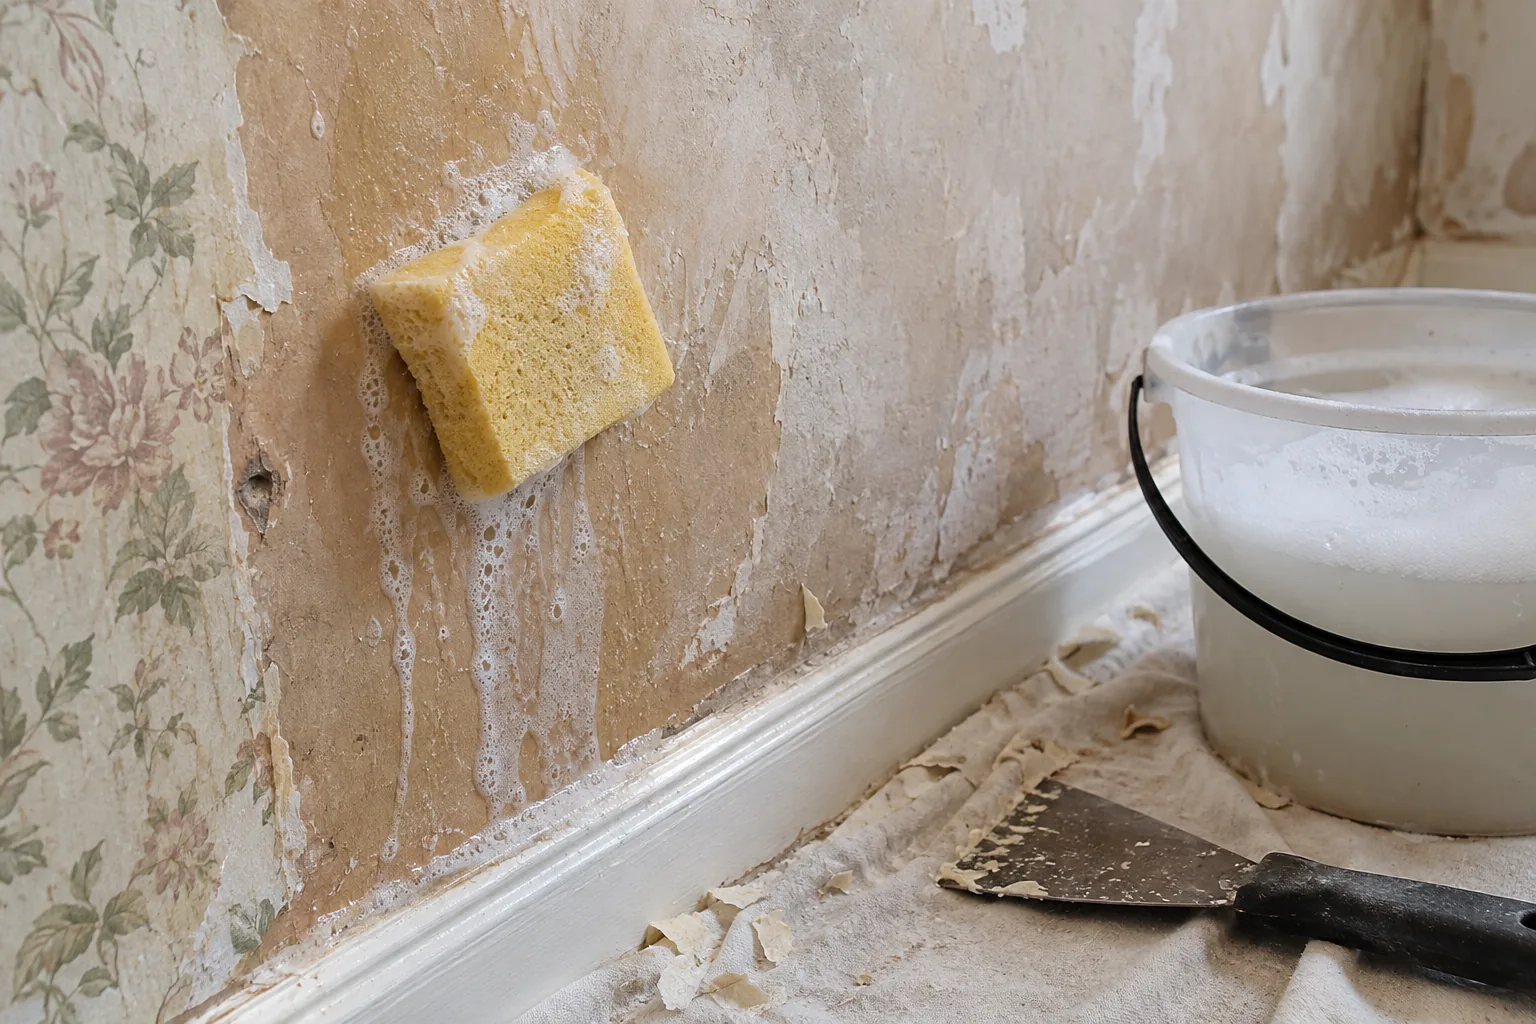
Work from the bottom upwards in manageable sections so dirty water does not form long runs. Apply warm water with a wrung sponge, allow a short dwell time, then wipe and scrape softened adhesive. Rinse the sponge frequently and change the water. Smearing dissolved paste across the wall merely redistributes it.
After the wall dries, test several areas with a damp fingertip. Any slippery or tacky feel means adhesive remains. Use a proprietary remover only as directed and rinse where the instructions require. Residue beneath emulsion can reactivate and cause crazing or poor bonding.
Step 3: stabilise damaged paper and powdery surfaces
Trim loose plasterboard paper with a sharp knife; do not peel beyond the detached area. Seal exposed brown paper with a compatible problem-surface primer. Water-based filler applied directly to fuzzy paper can make it bubble. Allow the sealer to dry, then skim the shallow depression.
For solid plaster, brush and vacuum powder. If the surface continues to shed, use an appropriate stabilising product after identifying the coating. Ordinary diluted emulsion is not a universal stabiliser and may form a weak layer over dust.
Step 4: fill gouges, plug holes and cracks
Repair deep defects in separate applications. Press filler into the clean base, scrape it close to level and let it dry before a wider finishing coat. Treat small plasterboard holes using the supported method in the guide to repairing plasterboard holes. Fine cracks need their own assessment; a moving joint cannot be solved by a smear of filler.
Keep the edges broad and shallow. A perfectly filled dent with a hard ridge around it will still show after painting. Use side light to find low spots rather than adding filler to the whole wall automatically.
Step 5: sand with restraint
Sand dry repairs with a flat block and fine abrasive. Concentrate on ridges, not the original wall. Excessive sanding can polish old paint, tear plasterboard paper and create undulations. Vacuum dust from the wall, skirting and floor; airborne filler dust quickly settles into wet primer.
Run a clean hand across the surface and inspect it from several angles. Mark anything that remains, apply a final thin skim and repeat the check. This is the stage that decides whether low side light will reveal the old wallpaper lines later.
Step 6: choose the primer for the next finish
Bare filler and plaster absorb differently from old paint, so spot priming alone can leave visible patches. A full suitable primer evens porosity and provides a consistent base. If adhesive staining cannot be removed completely, use a stain-blocking or problem-surface primer designed for that contamination rather than relying on extra emulsion coats.
New wallpaper may require a specific size or primer. Follow the wallcovering adhesive instructions. Paint systems also vary, especially over chalky old finishes. Bob’s painters and decorators can specify a compatible system where several old coatings remain.
Frequent preparation mistakes
Painting while paste still feels tacky.
Saturating plasterboard with water or steam.
Filling directly over torn face paper.
Sanding the sound wall more than the repair.
Using a single thick filler coat in deep gouges.
Skipping primer because the wall already has some paint.
Assuming stains are cosmetic without checking for damp.
When lining paper or professional preparation makes sense
A wall with many shallow defects can sometimes be improved with lining paper, but lining does not stabilise loose plaster, remove paste or cure damp. Severe ridges, failed skim plaster and large areas of torn plasterboard may be faster and better to reskim or replace. Intricate rooms and high stairwells also involve access risks.
Minor repairs can be grouped into an odd-jobs visit. Where the room will be fully redecorated, coordinated wall painting preparation reduces visible differences between patched and original areas.
Do not let the new finish become the test coat
The wall should be clean, dry, firm and evenly absorbent before expensive paint or paper is opened. Wash until paste is gone, seal torn paper, fill only stable defects, inspect under side light and prime for the intended finish. That work is less dramatic than stripping wallpaper, but it is what makes the next surface last.
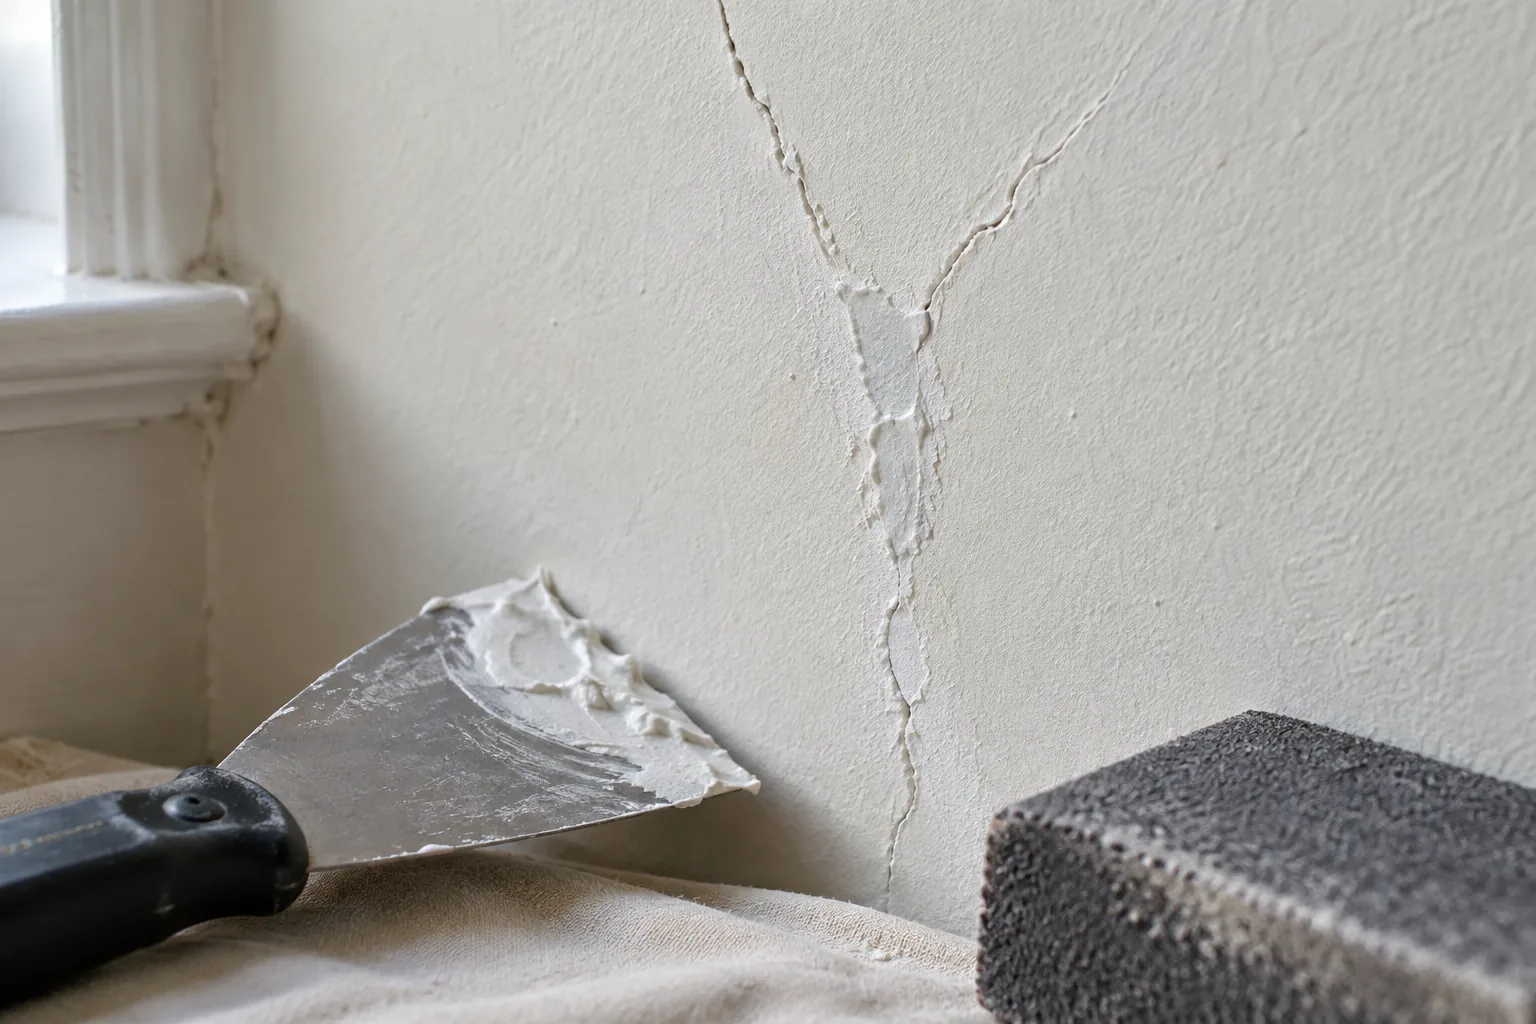
A hairline crack can be a harmless result of drying and seasonal movement, or the visible edge of a continuing problem. Filling it without looking at its shape, location and history may produce a smooth wall for a few weeks, followed by the same line through the new paint. The useful question is not simply which filler to buy, but whether the crack is stable enough for a decorating repair.
This guide deals with fine cracks in otherwise firm internal plaster. It explains how to record the defect, prepare it without causing unnecessary damage, use a compatible filler and blend the repair. Wide, displaced, damp or rapidly changing cracks should be assessed rather than hidden.
Decide whether the crack is suitable for DIY repair
Look at the full wall in good light. Fine straight cracks at plasterboard joints, short lines above openings and shallow crazing in old finish plaster can often be repaired decoratively. Cracks that are wider at one end, run diagonally from windows or doors, continue through masonry, or are accompanied by bulging plaster deserve more caution.
Mark the ends lightly with pencil and write the date on masking tape nearby. Take a clear photograph with a ruler in view. Recheck after several weeks, particularly if the line appeared recently. If it grows, reopens quickly or changes with sticking doors and windows, seek competent advice before decorating.
Check for moisture and loose plaster
Discolouration, a cold damp feel, bubbling paint or a musty smell can indicate moisture. Filling over damp traps the symptom and weakens adhesion. Trace plumbing, roof or window problems first. Bob’s water damage repair service is relevant when plaster has softened or staining follows a leak.
Tap gently around the line with a knuckle. A consistent solid sound is reassuring. A hollow sound, surface movement or pieces lifting at the edge means the plaster has lost its key and needs more than a narrow filler repair.
Tools and materials
Dust sheet, eye protection and suitable dust mask
Sharp filling knife or small scraper
Vacuum with a soft brush attachment
Fine-surface or flexible decorator filler suited to the substrate
Joint tape where a plasterboard seam has failed
Wide filling knife and fine abrasive block
Primer and matching wall paint
Do not sand unknown old coatings aggressively. Older properties can contain hazardous paint layers, and textured coatings may require specialist identification.
Step 1: remove only material that is already unsound
Run the corner of a scraper lightly along the crack. The aim is to remove loose paint and fragile plaster, not to carve a deep trench into a stable wall. A very narrow crack may need opening into a shallow V so filler can enter, but keep the channel modest and consistent. Feather back flaking paint until its edge is firmly bonded.
Vacuum the channel and surrounding surface. Dust left inside prevents filler bonding to the plaster. If the exposed plaster is unusually porous, use the primer or stabilising treatment recommended for the chosen filler rather than soaking the area with water.
Step 2: recognise a failed plasterboard joint
A straight crack that follows a board joint, especially with a slight ridge, can indicate failed tape. Pressing filler into the visible line will not reconnect the joint. Remove detached tape only as far as it is loose, bed new joint tape in compound and cover it with progressively wider coats. This produces a much broader repair than a crack in solid plaster.
If the boards move when pressed, additional fixing or investigation is needed before retaping. Do not add screws until you have checked for hidden cables and pipes and located the supporting timber or metal framework.
Step 3: fill the prepared crack
Work filler firmly across the crack so it contacts both sides and reaches the base of the shallow channel. Scrape away the excess, leaving a slight allowance for shrinkage where the product instructions suggest it. For deeper areas, use separate applications and allow each to dry. A thick wet bead skins over while remaining soft beneath.
Flexible filler can accommodate tiny seasonal movement, but it is not a cure for structural movement or loose plaster. Some flexible products cannot be sanded easily, so shape them carefully while workable. Check compatibility with the final paint.
Step 4: feather a second coat beyond the line
After the first application is fully dry, inspect it under a light held close to the wall. Apply a thin second coat with a wider knife, extending beyond the first. This reduces the sharp change in surface level that otherwise shows through side lighting. Keep the knife clean; dried particles make grooves that require another coat.
Where joint tape is involved, the finished compound may need to extend several hundred millimetres to disguise the build-up. That is normal. A narrow, thick strip is much more visible than a wide shallow taper.
Step 5: sand lightly, prime and paint
Use a flat sanding block and minimal pressure. Stop as soon as the ridge disappears; sanding into the surrounding paint can create a polished halo or expose paper on plasterboard. Vacuum thoroughly. Run a hand and a straightedge across the repair, then check it again with side light.
Prime bare filler before painting. Filler absorbs paint differently, causing flashing even when the colour matches. Apply the finish with a roller texture consistent with the rest of the wall. On strong colours or walls lit from the side, repainting the full wall section may be necessary. The guide on preparing stripped walls covers larger areas of surface correction.
Why hairline crack repairs reappear
The crack was filled over dust or loose paint.
A plasterboard joint needed tape, not filler alone.
The plaster or board is moving beneath the surface.
Moisture weakened the background.
A thick application shrank as it dried.
The filler was too rigid for minor seasonal movement.
Decorating began before the repair was dry.
Safety and warning signs
Stop treating the issue as decoration if a crack grows noticeably, exceeds a few millimetres, shows displacement from one side to the other, or appears with sagging ceilings, sticking openings or exterior masonry cracks. Cracks after major building work, impact, escape of water or ground movement need context-specific assessment.
Ceiling cracks are awkward to prepare safely from a ladder and may involve loose plaster overhead. Extensive making-good is better handled by painters and decorators or a suitable plastering professional. Small stable repairs can be combined with other property maintenance jobs.
Repair the cause before hiding the line
A durable finish comes from classification and preparation. Record the crack, check that the background is dry and firm, open only the fragile edge, use tape where a joint has failed, and feather the repair wider than the visible line. If the evidence suggests continuing movement, the most useful action is investigation, not another coat of filler.
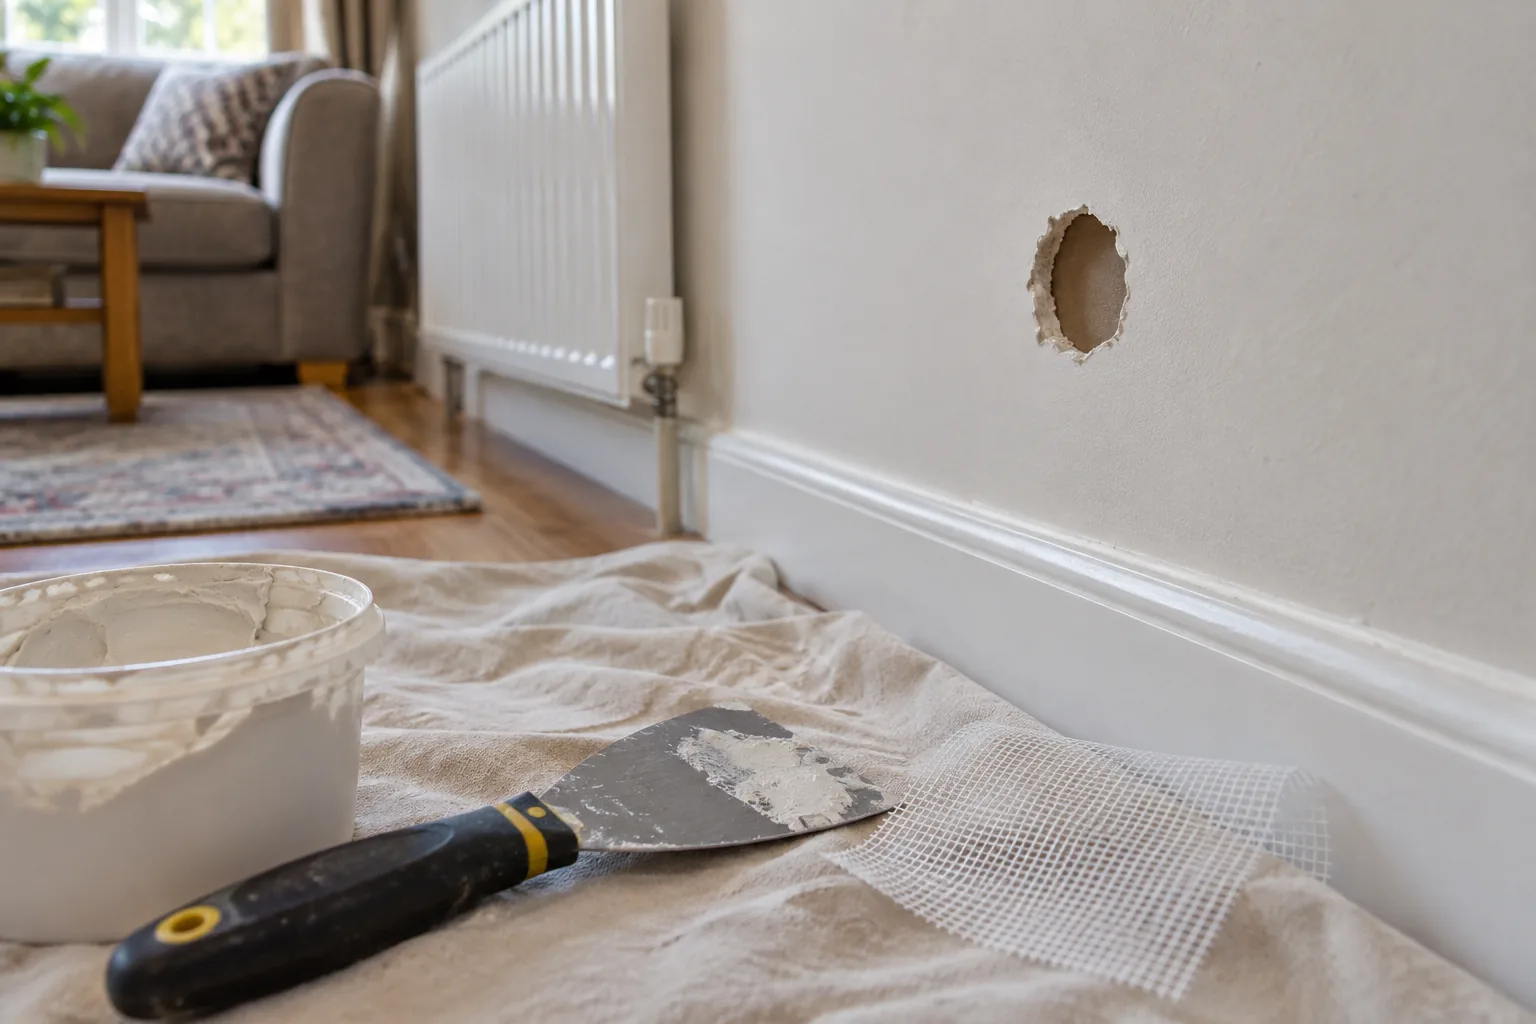
Small plasterboard holes are easy to underestimate. A screw hole needs little more than cleaning and filling, while an impact hole the size of a door handle needs support across the opening. Treat both in the same way and the larger repair often sinks, cracks or shows as a raised circle after painting.
A good patch replaces damaged material, remains stable when the wall moves slightly and blends into a broad area rather than forming a hard-edged mound. The following method covers holes from redundant wall plugs up to modest local damage between studs. Damp, widespread cracking or a soft wall needs diagnosis before cosmetic repair.
Check the hole and the wall around it
Remove loose paper and gypsum gently, then press around the edge with a fingertip. Sound plasterboard feels firm. If the face paper has detached over a wide area, the board flexes, or the gypsum crumbles without resistance, enlarge the repair to reach stable material. Look for water staining, mould and rusted fixings. A recurring damp mark should be investigated through leak detection and repair before it is covered.
Consider why the hole formed. A door handle impact will happen again unless a stop is fitted. A failed shelf or rail may indicate unsuitable fixings or an overloaded board. Repairing the surface alone does not restore the strength required to rehang a heavy item in the same spot.
Select the repair method by size
Pinholes and screw holes
Clean out dust, remove any proud paper and fill in one or two thin applications. Deep holes shrink if packed with a thick surface filler in one pass.
Old wall-plug holes
Remove the plug if it is loose or proud. A plug can sometimes be driven just below the surface, but first make sure it will not push damaged board into the cavity. Seal torn face paper before filling so moisture in the compound does not cause it to bubble.
Small impact holes
Use a self-adhesive mesh patch only where the surrounding board is sound and the patch can overlap it generously. A rigid backing patch or small replacement piece is stronger for an irregular opening. Do not bridge a deep cavity with filler alone.
Tools and materials
Sharp utility knife
Dust mask, eye protection and vacuum
Filling knives in narrow and wide sizes
Mesh patch or plasterboard offcut and timber backing strip
Joint compound or appropriate repair filler
Primer for torn plasterboard paper
Fine abrasive and sanding block
Matching primer and wall paint
Older painted surfaces may contain hazardous coatings, and cutting into any wall risks concealed services. Use a detector and avoid openings in likely cable or pipe routes. Stop if you cannot establish what is behind the board.
Step 1: make the edge stable
Cut away only paper and gypsum that are already loose. Beveling a tiny screw hole slightly gives filler a clean key, but do not turn a small defect into a large crater. For an impact hole, trim the edge to a simple shape if a plasterboard insert will be used. Vacuum the dust rather than wiping loose gypsum around with a wet cloth.
Where the brown paper layer is exposed or fuzzy, apply a suitable sealer and let it dry. Filling directly over torn paper often creates a blister that appears only after decoration.
Step 2: support anything larger than a simple filler repair
For a backed patch, slide a narrow timber strip into the cavity, hold it across the rear of the opening and screw through the existing board into both ends. Keep screw heads just below the surface without breaking the paper. Cut a plasterboard piece to fit the opening and secure it to the backing.
A mesh patch is quicker on a small sound area. Centre it with adequate overlap and press it flat. Mesh does not make a weak surrounding board strong, so do not use it over crushed gypsum or a hole next to a failed fixing that will be loaded again.
Step 3: apply filler in thin, widening coats
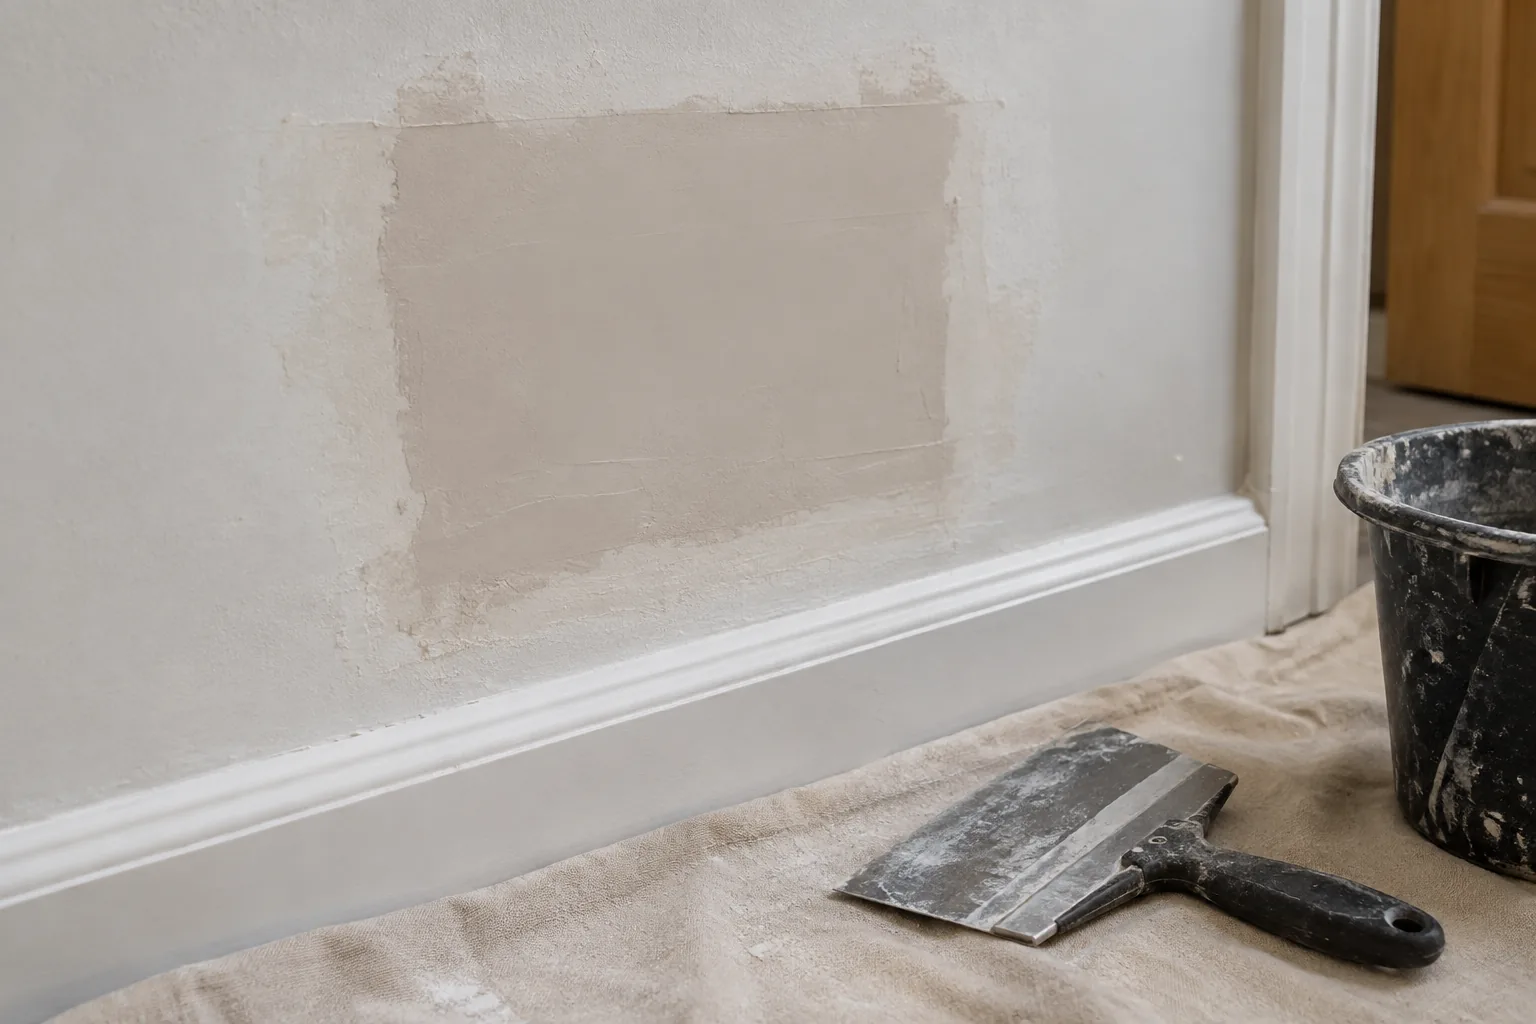
Press the first coat through the mesh or into the joints around an insert. Scrape it nearly level and allow it to dry fully. Apply the next coat with a wider knife, extending well beyond the patch. The centre needs enough material to cover the mesh, while the outer edge should be almost transparent.
Do not keep working compound as it begins to set; dragging it creates ridges and weakens the edge. Several controlled coats are faster to finish than one thick mound that shrinks and requires heavy sanding.
Step 4: check the surface with side light
Once dry, use a sanding block lightly and keep it flat. A fingertip can miss a broad hump, so hold a work light close to the wall and shine it across the repair. Shadows reveal ridges and hollows. Apply a final skim rather than sanding through the face paper around the patch.
Vacuum dust and wipe the area according to the filler instructions. A repaired patch is more porous than painted wall, so prime it before applying the finish coat. Without primer, the repair can show as a dull patch even when perfectly flat.
Step 5: blend the paint
Use the same paint type and sheen as the wall. Old paint changes colour, and a small spot repair can remain visible because of texture and fading rather than colour alone. Feather the paint beyond the filler. On a strongly lit or dark-coloured wall, repainting from corner to corner may produce a better result. Bob’s wall painting service is relevant where several repairs need a uniform finish.
Common causes of a visible or failed patch
Filling over loose gypsum or torn paper.
Trying to span an opening with unsupported filler.
Leaving the mesh proud instead of embedding it.
Applying one thick coat that shrinks at the centre.
Sanding a small circle and creating a polished halo.
Painting bare filler without primer.
Reusing the patched area for a heavy fixing.
When the wall needs more than a small patch
Arrange professional help when the board moves between studs, damage reaches an electrical accessory, the hole exposes a cable or pipe, or staining suggests an active leak. Multiple impacts, failed fixings and large detached areas may justify replacing a section of board. Cracks that return quickly may reflect movement rather than poor filler; compare them with the separate guide to repairing hairline plaster cracks.
An odd-jobs appointment can combine patching with door stops, small fixing repairs and preparation for decorating. Larger making-good is often best coordinated with painters and decorators.
Build the repair from sound edges outwards
The most important work is hidden beneath the paint: stable edges, suitable support and fully dried thin coats. Once those are right, broad feathering, side-light inspection and primer make the patch disappear. If the same hole is likely to be struck or loaded again, correct that cause before treating the surface as finished.
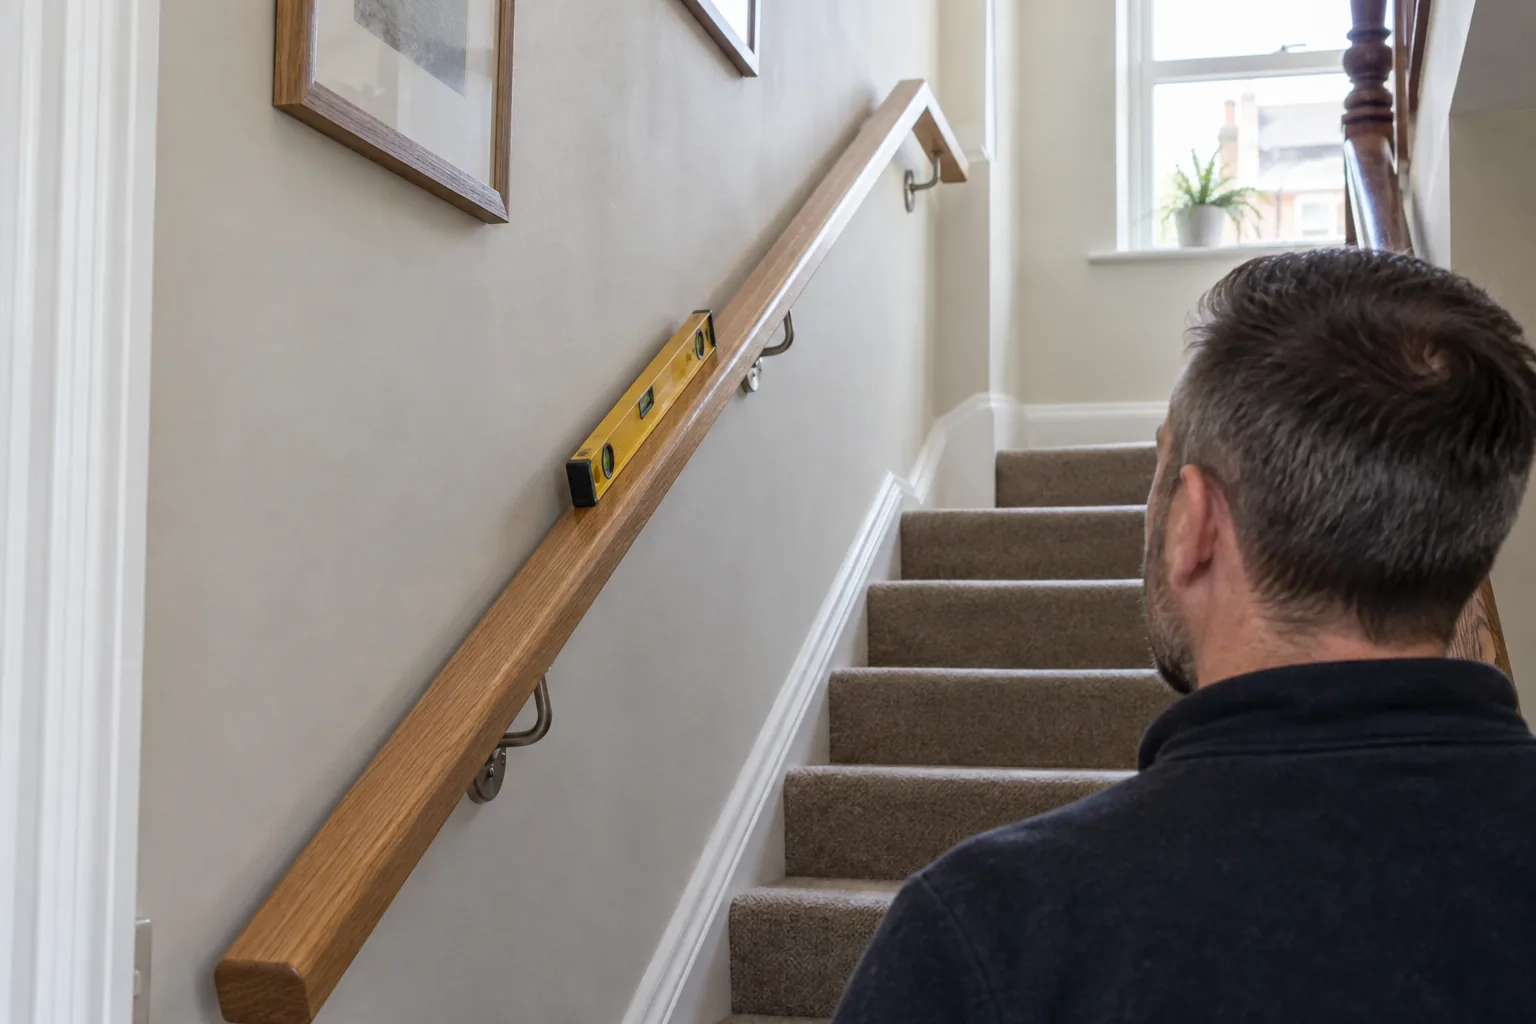
A moving stair handrail is a safety defect, not just an annoying rattle. People put sudden, uneven loads through a rail when they lose balance, and a fixing that feels adequate during a gentle test may pull out when it is genuinely needed. The repair therefore starts with the wall and bracket, not with the nearest larger screw.
This guide covers wall-mounted timber handrails on ordinary domestic stairs. It explains how to distinguish a loose bracket from damaged plaster or an insecure timber rail, how to choose a fixing for the actual wall, and when the safest decision is to reposition the bracket or call a professional.
Identify what is moving
Hold the rail close to each bracket and apply modest pressure in different directions. Watch the joint between rail and bracket, then the joint between bracket and wall. If the rail moves but the wall plate stays still, the small screws into the underside of the timber may be loose. If the whole bracket shifts, the wall fixing has failed. Movement in the wall surface, cracking plaster or a hollow crunching sound points to a wider substrate problem.
Check every bracket. One failed fixing often makes the adjacent brackets carry more load, so tightening only the most obvious loose point can leave the system vulnerable. Also look for a split rail, a bent bracket or a bracket that no longer sits flat.
Do not use the rail while it is insecure
Tell everyone in the property that the rail is out of use and keep the staircase well lit. Older people, children and anyone with limited mobility may need an alternative safe route or support until the repair is complete. Do not remove all brackets simultaneously; a long timber rail is awkward to control on a staircase and can damage walls or cause a fall.
Tools and materials
Screwdrivers that fit the existing screw heads
Stud, cable and pipe detector suitable for the wall
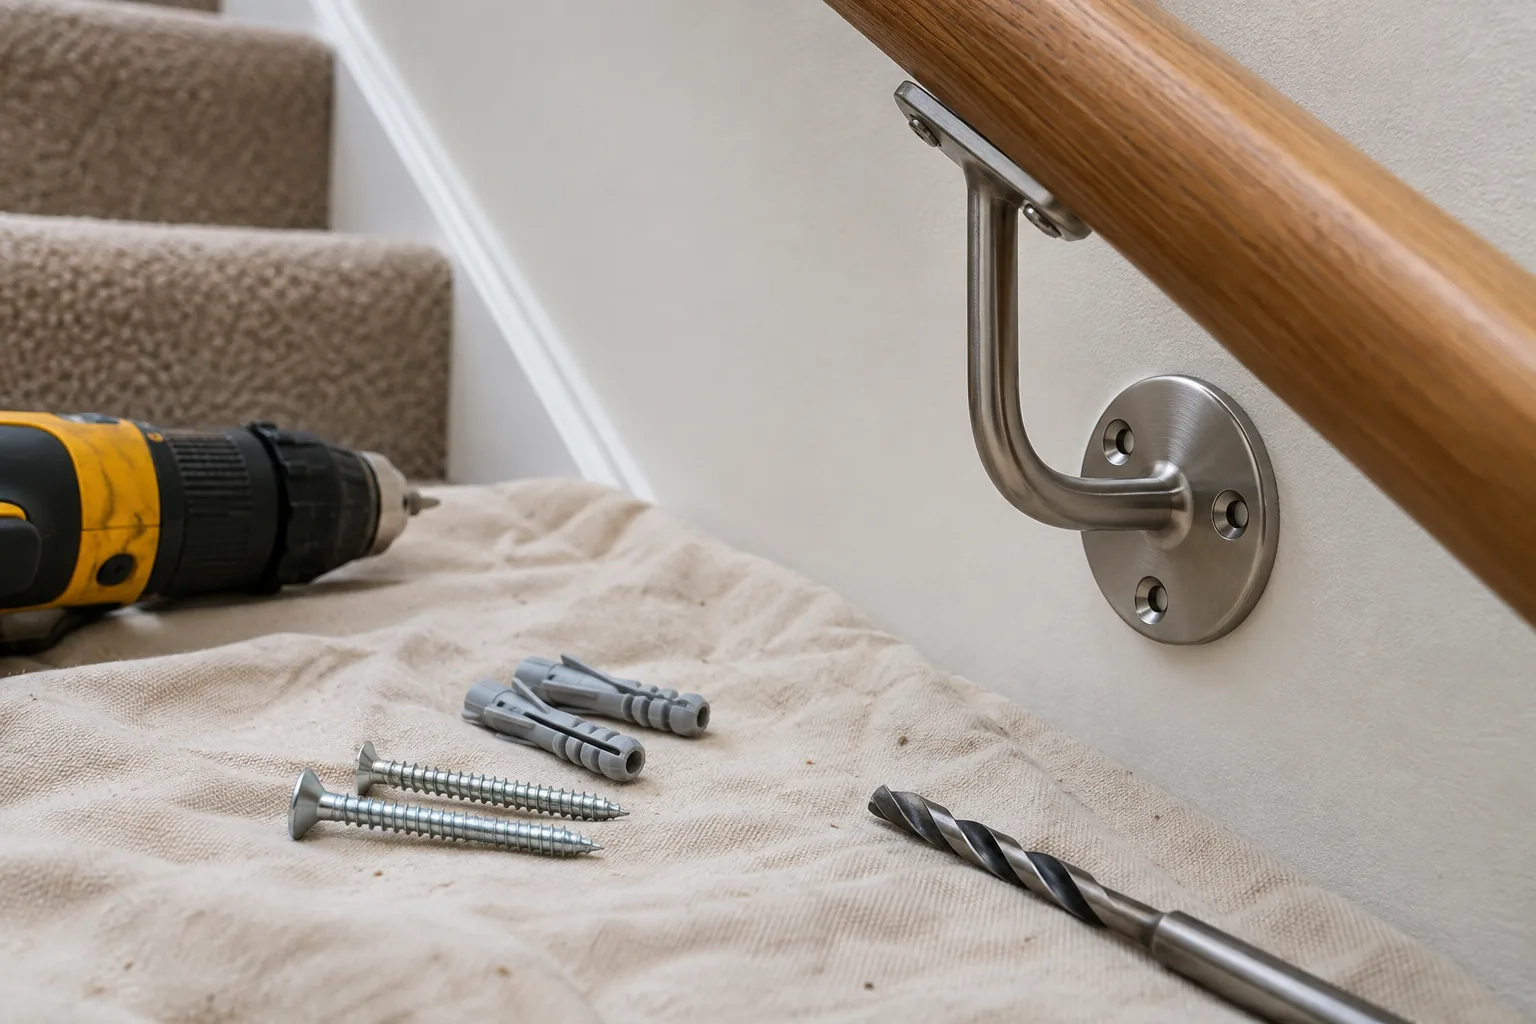
Drill and bits matched to timber, masonry or plasterboard
Correctly rated screws and fixings for the identified substrate
Spirit level, tape measure and pencil
Vacuum, eye protection and dust mask
Wood glue and hardwood repair material if the rail holes are stripped
A handrail fixing is not a good place for an unverified universal plug. Product load claims depend on the wall, installation method, edge distances and direction of force. Follow the fixing manufacturer’s instructions and remember that plasterboard itself is not the same as the timber or masonry behind it.
Step 1: tighten sound screws and inspect the bracket
Support the rail while checking the screws that join the bracket to the timber. Tighten them by hand. If a screw spins, the hole in the rail is stripped; repair it with sound hardwood rather than soft filler. The method is similar to repairing a stripped hinge hole, although screw length must suit the rail thickness.
Inspect the metal bracket for cracks, distortion and enlarged screw holes. Replace a damaged bracket with one of suitable strength and compatible geometry. Decorative light-duty brackets intended for shelving are not substitutes for handrail brackets.
Step 2: establish the wall construction
Common UK stair walls include solid brick or block with plaster, timber stud partitions faced with plasterboard, and dot-and-dab plasterboard over masonry. Each needs a different fixing strategy. A detector can help locate studs, cables and pipes, but it is not infallible. Use construction clues such as wall thickness at nearby openings, socket depth and the sound from gentle tapping.
Do not drill above or below electrical accessories or where concealed services are possible without careful checking. If the wall construction remains uncertain, stop. The cost of a professional fixing is small compared with a pierced cable or pipe.
Step 3: decide whether the existing holes can be reused
Remove one wall screw while supporting the rail. A masonry plug that comes out with the screw, a plasterboard fixing that spins, or crumbling material around the hole shows that the existing fixing cannot simply be retightened. Inspect the hole without enlarging it. Sound masonry may accept a correctly sized new plug after the old material is removed and the hole cleaned.
In plasterboard, a damaged hole often needs the bracket moved so new fixings reach sound material. If possible, position brackets into timber studs or installed pattressing. Heavy-duty cavity anchors may be appropriate in some walls, but their rating and installation space must suit the load. A cavity full of insulation, a very narrow void or damaged board can prevent correct installation.
Step 4: position a replacement or relocated bracket
Keep the handrail at a consistent, comfortable line. Use the existing sound brackets and a spirit level or measured offset from the stair pitch to establish the position. Confirm that the bracket base will sit flat and that all proposed drilling points are clear of services.
Mark holes through the bracket without allowing it to rotate. On masonry, drill straight to the required diameter and depth, then vacuum the dust. On timber, use a pilot hole that prevents splitting but leaves enough material for the thread. On plasterboard, install the selected anchor exactly as specified rather than improvising with extra screws.
Step 5: secure the bracket and reconnect the rail
Tighten wall fixings evenly so the bracket sits flat. Do not crush plasterboard or pull a metal bracket into soft plaster. Reattach the timber rail using screws that cannot break through the upper surface. If the original holes in the rail are damaged, repair and redrill them before applying load.
Once all fixings are secure, remove temporary supports and test progressively. Start with light pressure at each bracket, then apply a firm controlled load along the rail. There should be no clicking, wall movement or change in the bracket position.
Common unsafe shortcuts
Putting a wider screw into a loose wall plug without checking the substrate.
Filling the hole with decorator’s filler and redrilling it.
Adding several small screws through a bracket not designed for them.
Using a basic plastic plug in plasterboard or a hollow section.
Drilling near hidden electrical or plumbing routes without checks.
Testing the finished rail with a sudden uncontrolled body-weight pull.
Leaving one bracket loose because the others appear secure.
When a loose handrail points to a larger problem
Cracking that spreads beyond the bracket, repeated fixing failure, damp or powdery masonry, and movement in the stair structure all require further investigation. A rail that is too short, too low or missing where the stair layout needs support is not solved by tightening one bracket. For a broader assessment, see the site’s home safety and security service.
Long hardwood rails, curved stairs and awkward landings are difficult to support safely while drilling. A carpenter can add secure timber support, repair the rail and position brackets into dependable structure. General bracket replacement and minor making-good can also be grouped into an odd-jobs appointment.
A secure result starts behind the visible bracket
The bracket is only as reliable as the material holding it. Identify the moving joint, protect stair users, confirm the wall construction, abandon damaged holes where necessary and test the repair progressively. A handrail should feel completely uneventful in use: firm, quiet and ready to take an unexpected load.
A hinge screw that turns endlessly is not holding the door. The timber thread inside the frame has been crushed or torn away, so tightening harder only enlarges the hole. Left alone, the hinge begins to move, the door drops and the latch no longer lines up. The repair is usually manageable on an ordinary internal timber frame, provided the surrounding wood is dry and intact.
The aim is to give the screw sound material to bite into while keeping the hinge exactly where it belongs. Filling the hole with soft putty or forcing in an oversized screw may feel secure for a day, but neither is a dependable structural repair. This guide sets out stronger options and explains when the damaged frame needs a carpenter.
Confirm that the screw hole is the real problem
Support the open door with a wedge, then watch the hinge while gently lifting the handle side. Movement between the hinge leaf and frame points to loose frame screws. Movement between the hinge and door points to stripped holes in the door edge instead. A worn hinge pin produces play within the hinge knuckle and will not be cured by repairing screw holes.
Remove one suspect screw and inspect it. A screw coated with soft, dark material may indicate decayed timber. Fresh wood dust and a clean but enlarged hole suggest mechanical wear. Check for cracks running from the hinge recess, damp staining and previous repairs. If the frame is wet, fix the moisture source before closing it up. The leaks service can help where staining is active rather than historic.
Choose a repair that suits the damage
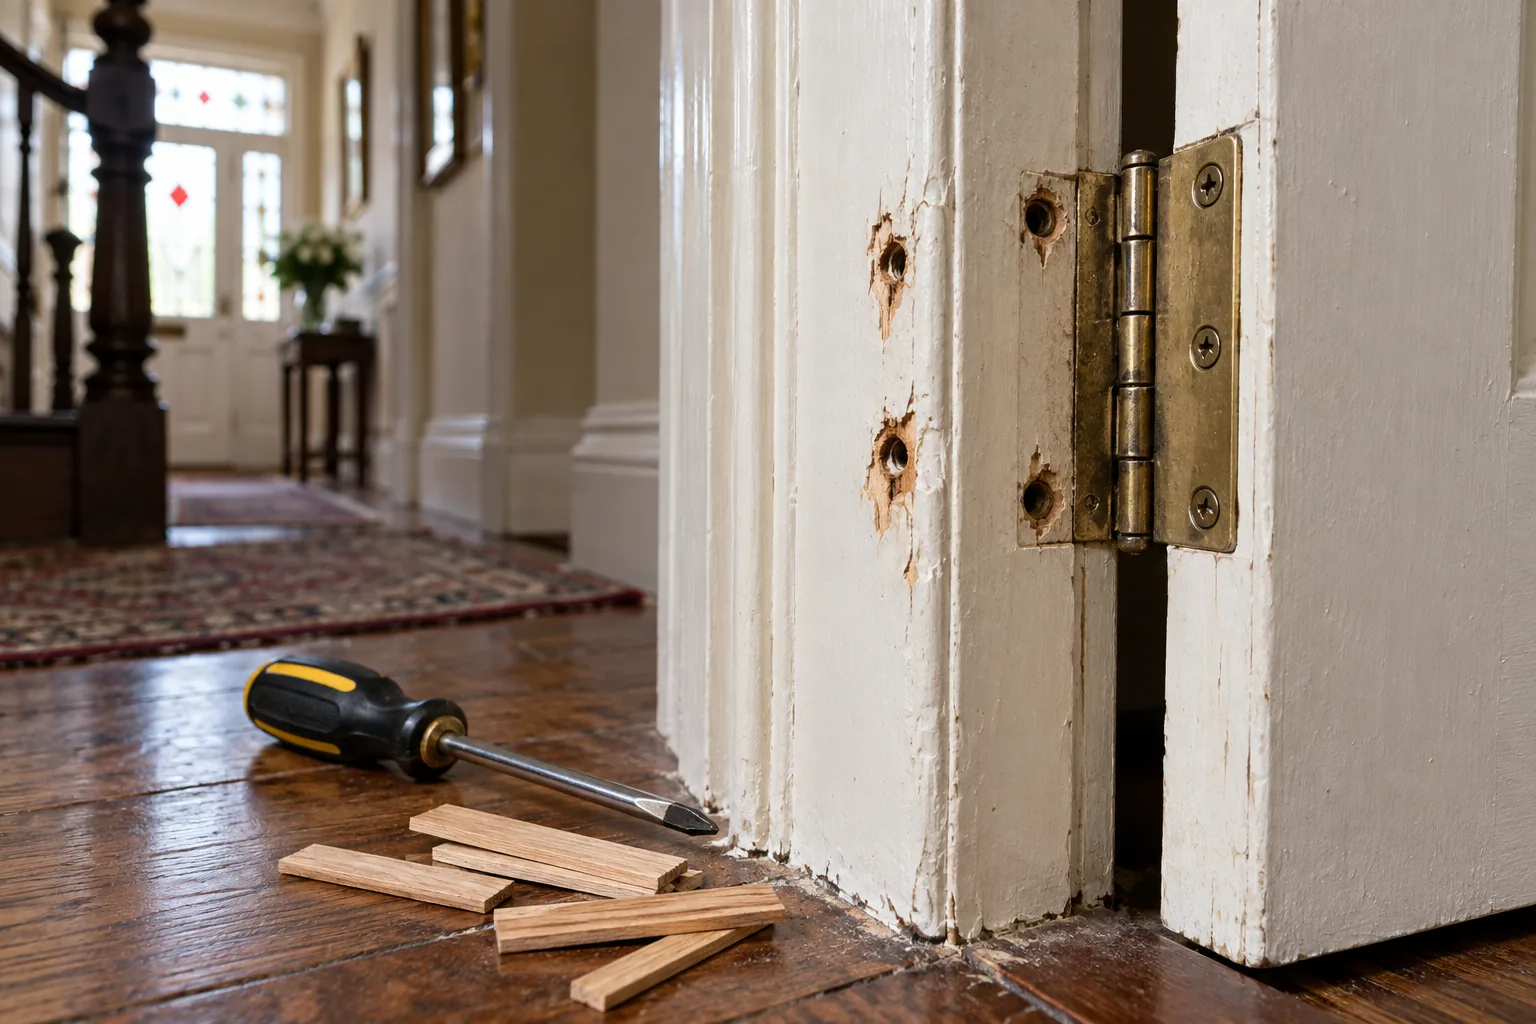
There are three sensible levels of repair. A longer screw can work when the lining hole is worn but substantial framing timber sits behind it. Hardwood slivers bonded into the hole suit local thread damage in solid timber. A drilled hardwood dowel is the strongest neat repair for a badly enlarged hole, but it demands accurate drilling. Split, rotten or repeatedly patched timber needs a more extensive section repair.
What not to use
Matchsticks and cocktail sticks are often suggested because they are convenient. They can work as an emergency packing material in a light internal door, but their soft, irregular timber and waxed surfaces are not ideal. Plastic wall plugs are designed for masonry or sheet materials, not as universal substitutes for damaged timber. General-purpose filler is too brittle and has little screw-holding strength.
Tools and materials
Door wedge or stable support
Correct Pozidriv or Phillips screwdriver
Sharp drill bits and depth tape
Hardwood slivers or a straight-grained hardwood dowel
Quality wood glue
Flush-cut saw or sharp chisel
Replacement countersunk wood screws of suitable gauge and length
Vacuum and eye protection
Do not select a longer screw blindly. Hidden cables and pipes can pass near a frame, and the construction behind a thin lining is not always obvious. Use a length appropriate to the known frame build-up and stop if there is any uncertainty.
Step 1: support the door and remove one hinge leaf
Open the door far enough to reach the screws and place a wedge beneath its outer edge. Mark the hinge outline with a sharp pencil if paint does not already show the position. Remove one hinge from the frame at a time. Keeping the other hinges attached helps preserve alignment and avoids handling the full door.
If paint bridges the hinge edge, score it lightly before lifting the leaf. Pulling through several paint layers can tear the frame finish. Keep the screws in order and note whether different lengths were used. A screw with a damaged head should be replaced even if its thread looks usable.
Step 2: repair a moderately worn hole with hardwood slivers
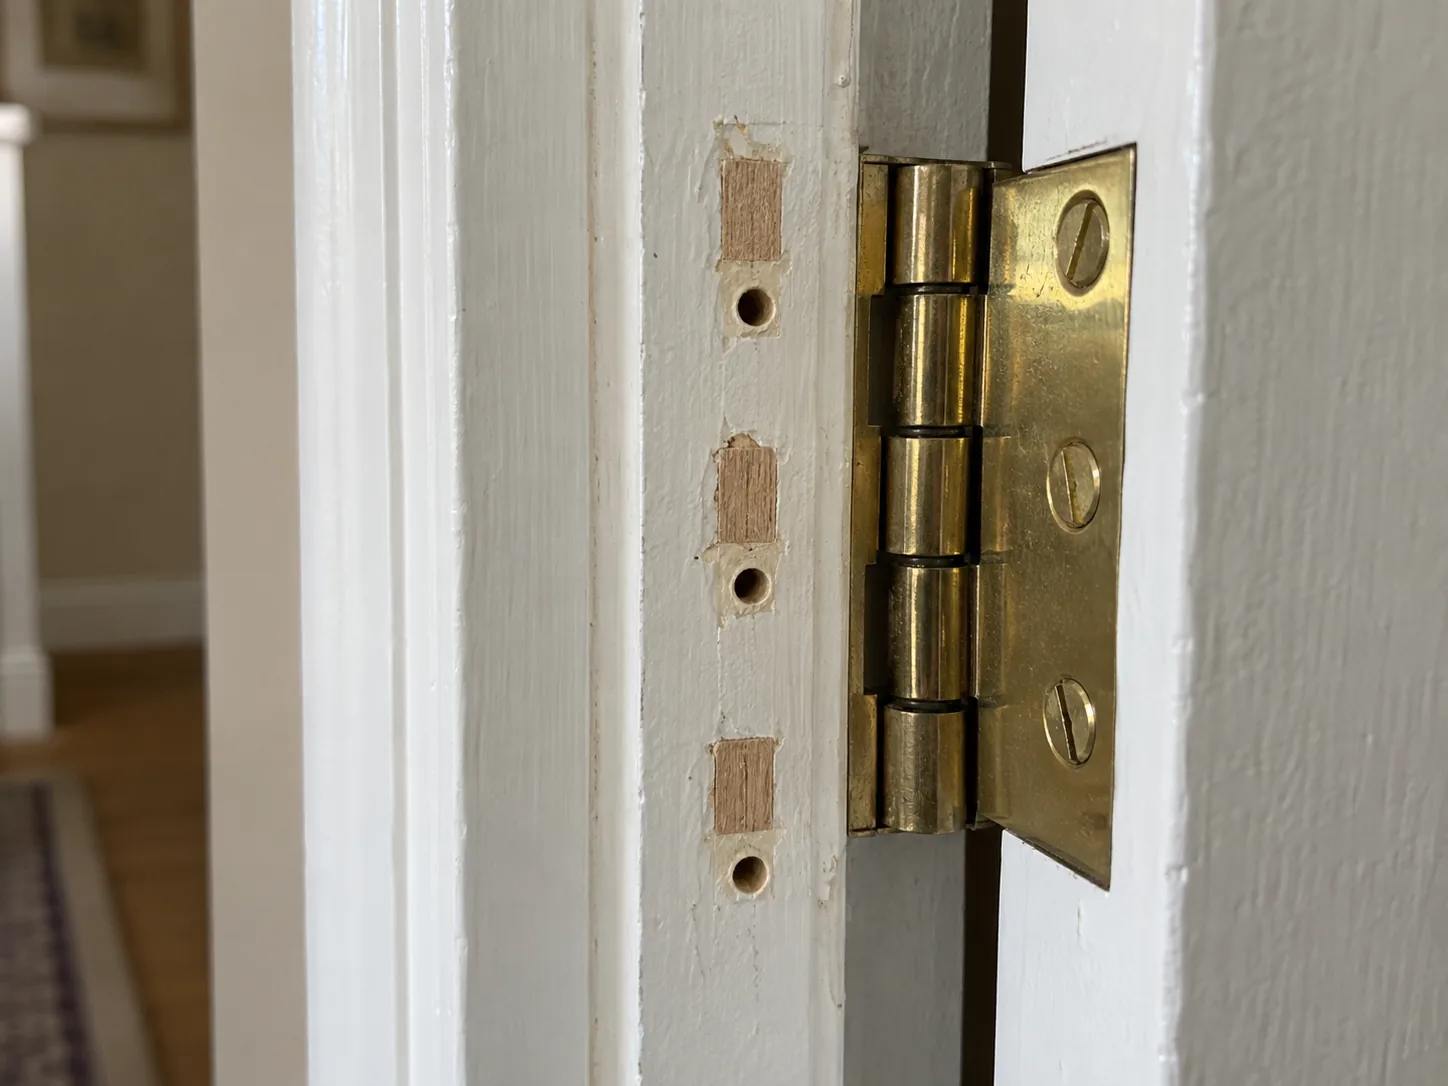
Vacuum loose fibres from the hole. Cut two or three narrow hardwood slivers long enough to reach the bottom without protruding far beyond the surface. Coat them sparingly with wood glue and tap them in so the grain runs along their length. The aim is a dense timber repair, not a plug floating in a pool of glue.
Allow the adhesive to cure fully according to its instructions. Trim the slivers flush using a sharp tool held flat to the frame. Do not refit the screw while the glue is wet: the screw can drag the repair out, and it becomes difficult to centre the new pilot hole.
Step 3: use a dowel for a badly enlarged hole
Where the hole is irregular or has already been patched several times, a dowel creates a known piece of sound timber. Choose a drill size that matches the dowel. Mark the bit with tape so you cannot drill too deep. Keep the drill square to the hinge recess and remove only enough material to form a clean round hole.
Glue in the dowel, keeping its grain orientation suitable for taking a screw, and let it cure. Cut it flush without damaging the recess. This method is less forgiving near the edge of a thin lining: an oversized dowel or poorly centred hole can split the frame. Ask a carpenter to handle it if there is little sound wood around the hole.
Step 4: mark and drill the new pilot hole
Put the hinge leaf back inside its original recess and hold it firmly against the correct edges. Use the centre of the countersunk hinge hole as the guide. A bradawl helps establish the centre before drilling. Select a pilot bit slightly smaller than the screw’s solid core, not its outer thread diameter.
Drill straight and only to the planned depth. A pilot hole that wanders pulls the hinge sideways as the screw tightens. That small shift can change the gap at the far side of the door and recreate the rubbing described in the guide to fixing a door that catches the floor.
Step 5: refit the hinge without overtightening
Fit a countersunk screw whose head sits fully inside the hinge. Tighten it until the leaf is secure and flat, then stop. The screw should not distort the metal or crush the surrounding timber. Fit the remaining repaired screws and remove the support wedge gradually while watching for movement.
Open and close the door several times. Check the top and side gaps, latch operation and whether the hinge remains still. If the door position changed, confirm that the leaf is seated flat in its recess before attempting any further adjustment.
Can a longer screw solve it?
A longer screw is useful when it can pass through a worn lining hole and reach a known structural stud or frame behind it. It is not a cure when the visible frame is split, the screw angle is wrong or the longer screw would enter an unknown void. Match the head to the hinge and avoid a gauge so large that it jams in the metal countersink.
On a heavy door, one suitably positioned longer screw in the top hinge can improve load transfer, but the rest of the hinge and frame must also be sound. This is not a substitute for correct door hanging.
Common mistakes
Repairing every hinge at once and losing the original alignment.
Driving a screw into wet glue before the timber repair has cured.
Skipping the pilot hole and splitting the repaired area.
Using filler, plastic plugs or soft debris where structural timber is needed.
Choosing a screw head that stands proud and prevents the hinge closing.
Using an impact driver and stripping the fresh repair.
Ignoring decay, frame cracks or repeated movement elsewhere.
When to stop and arrange a proper frame repair
Do not rely on a local plug if the timber crumbles under light pressure, a crack extends beyond the hinge recess, or several hinges have pulled away. Heavy glazed doors, external security doors and fire doors deserve professional attention. Their weight, closing action and clearances have safety implications beyond a loose internal cupboard-style hinge.
A door repair visit can combine hinge repair with frame alignment and latch adjustment. That is usually more economical than repeating temporary fixes that remove more timber each time.
The test of the repair is movement, not appearance
A neat surface is useful, but the important result is a hinge that remains still under the door’s weight. Support the door, rebuild the damaged hole with sound hardwood, drill a centred pilot and tighten with restraint. If the surrounding frame cannot carry the load, treat that as the real problem rather than hiding it beneath a larger screw.
Uneven cupboard doors can make an otherwise sound kitchen look tired. One door may sit higher than the next, the gap may taper from top to bottom, or two handles may no longer meet at the same level. Modern concealed hinges are designed to correct these small errors, but turning every screw at random usually trades one problem for another.
The reliable approach is to identify the direction of the error, make one small adjustment at a time, and keep checking the relationship between neighbouring doors. This guide covers common European-style concealed hinges fitted to many UK kitchens. Surface-mounted hinges, damaged cabinets and doors that have swollen need a different repair.
Work out whether the door or cabinet is at fault
Stand back and look at the full run of units. If several doors slope in the same direction, check the cabinet and floor with a spirit level; the units may have settled or the worktop may not be level. If only one door is wrong, the hinge or its fixing is more likely to be responsible. Open the door and lift gently at the handle. Noticeable movement at the hinge plate means the screws or cabinet material are loose.
Also check that nothing inside the cabinet is pushing against the door. A bin, pan handle or overfilled shelf can prevent complete closure and imitate a depth-adjustment problem. Clean grease from the hinge and confirm that both hinge arms are fully clipped onto their mounting plates.
Tools and preparation
A well-fitting Pozidriv screwdriver, usually PZ2
Small spirit level or straightedge
Masking tape and pencil
Two-millimetre card spacers for checking consistent gaps
A tray for screws and hinge caps
Wood glue and suitable repair plugs only if a fixing hole is stripped
Empty fragile items from the cupboard and support a large door while working. Do not use a high-speed drill for adjustment screws. Concealed hinge mechanisms are small, and excessive torque can strip the screw or damage the cam.
Learn what the three adjustments do
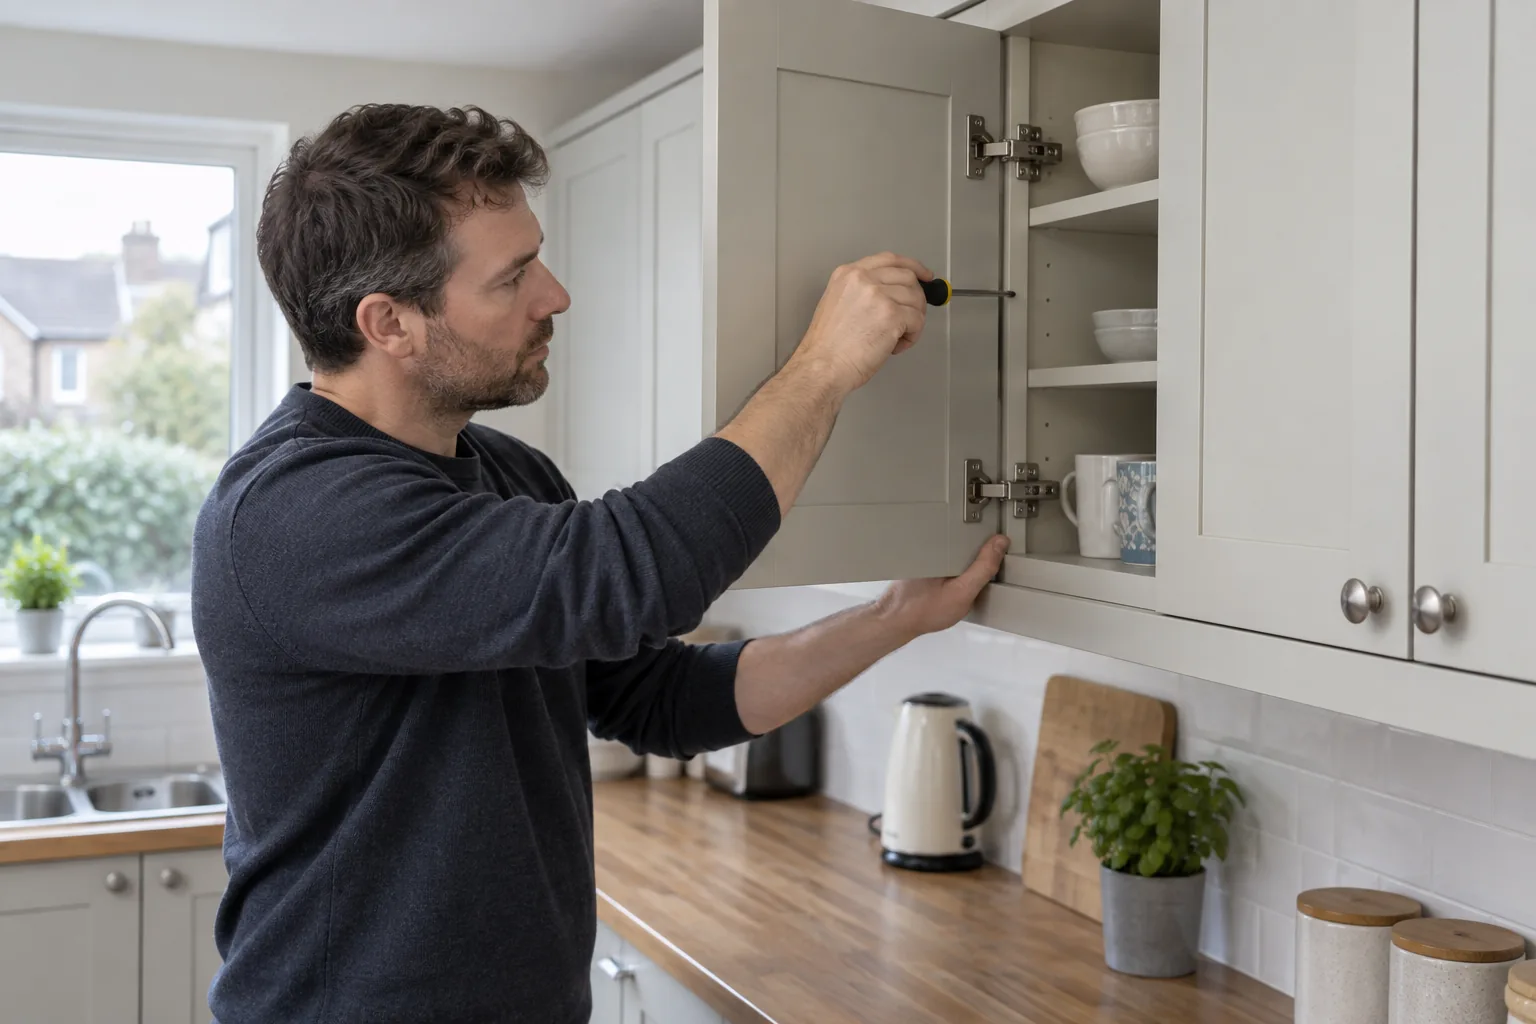
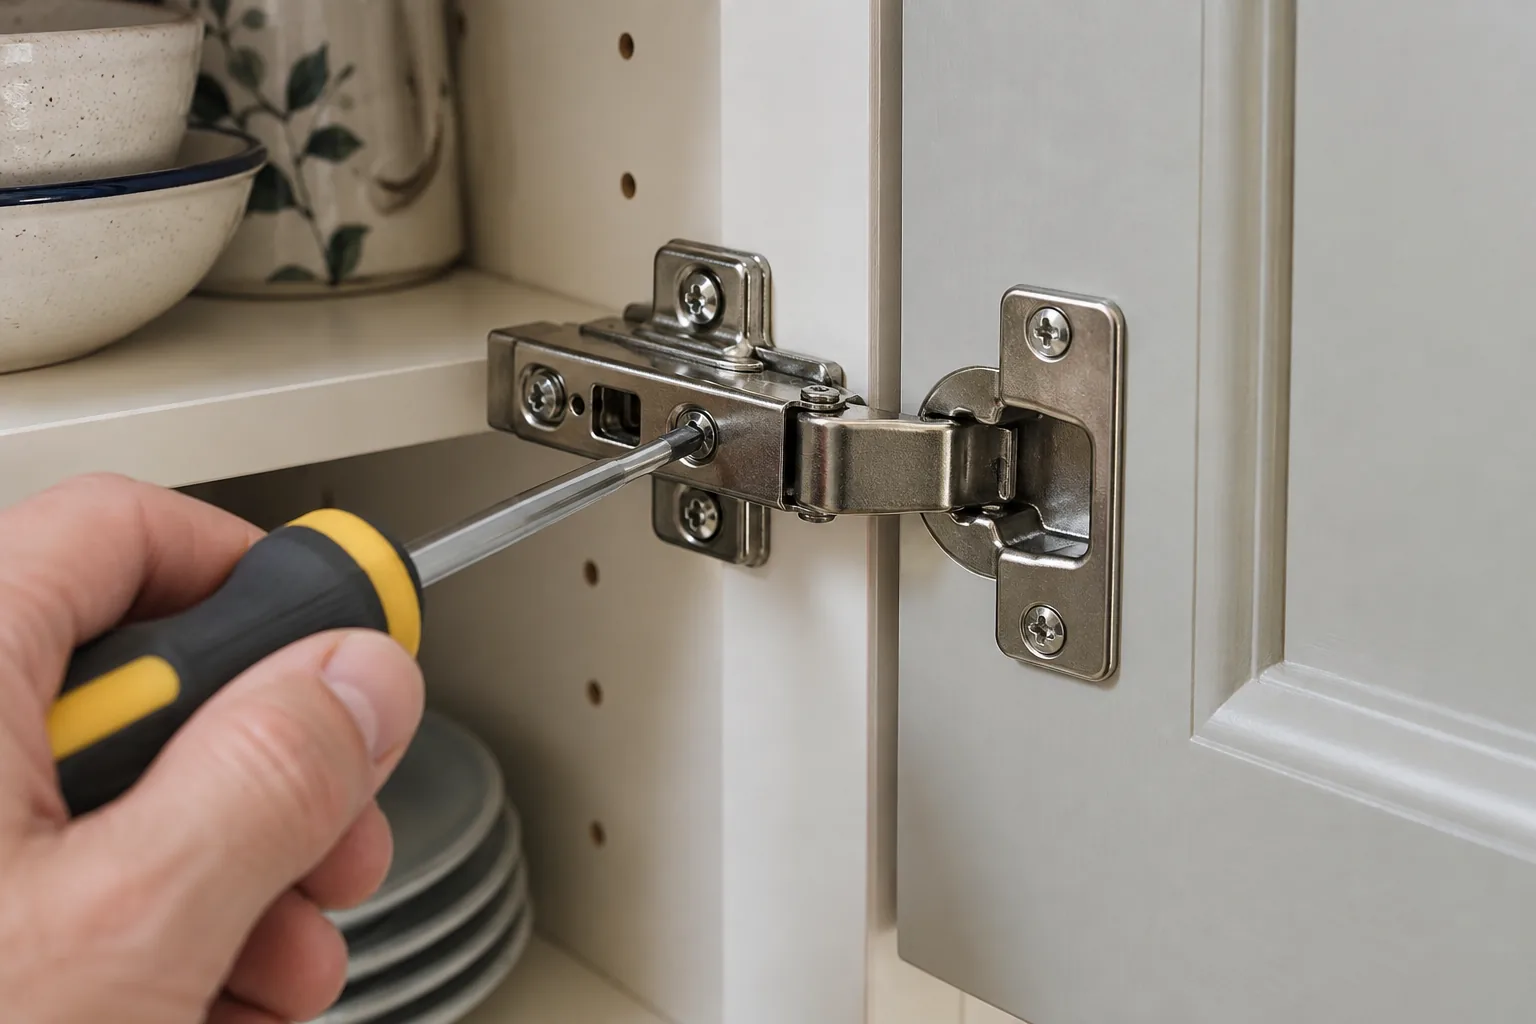
Although hinge designs vary, most concealed hinges provide three directions of movement. The screw nearest the front of the cabinet commonly moves the door sideways. A second screw along the hinge arm alters how far the door sits from the cabinet. Height is often controlled by loosening screws in the mounting plate and sliding the door up or down. Some newer plates have a separate height-adjustment cam.
Do not assume the layout from appearance alone. Turn an adjustment screw only an eighth or quarter turn, close the door and observe the result. If nothing moves and the screw starts to come out, return it to its original position; it may be a fixing screw rather than an adjuster.
Step 1: tighten loose mounting screws first
Before changing alignment, tighten the screws holding the hinge cup to the door and the plate to the cabinet. They should be secure but not forced. Chipboard cabinets are easy to strip. If a plate shifts when the screw is tightened, the hole needs repair. Repeatedly fitting a larger screw can split the board or leave too little material for a lasting fixing.
For minor damage, a purpose-made chipboard hinge repair plate can spread the load over fresh material. It must be fitted squarely or the adjustment range will be lost. A badly broken cabinet side or torn-out hinge cup is better assessed through a furniture repair service.
Step 2: correct the height
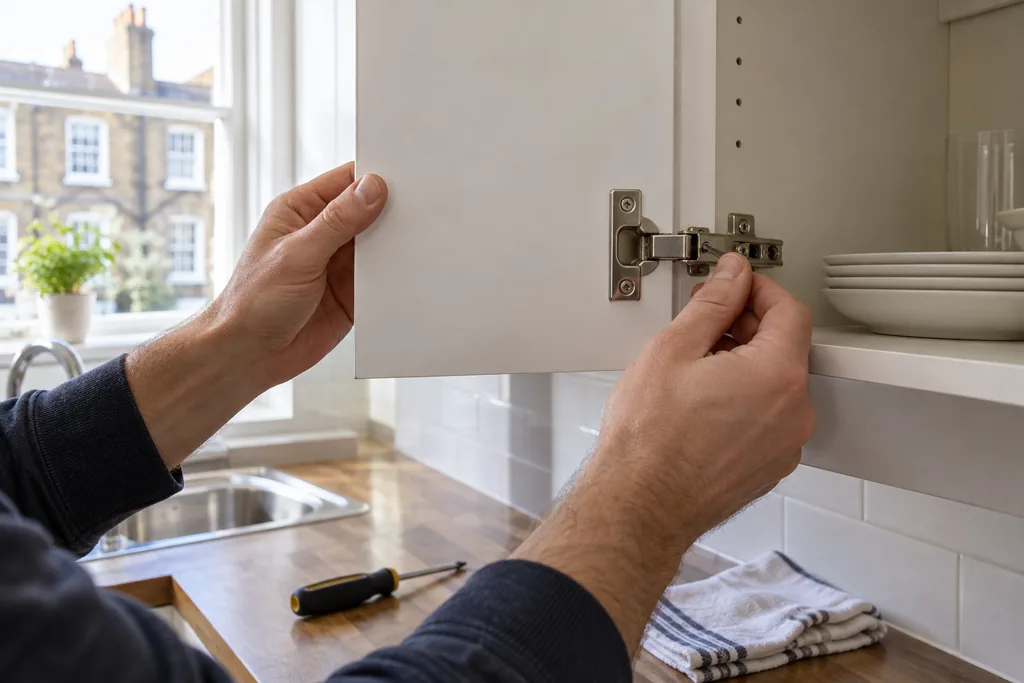
Use masking tape to mark the desired top edge, referring to the adjacent door rather than the worktop alone. Support the door from below. Loosen—do not remove—the mounting-plate screws on both hinges just enough for the plate or hinge arm to move vertically. Slide the door a small amount, retighten the top screw lightly, then the lower one, and check the position.
On tall doors with three hinges, loosen all three plates evenly and keep the door supported. If one plate remains fixed while the others move, the hinge arms can be placed under strain. Once the height is correct, tighten all fixings by hand and check that the door still opens freely.
Step 3: make the side gaps parallel
A tapered gap usually needs side-to-side adjustment. Work with the top and bottom hinges as a pair. Moving the top edge one way and the bottom edge the opposite way rotates the door slightly. Make very small turns and close the door after each pair of changes. A card spacer held between adjacent doors makes changes easier to see.
Do not aim for a gap so tight that doors touch. Painted and foil-wrapped fronts need clearance to open without chipping. Check the handle side, the hinge side and the line between double doors. If the adjuster reaches the end of its travel before the gap is straight, recheck cabinet level and mounting-plate position.
Step 4: set the closing depth
When one corner projects beyond the cabinet, use the depth adjustment to move that part of the door in or out. Adjust both hinges if the whole door sits proud. Adjust one hinge only when correcting a twist, and avoid using the hinge to force a warped door flat. A bowed timber or MDF front will continue to load the hinge and may need replacement.
Leave enough space between the door and cabinet for the hinge to move. If the door is pulled too far inward, it may catch the carcase before reaching the closed position. Check bump stops as well: a missing rubber buffer can make one corner appear recessed.
Step 5: test soft-close action and nearby doors
Open the door fully and close it several times. The soft-close mechanism should engage without a knock or hesitation. Some hinges have an on/off switch or separate damper; make sure it was not moved accidentally. Then open neighbouring doors together to confirm the handles and edges do not collide.
If several doors need adjustment after new flooring or building work, the base units may have shifted. Correcting each hinge can disguise a cabinet-level problem while reducing future adjustment range. A kitchen refurbishment professional can check the unit run, wall fixings and worktop support.
Common mistakes
Turning several screws before testing: you lose track of which movement caused the change.
Using an electric driver at full torque: hinge cams and chipboard threads are easily damaged.
Aligning one door in isolation: kitchen fronts must be judged as a complete run.
Forcing a warped door flat: hinge adjustment cannot remove a permanent bow.
Ignoring loose plates: alignment will drift again within days.
Removing mounting screws completely: a heavy door can fall and tear the remaining hinge out.
When adjustment is not enough
DIY adjustment is reasonable when the hinges and cabinet material are sound and the door needs only a few millimetres of movement. Ask for help when a hinge cup has broken out of the door, the cabinet side is crumbling, a tall or glazed door is difficult to support, or the units themselves are no longer level. If the problem began after a door was replaced, the drilling pattern or hinge specification may be incompatible.
Multiple loose fronts, sticking drawers and damaged edge banding can be dealt with together during a handyman visit. For a sticking drawer rather than a door, use the dedicated guide to repairing drawer runners.
Finish with balanced gaps, not perfect measurements
Real kitchens are not laboratory-level, especially in older properties. The goal is an even visual line, reliable closure and hinges that are not under strain. Tighten loose fixings first, correct height, straighten the side gap, set depth last, and test the whole bank of units. That order preserves the available adjustment and makes future fine-tuning straightforward.
An empty rental property gives you a brief advantage: you can see every room clearly and arrange repairs without working around a tenant's belongings. That window can disappear quickly once cleaning, viewings and the next move-in date are booked. The useful question is not “What can we make look new?” but “What must work properly, what could worsen, and what can be done in the time available?”
This checklist is for planning a practical repair visit after the outgoing tenant has left. It covers the small defects a landlord or managing agent can spot on a careful walk-through, how to decide what needs specialist attention, and the order in which to book the work. It is not a substitute for any statutory checks or for your tenancy and inventory records.
Make one walk-through before booking individual jobs
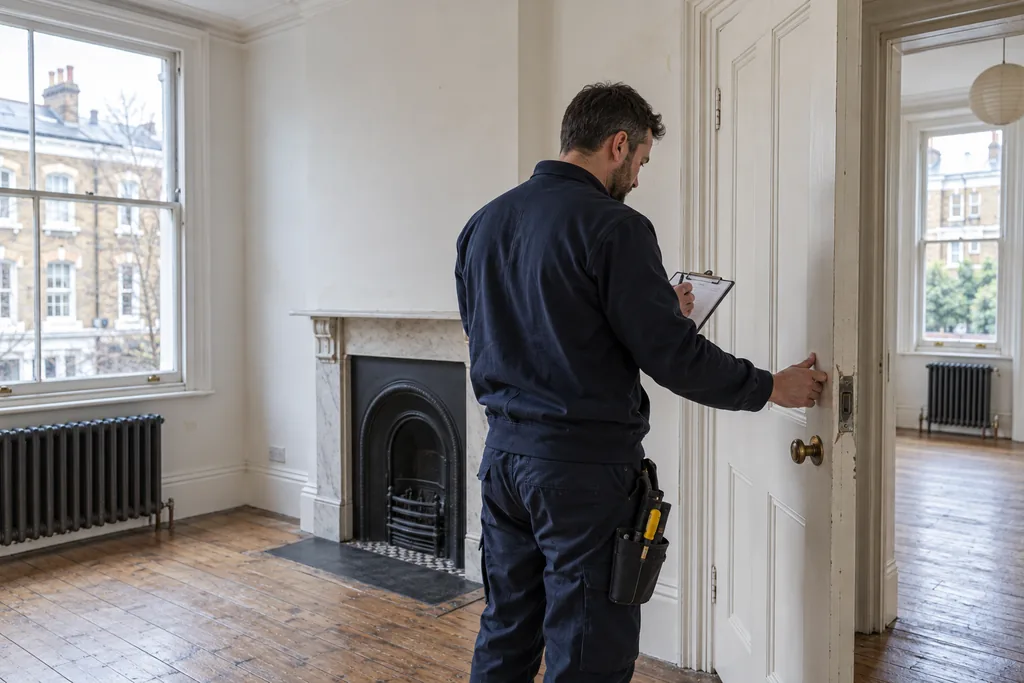
Start at the entrance and move through the property in a fixed order. Take a dated photograph of each defect, then a wider photograph showing which room it is in. A close-up of a damaged hinge is less useful later if nobody can tell which cupboard it belongs to. Note the approximate size, the material, and whether the fitting can still be used.
Open and close doors, windows and cupboard fronts rather than relying on appearance. Run taps briefly, check under sinks for fresh moisture, test that drawers slide freely, and look along the edges of flooring for raised or loose sections. If a room smells damp, find the cause before putting fresh paint over the mark. The guide to signs of a hidden leak explains what to look for when staining is less obvious than a dripping tap.
Group the findings by room in one job list. For example: “Kitchen: upper left cupboard hinge loose; sealant split behind sink; two scuffs on wall by bin.” This makes it easier to quote, bring the right materials and finish several small tasks in one visit. Bob's guide to preparing for a handyman appointment is useful once the list is ready.
Sort the list by consequence, not by visibility
An obvious paint scuff may be the first thing you see, but it is rarely the first thing to fix. Put each item into one of three groups:
Stop and investigate: active leaks, unsafe electrical fittings, a door that will not secure, unstable handrails, or signs of significant damp. Keep the affected area out of use and arrange the appropriate qualified trade where needed.
Repair before occupation: fittings that are loose or unreliable, doors that catch, failed sealant, damaged flooring edges and appliances or fixtures supplied with the property that do not work as expected.
Cosmetic and presentation: small filling jobs, local paint touch-ups and marks that cleaning will not remove.
This order keeps a quick decorating job from hiding a defect that still needs attention. It also prevents paying for two finishes on the same surface. A stained wall beneath a leak, for instance, needs the source of the water repaired and the area dried before filling and painting. If you are unsure whether a mark is old or active, investigate rather than promising the next tenant that it has been solved.
Check the parts tenants use every day
Doors, windows and security
Check every internal door for rubbing, stiff latches and loose handles. The entrance door should close and lock without being lifted or slammed. Window handles, restrictors and catches should work smoothly; do not force a jammed mechanism. A door that catches at the floor may need a simple hinge adjustment, but a changed gap around the frame can point to movement or swelling. The door-rubbing guide shows the distinction. Where the fit or hardware needs professional attention, include it in a door repair booking.
Kitchen and bathroom fittings
Pull each cupboard door gently and look for hinges that shift in their screw holes. Check drawer runners, handles and shelves; a tenant should not discover a falling shelf on moving day. Around sinks, baths and showers, look for split sealant, soft timber, loose taps and moisture in adjacent cupboards. Wipe under the waste pipe and check again after running water. A leak that only shows while the sink drains can otherwise go unnoticed during a quick visual inspection.
Record whether a repair is isolated or part of a wider failure. One loose hinge belongs on a small odd-jobs visit. A swollen cabinet base with repeated damp marks calls for investigation of the water source before any carpentry work. Do not paint or seal over damp material to meet a deadline.
Walls, floors and fixed furniture
Walk the floor slowly, especially at thresholds and around appliances. Note sharp or lifting trim, cracked tiles and boards that move underfoot. Check skirting near bathrooms and radiators for swelling; the guide to water-damaged skirting boards can help separate a localised repair from a moisture problem that needs tracing. Check fixed wardrobes, curtain rails, mirrors and bathroom accessories for movement. Empty rooms make screw holes and dents in walls conspicuous, but a localised repair may be enough. Photograph the finish and keep any paint information from previous work; a touch-up in the wrong shade or sheen can look more obvious than the original mark. For a room that genuinely needs a new finish, wall painting is best planned after drilling, filling and damp repairs.
Sequence the work around cleaning and the inventory
Book inspection and defect decisions first. Then arrange any specialist checks or leak repairs, followed by carpentry, fitting and surface repairs. Painting comes after dusty work and after prepared areas are dry. A final clean belongs near the end, with enough time afterwards for an inspection and photographs. If a trade must return, tell the cleaner and inventory clerk so fresh work is not mistaken for new damage.
Access matters in London flats. Confirm keys or codes, parking and loading restrictions, lift rules and any limits on noisy work. If the property is in a managed block, check the building's requirements before booking work in communal areas or altering shared fittings. Ask the person quoting to identify any materials that must be ordered; a missing hinge or matching threshold strip can determine whether a one-day visit is realistic.
Leave some time between the last repair and the new tenant's arrival. Sealant and paint need the curing or drying time stated by their manufacturers, and a newly repaired door should be opened and closed more than once. A “finished” room that cannot be used yet is not ready for handover.
Record what was fixed, then do a final use test
Keep the original photographs, the agreed job list and a short completion record. A simple note such as “bathroom basin waste repaired; checked after running tap” is more useful than “bathroom done”. Photograph the finished area from the same angle as the defect where possible. This helps the landlord, agent and incoming tenant share an accurate starting point; it is not a judgement about who caused earlier damage.
Before handing over keys, repeat a short practical test: doors close, locks operate, taps and drains behave normally, cupboard fronts are secure, and no tool or packaging has been left behind. Look at repairs in daylight and with the room lights on. Paint can reveal a patch only after it has dried, while a small drip may take several minutes to show beneath a sink.
There is no need to turn every changeover into a full refurbishment. A careful survey, a prioritised list and sensible sequencing usually reveal which jobs genuinely need doing now. If your London rental has several small repairs across different rooms, send Bob's Handyman Services one clear list and photographs when you enquire about an odd-jobs visit. That gives the team a practical starting point for scoping the work before the next tenant moves in.
A door that drags across the floor rarely needs to be planed immediately. In many homes, the real cause is a loose hinge, a frame that has moved slightly, a new floor covering, or moisture making the timber swell. Removing wood before finding the cause can leave an oversized gap once the door settles or the season changes.
This guide explains how to locate the exact contact point, make the low-risk adjustments first, and decide when trimming the door is justified. It applies to ordinary internal timber doors over carpet, laminate and wooden flooring. Fire doors, external doors and doors with damaged frames need more caution because their clearances and security matter.
Start by finding where the door touches
Open and close the door slowly while watching the bottom edge. A rubbing mark on carpet may be obvious, but contact on a hard floor can be subtle. Look for a polished line, scuff, small pile of wood dust or a change in the sound as the door moves. Slide a sheet of paper beneath the closed door and move it along the gap. Where the paper will not pass, you have found the tight area.
Mark the contact point lightly with a pencil or a piece of low-tack masking tape. Then check whether the problem happens throughout the swing or only near the closed position. Contact close to the hinge side often indicates a loose or distorted lower hinge. Contact at the leading corner commonly points to the door dropping on its hinges. Rubbing across most of the width may follow a thicker carpet, raised threshold or general swelling.
Tools and materials you may need
Pozidriv or Phillips screwdriver that fits the hinge screws properly
Spirit level and pencil
Masking tape and a sheet of paper
Timber wedges or folded card to support the door
Longer screws of the correct gauge for loose hinges
Wood glue and hardwood slivers for damaged screw holes
Block plane or powered planer only if adjustment cannot create enough clearance
Sandpaper, primer and paint or varnish for a newly cut edge
A cordless drill can help with replacement screws, but use a low torque setting. Driving a screw too hard can strip the frame or pull the hinge leaf out of alignment.
Step 1: check every hinge screw
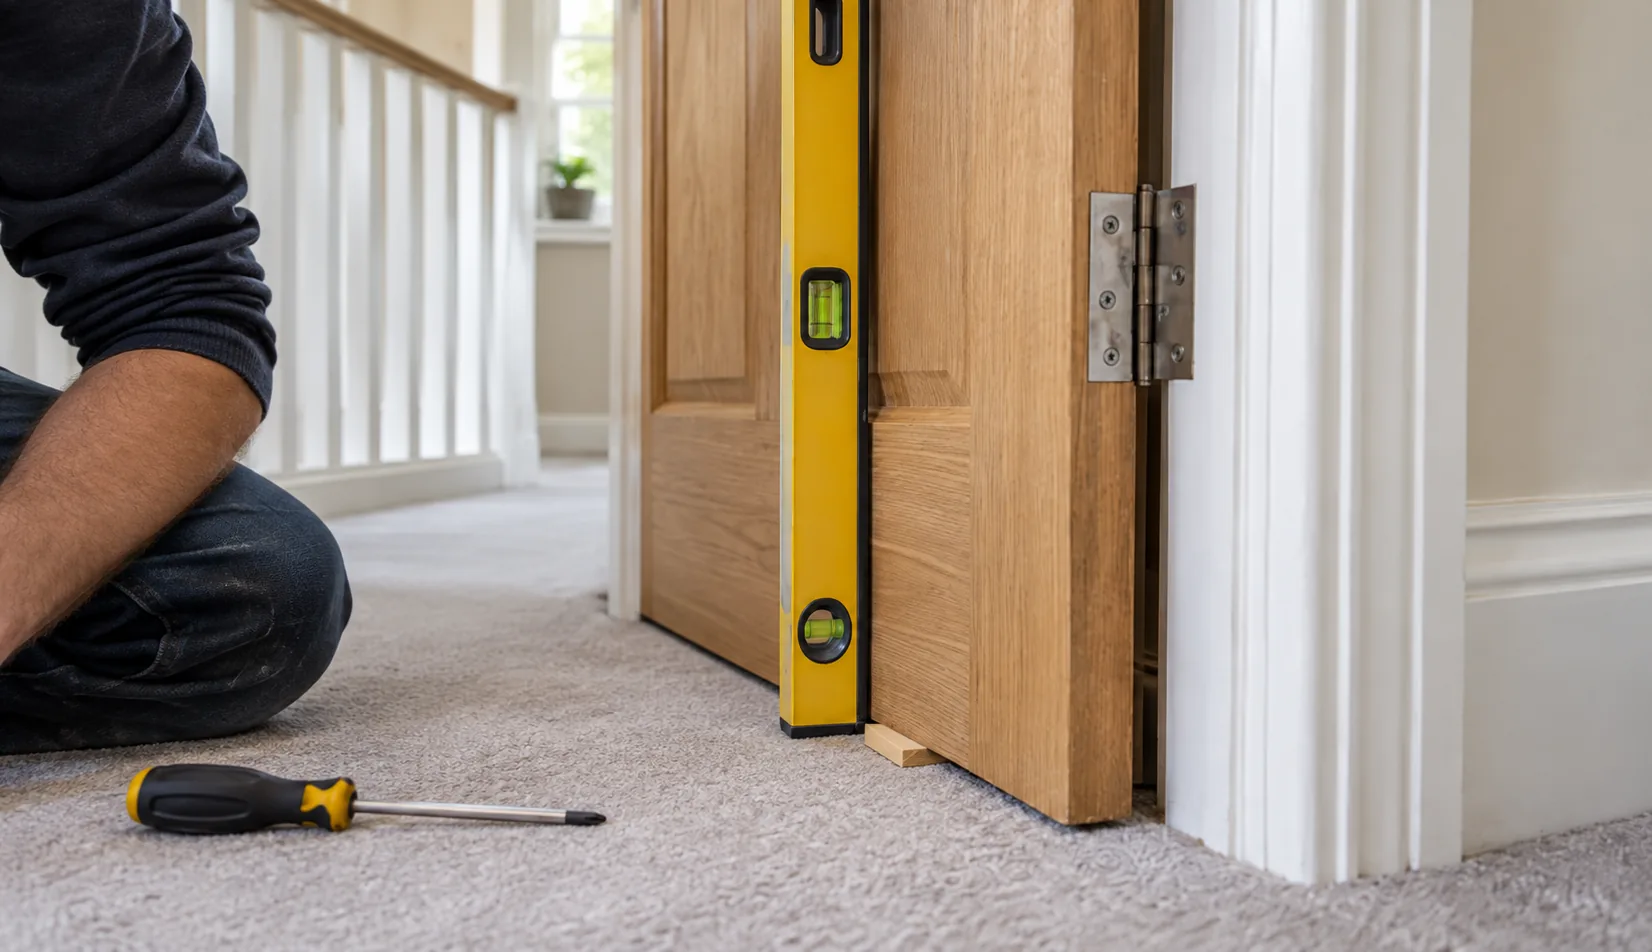
Support the outer edge of the open door with a wedge so its weight is not hanging from loose screws. Tighten the screws in the door leaf and frame leaf of each hinge. Use a manual screwdriver for the final turn so you can feel when the screw is secure. If a screw turns without tightening, the hole has stripped and simply fitting the same screw again will not solve it.
For a slightly worn frame hole, a longer screw of the same head type and suitable gauge may reach sound timber behind the lining. It must sit flush in the countersunk hinge hole; a proud screw head can stop the hinge closing. If the timber is badly damaged, repair the hole with glued hardwood slivers, allow the glue to cure, trim them flush and drill a small pilot hole before refitting the screw. Extensive splitting around the hinge is a job for a carpenter rather than another oversized screw.
Step 2: check whether the door has dropped
Close the door and compare the gap above it. A gap that is narrow above the latch side and wider above the hinge side is a classic sign of a dropped door. You may also see the latch sitting below its keep. Place a spirit level against the vertical edge, but remember that an older frame itself may not be perfectly plumb; the evenness of the surrounding gaps is often more useful than the bubble alone.
After tightening the top hinge, test the door again. If the frame fixing is sound but the door still drops, the hinges may be worn or bent. Replacing them like for like can restore the position without cutting the door. Match the hinge size, thickness, screw pattern and load rating. Changing to a thicker hinge alters the gap and can create a new bind on the opposite side. A door repair specialist can identify whether the hinge, frame or door edge needs correction.
Step 3: rule out flooring and moisture changes
If the door moved freely before a new carpet or underlay was fitted, measure the clearance at several points. Do not compress thick carpet with the door indefinitely; it can damage the pile, loosen the hinges and make the door difficult to use. A loose threshold strip can also lift into the door path. Secure the strip correctly before altering the door, following the separate guide on fixing a loose doorway threshold.
Solid timber can swell after decorating work, a plumbing leak or a period of high indoor humidity. Look for fresh paint bridging the gap, damp staining, softened frame timber or condensation nearby. Deal with the moisture source first. If the rubbing reduces as the timber dries, permanent trimming may be unnecessary. Persistent water marks warrant a check for leaks or local water damage.
Step 4: adjust the hinge position only when necessary
A small alignment error can sometimes be corrected by resetting a hinge leaf squarely in its recess. Remove one hinge at a time while the door is fully supported. The leaf should sit flat and flush, not on paint ridges or crushed filler. Carefully remove only loose paint or debris. Do not deepen the recess casually: even a millimetre changes the position at the opposite edge.
Packing behind a hinge with random cardboard is a common short-term fix, but compressible material moves and absorbs moisture. Where a thin pack is genuinely needed, use stable hinge packing material cut to the full leaf shape. If several hinges need different packs, the frame may be distorted and professional adjustment is more predictable.
Step 5: trim the door only after the adjustments fail
Remove the minimum material needed for a free swing and an appropriate gap. Mark a straight line from the confirmed high spot rather than taking the same amount from the full width without checking. Take the door off and place it on stable trestles. Before planing, score a painted edge with a sharp knife to reduce chipping and check the grain direction. Work from each outer corner towards the centre so the end grain does not break away.
Test-fit the door before removing more. A carpeted room may need a little more working clearance than a hard floor, but an excessive gap looks poor and can affect privacy, sound and airflow. Prime and finish any bare timber, including the bottom edge. Leaving it unsealed makes moisture movement more likely.
Common mistakes that make the problem worse
Planing first: this hides a loose hinge instead of repairing it.
Using the wrong screwdriver: a damaged screw head becomes much harder to remove.
Fitting oversized screws everywhere: this can split the frame or prevent the hinge closing.
Ignoring a raised threshold: cutting the door does not secure loose flooring hardware.
Removing too much timber: seasonal swelling may disappear, leaving a permanent gap.
Failing to seal the cut edge: bare end grain absorbs moisture quickly.
When not to treat it as a DIY adjustment
Stop if the frame is cracked, the hinge screws have pulled out with chunks of timber, or the door is unusually heavy. Do not plane a labelled fire door or change its gaps without competent advice; fire-door clearances, seals and self-closing performance are safety features. An external door that rubs alongside lock or frame movement may have a security or structural issue. Doors containing glass also need careful support and handling.
For an ordinary internal door, tightening a loose hinge is a reasonable homeowner task. Hinge recess repairs, significant trimming and distorted frames are better included in an odd-jobs visit, particularly when several doors show the same problem.
A good repair preserves the door, not just the floor
The useful order is simple: locate the contact, support the door, secure the hinges, check the surrounding gap, investigate flooring or moisture, and trim only as a final measured step. That sequence fixes the cause in most cases and avoids sacrificing sound timber for a problem that began with one loose screw.
A loose or spinning handle is usually caused by a worn or snapped spindle, not the handle itself.
Measure door thickness before buying a replacement spindle, and measure both sides of the door before buying a euro cylinder.
Take the old lock or cylinder with you when shopping for a replacement to avoid sizing mistakes.
British Standard front door locks tied to insurance cover are best fitted by a professional.
Signs of attempted forced entry warrant a professional inspection of both the lock and door frame.
"*" indicates required fields
A broken door handle or lock is one of those problems that seems minor until you’re standing in the hallway unable to get into your own bedroom, or worse, unable to lock your front door at night. Whether it’s a wobbly handle that’s finally given up, a snapped spindle, or a lock mechanism that’s stopped turning, the good news is that most of these repairs are entirely manageable with the right tools and a bit of patience. This guide walks through how to diagnose the problem, replace a broken door handle, and swap out a faulty lock mechanism, along with guidance on when it’s worth calling in a professional instead.
Common Door Handle and Lock Problems
Door handles and locks tend to fail in fairly predictable ways, and knowing which problem you’re dealing with makes the repair much easier to plan.
A loose or drooping handle is usually caused by a worn or snapped spindle, the metal bar that connects the two handles through the door and operates the latch. Over time, especially on internal doors that get used dozens of times a day, this spindle can wear down or twist out of shape. A handle that spins freely without engaging the latch is almost always a sign the spindle has sheared.
A stiff or sticking lock often points to a build-up of dirt and old lubricant inside the mechanism, or a misaligned latch that’s no longer lining up with the strike plate on the door frame. This is common after a door has been repainted, since paint can build up around the edges and shift the fit slightly.
A key that turns but doesn’t lock or unlock the door usually means the lock cylinder itself has worn internally, or the mounting screws holding the lock body in place have loosened, causing the whole mechanism to sit at a slight angle.
A door that won’t latch shut at all is typically a latch or strike plate issue rather than a full lock failure, and it’s often the easiest of these problems to fix.
If your door still opens and closes but just feels loose, sticky, or slightly wrong, it’s worth checking the screws on the handle plate before assuming you need a full replacement. A quarter-turn on a few loose screws solves more of these problems than people expect.
Tools You’ll Need
For most handle and lock replacements on a standard UK door, you’ll want a cross-head and flat-head screwdriver, a tape measure, a pencil for marking, and a chisel if you’re adjusting a mortice recess. A cordless drill with a selection of bits speeds things up considerably, particularly for mortice lock work. You’ll also want some fine sandpaper for tidying up any rough edges left behind, and a small amount of wood filler on hand in case old screw holes need filling before new ones are drilled. If you’re replacing a euro cylinder lock, a small tape measure is essential for getting the correct cylinder length, which is a detail people get wrong more often than any other part of the job.
Step-by-Step: Replacing a Door Handle
Start by removing the old handle. Most UK internal door handles are held on with a small grub screw on the underside of the handle collar, so loosen this first with an Allen key or flat-head screwdriver before sliding the handle off the spindle. On some older or higher-end handles, you’ll need to remove a visible screw on the handle plate itself.
Once both handles are off, pull the spindle out through the latch mechanism and inspect it. If it’s bent, twisted, or snapped, replace it entirely rather than trying to reuse it, since a compromised spindle will fail again quickly.
Measure the door thickness before buying a replacement spindle, as they come in different lengths and a spindle that’s too short won’t reach through both handles properly.
Fit the new spindle through the latch, then slide the new handles onto each end. Tighten the grub screws evenly so the handle sits square rather than tilted, and test the action a few times before fully tightening. Finally, check that the latch engages smoothly with the strike plate on the frame, adjusting the plate slightly with a screwdriver if the latch is catching.
Step-by-Step: Replacing a Lock Mechanism
Begin by removing the door handles and any visible screws holding the lock faceplate to the edge of the door. With the faceplate free, the lock body should slide out of the mortice recess, or in the case of a euro cylinder, unscrew from the centre of the door once the retaining screw is removed.
If you’re replacing a euro cylinder, measure both sides of the door from the centre screw hole to each edge, since cylinders are sold by these two measurements combined and getting this wrong is the most common mistake in a DIY lock swap. Buy a cylinder that matches, or is very slightly shorter than, the old one.
For a full mortice lock replacement, take the old lock with you when buying a new one, or at minimum note the case size and backset measurement, which is the distance from the edge of the door to the centre of the keyhole. Mortice locks vary enough between manufacturers that a mismatched size will mean re-chiselling the recess, which is more work than most people want to take on.
Fit the new lock body into the recess or door hole, secure the faceplate, then reattach the handles and test the key and latch action several times before considering the job finished. Check that the door locks smoothly from both inside and outside, and that the bolt extends fully into the frame without needing extra force.
When to Call a Locksmith Instead
Some situations are better left to a professional. If your front door is fitted with a British Standard lock as part of a home insurance requirement, replacing it yourself may affect your cover if it’s not fitted correctly, so it’s worth having this done by someone experienced. If you’re locked out entirely and can’t access tools or a spare key, a locksmith or handyman with lock-picking experience will resolve this far faster and with less damage to the door than a DIY attempt. Uneven or warped doors that no longer sit square in the frame often need more than a straightforward lock swap, since the whole frame alignment may need adjusting first. And if you’ve discovered signs of attempted forced entry, it’s sensible to have a professional assess both the lock and the door frame for hidden damage before fitting anything new.
If any part of the job feels beyond what you’re comfortable with, or the door in question is your main entry point, it’s always worth getting a second opinion before relying on a repair you’re unsure of.
Frequently Asked Questions About London Door Repairs
Can I replace a door lock myself without calling a locksmith?
Yes, for most internal doors and many front door locks, a straightforward replacement is well within reach for a confident DIYer with the right measurements and tools. British Standard front door locks tied to insurance requirements are the main exception worth having checked professionally.
How do I know what size euro cylinder lock I need?
Measure from the centre of the screw hole on each side of the door to the edge, then add both measurements together. Cylinders are sold by this combined length, and taking the old cylinder with you when buying a replacement avoids sizing mistakes.
Why does my door handle keep coming loose after I tighten it?
This is usually a sign the spindle is worn or slightly bent, causing uneven pressure on the grub screw. Replacing the spindle alongside the handle, rather than just tightening the screw repeatedly, usually solves the problem for good.
Is it cheaper to repair a lock or replace it entirely?
For minor issues like a sticking latch or loose screws, a repair is almost always cheaper. Once the cylinder or lock body itself has worn internally, replacement tends to be more cost-effective than ongoing repairs, since a failing mechanism will keep causing problems.
What Our Customer Say’s
These are some of the responses from our customers who are very satisfied
Great service, punctual and as expected.
Luz Konak
Great efficient service, came on time, really conscious of keeping our flat clean and tidy by taping plastic bag to catch the dust from the drilling, didn’t even need to tell him to take his shoes off (we have no shoes policy). Really impressed with the service, definitely use Bob’s Handyman Service again.
Edgar Beesley
Very good service! They came on time, very happy I used your services!
Shannon Henly
Good job done. Dishwater installed perfectly. Arrived on time, easy booking and reliable staff.
Bindo
It was quick, professional executed in every way and done by a very friendly and peasant guy. Thank you. I will definitely use you again and recommend you to others.
Eva Martines
Bob’s Handyman team did a great job the first time I called them. I would certainly be happy to use their services again.
Jacob Halse
Great job! I highly recommend them!
Jerry Morison
Great value for money. Reliable workmen, competitive prices and very efficient. Will use your company again.
John Pearson
I was very impressed with your service – it was the first time I used it, but it surely will not the last!
Juan Quintas
Thank you Bob’s Handyman for the amazing job done on my bathroom. Very professional company.
Kemi O
I would definitely book them again, if I need help!
Maia Penwell
It was a pleasure to deal with your staff.
Philippa Robertson
Excellent service! I needed a whole room repainted and the people you sent did a wonderful job. I would recommend you to my friends.
Rebecca Stevenson
I’ve been using these guys for over an year now and they are brilliant every single time. No matter of its something small or a job that needs a lot of skills they do it professionally. I’ve been recommending them to everyone.
S. Mittal
I was really pleased with the work that was completed on time. The handyman who came did the jobs quickly and efficiently and left everything tidy.
Sharon Boughton
I’m very pleased with the carried out work. The handyman was very knowledgeable, worked tidy and quickly and did e great job. Will be recommending your services.
Sheila Shah
The job was for my parents who were very happy with the person who did the job and would definitely use your services again.
Susan Shyllon
Your handy man put in extra effort to do the job, which I appreciate very much.
To provide the best experiences, we use technologies like cookies to store and/or access device information. Consenting to these technologies will allow us to process data such as browsing behaviour or unique IDs on this site. Not consenting or withdrawing consent, may adversely affect certain features and functions.
Functional
Always active
The technical storage or access is strictly necessary for the legitimate purpose of enabling the use of a specific service explicitly requested by the subscriber or user, or for the sole purpose of carrying out the transmission of a communication over an electronic communications network.
Preferences
The technical storage or access is necessary for the legitimate purpose of storing preferences that are not requested by the subscriber or user.
Statistics
The technical storage or access that is used exclusively for statistical purposes.The technical storage or access that is used exclusively for anonymous statistical purposes. Without a subpoena, voluntary compliance on the part of your Internet Service Provider, or additional records from a third party, information stored or retrieved for this purpose alone cannot usually be used to identify you.
Marketing
The technical storage or access is required to create user profiles to send advertising, or to track the user on a website or across several websites for similar marketing purposes.