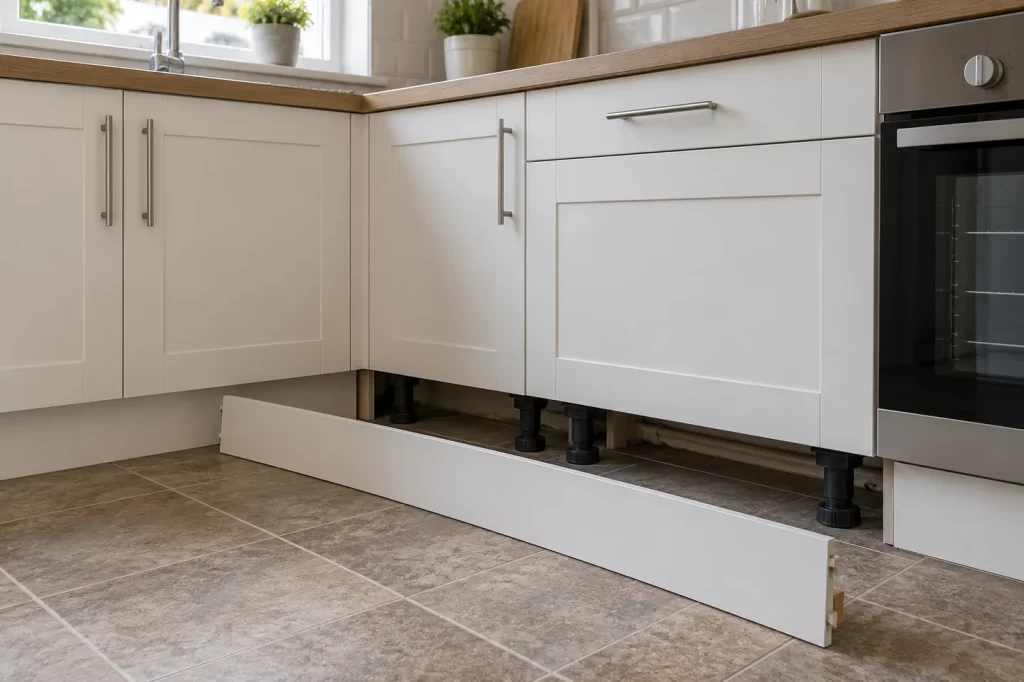
A kitchen plinth, often called a kickboard, covers the gap beneath base units. It usually clips to the adjustable cabinet legs so it can be removed for access. If it keeps falling off, the visible gap is only the symptom. The clips may be broken or misplaced, the board may have swollen, or a cabinet leg may have shifted. Check the space behind it before pressing it back into place: a detached plinth sometimes reveals the first sign of a leak.
This repair is separate from adjusting kitchen cupboard doors or repairing a damaged worktop. The plinth should sit neatly, but its more useful role is to remain removable while protecting the underside of the units from everyday knocks and dirt. Gluing it permanently across the whole run can hide moisture and make later access to pipework or appliance connections difficult.
Remove the loose board without snapping the clips
Clear the floor and photograph how the board currently fits, including corners and any return pieces. Many plinths pull forward from the legs, but systems vary. Look behind an already loose end for a plastic spring clip or bracket before pulling. Support the board along its length so the remaining clips do not take all the bending force. A long chipboard plinth can split at a cut-out if it is twisted.
If a section passes in front of a dishwasher or another appliance, check whether it is attached to the cabinets or to the appliance’s own adjustable panel. Do not force a board that catches on a machine door. Some appliance ventilation grilles must remain clear; replacing them with a plain board can interfere with the manufacturer’s installation requirements.
Place the detached board flat on a clean surface. Keep clips, small screws and any corner connectors together. If one end is fixed firmly and the other end is loose, avoid levering from the fixed end. Release each connection in turn, following the direction its clip opens. If you cannot see how it is secured, a careful inspection is cheaper than replacing a cracked finish panel.
Inspect behind the plinth before refitting
Use a torch to look along the floor and beneath the cabinets. Dry dust is normal. Standing water, dark staining, a musty smell, softened chipboard or swollen flooring needs investigation. A leak may be coming from a sink, appliance hose, waste pipe or something farther away; the plinth gap alone does not identify the source. If water is active, address it before enclosing the area. The site’s article on damage to a kitchen worktop discusses why swollen board needs a different decision from a superficial chip.
Check cabinet legs and floor contact. An adjustable leg may have turned or shifted so its clip no longer meets the position on the board. Do not use the plinth to push an unstable cabinet back into line. A base unit that rocks, carries a heavy worktop or is out of level needs the unit support checked first. The plinth is trim, not a prop.
Look for pests or damaged cables only from a safe distance. Do not reach into an unknown void or disturb electrical fittings. Note the location and arrange the appropriate specialist if there are signs of a wider problem. A removable board is useful precisely because it lets these issues be discovered early.
Diagnose the clips and board condition
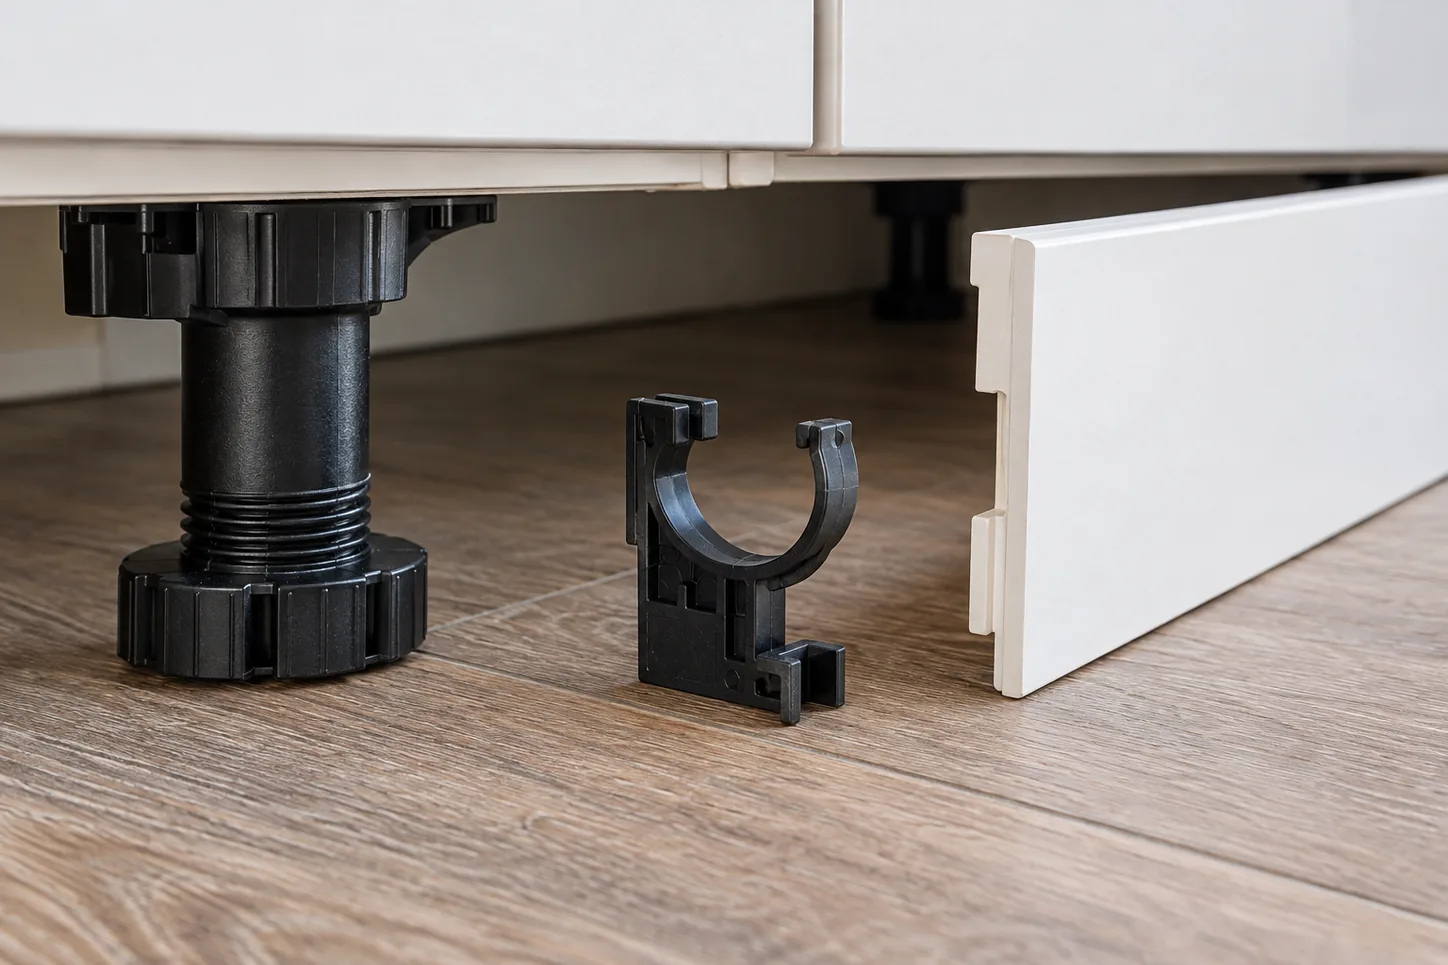
Most clip-on plinths have brackets fixed to the back of the board that grip the round cabinet legs. Compare each clip. A cracked jaw, missing screw or bent bracket may explain why one point will not hold. Check whether the screw hole in the board still grips. Replacing a clip with a matching part is preferable to adding a large screw through the visible face.
Measure the diameter of the cabinet leg and the existing bracket before buying replacements. Clips that look alike may suit different legs and board positions. Some allow a little adjustment; others require their mounting point to be moved. Photograph a sound clip as a reference. If every clip has failed after a short period, consider whether the board is too tight against the floor or being hit by a mop, vacuum or cabinet door.
Lay a straightedge along the board. A plinth bowed by moisture or storage pressure may spring away even with new clips. Inspect the bottom edge closely. Chipboard that has expanded into a rough, flaky edge will not reliably return to its original thickness when it dries. Repainting or adding a new clip may hide the damage briefly, but replacement of the affected length can be the better repair once the moisture source has been removed.
Check clearances and ventilation
The board should meet the cabinet line without being wedged hard between the floor and unit. Floors are rarely perfectly level; a long run may need careful fitting so the top edge remains neat while the bottom has appropriate clearance. Do not remove so much material that a large gap admits dirt or looks uneven. If the board has warped because it was cut too tight and repeatedly absorbed mop water, protect the replacement edge as the material supplier recommends.
Some kitchens rely on ventilation through a specific grille, particularly near integrated appliances. Preserve the original opening and use a suitable replacement part if it is damaged. Do not cover a grille because it looks untidy. Check appliance instructions before changing any trim that forms part of its ventilation path. A dishwasher door, for example, may also need room to swing without catching the plinth.
At a corner, the return board may meet the front length with a joining piece or mitred edge. A loose connector can pull the main board off its clips each time someone kicks the corner. Repair the connector rather than forcing the front length tighter. A small gap at a wall can sometimes be finished neatly, but sealant should not turn the entire plinth into a permanently fixed barrier.
Refit in a controlled sequence
Once the void is dry and the clips are sound, align the board in front of the cabinet legs. Start at one end and engage clips sequentially, supporting the plinth close to each fixing. Press near the clip rather than in the middle of a long unsupported span. You should feel a positive engagement, not need to hammer the board. If a clip misses its leg, remove the board and adjust the bracket position rather than bending the board to reach it.
Check the top line against the cabinets and the bottom line against the floor. Open every nearby cabinet door and appliance door to ensure the plinth does not obstruct them. A plinth that springs back at one point may have a missing or displaced leg behind it. Inspect that location; adding pressure elsewhere will not solve it.
Give the board a light, controlled pull at each clip position to confirm it is held but still removable. Avoid tugging so hard that you break new brackets. Clean up dust and note the repair date if there had been moisture. A quick later inspection can reveal whether the void stays dry.
When replacement or professional repair is sensible
Replace the affected length if the board is swollen, split, badly bowed or cannot hold clips in sound material. A carpenter can match its height, finish, return corners and appliance cut-outs. The site’s carpentry service is relevant for a fitted plinth; kitchen refurbishment is the broader route if cabinet bases and several panels are damaged. If the visible issue is instead an uneven cupboard door, use the existing guide to adjusting kitchen cupboard doors.
Describe whether the board fell off once or repeatedly, whether clips remain on it, and whether the space beneath the units is dry. A photo of the board’s reverse side and the exposed cabinet legs helps identify parts before a visit. The durable fix is to correct the cause behind the loose plinth, retain necessary access and leave the trim secure without sealing a hidden problem behind it.