
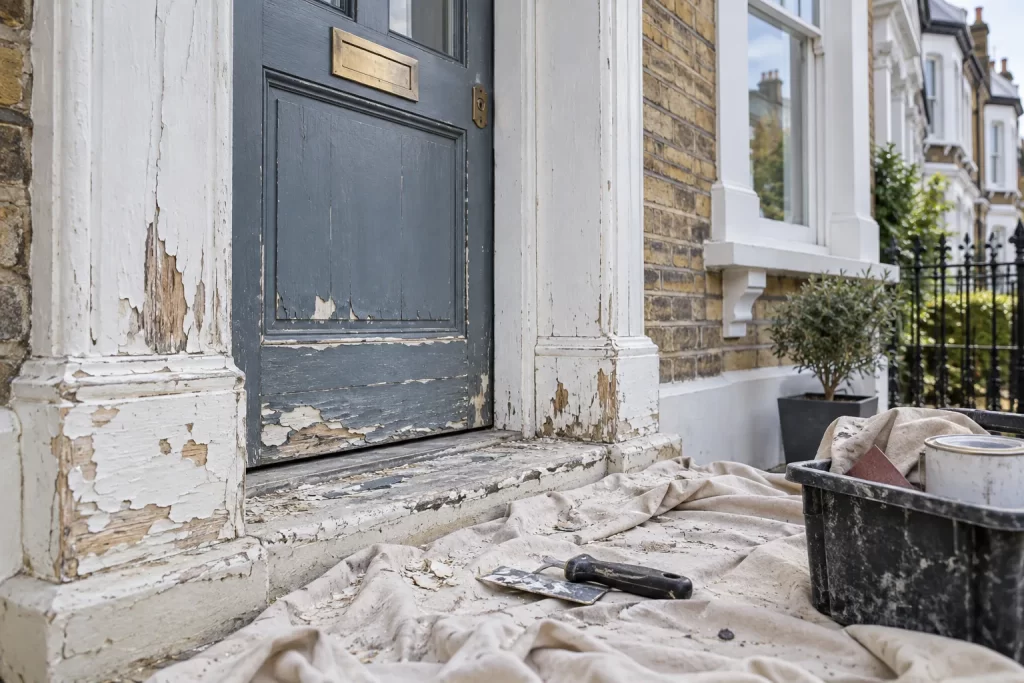
Exterior paint fails from the wood outward as often as it fails from the weather side. Water entering an open joint, a rotten sill end or damp masonry can push a new coating off within months. Preparation therefore begins with moisture and timber condition, not choosing a colour or sanding every surface smooth.
Inspect on a dry day
Walk around the item in good light. Look at horizontal sills, lower door rails, glazing beads, end grain, joints and places where timber meets masonry. Mark peeling, cracking, grey bare wood, open mitres, rust staining and soft areas. Check whether gutters, drips or failed sealant direct water onto it.
Press suspect timber gently with a blunt probe. Sound wood resists and retains a clear surface; decayed fibres feel soft or crumble. Do not dig into sound historic joinery. Extensive decay, loose glazing or structural movement needs carpentry repair before decoration.
Identify why the coating failed
Peeling only at the bottom can indicate standing water or unsealed end grain. Blistering over broad areas may come from trapped moisture, poor adhesion or painting in strong sun. Fine surface chalking is normal ageing, while cracks following joints suggest timber movement.
Check internal faces for condensation, damp staining or failed seals. Painting the outside cannot correct a persistent leak. Repair gutters, flashing and plumbing, and allow the wood to dry.
Check the old coating and work safely
Older paint may contain lead. In the UK, assume caution on pre-1960s joinery and use an appropriate test or specialist advice. Avoid uncontrolled dry sanding, burning or hot-air stripping of suspect coatings. Keep children, pets and neighbours away from debris and follow current hazardous-waste guidance.
Use stable access equipment. Do not lean from a ladder while scraping or work above doors in use. High-level windows, rotten supports and areas close to overhead services belong with professional exterior painting.
Choose a workable weather window
Read every product’s temperature, humidity and rain-free requirements. The surface must be dry, not merely rain-free at the moment. Avoid direct hot sun, frost, heavy dew and wind that carries dust. Plan enough time for primer, undercoat and topcoats to cure before overnight moisture.
Tools and materials
- Dust sheets secured against wind
- Scrapers with sharp controlled edges
- Abrasive paper and sanding blocks
- Vacuum and suitable dust extraction
- Exterior-grade timber repair system
- Compatible knotting solution if required
- Primer, undercoat and topcoat from a compatible system
- Quality brushes, mixing sticks and paint kettle
- Personal protection specified by product data
Step 1: protect the area and remove hardware
Cover paths, brickwork and plants without sealing vegetation under plastic in sun. Remove door furniture, catches and weather strips where practical, label screws and store them safely. Mask glass only after cleaning; do not rely on tape to protect loose glazing putty.
Step 2: clean before scraping
Wash away dirt, salts, algae and grease with a cleaner suitable for the coating and nearby materials. Rinse as directed and let timber dry thoroughly. Sanding dirt into the surface reduces adhesion and can spread biological growth.
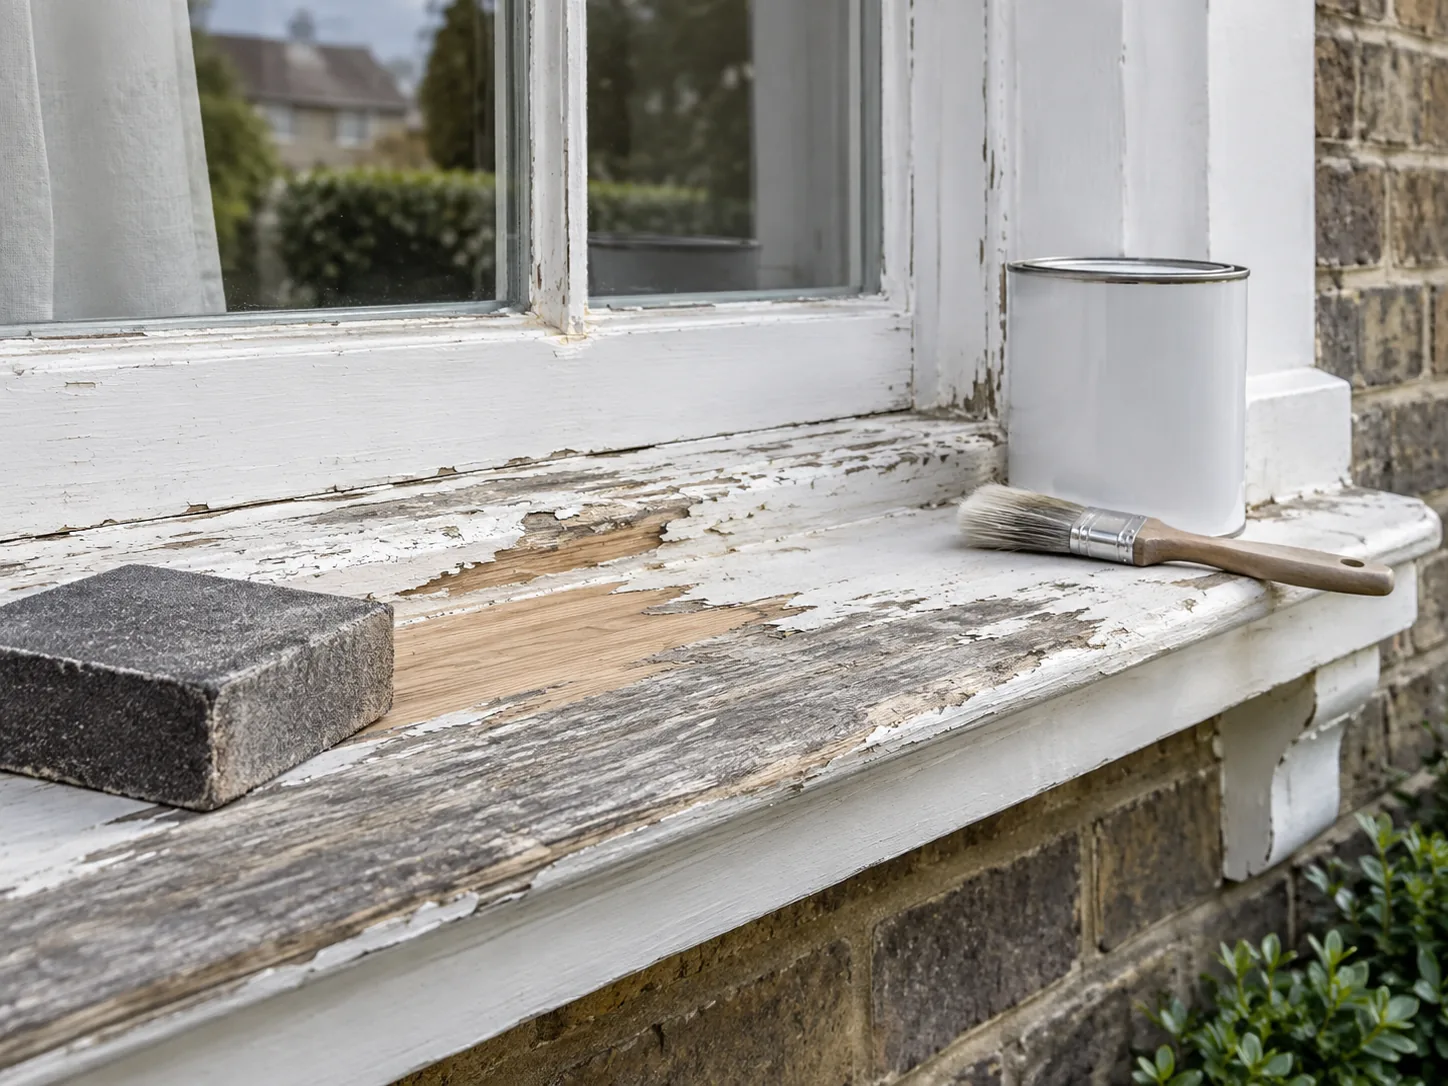
Step 3: remove failed paint, not every sound layer
Scrape back all loose, flaking and hollow-sounding coating to a firm edge. Work with the grain and keep the scraper flat so it does not gouge soft wood. Sound compatible paint can remain if it is well bonded, clean and feathered smoothly.
Collect chips continuously. Where lead is possible, use the containment and protective method recommended by competent guidance or employ a specialist.
Step 4: sand and feather edges
Use a block on flat faces and finer abrasive to blend the step between bare timber and retained paint. Round no crisp joinery details unnecessarily. Vacuum dust from profiles and joints, then wipe as the coating manufacturer directs. Avoid leaving water on freshly exposed wood.
Step 5: repair timber and open joints
Cut out decay only to the extent required by the chosen repair system. Small local defects may accept an exterior two-part timber repair after the source of moisture is corrected. Large rotten sections, failed tenons and loose sills need spliced timber or replacement, not a deep plug of filler.
Use flexible exterior sealant only in joints designed to be sealed and confirm paint compatibility. Do not block drainage holes, glazing channels or the underside drip groove.
Step 6: prime bare and repaired areas promptly
Apply the specified primer to dry bare wood, repair compounds and end grain. Work it into profiles without leaving runs. Treat resinous knots only with a product compatible with the paint system. Spot-priming may be sufficient where most old paint remains sound; extensive bare timber may need a full prime coat.
Step 7: build the coating system
Apply undercoat and topcoats at the stated spreading rate and recoat interval. Thin only if instructions permit. Brush along the grain, maintain a wet edge and inspect lower edges for runs. Several correct coats outperform one thick coat that skins over while remaining soft beneath.
Paint glazing lines neatly onto the glass by the small amount required by the glazing system to shed water. Keep sash edges, hinges, locks, drainage paths and flexible weather seals free unless instructions state otherwise.
Step 8: cure and refit hardware
Allow the final coat to reach the stated hardness before closing a door tightly or refitting seals. Fresh paint can bond opposing faces. Replace corroded screws with suitable compatible fixings and adjust hardware without cutting through the new coating unnecessarily.
Common mistakes
- Painting damp timber after one dry afternoon.
- Filling rot without removing its moisture source.
- Sanding suspected lead paint without containment.
- Leaving sharp ridges around retained paint.
- Mixing incompatible primer and topcoat systems.
- Applying one very thick coat.
- Painting over drainage holes and moving hardware.
Maintenance after repainting
Inspect each spring and autumn, especially horizontal surfaces and lower joints. Clean dirt that holds moisture, touch in a small chip before water enters and keep gutters clear. A quick local repair to sound paint is far easier than another full strip after decay begins.
Where preparation reveals loose frames, failed beads or several small joinery defects, combine them into planned handyman repairs before the final coating schedule begins.
Record the product names, colours and date. Future compatibility is easier to judge when the coating system is known.
Paint protects only sound, dry timber
Interior plaster defects need a different preparation sequence; use the guide to repairing hairline plaster cracks. Where old coverings have been stripped indoors, follow the checks for preparing walls after wallpaper removal.
Durability comes from correcting water paths, removing failed material and following one compatible coating system under suitable weather. Treat rot as a timber repair and lead as a hazard, not preparation inconveniences. When the substrate is stable, careful thin coats can protect exterior joinery for years and make later maintenance manageable.

