Call us now 020 3137 9380

Category Archives: News

Pet Damage Repairs: What Can a Handyman Fix?
Pet Damage Repairs

  • Common Damage: Pets frequently cause damage to doors, skirting boards, and flooring through scratching and chewing.
  • Act Early: Fixing issues promptly prevents them from worsening and saves money on future repairs.
  • Repair vs. Replace: Surface scratches can be filled and sanded, while deep structural damage may require replacement.
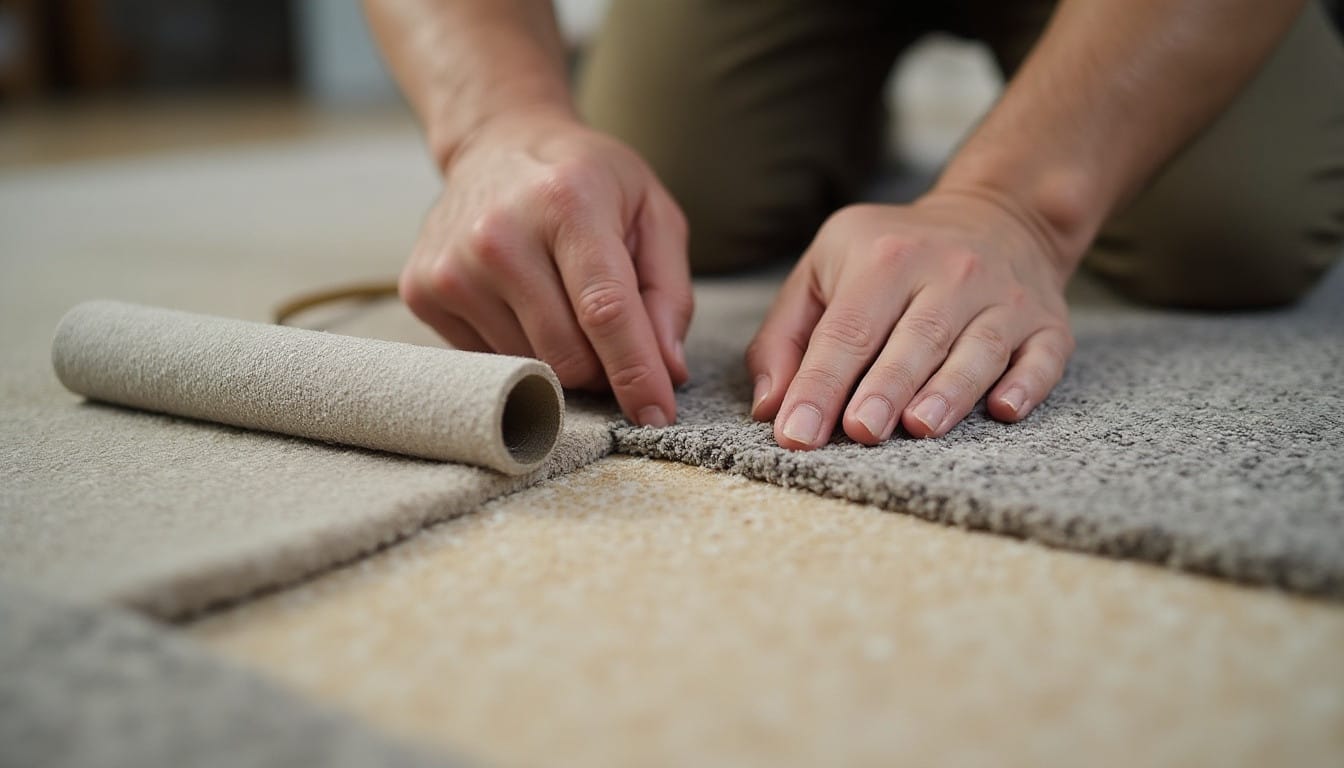
  • Flooring Fixes: Laminate and vinyl can be touched up easily; carpet damage can often be patched rather than replaced.
  • Protect Deposits: Proactively repairing pet damage before moving out helps secure your tenancy deposit.
  • Save Costs: Bundle multiple small repairs into a single visit to reduce service fees.
  • Expert Advice: A professional assessment can determine the most cost-effective route, saving you money in the long run.

"*" indicates required fields

Anyone who has shared a home with a dog, cat or overenthusiastic rabbit knows that pets leave their mark. Sometimes that mark is a scratched door frame, sometimes it’s a gouged skirting board, and sometimes it’s a patch of flooring that’s seen better days. For London homeowners and tenants alike, pet damage repairs are one of those jobs that tend to pile up until moving day or a landlord inspection forces the issue. The good news is that most of this damage falls squarely within a general handyman’s remit, and getting it sorted early is usually far simpler β€” and cheaper β€” than waiting.

The Most Common Types of Pet Damage in London Homes

Pet damage tends to follow a familiar pattern, whatever the size of the animal responsible. Doors and door frames take the brunt of it, particularly around handles and lower panels where claws and paws make repeated contact. Skirting boards are another frequent target, especially for dogs prone to chewing when they’re teething or anxious. Flooring suffers too, whether that’s scratched laminate, stained carpet, or scuffed hardwood near entry points and favourite resting spots. Walls aren’t immune either, picking up scrapes from claws or the odd scuff from an overzealous greeting at the front door.

London’s housing stock adds its own wrinkle to all this. A huge proportion of the city’s homes are flats and converted properties, often with shared entrances, communal stairwells, and landlord-owned fixtures that come with their own rules about alterations and repairs. That means pet damage in a rented flat isn’t just a cosmetic annoyance β€” it can have real implications for a deposit or a renewal conversation, which is worth keeping in mind before damage is left to worsen.

Scratched Doors, Chewed Skirting and Damaged Flooring

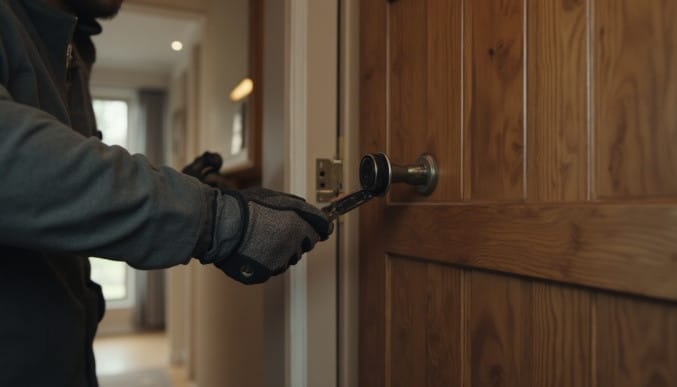
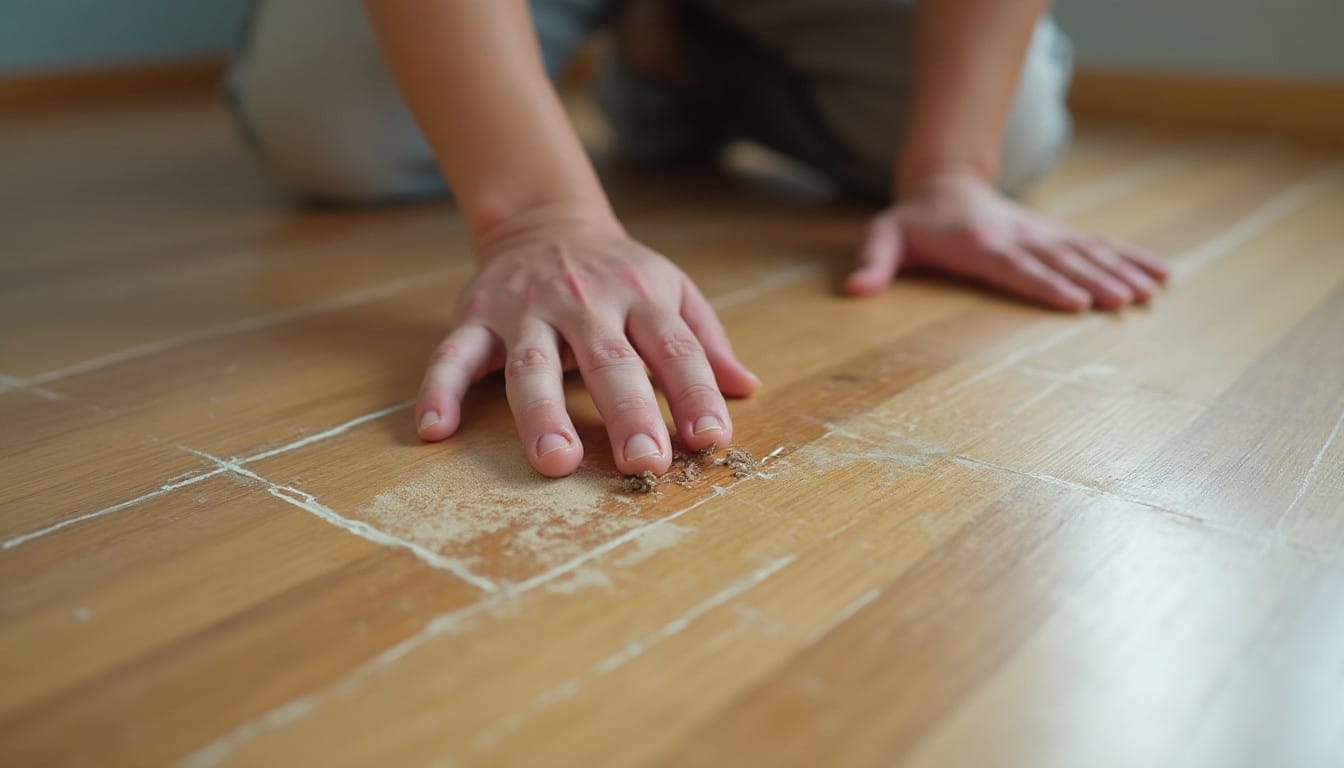
Scratched doors are one of the easiest fixes on this list, and also one of the most commonly requested. Light surface scratches can often be filled, sanded and refinished to match the surrounding wood or paintwork, while deeper gouges might call for wood filler and a fresh coat of paint to blend the repair in properly. Where scratching has gone right through a veneer, a panel replacement is sometimes the more sensible route, particularly on hollow-core doors that don’t take repeated sanding well.

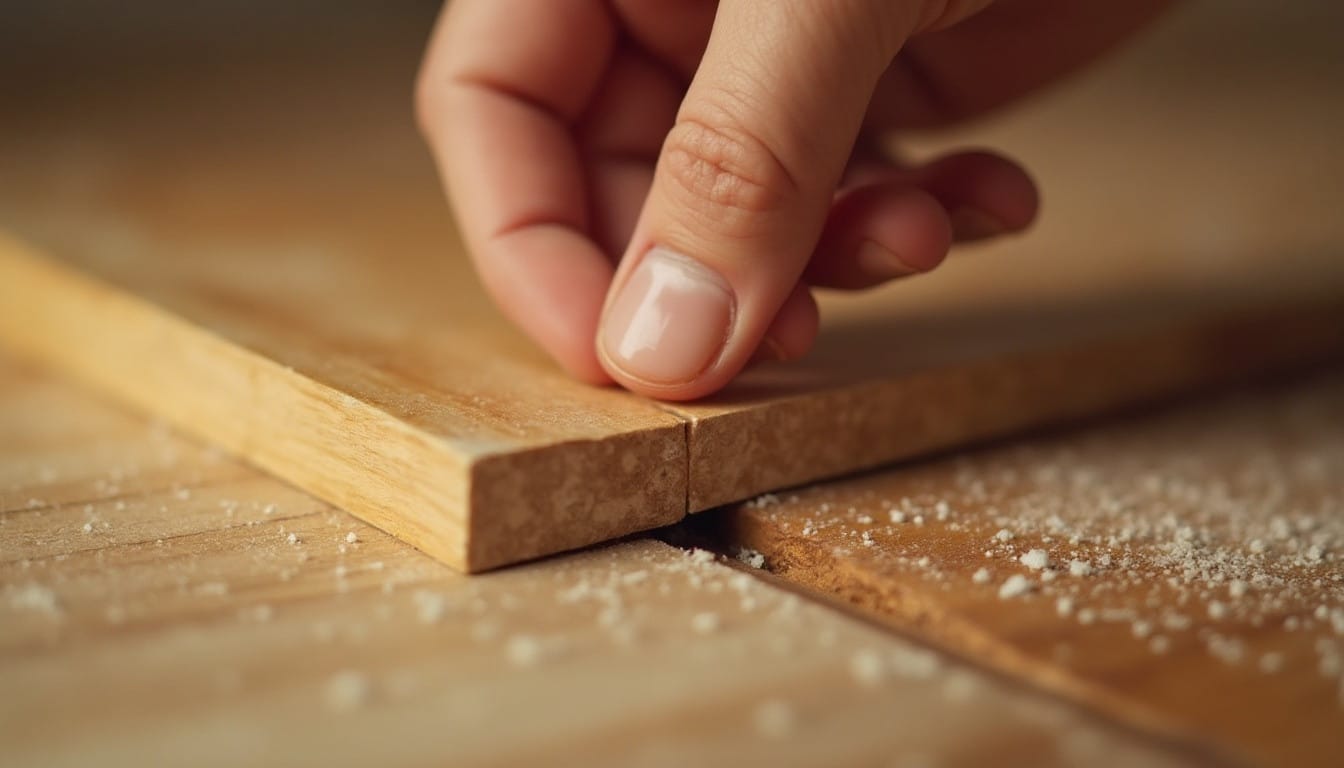
Chewed skirting is a bit more involved but still very manageable. Small nibbled sections can be filled and repainted, while more extensive chewing usually means cutting out and replacing the affected length rather than patching around it β€” a cleaner result and a job that a skilled handyman can usually complete in a single visit.

Flooring is the trickiest of the three, mostly because the right fix depends heavily on the material. Laminate and vinyl scratches often respond well to filler kits and touch-up finishes, whereas carpet damage from digging or accidents may need a targeted patch rather than a full replacement, especially if the affected area is small and tucked out of the way. Solid wood floors are usually the most forgiving in the long run, since scratches and light gouges can typically be sanded out and refinished rather than replaced outright.

What’s Repairable vs What Needs Replacing?

The line between repair and replacement usually comes down to how deep the damage runs and how visible it is once fixed. Surface-level scratches, small chew marks, and minor scuffs are almost always repairable with filler, sanding, and paint or varnish matched to the original finish. The results can be genuinely difficult to spot once the work is done.

Replacement tends to become the better option when structural integrity is compromised β€” a door panel that’s been chewed through, a skirting board with a chunk missing, or flooring where the damage has gone below the surface layer and can’t be sanded back without leaving a visible dip or discolouration. In flats and rented properties particularly, it’s often worth getting a second opinion before committing to either route, since a handyman can usually spot straight away whether a repair will hold up or whether replacement will save money in the long run by avoiding a repeat callout.
Pet Damage and Tenancy Deposits β€” What to Know

For renters, pet damage sits in a slightly different category to ordinary wear and tear. Tenancy deposit schemes generally distinguish between fair wear and tear, which is expected over the course of a tenancy, and damage that goes beyond normal use β€” and pet-related marks often fall into the latter camp, particularly scratched doors, chewed skirting, or stained flooring. Getting repairs done properly and promptly, ideally with some record of the work, tends to put tenants in a stronger position when it comes to end-of-tenancy discussions or deposit negotiations. Landlords, for their part, are generally looking for evidence that damage has been addressed rather than left to compound, so a professional repair before check-out is usually time well spent for anyone with a pet clause in their tenancy agreement.

How Much Does Pet Damage Repair Cost?

Costs for pet damage repairs vary quite a bit depending on the extent and type of damage, the materials involved, and how many separate issues need addressing in one visit. A single scratched door or a short section of chewed skirting is generally at the lower end of the scale, while multiple flooring repairs or several doors across a property will naturally push the total higher. Bundling several small jobs into one handyman visit is usually more cost-effective than tackling them separately, since it saves on repeat callout costs and lets the work be planned efficiently in a single session. Getting a clear quote beforehand, once the damage has been assessed in person, is the most reliable way to know what a job will actually involve.
Pet Damage Repair Questions Answered

Can scratched doors always be repaired, or do they sometimes need replacing?
Most surface scratches and moderate gouges can be repaired with filling, sanding and refinishing. Replacement is usually only necessary where the damage goes through the panel or veneer entirely.
Is it cheaper to fix several pieces of pet damage at once?
Yes, in most cases. Combining multiple small repairs into a single visit tends to work out more cost-effective than booking separate callouts for each one.
Can carpet damage from pets be patched rather than replaced?
Small, localised areas of carpet damage can often be patched neatly, particularly if there’s spare matching carpet available, rather than requiring a full room replacement.

Pet Damage Repairs: What Can a Handyman Fix?

Handyman Jobs in London

  • Furniture Assembly:Β Efficiently building flat-pack wardrobes, beds, and kitchen units.
  • TV Mounting:Β Secure wall mounting with professional cable management.
  • Door Repair:Β Fixing sticking or misaligned doors caused by seasonal changes.
  • Leak Fixing:Β Prompt repair of taps and pipes to prevent water damage.
  • Shelf Fitting:Β Secure installation ensuring the right fixings for wall types.
  • Painting Touch-Ups:Β Seamless colour-matching for scuffs, chips, and rental upkeep.
  • Picture Hanging:Β Safe, level mounting for heavy mirrors and artwork.
  • Appliance Installation:Β Expert connection and levelling of integrated white goods.
  • Fence & Gate Repair:Β Fixing weather-worn panels, posts, and hinges.
  • Light Fitting:Β Safe and secure replacement of electrical fixtures.

London homes come with their own particular set of quirks. Between period conversions with uneven walls, new-build flats with flimsy fixtures, and the sheer pace of life in the capital, it’s no surprise that so many residents reach for a handyman rather than tackling jobs themselves. Time is often the real constraint. Between long commutes, demanding jobs, and weekends that disappear before they’ve properly started, a two-hour DIY task can easily stretch into an entire lost Saturday.

There’s also the tool problem. Renting a flat or living in a smaller property often means there’s nowhere to store a full toolkit, and buying specialist equipment for a single job rarely makes financial sense. A qualified handyman turns up with everything needed, does the work properly the first time, and leaves without the trip to the hardware shop, the trial and error, or the patched-up result that needs redoing a few months later.

Below are the ten jobs Handyman Services gets asked to do most often across London homes, along with a look at how bundling several of them into one visit can save both time and money.

1. Furniture Assembly

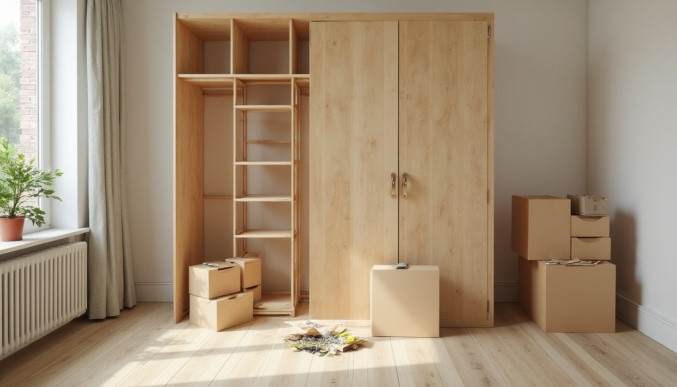
Flat-pack furniture has become a rite of passage for anyone moving into a London home, but instructions that seem straightforward on paper often turn into hours of frustration once the parts are actually spread across the floor. Wardrobes, bed frames, and kitchen units are the most common callouts, particularly after a house move when several pieces need building at once. A handyman can usually assemble a standard wardrobe or bed frame within an hour, checking that everything is level and properly secured rather than just visually finished.

2. TV Mounting

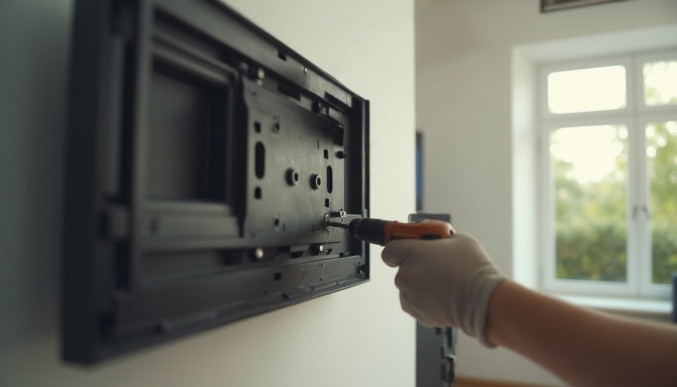
Wall-mounting a television sounds simple until it’s time to drill into a wall of unknown composition. Period properties often hide lath and plaster or uneven brickwork behind a plaster skim, and getting the fixing wrong can mean a TV that isn’t properly supported. A handyman identifies the wall type, uses the right fixings, and manages the cable routing so the finished setup looks tidy rather than trailing wires down to the skirting board.

3. Door Repair

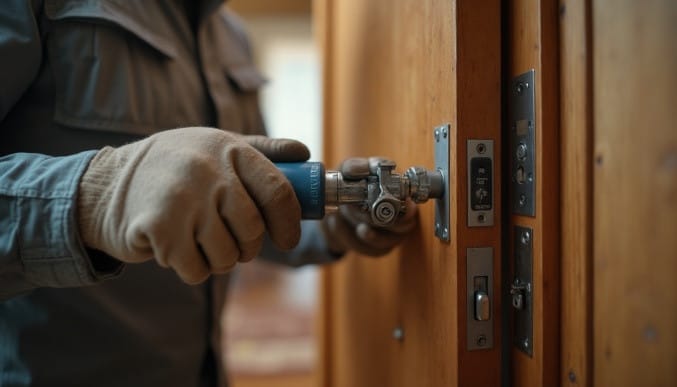
Doors that stick, drag on the carpet, or won’t latch properly are one of the most common issues in both older and newer London homes. Seasonal humidity changes can cause wooden doors to swell or contract, while poorly fitted hinges are a frequent culprit in newer builds. Most door repairs, whether it’s rehanging, planing down a sticking edge, or replacing a worn hinge, can be sorted within a single short visit.

4. Leak Fixing

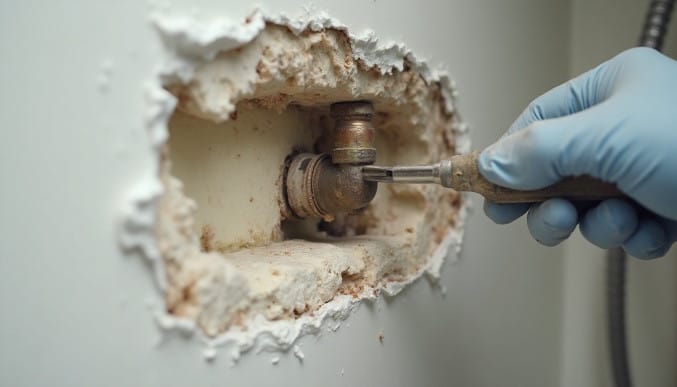
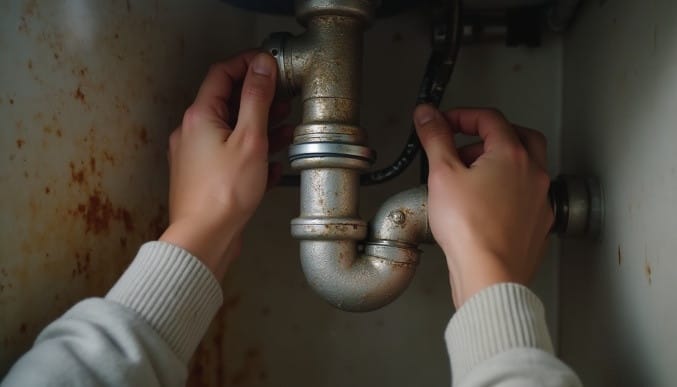
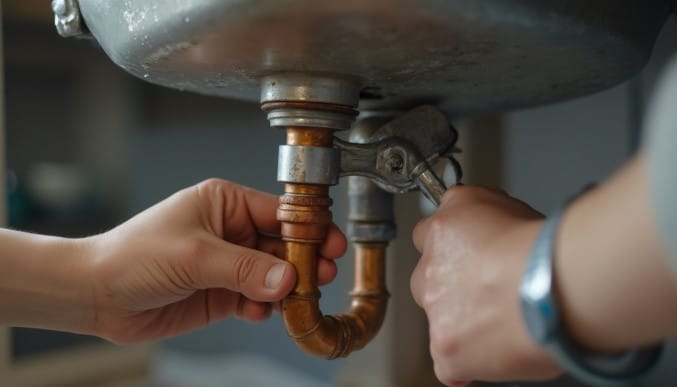
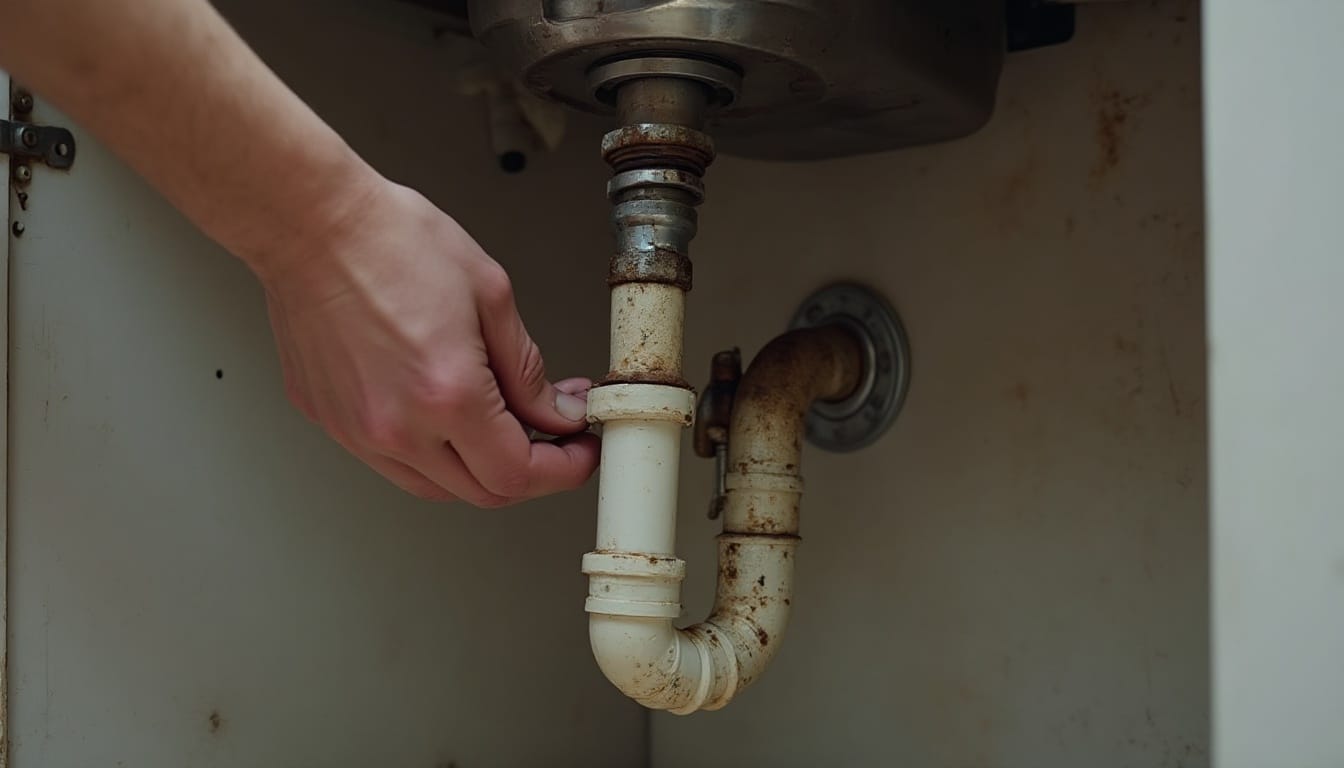
Dripping taps, leaking pipework under the sink, and slow leaks around toilet cisterns are among the most requested repairs, largely because they tend to get worse the longer they’re left. A dripping tap alone can waste a noticeable amount of water over a year, and unresolved leaks under cabinets can lead to swollen wood or mould if ignored. Catching these early with a proper repair, rather than a temporary fix, tends to save money in the long run.

5. Shelf Fitting

Shelving is one of those jobs that seems easy in theory but often ends with wonky brackets or shelves that come away from the wall under weight. Getting it right depends on finding solid fixing points, particularly in properties with plasterboard or dry-lined walls where a stud or cavity fixing makes all the difference. A handyman will assess the wall type before fitting, ensuring the shelf can actually hold the weight it’s meant to.

6. Painting Touch-Ups

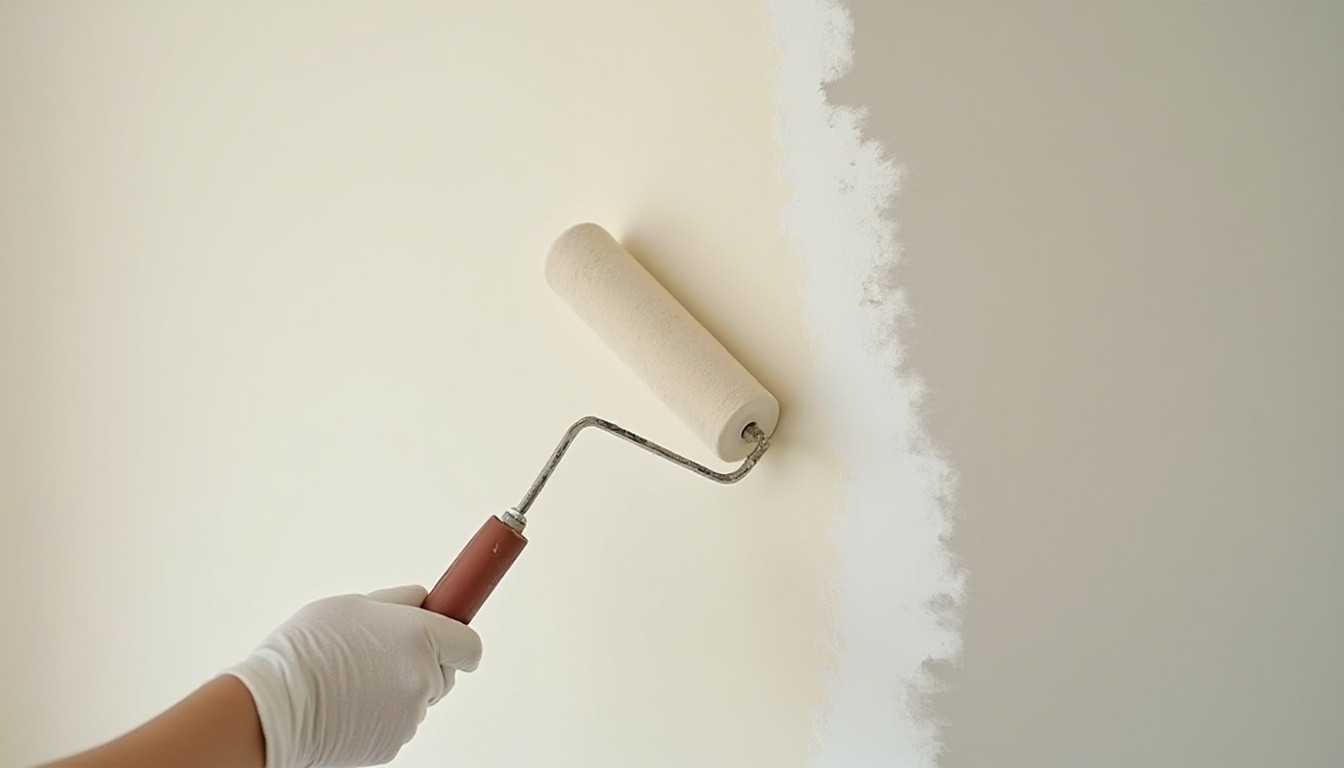
Scuff marks near light switches, scratched skirting boards, and chipped paint around door frames are common wear-and-tear issues, especially in rental properties ahead of an inspection or move-out. Rather than repainting an entire room, a handyman can colour-match and touch up the affected areas so the finish blends in seamlessly. This is particularly useful for landlords and tenants working to a deadline.

7. Picture Hanging

Hanging pictures, mirrors, and artwork sounds like a five-minute job until the wall turns out to be plasterboard, brick, or something in between, each requiring a different fixing approach. A heavier framed mirror needs a completely different fixing to a lightweight print, and getting it wrong risks damage to both the wall and the item itself. A handyman brings the right hardware for the wall type and ensures everything is properly level and secure.

8. Appliance Installation

Fitting a new washing machine, dishwasher, or integrated oven involves more than just sliding it into place. Plumbing connections, electrical safety, and correct levelling all matter, particularly for integrated appliances that need to sit flush within existing cabinetry. A handyman handles the connection and testing so the appliance works properly from day one, rather than leaking or vibrating out of position.

9. Fence and Gate Repair

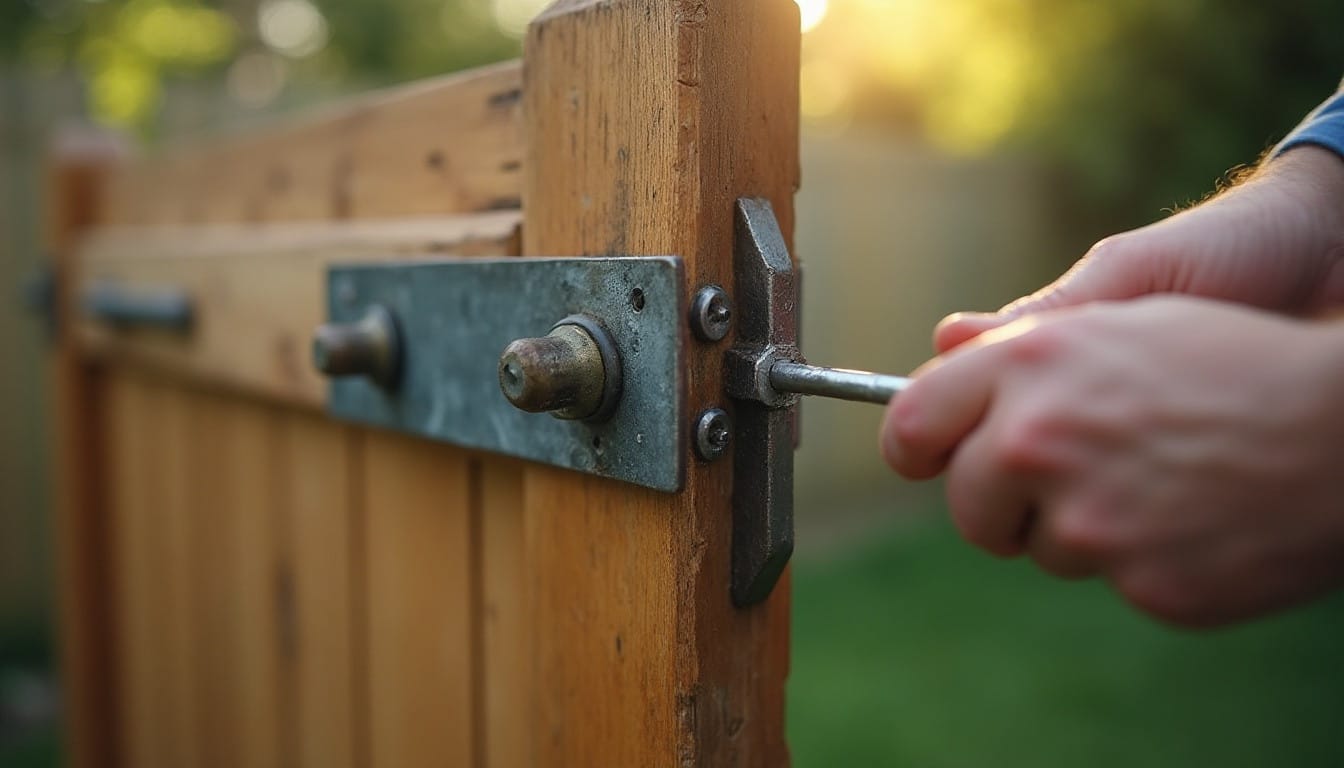
Garden fences and gates take a battering from London’s weather, with wind and rain loosening panels, warping wood, and rusting hinges over time. A leaning fence panel or a gate that won’t latch properly is a common request, particularly after a stretch of bad weather. Repairs typically involve replacing damaged posts or panels and rehanging gates so they close and lock properly again.

10. Light Fitting

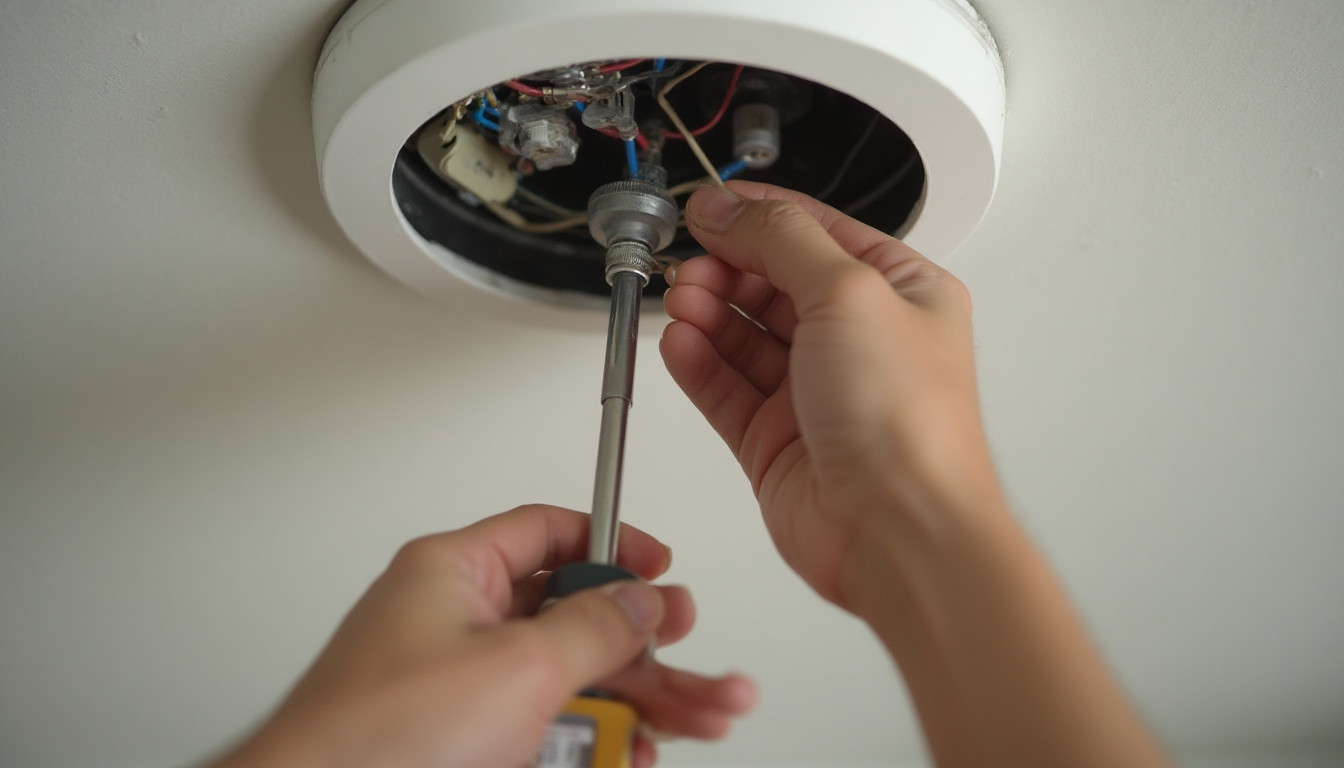
Replacing light fittings, from pendant lights to spotlights, is one of the more frequently requested electrical jobs, particularly in homes being updated or redecorated. While swapping a lampshade is simple enough, replacing a fitting properly means working safely with the electrics and ensuring everything is wired and secured correctly. A handyman completes this safely and checks the fitting works before finishing up.

How to Save Money by Bundling Jobs in One Visit

One of the most practical ways to cut costs is to group several smaller jobs into a single appointment rather than booking separate callouts. It also means less disruption at home, with one appointment to plan around instead of several.

Before booking, it’s worth making a list of every small job that’s been put off, from the sticking door to the wobbly shelf, and mentioning all of them when arranging the visit. This gives the handyman a chance to plan the work efficiently, bringing the right tools and materials for everything in one trip rather than needing a follow-up visit for something that was mentioned only once work had already started.

Everything You Need to Know Before Booking a Handyman

What is the most common handyman job in London?
Furniture assembly and TV mounting are among the most frequently requested jobs, particularly in homes that have recently moved or been redecorated.
How long does a typical handyman visit take?
Most single jobs, such as door repairs or shelf fitting, take between 30 minutes and two hours, though this varies depending on the complexity of the task.
Can a handyman do electrical work?
Simple electrical tasks like light fitting replacement are common, though larger electrical jobs may require a certified electrician depending on the scope of work.

Most Requested Handyman Jobs in London Homes

How to fix a sagging gate

  • Sagging/leaning is usually caused by weather cycles, clay soil movement, hinge wear, rot, rust, or poor original installation.
  • A 10-minute inspection (hinges, posts, fixings, standing back to view the line) identifies the real cause before repair.
  • Gate fixes: tighten/replace hinges, fit a turnbuckle diagonal brace, add a timber diagonal brace, upgrade to heavier hinges, reset the hinge post.
  • Fence fixes: straighten and re-secure leaning posts, fit a metal post spur, replace rotten posts, re-tension panels with galvanised fixings.

"*" indicates required fields

There’s nothing quite like the scrape of a gate dragging along the path, or a fence panel leaning drunkenly into next door’s garden. If you’ve ever wrestled with a sagging gate on a wet Sunday morning, you’ll know it’s one of those jobs that always seems to happen at the worst possible time – usually right before you’re heading out.

The good news is that most sagging gates and leaning fences are fixable, often without calling in a professional. This guide walks you through why it happens, how to check what’s actually wrong, and the practical fixes you can try yourself before deciding whether it’s time to bring in help. Whether you’re dealing with a wooden garden gate, a wrought iron side gate, or a full run of fence panels, the same principles apply.

Why Gates and Fences Sag Over Time

Gates and fences live outdoors, which means they’re constantly battling the British weather – and that takes its toll. Understanding the root cause helps you fix the problem properly rather than just patching over it.

Weather and moisture are the biggest culprits. Timber swells when it’s wet and shrinks as it dries out, and repeated cycles of this weaken joints, warp panels, and loosen fixings. London’s mix of damp winters and dry spells is particularly hard on wooden structures.

Ground movement is another common cause, especially with London’s clay-heavy soil. Clay expands when wet and contracts when dry, which can shift fence posts out of true over a season or two. If your fence has started leaning gradually rather than suddenly, shifting ground is often to blame.

Gravity and hinge wear affect gates specifically. Every time a gate swings open and shut, its full weight pulls on the hinges and the post they’re fixed to. Over months and years, screws work loose, hinge plates wear thin, and the whole gate begins to drop at the latch side – the classic sagging gate problem.

Rot and rust creep in wherever moisture sits. Fence posts rot fastest at ground level where they meet the soil, and metal fixings rust where water collects, both of which weaken the structure from the inside out.

Poor original installation can also be the underlying issue. Posts set too shallow, insufficient concrete, or undersized hinges for a heavy gate will all lead to sagging much sooner than they should.

Checking Hinges, Posts and Fixings

Before reaching for tools, spend ten minutes doing a proper inspection. This tells you whether you’re dealing with a simple tightening job or something more structural.

Start with the hinges. Open and close the gate slowly and watch how it moves. Listen for grinding or squeaking, and check whether the hinges are bent, rusted, or pulling away from the post. Give each screw a wiggle test with a screwdriver – if a screw spins freely without biting, the hole has likely worn out.

Check the posts next. Push firmly on the gate post and any nearby fence posts to see if they rock in the ground. A wobbly post usually means the concrete footing has cracked or the post itself has begun to rot below ground level. Look closely at the base of timber posts for soft, spongy wood or discolouration – both are signs of rot.

Inspect all fixings. Run your hand along fence rails and panels, checking for loose nails, missing screws, or brackets that have pulled away from the timber. On gates, check the latch and any diagonal bracing, since a missing brace is a very common reason for sagging.

Look at the whole structure from a distance. Step back and view the gate or fence line from several metres away. This makes it much easier to spot whether the lean is coming from one post, a whole run of panels, or the gate itself.

DIY Fixes for a Sagging Gate

Once you know what’s causing the sag, most gate repairs are straightforward weekend jobs.

Tighten or replace the hinges. If screws have worked loose, remove them, fill the holes with wood filler or wooden matchsticks and wood glue, let it dry, then re-drill and refit. For badly worn holes, move the hinge slightly and screw into fresh timber instead.

Fit a turnbuckle diagonal brace. This is the classic fix for how to fix a sagging gate and works brilliantly on timber gates. A turnbuckle kit runs a cable diagonally from the top hinge corner to the bottom latch corner, and tightening the turnbuckle pulls the frame back square. It’s inexpensive, widely available at DIY shops, and takes under an hour to fit.

Add or replace a wooden diagonal brace. If you’d rather not use a cable kit, a timber brace fitted diagonally across the gate frame – always running from the bottom hinge corner up to the top latch corner – does the same job and blends in more naturally with a traditional gate.

Upgrade to heavier-duty hinges. If your gate is solid oak or a wide double gate, standard hinges may simply be undersized. Fitting longer, heavier hinges with more fixing points spreads the load and reduces future sag.

Pack out or reset the hinge post. If the post itself has moved, you may need to firm it up in the ground before any hinge repair will hold. See the fence-post advice below, as the same principles apply.

DIY Fixes for a Leaning Fence

A leaning fence is usually a post problem, a panel problem, or both.

Straighten and re-secure a leaning post. For a post that’s shifted but is still structurally sound, you can often straighten it using a temporary support strut, then pack the base with fresh gravel or postcrete poured around it. Let it cure fully before removing the support.

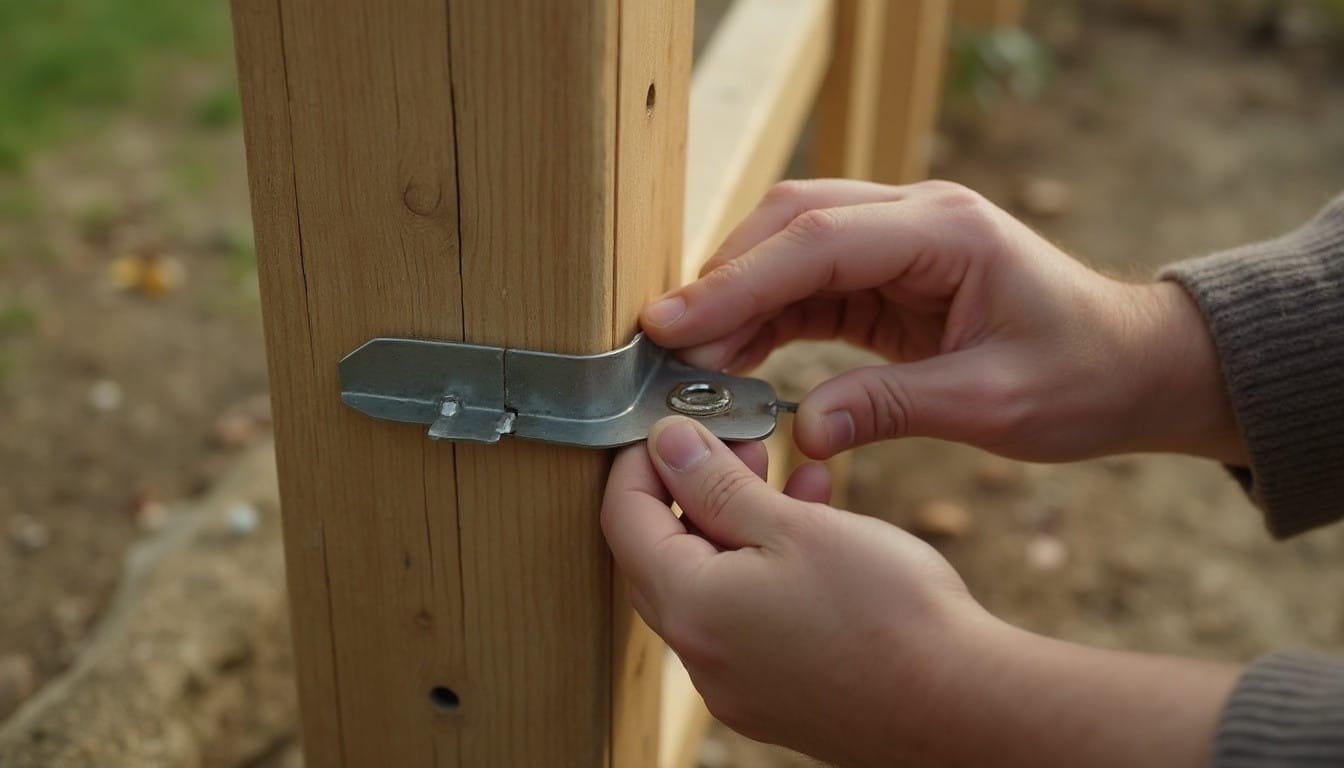
Fit a metal post support (spur). If the base of a timber post has rotted but the top section is fine, a concrete-in metal spur bolted to the sound timber is a quick, effective leaning fence fix that avoids digging out and replacing the whole post.

Replace rotten posts entirely. Where rot has taken hold throughout, it’s usually better to dig out the old post, set a new one in fresh concrete to the correct depth (generally around two feet, deeper for taller fences), and allow it to cure before reattaching panels.

Re-tension or replace panel fixings. Loose panels can often be pulled back square and reattached with galvanised brackets or coach screws rather than the thinner nails originally used. Galvanised fixings resist rust far better over time.

Add extra support for exposed runs. Fence lines that catch strong wind – common on corner plots or exposed gardens across London – benefit from additional postcrete depth or concrete gravel boards at the base to reduce future movement.

When It’s Time to Call a Professional

Some jobs are well within DIY reach, but others are worth handing over. Consider calling in a professional if:

  • Multiple posts are rotten or the whole fence line is out of true, not just one section
  • You’re dealing with a heavy gate, an automated gate, or ironwork requiring welding
  • Ground conditions make digging and concreting difficult, such as clay soil or nearby drainage and utility runs
  • You’ve tried a repair and the sag has returned within a few months
  • You simply don’t have the time or the right tools for the job

A local specialist in fence repair London homeowners trust will also know how to work around shared boundaries, party wall considerations, and council or conservation area rules that sometimes apply to garden structures.

Get It Sorted Properly

A sagging gate or leaning fence rarely fixes itself, and the longer it’s left, the more strain it puts on the rest of the structure. If you’ve worked through the checks above and you’re still not confident tackling the repair yourself, Bob’s Handyman Services is on hand across London to get your gate swinging smoothly and your fence standing straight again.Β 

Common Questions About Leak Repairs in London

What is a sagging gate?
A sagging gate is one that has dropped out of alignment so it no longer swings freely or sits square in its frame – it’s usually most obvious at the latch end, where the gate drags on the ground or won’t close properly.
What causes a gate to drop?
Gate drop nearly always starts at the hinge post – either the hinge fixings have worked loose, the post itself has shifted, or the frame has racked out of square under the gate’s own weight over time.
How do I adjust a gate that has dropped?
For a small drop, try loosening the hinge screws, lifting the gate back level, and slipping a washer or thin shim behind the top hinge before retightening – this alone can correct a slight sag. For anything more pronounced, you’ll likely need one of the bracing or hinge fixes covered above.
How do you make a gate that won’t sag?
Good prevention starts at the build stage: use properly seasoned, adequately sized timber, fit heavy-duty hinges rated for the gate’s actual weight, include a diagonal brace from the start rather than adding one later, and set the hinge post in a solid concrete footing.
Why has my fence started leaning suddenly?
A sudden lean usually points to strong wind combined with a weakened or rotten post, rather than gradual ground movement. Check the post at ground level for rot or a cracked concrete base.
How much does professional fence repair cost in London?
Costs vary depending on the extent of the damage, access, and whether posts need full replacement. It’s best to get a few quotes so you can compare like for like.

How to Stop a Gate or Fence from Sagging

Fix Squeaky Floorboards

  • Squeaks happen when loosened nails or screws let boards shift and rub against the joists below.
  • Find the exact spot by walking slowly and pressing down where the noise starts.
  • Talcum powder or graphite worked into the carpet pile can quieten mild squeaks quickly.
  • Breakaway screw kits fix squeaks permanently through carpet, with no visible mark left behind.
  • If you have access from below, shims or extra screws into the joists give a longer-lasting repair.
  • Widespread squeaking, sagging, or damp signs mean it’s time to call a professional.


Squeaky floorboards have a way of announcing themselves at the worst possible moment. The good news: most squeaks can be fixed without lifting your carpet at all, using a few simple tools and a bit of patience.

"*" indicates required fields

There’s a particular kind of dread that comes with tiptoeing past a sleeping baby, a light-sleeping partner, or a flatmate who works nights, only for one floorboard to let out a creak so loud it could wake the neighbours. Squeaky floors are one of those problems that seem minor until you’re the one holding your breath at 2am, weight balanced on one foot like a poorly trained ballet dancer.

The good news is that you don’t need to rip up your carpet to sort it out. Most squeaks can be tackled with a bit of patience, the right tools, and an afternoon you weren’t planning to spend crawling around your living room. This guide walks through how to fix squeaky floorboards without lifting carpet, from working out what’s actually causing the noise to the fixes that genuinely work.

Why Do Floorboards Squeak?

Floorboards squeak for one simple reason: something is moving that shouldn’t be. Wood expands and contracts with changes in temperature and humidity, which is completely normal, but over time this movement can loosen the nails or screws holding boards to the joists underneath. Once that grip weakens, the board shifts slightly whenever weight is applied, and the friction between wood, nail, and joist creates that unmistakable creak.

Older London properties are particularly prone to this. Many homes have original timber floors that have been through decades of seasonal movement, DIY carpet fittings, and the occasional over-enthusiastic house party. Add in the fact that carpet hides the floorboards from view, and it’s easy for small gaps or loose fixings to go unnoticed until the squeaking becomes impossible to ignore.

Other common culprits include joists that have dried out and shrunk slightly, subfloor panels that weren’t fully secured, or boards that were never quite fitted flush in the first place. None of this means your floor is falling apart. It just means a few fixings need attention.

Finding the Source of the Squeak

Before reaching for tools, spend ten minutes playing detective. Walk slowly across the room in socks, applying steady weight with each step, and listen carefully for where the noise starts. It’s often not exactly where you’d expect, so it helps to mark the spot with a small piece of masking tape once you find it.

Press down firmly on the suspected area with your hand or foot. A squeak that appears with downward pressure usually means a board is rubbing against a nail or against a neighbouring board. If you feel any give or slight movement in the floor as you press, that’s a good sign the fixings underneath have loosened.

It’s worth checking a few square feet around the noisy spot too, since squeaks can travel along a board and seem to come from slightly the wrong place. Once you’ve narrowed it down, you’re ready to try a fix.

Fixes You Can Try Without Lifting the Carpet

The beauty of most squeaky floorboard repairs is that they work through the carpet itself, so there’s no need to touch your flooring.

The simplest option is a lubricant. Talcum powder, powdered graphite, or a specialist floor lubricant can be worked into the carpet pile at the squeaky spot. Sprinkle it on, then work it gently into the fibres with your fingers or a soft brush so it filters down between the boards. This reduces the friction that’s causing the noise and is often enough to quieten a mild squeak, though it’s more of a short-term fix than a permanent one.

For something longer lasting, specialist squeak-fixing screw kits are widely available and designed specifically for use through carpet. These kits use a breakaway screw head: you drive the screw through the carpet and into the floorboard and joist below, and once it’s fully seated, the head snaps off cleanly below the carpet pile, leaving no visible mark. It sounds fiddly, but the kits come with a depth-control jig that makes the process fairly foolproof, and it’s genuinely satisfying to hear a squeak disappear for good.

If you don’t fancy buying a specialist kit, a standard countersunk screw can work in a similar way, though you’ll need to locate the joist first using a stud finder so you’re screwing into something solid rather than thin air. Drive the screw at a slight angle through the carpet, board, and into the joist, then use pliers to snap off any protruding tip before smoothing the carpet back over the top.

Fixes From Below If You Have Access

If you have access to the floor from underneath, such as through a cellar, crawl space, or an accessible loft for upstairs floors, you’re in a much stronger position, because these repairs tend to be more permanent and don’t involve going anywhere near the carpet at all.

Look for gaps between the floorboards and the joists. A common fix is to insert shims, thin wedges of wood coated with a little wood glue, into any gaps you find, tapping them gently into place so the board sits snugly again. Avoid overdoing it, since forcing a shim in too far can actually lift the board and create a new squeak somewhere else.

Another effective approach is to add extra screws from below, driven up through the subfloor and into the underside of the floorboard, pulling everything tightly together. Metal bridging or additional blocking between joists can also help stiffen a bouncy section of floor that’s contributing to multiple squeaks in one area.

When the Repair Needs a Professional

Most squeaks respond well to a DIY fix, but there are times when it’s worth calling in a professional rather than spending your weekend under the floor. If squeaking is widespread across an entire room rather than isolated to a board or two, this can point to more significant movement in the subfloor or joists, which is a bigger job than a few screws can solve.

Persistent squeaking paired with visible sagging, soft or springy patches underfoot, or any sign of damp is also worth getting checked properly, since these can indicate structural issues rather than simple wear. Likewise, if your home has engineered or floating floors rather than traditional floorboards, the fix is often different and can be easily bungled by well-meaning DIY attempts.

A professional can also access areas you can’t, such as spaces beneath fitted carpet in awkward corners, and will have the tools to make a lasting repair without damaging your flooring or dΓ©cor in the process.

Common Questions About Leak Repairs in London

Will fixing squeaky floorboards damage my carpet?
Not if it’s done carefully. Breakaway screw kits are designed to leave no visible trace, and lubricant methods work into the pile without causing any harm.
How do I find the joists under my carpet?
A stud finder designed for floor joists will locate them without needing to lift anything, though tapping gently to listen for a solid sound underneath can also give a rough guide.
How much does professional floorboard repair cost in London?
Costs vary depending on the extent of the problem and access to the floor, so it’s worth getting a proper assessment rather than guessing.
Will the squeak come back after a DIY fix?
A well-placed screw fix is usually permanent, while lubricant tends to need topping up every so often as it wears away.

How to Fix Squeaky Floorboards Without Lifting Carpet

How to Stop a Dripping Tap

  • Always turn off the water supply before starting any tap repair.
  • Pop the plug in the sink to avoid losing small screws or washers.
  • Identify whether you have a compression tap or a mixer tap first.
  • Take the old washer or cartridge with you when buying a replacement.
  • Use PTFE tape on threads to help prevent future leaks.
  • Don’t overtighten fittings when reassembling, as this can crack components.
  • If the drip continues after a repair, the valve seat may need attention.
  • When in doubt, a professional handyman can save you time and prevent water damage.


"*" indicates required fields

A dripping tap is one of those small annoyances that quickly becomes a big headache. Beyond the constant drip, drip, drip keeping you up at night, a leaking tap wastes water, pushes up your bills, and can lead to limescale build-up or even water damage if left unchecked. The good news is that fixing a dripping tap is often a straightforward DIY job that most London homeowners and tenants can tackle in under an hour with the right tools and a bit of patience.

In this guide, we’ll walk you through exactly how to stop a dripping tap, whether you’ve got an older compression tap or a modern mixer tap, and help you work out when it’s time to call in a professional instead.

Why Is My Tap Dripping?

Before you start unscrewing anything, it helps to understand what’s actually causing the problem. Most dripping taps in UK homes come down to one of a few common culprits.

The most frequent cause is a worn or perished washer. Every time you turn a compression tap off, the washer is pressed against the valve seat to stop the flow of water. Over time, this rubber or fibre washer hardens, cracks, or wears down, and it stops forming a tight seal. This is especially common in older London properties with traditional taps.

In mixer taps, the culprit is usually a worn cartridge or O-ring rather than a washer. These taps use a ceramic disc cartridge to control water flow and temperature, and when the cartridge wears out, drips and leaks follow.

Other causes include a damaged valve seat, which can develop pitting or corrosion over time, loose components that have worked their way free through daily use, or simply high water pressure that’s putting extra strain on ageing fittings. London’s notoriously hard water doesn’t help either, as limescale build-up can prevent components from sealing properly.

Tools You’ll Need

Before you begin, gather everything together so you’re not halfway through the job with wet hands, hunting for a spanner. For most tap repairs, you’ll need an adjustable spanner, a flathead and a Phillips screwdriver, a replacement washer or cartridge (matched to your tap’s make and model), some PTFE tape for sealing threads, and a cloth or towel to catch any drips and protect the sink surface. It’s also worth having a small container to hand for any tiny screws or components you remove, as these have a habit of disappearing down the plughole at the worst possible moment.

Step-by-Step: Fixing a Compression Tap

Compression taps are the traditional style found in many older London homes, usually with separate hot and cold handles that you turn to open and close.

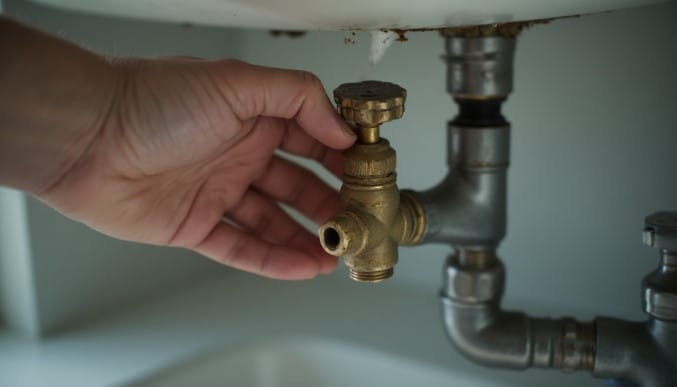
Start by turning off the water supply, either at the isolation valve beneath the sink or at the main stopcock if there isn’t one. Once the supply is off, turn on the tap to release any remaining water and pressure in the pipe, and pop the plug in the sink so you don’t lose any small parts.

Next, remove the tap handle. Most handles have a small screw hidden beneath a decorative cap on top, which pops off with a flathead screwdriver. Undo the screw and lift the handle away.

With the handle off, you’ll see the headgear nut. Use your adjustable spanner to loosen and remove this, then lift out the entire valve mechanism. At the bottom of the valve, you’ll find the old washer held in place by a small retaining nut. Undo this nut, slide off the worn washer, and replace it with a new one of the same size.

Before reassembling, take a look at the valve seat inside the tap body. If it feels rough or pitted, this could be contributing to the drip and may need resurfacing or replacing separately. Once you’re happy, reassemble the tap in reverse order, tightening each part firmly but without overdoing it, then turn the water supply back on and test.

Step-by-Step: Fixing a Mixer Tap

Mixer taps are common in London kitchens and bathrooms, and while the principle is similar, the internal mechanism is different.

As with a compression tap, turn off the water supply first and release any pressure by opening the tap. Protect the sink with a towel and keep the plug in.

Locate the small cap on top of the handle, usually marked hot or cold or with a coloured indicator, and prise it off carefully with a flathead screwdriver. Underneath, you’ll find a fixing screw. Remove this and lift the handle away to expose the cartridge.

Using your spanner, unscrew the retaining collar or nut around the cartridge, then carefully lift the old cartridge straight out. Take it with you to a plumbers’ merchant if possible, as cartridges vary by brand and model and you’ll want an exact match.

Fit the new cartridge in the same orientation as the old one, replace the retaining collar, and reassemble the handle and cap. Turn the water supply back on gradually and test the tap through its full range of movement to make sure the drip has stopped and the temperature control still works properly.

When a Dripping Tap Means a Bigger Problem

Sometimes a drip is more than just a worn washer. If you’ve replaced the washer or cartridge and the tap is still leaking, this could point to a damaged valve seat, corroded internal threads, or a fault with the tap body itself. Dripping from the base of the tap rather than the spout often indicates a worn O-ring rather than a washer issue. And if you’re noticing low water pressure, discoloured water, or leaks appearing elsewhere in the same pipework, this could suggest a wider plumbing issue rather than a simple tap fault, and is worth having looked at properly.

When to Call a Professional Instead of DIY

DIY tap repairs are a great option for straightforward washer or cartridge replacements, but there are times when calling a professional makes far more sense. If you’re dealing with an unusual or high-end tap design, if you’ve attempted a repair and the drip persists, if you’re not confident isolating your water supply safely, or if you suspect the issue is linked to your home’s wider plumbing, it’s worth bringing in an experienced handyman. This saves you time, avoids the risk of water damage from a botched repair, and ensures the job is done properly the first time, particularly important in rented London properties where you may need the work documented for your landlord.


Common Questions About Leak Repairs in London

How much does it cost to fix a dripping tap in London?
Costs vary depending on the type of tap and whether parts need to be sourced, but a simple washer or cartridge replacement by a local handyman typically costs less than calling out a specialist plumber for an emergency visit.
Can a dripping tap increase my water bill?
Yes. Even a slow drip can waste a significant amount of water over the course of a year, and if you’re on a water meter, this will show up directly on your bill.
Do I need to turn off my whole house’s water supply to fix a tap?
Not usually. Most taps have an isolation valve underneath the sink that lets you shut off the supply to just that tap. If there isn’t one, you’ll need to use the main stopcock instead.

How to Stop a Dripping Tap: A Step-by-Step Guide

Broken Tile

  • Remove the surrounding grout before lifting the broken tile.
  • Always clear away old adhesive for a level installation.
  • Use tile spacers to maintain even grout joints.
  • Check the tile with a spirit level before the adhesive sets.
  • Allow the adhesive to cure fully before applying grout.
  • Match the grout colour carefully for an invisible repair.


A cracked or chipped tile may seem like a minor cosmetic issue, but leaving it unattended can allow moisture to penetrate beneath the surface and weaken the adhesive over time. Whether you’re replacing a single wall tile or repairing a damaged floor tile, following the correct steps will help you achieve a durable, professional-looking finish.

"*" indicates required fields

There’s always one, isn’t there? A cracked tile behind the toilet that you’ve been stepping around for six months. A chipped one by the back door that catches your eye every time you bring the bins in. Nobody plans to live with a broken tile β€” it just sort of happens. You mean to sort it, then life gets in the way, and before you know it you’ve mentally filed it under “not today.”

Here’s the thing though: a single broken tile rarely stays a single broken tile. Water gets into the crack, the adhesive underneath starts to weaken, and what was a five-minute fix becomes a proper job. The good news is that replacing one tile is genuinely one of the more forgiving DIY jobs out there β€” as long as you take your time and don’t rush the drying stages. Let’s walk through how to do it properly.

When to DIY vs When to Call a Pro

If you’re dealing with a single cracked or chipped tile on a wall or floor away from major water exposure β€” a kitchen splashback, a hallway floor, a spare bedroom β€” this is a very doable weekend job for a confident beginner.

Where we’d suggest pausing and picking up the phone instead: tiles inside a shower enclosure or wet room, anything near underfloor heating pipes, or a run of several tiles that all seem to be lifting or hollow-sounding when you tap them. That last one usually means a wider problem with the substrate or the original installation, and waterproofing (tanking, in the trade) is not something you want to guess at. Get it wrong in a shower and you’re looking at a leak into the flat below, not just an ugly tile. If in doubt, it’s always worth a quick chat with a professional before you start chiselling.

Tools and Materials You’ll Need

You don’t need a van full of kit for this. Most of it you can pick up from Wickes, Screwfix, or B&Q in one trip, and a lot of it you’ll already have knocking about in a toolbox.

  • Safety gear β€” safety goggles and gloves, non-negotiable, tile shards go everywhere
  • Grout removal tool or a multi-tool with a grout blade β€” saves your wrists
  • Cold chisel and club hammer β€” for lifting the old tile
  • Tile adhesive β€” check whether you need a rapid-set for a floor you need back in use quickly
  • Notched trowel β€” matched to your tile size, ask in-store if you’re not sure which notch
  • Tile spacers β€” cheap, and worth buying a fresh pack rather than reusing bent old ones
  • Spirit level
  • Grout, ideally colour-matched to your existing grout
  • Grout float and a sponge
  • A replacement tile β€” see below, this trips people up more than anything else

A word on sourcing the replacement tile: if your tiling is a few years old, the exact match may well be discontinued. Check under the bath panel, in the loft, or wherever the original installer left spare tiles β€” homeowners forget these exist more often than you’d think. If there’s nothing spare, take a broken piece to a tile shop and see what’s closest. Sometimes a “close enough” tile placed somewhere less obvious does the job just fine.

Step-by-Step: Removing the Broken Tile

This bit’s oddly satisfying, if a little violent for a Sunday afternoon.

  1. Suit up first. Goggles on, gloves on. Old tile shatters in unpredictable directions and you don’t want a shard in your eye over something this small.
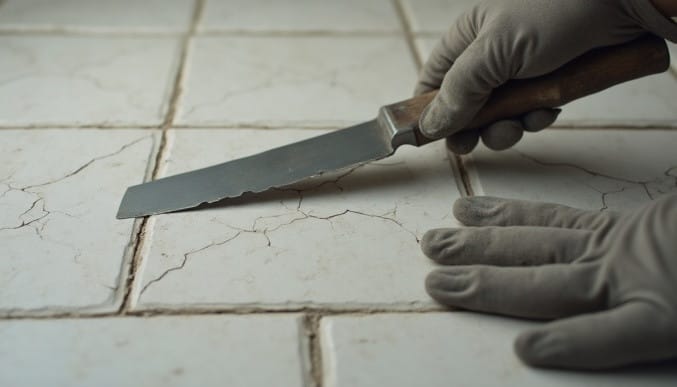
  2. Remove the grout around the broken tile. Run your grout tool or multi-tool along all four edges, cutting through fully so the tile is isolated from its neighbours. Don’t skip this β€” trying to lever a tile out with the grout still bonded will crack the tiles either side of it too, and now you’ve got three problems instead of one.
  3. Score the tile. A few criss-cross scores with the chisel across the face of the broken tile helps it break into smaller, more manageable pieces rather than one big awkward slab.
  4. Chisel out from the centre. Start in the middle of the tile where it’s already cracked, angling the chisel slightly and working outwards towards the edges. Working from the middle out reduces the risk of chipping the tiles around it.
  5. Clear the old adhesive. Once the tile’s out, you’ll have a bed of old adhesive on the wall or floor. Chisel this back as flat as you reasonably can β€” you’re aiming for a clean, sound surface, not perfection. Hoover up the dust and debris properly before moving on.

Step-by-Step: Fitting the Replacement Tile

Mix your adhesive according to the packet instructions if you’re using a powder β€” you want a consistency like thick peanut butter, not soup.

Apply adhesive to the back of the tile using your notched trowel, combing it in one direction to create even ridges. This helps the tile bed in properly and avoids air pockets, which is usually what causes tiles to sound hollow later on.

Press the tile into place, wiggling it very slightly to help it settle, and use your spacers on all sides to keep the gap even with the surrounding tiles.

Check it with the spirit level, both across the tile and in line with the tiles around it. This is the step people rush, and it’s the one that makes or breaks how the finished job looks. A tile that sits even a millimetre proud catches the light differently and it’ll bug you every time you walk past it.

Leave it to set. Standard adhesive typically needs 24 hours before grouting, though rapid-set versions can be quicker β€” check the tub. Resist the temptation to crack on with grouting early. We see this a lot: someone grouts the next morning, the tile shifts slightly under the grout, and they’re back to square one.

Grouting and Finishing

Once the adhesive’s fully cured, remove your spacers and mix your grout to a similar thick, spreadable consistency.

Using the grout float, work the grout into the joints at a diagonal angle across the tile, pushing firmly to fill the gaps completely. Matching the grout colour matters more than people expect β€” grout does fade and discolour over time, so hold your new grout up against the old before you commit, and consider a slightly worn-in shade rather than a bright white that’ll stick out.

Wipe away the excess with a damp sponge once it starts to firm up, rinsing the sponge regularly so you’re not just smearing grout haze around. Leave it to cure fully β€” again, check the packet, but 24 to 48 hours is typical β€” before applying a grout sealer if the area’s prone to moisture, such as a kitchen splashback or a floor near an external door.

Common Mistakes to Avoid

The single biggest one we come across: people rushing the drying time because they want their bathroom or kitchen back to normal. Adhesive and grout both need proper curing time, and cutting corners here is almost always why a repaired tile fails again within a few months.

A close second is not clearing old adhesive off the substrate properly before fitting the new tile β€” leaving it lumpy means the new tile never sits flush, however careful you are with the spirit level.

And a smaller but common one: forgetting to dry-fit the tile and spacers before mixing the adhesive. Once that adhesive’s mixed, the clock’s ticking, so any last-minute “does this actually fit” moment should happen beforehand, not while you’re on your knees with sticky hands.

When It’s Worth Calling In a Professional

If you’ve read all this and thought “that sounds like a lot of ways to go wrong,” you’re not being unreasonable. Tiling rewards patience and a steady hand, but not everyone’s got a free weekend or the inclination to find out the hard way. That’s especially true for bathroom and wet area repairs, where getting the waterproofing wrong can cause damage well beyond the tile itself.

This is exactly the kind of job our team handles regularly as part of flooring and tiling work β€” whether it’s a single broken tile or a full retile, we’ll match the job to what actually needs doing rather than talking you into more than you need.Β 

A Small Fix, Well Worth DoingΒ 

A broken tile is a small problem that’s very easy to fix properly, and very easy to make worse by rushing. Take it slow, respect the drying times, and you’ll end up with a repair nobody would ever guess wasn’t done by a professional. And if it turns out not to be your cup of tea halfway through β€” no shame in that, we’re only ever a phone call away.


Common Questions About Leak Repairs in London

Can I replace just one broken tile?
Yes. If the surrounding tiles are secure and the substrate is undamaged, replacing a single tile is a straightforward repair.
How long should tile adhesive dry before grouting?
Most standard tile adhesives require around 24 hours, while rapid-set products may cure sooner. Always follow the manufacturer’s instructions.
Do I have to remove the grout first?
Yes. Removing the grout helps isolate the damaged tile and reduces the risk of cracking neighbouring tiles during removal.

How to Remove and Replace a Broken Tile

Hidden Water Leak

  • Monitor your water bills for unexpected increases.
  • Check your water meter when no water is being used.
  • Investigate damp patches on walls, ceilings, or floors immediately.
  • Never ignore musty odours, especially in enclosed spaces.
  • Listen for running water when all taps and appliances are turned off.
  • Inspect under sinks and behind appliances regularly.


Hidden water leaks are one of the most expensive household problems because they often remain unnoticed until significant damage has already been done. Learning the early warning signs can help you act quickly, protect your property, and avoid costly repairs. Below, you’ll find practical advice on identifying hidden leaks, simple checks you can perform yourself, and answers to common questions homeowners ask.

"*" indicates required fields

A dripping tap is easy to spot. A leak behind your bathroom wall or under your kitchen floor is a different story altogether β€” it can carry on for weeks, sometimes months, before anyone notices anything’s wrong. By the time it shows itself, you’re often looking at soaked insulation, damaged plasterboard, or a floor that needs ripping up.

The good news is that your home usually gives you clues long before things get that bad. You just need to know what you’re looking and listening for. This guide walks through the common signs of a hidden leak, how to find a leak at home using a few simple checks, and when it’s time to bring in a professional to trace and fix the problem properly.

What Counts as a “Hidden” Leak?

A hidden leak is simply one you can’t see with the naked eye β€” the water’s escaping somewhere out of view rather than dripping onto the floor in front of you. In most London homes, that tends to mean one of a few places:

  • Behind walls β€” often from pipework feeding a bathroom, kitchen, or airing cupboard
  • Under floors β€” particularly where pipes run beneath floorboards or a concrete screed
  • In the loft β€” from a header tank, cold water storage, or pipework running through the roof space
  • Underground supply pipes β€” the pipe running from the street or your stopcock into the property, which can crack or corrode over time

Because none of these are on show day to day, a leak in any of these spots can sit there quietly getting worse until the damage forces its way into view.

Signs of a Hidden Leak to Watch For

Most hidden leaks announce themselves eventually β€” you just need to know what to look, listen and sniff out.

An Unexplained Rise in Your Water Bill

If your usage habits haven’t changed but your bill has crept up, that’s often the first real clue. A constant, low-level leak can use a surprising amount of water over a billing period without ever being visible.

Damp Patches, Discolouration or Bubbling Paint

Yellow or brown staining on a ceiling, a damp patch that won’t dry out, or paint and wallpaper starting to bubble and peel are classic signs of a hidden leak working away behind the surface. Even a small, faint patch is worth investigating rather than painting over.

Musty or Damp Smells

A persistent musty smell in a room β€” especially one that doesn’t have an obvious source like a damp towel or wet coat β€” often points to moisture building up somewhere it shouldn’t be, even if you can’t see any staining yet.

The Sound of Running Water When Everything’s Off

If you can hear water moving through the pipes when every tap, appliance and toilet in the house is switched off, take that seriously. It’s one of the more reliable signs something’s leaking somewhere in the system.

Mould Growth

Mould needs moisture to grow, so patches appearing on walls, ceilings, skirting boards or even inside cupboards β€” particularly if they keep coming back after cleaning β€” usually mean there’s a damp source feeding them from behind the scenes.

Warped Flooring or Skirting Boards

Laminate that’s started to lift or bow, floorboards that feel spongy underfoot, or skirting boards that have swollen or come away from the wall are strong indicators of water sitting beneath or behind them.

Reduced Water Pressure

A sudden or gradual drop in pressure from your taps or shower can mean water is escaping somewhere along the pipe run before it reaches the fixture, rather than a problem with the fixture itself.

If you’re noticing two or three of these together, it’s a good sign that something’s going on and worth acting on rather than waiting to see if it settles down.

How to Find a Leak at Home

Once you suspect a problem, a few simple checks can help narrow things down before you call anyone out.

  1. Check your water meter. Turn off every tap and appliance in the house, then note the meter reading. Leave it for an hour or two without using any water, and check again. If the reading has moved, water is escaping somewhere in the system.
  2. Isolate fixtures one at a time. If you’ve got a leak but aren’t sure where, turn off the isolation valves under sinks, toilets and appliances one by one, checking the meter or listening for running water after each. This can help you work out which part of the system is affected.
  3. Inspect under sinks and behind appliances. Pull out washing machines and dishwashers where you can, and check the flexible hoses, connections and cupboard bases under sinks for dampness, staining or a musty smell.
  4. Check your loft. Look at the header tank, ballcock and any visible pipework for drips, staining on the tank stand, or damp insulation nearby.
  5. Look outside. Walk the perimeter of the house and check for unusually damp or lush patches of lawn, damp patches on external walls, or water pooling near the stopcock or drainage β€” signs of a leak in the underground supply pipe.
  6. Check your boiler and radiators. A boiler that keeps losing pressure, or a radiator with a damp patch beneath it, can point to a leak in the central heating pipework rather than the mains supply.

These steps will often tell you roughly where the problem lies, even if they won’t show you the exact spot β€” and that’s usually as far as it’s sensible to go without specialist equipment.

Why Hidden Leaks Cause So Much Damage If Left

A leak that goes unnoticed doesn’t stay small. Water tracks along joists, soaks into plasterboard, and pools in places that were never designed to handle moisture. Left long enough, it can weaken timber flooring and joists, cause plaster to crumble, and even affect the structural integrity of a ceiling or wall.

Damp conditions are also exactly what mould needs to take hold, and prolonged exposure to mould and damp air isn’t good for anyone living in the property, particularly those with asthma or other respiratory conditions.

There’s a cost angle too. A leak that’s caught early might mean replacing a section of pipe. A leak that’s been running for months can mean new flooring, replastering, redecorating, and sometimes drying out the whole affected area before any repair work can even begin. The earlier it’s found, the smaller and cheaper the fix tends to be.

When to Call a Professional

The checks above are genuinely useful for narrowing down whether you’ve got a leak and roughly where it might be. But tracing the exact source β€” especially when it’s behind a wall, under a solid floor, or in an underground supply pipe β€” usually needs proper leak detection equipment and the experience to know where to look.

Going in blind with a hammer and chisel to “have a look behind the wall” can turn a contained leak into a much bigger repair job. A trained handyman or plumber can pinpoint the source with minimal disruption, carry out the repair, and make good the area afterwards, rather than leaving you with a hole in the wall and the same leak.


Common Questions About Leak Repairs in London

How do I know if I have a hidden water leak?
Common signs include higher-than-normal water bills, damp patches, mould growth, musty smells, peeling paint, warped flooring, and hearing water running when nothing is in use. If you notice several of these symptoms together, it’s worth investigating further.
Can a hidden leak increase my water bill?
Yes. Even a small leak can waste hundreds of litres of water over time. Because hidden leaks often run continuously, they can significantly increase your monthly water costs before you notice any visible damage.
Is a hidden water leak covered by home insurance?
It depends on your insurance policy. Many insurers cover damage caused by a sudden escape of water, but they may not cover repairing the leaking pipe itself or damage resulting from poor maintenance. Always check your policy wording.

How to Spot a Hidden Water Leak Before It Causes Serious Damage

Leak Fixing Help

  • Shut off your stopcock first. It’s usually under the kitchen sink β€” turn it clockwise to stop water flow instantly.
  • Stay away from electrics. If water is near sockets or fittings, switch off the mains at the fuse box immediately.
  • Contain the damage. Buckets, towels, and moving furniture takes minutes but can save hundreds in repair costs.
  • Take photos before you mop up. Your handyman will diagnose the problem faster with visual evidence.
  • Most leaks don’t need a plumber. Taps, pipes, radiator valves, and seals are all within a handyman’s scope.
  • The sooner you call, the less it costs. Water damage compounds quickly β€” same-day help is available across London.

"*" indicates required fields

A dripping pipe under the sink. A damp patch spreading across the ceiling. A puddle forming where there was none yesterday. Leaks have a way of appearing at the worst possible moment β€” and the panic that follows can make things worse. If you’re searching for a leak fixing handyman in London, you’ve probably already got water where it shouldn’t be.

This guide will walk you through exactly what to do right now, before help arrives. Acting quickly and calmly in the first few minutes can be the difference between a minor repair and a costly renovation.

Don’t Panic – Here’s What to Do Right Now

The most important thing you can do when you spot a leak is stay calm and act methodically. Water damage escalates quickly, but most leaks are manageable if you respond sensibly in the first few minutes.

Start by identifying the source. Is it coming from a pipe, a fitting, a radiator, or somewhere you can’t immediately see? Look for wet patches on walls or ceilings above the problem area β€” water often travels before it drips. Take a photo if you can; it’ll help your handyman diagnose the issue faster when they arrive.

Next, move anything valuable, electrical, or water-sensitive away from the affected area. Switch off any nearby electrical sockets or appliances if water is near them β€” safety comes first.

If the leak is severe, don’t wait. Shut off your water supply immediately, then call for urgent leak repair straight away.

How to Shut Off Your Water Supply

Knowing how to stop the water is one of the most useful things you can do in a leak emergency.

Your stopcock is the main valve that controls water coming into your property. In most London homes, it’s located under the kitchen sink, in a utility cupboard, or near the front door. Turn it clockwise to close it β€” “righty tighty, lefty loosey” is the rule.

If you can’t find your internal stopcock, or it’s seized and won’t turn, there may be an external stopcock in a small cover in the pavement outside your property. You’ll need a special key (sometimes called a stopcock key) to access it β€” these are available from DIY shops.

Once the water is off, run a cold tap to relieve any pressure remaining in the pipes. This will slow or stop most leaks almost immediately.

If the leak is isolated to a single appliance β€” a washing machine or dishwasher, for example β€” there may be an isolation valve on the supply pipe directly behind it. A flat-head screwdriver turned a quarter-turn can close this without affecting the rest of your water supply.

Minimising Damage While You Wait

With the water off or slowed, your next task is containment. Every minute counts when it comes to water damage.

Place towels, buckets, or bowls under any drips. If water is coming through a ceiling, gently press on the wet area to find where it’s pooled β€” sometimes releasing that pressure by making a small hole prevents a larger ceiling collapse. (If the bulge is large, contact your handyman before doing this.)

Lift rugs, move furniture, and protect flooring. If water has reached a wooden floor, dry it as quickly as possible to prevent warping. Use a mop, old towels, or even a wet-dry vacuum if you have one.

Open windows if it’s safe to do so β€” improving ventilation helps the area dry out faster and reduces the risk of mould developing later.

If water is near any electrics β€” light fittings, sockets, consumer units β€” do not touch them. Turn off the mains electricity at the fuse box and call your handyman or an electrician immediately.

What Types of Leaks Can a Handyman Fix?

A skilled leak fixing handyman can handle a wide range of common household leaks, including:

  • Leaking taps and mixer taps β€” worn washers, O-rings, or cartridges
  • Dripping pipes β€” including burst or cracked pipe sections and loose joints
  • Leaking radiator valves β€” common in older central heating systems
  • Under-sink leaks β€” from supply pipes, waste pipes, or P-traps
  • Leaking shower trays or bath seals β€” often caused by failed silicone sealant
  • Overflowing toilet cisterns β€” faulty ballcock valves or fill valves
  • Leaking washing machine connections β€” supply hoses or drain hose fittings

For most of these jobs, a reliable handyman carries the tools and parts needed to complete the repair in a single visit.

When Do You Need a Plumber Instead?

There’s some overlap between what a handyman and a qualified plumber can do, but certain situations genuinely require a Gas Safe registered plumber or specialist.

You’ll need a plumber if:

  • The leak involves your boiler, gas supply, or central heating pipework.
  • You suspect a problem with your mains water supply outside the property
  • The work requires notifiable plumbing under building regulations (such as replacing a soil stack)
  • There’s a significant burst affecting multiple areas of your home
  • You need a new bathroom or full pipe installation

If you’re ever in doubt, a good handyman will tell you honestly whether the job is within their scope. For a straightforward emergency plumber handyman situation β€” a dripping pipe, a leaking tap, a failed seal β€” a handyman is often the faster, more affordable option.

What to Tell the Handyman When They Arrive

The more clearly you can describe the problem, the faster the repair. When your handyman arrives, be ready to explain:

  • Where the leak is β€” which room, which fixture, which wall or ceiling
  • When you first noticed it β€” and whether it’s getting better or worse
  • What you’ve already done β€” particularly if you’ve shut off the water
  • Whether there’s been any previous work in that area β€” this can help identify the cause
  • Any photos you took β€” these are genuinely useful

Point out the location of your stopcock if they need to isolate the supply. If you’ve managed the leak well before they arrive, let them know β€” it means they can assess the damage properly and plan the repair accordingly.

Common Questions About Leak Repairs in London

How quickly can a leak fixing handyman reach me in London?
We offers fast response times across London. In many cases, we can be with you the same day β€” often within a few hours for urgent jobs. Call us as soon as you spot the problem so we can get someone to you quickly.
Is it safe to use water while waiting for the handyman?
That depends on the leak. If you’ve isolated the affected supply only, the rest of your water should be fine. If you’ve shut off your main stopcock, you won’t have any running water until it’s reopened. Try to keep water use minimal until the repair is complete.
Can a handyman fix a leak in a rented property?
Yes β€” tenants can call a handyman, though it’s worth notifying your landlord first if time allows. In an emergency, your safety comes first. For anything structural or involving shared building systems, your landlord or managing agent should be informed.

What Our Customer Say’s

These are some of the responses from our customers who are very satisfied

5 stars rating

Great service, punctual and as expected.

Luz Konak

5 stars rating

Great efficient service, came on time, really conscious of keeping our flat clean and tidy by taping plastic bag to catch the dust from the drilling, didn’t even need to tell him to take his shoes off (we have no shoes policy). Really impressed with the service, definitely use Bob’s Handyman Service again.

Edgar Beesley

5 stars rating

Very good service! They came on time, very happy I used your services!

Shannon Henly

5 stars rating

Good job done. Dishwater installed perfectly. Arrived on time, easy booking and reliable staff.

Bindo

5 stars rating

It was quick, professional executed in every way and done by a very friendly and peasant guy. Thank you. I will definitely use you again and recommend you to others.

Eva Martines

5 stars rating

Bob’s Handyman team did a great job the first time I called them. I would certainly be happy to use their services again.

Jacob Halse

5 stars rating

Great job! I highly recommend them!

Jerry Morison

5 stars rating

Great value for money. Reliable workmen, competitive prices and very efficient. Will use your company again.

John Pearson

5 stars rating

I was very impressed with your service – it was the first time I used it, but it surely will not the last!

Juan Quintas

5 stars rating

Thank you Bob’s Handyman for the amazing job done on my bathroom. Very professional company.

Kemi O

5 stars rating

I would definitely book them again, if I need help!

Maia Penwell

5 stars rating

It was a pleasure to deal with your staff.

Philippa Robertson

5 stars rating

Excellent service! I needed a whole room repainted and the people you sent did a wonderful job. I would recommend you to my friends.

Rebecca Stevenson

5 stars rating

I’ve been using these guys for over an year now and they are brilliant every single time. No matter of its something small or a job that needs a lot of skills they do it professionally. I’ve been recommending them to everyone.

S. Mittal

5 stars rating

I was really pleased with the work that was completed on time. The handyman who came did the jobs quickly and efficiently and left everything tidy.

Sharon Boughton

5 stars rating

I’m very pleased with the carried out work. The handyman was very knowledgeable, worked tidy and quickly and did e great job. Will be recommending your services.

Sheila Shah

5 stars rating

The job was for my parents who were very happy with the person who did the job and would definitely use your services again.

Susan Shyllon

5 stars rating

Your handy man put in extra effort to do the job, which I appreciate very much.

Tomas Lush

Leak Fixing Help: What to Do Before a Handyman Arrives

Door Repair

  • Shave & Plane Sticking Doors: Trimming down swollen or sagging wood so doors open and close smoothly.
  • Secure Loose Hinges: Tightening stripped screw holes and replacing worn hinges to eliminate sag and squeaks.
  • Align Misaligned Latches: Adjusting strike plates so door handles click shut perfectly without forcing them.
  • Seal Out Chilly Draughts: Installing weatherstripping and brush strips to cut down energy bills in older homes.


"*" indicates required fields


A faulty door is one of those household nuisances that starts as a minor irritation but quickly escalates into a major headache. Whether it’s a living room door that refuses to latch, a front door that lets in a freezing winter draught, or a bedroom door that scrapes loudly across your brand-new laminate flooring every time it opens, door issues disrupt the flow, security, and comfort of your home.

Fortunately, you don’t always need to call out an expensive specialist joiner or replace the entire door structure when things go wrong. Most everyday issues can be resolved swiftly and cost-effectively by an experienced door repair handyman London residents trust. In this comprehensive guide, we will break down why doors fail, the most common issues London homes experience, what a handyman can fix in a jiffy, and what to expect regarding timelines and costs.

Why Do Doors Develop Problems?

Doors are among the most heavily used mechanical objects in any building. They are subject to constant friction, structural movement, and environmental stress. In a bustling city like London, several unique factors contribute to doors deteriorating faster than you might expect:

  1. Building Settling and Subsidence: London is famous for its historic housing stock, ranging from Victorian and Edwardian terraces to Georgian townhouses. Many of these properties sit on clay soil, which expands and contracts depending on the weather. As a result, buildings subtly shift over time, throwing door frames out of alignment.
  2. Humidity and Temperature Fluctuations: The UK weather is notoriously unpredictable. Timber is a porous natural material that absorbs moisture during damp winters and dries out during hot summers. This constant cycle causes wooden doors to warp, swell, and shrink.
  3. General Wear and Tear: In a busy family home or shared London flat, doors are opened and closed dozens of times a day. Over time, hinges loosen, screws strip, and handles begin to sag under the sheer volume of daily use.

The Most Common Door Issues London Homes Have

When you need to fix broken door London property owners often report a handful of recurring culprits. Here are the top five door issues that a multi-skilled handyman can resolve quickly:

1. Sticking Doors

If you find yourself using brute force just to open or close a room, you are dealing with a classic sticking door repair London issue. This usually happens because the timber has swollen due to seasonal humidity, or the hinges have begun to sag under the weight of the door leaf. A handyman can quickly determine where the door is catching, plane down the offending edges with precision, and re-hang it so it swings smoothly without catching on the carpet or frame.

2. Broken or Loose Hinges

Do your doors creak, groan, or sag noticeably to one side? The hinges are likely at fault. Over time, the heavy weight of a solid wood door pulls at the hinge screws, stripping the wood inside the screw holes. A handyman can reinforce the old screw holes, replace worn-out brass or steel hinges with heavy-duty alternatives, and ensure the door is perfectly level.

3. Damaged Frames and Architraves

A door is only as good as the frame holding it. Splits, cracks, and rot in the timber frame not only look unsightly but also compromise the security of your property. Whether a frame has been damaged during a clumsy furniture move or has suffered from localized dampness, a handyman can cut out the damaged timber, piece in new wood, sand it smooth, and prepare it for painting.

4. Door Not Closing or Latching Properly

There is nothing more frustrating than a door that constantly drifts open or won’t click shut unless you slam it. This occurs when the latch tongue does not line up correctly with the strike plate on the door frame. A handyman can easily reposition the strike plate, adjust the latch mechanism, or mortice a new pocket into the frame to restore perfect closure.

5. Draught and Insulation Issues

In older London homes, gaps around external doors can make your hallway feel like an icebox and drive up your heating bills. A handyman can install high-quality draught excluders, brush strips at the bottom of the door, and weatherstripping around the frame to seal out chilly winds and improve your home’s energy efficiency.

What a Handyman Can Fix vs What Needs a Specialist

While a local handyman is incredibly versatile, it is helpful to know where their expertise shines and when a niche specialist or structural engineer is required.

What a Handyman Can Fix Easily:

  • Trimming, planing, and resizing doors that stick or drag.
  • Replacing internal and external handles, latches, and bolts.
  • Swapping out old, squeaky, or damaged hinges.
  • Fitting letterboxes, spyholes, door chains, and cat flaps.
  • Minor repairs to split frames and rotten timber sections.
  • Hanging brand-new standard internal doors into existing frames.

When You Might Need a Specialist:

  • Bespoke Historic Joinery: If you own a Grade II listed property with highly intricate, heritage-protected architectural joinery, you may require a conservation specialist.
  • Severe Structural Subsidence: If your entire wall is bowing and throwing the door frame out of shape, a structural engineer must address the underlying foundation issue first.
  • High-Security Fire Doors: While handymen can adjust standard internal doors, certified commercial fire doors with complex self-closing mechanisms and intumescent seals must be fitted and signed off by a certified fire door installer to comply with strict safety regulations.

How Long Does Door Repair Take?

One of the best things about hiring a professional handyman is the speed of service. Because they carry a wide array of specialized toolsβ€”including electric planers, chisels, routers, and various fixingsβ€”most common door problems can be resolved in a single visit.

  • Sticking door adjustment/planing: 45 to 90 minutes per door.
  • Replacing hinges or realigning a sagging door: 1 hour.
  • Fixing a latch or strike plate alignment issue: 30 to 45 minutes.
  • Installing weatherstripping and draughtproofing: 1 to 2 hours.
  • Hanging a brand-new internal door into an existing frame: 2 to 3 hours.

How Much Does Door Repair Cost in London?

The cost of door repair in London varies depending on the complexity of the damage and whether new hardware (like hinges or locks) needs to be purchased.

Most reputable London handyman services charge either an hourly rate or a fixed half-day/full-day rate. On average, you can expect an hourly rate ranging from Β£50 to Β£80 per hour, with a minimum booking charge of one hour. For larger projects, such as rehanging multiple doors throughout a property, a half-day rate (Β£200 – Β£300) or a full-day rate (Β£400 – Β£550) offers excellent value.

Tip: To keep your costs down, take clear photos of the problem area and send them to your handyman beforehand so they can arrive with the correct materials and tools.

Frequently Asked Questions About London Door Repairs

Can you fix door locks?
Yes! A multi-skilled handyman can easily replace night latches (Yale locks), Euro cylinders, sash locks, and basic internal bathroom privacy locks. However, for highly complex digital smart locks or British Standard insurance-approved 5-lever mortice locks that require deep structural morticing, a specialist locksmith might be recommended.
Do you replace whole doors?
Absolutely. If your door is cracked beyond repair, warped too severely to be planed, or you simply want a modern aesthetic upgrade, a handyman can measure up, trim down a new standard door blank to fit your existing frame, mortice out the slots for the hinges, and install your chosen handles.
Do you repair internal and external doors?
Yes, we fix both. Whether it’s a lightweight hollow-core internal bedroom door or a heavy, solid oak external front door, a handyman has the heavy-duty equipment and expertise to handle both types safely.

What Our Customer Say’s

These are some of the responses from our customers who are very satisfied

5 stars rating

Great service, punctual and as expected.

Luz Konak

5 stars rating

Great efficient service, came on time, really conscious of keeping our flat clean and tidy by taping plastic bag to catch the dust from the drilling, didn’t even need to tell him to take his shoes off (we have no shoes policy). Really impressed with the service, definitely use Bob’s Handyman Service again.

Edgar Beesley

5 stars rating

Very good service! They came on time, very happy I used your services!

Shannon Henly

5 stars rating

Good job done. Dishwater installed perfectly. Arrived on time, easy booking and reliable staff.

Bindo

5 stars rating

It was quick, professional executed in every way and done by a very friendly and peasant guy. Thank you. I will definitely use you again and recommend you to others.

Eva Martines

5 stars rating

Bob’s Handyman team did a great job the first time I called them. I would certainly be happy to use their services again.

Jacob Halse

5 stars rating

Great job! I highly recommend them!

Jerry Morison

5 stars rating

Great value for money. Reliable workmen, competitive prices and very efficient. Will use your company again.

John Pearson

5 stars rating

I was very impressed with your service – it was the first time I used it, but it surely will not the last!

Juan Quintas

5 stars rating

Thank you Bob’s Handyman for the amazing job done on my bathroom. Very professional company.

Kemi O

5 stars rating

I would definitely book them again, if I need help!

Maia Penwell

5 stars rating

It was a pleasure to deal with your staff.

Philippa Robertson

5 stars rating

Excellent service! I needed a whole room repainted and the people you sent did a wonderful job. I would recommend you to my friends.

Rebecca Stevenson

5 stars rating

I’ve been using these guys for over an year now and they are brilliant every single time. No matter of its something small or a job that needs a lot of skills they do it professionally. I’ve been recommending them to everyone.

S. Mittal

5 stars rating

I was really pleased with the work that was completed on time. The handyman who came did the jobs quickly and efficiently and left everything tidy.

Sharon Boughton

5 stars rating

I’m very pleased with the carried out work. The handyman was very knowledgeable, worked tidy and quickly and did e great job. Will be recommending your services.

Sheila Shah

5 stars rating

The job was for my parents who were very happy with the person who did the job and would definitely use your services again.

Susan Shyllon

5 stars rating

Your handy man put in extra effort to do the job, which I appreciate very much.

Tomas Lush

Door Repair Problems a Handyman Can Fix Quickly

Furniture Assembly Problems

  • Missing parts can delay or stop furniture assembly entirely.
  • Instruction manuals are often unclear or difficult to follow.
  • Large items usually require more than one person to assemble safely.
  • Incorrect alignment can affect stability and usability.
  • Wall-mounted furniture requires correct fixing for different wall types.
  • DIY mistakes can damage panels and fittings.
  • Professional help can improve safety and accuracy.

"*" indicates required fields


Buying new furniture is often an exciting part of improving a home or workspace. Whether it is a new wardrobe for a bedroom, a desk for a home office, or storage units for a rental property, many people assume assembly will be a straightforward task. After all, most furniture arrives with instructions, labelled components, and all the fittings supposedly included in the box.

In reality, however, furniture assembly can quickly become more complicated than expected. Missing parts, unclear instructions, alignment issues, and heavy components frequently turn what seems like a simple project into a frustrating experience. Many homeowners, tenants, landlords, and property managers discover that assembling furniture properly requires more time, tools, and practical knowledge than anticipated.

Understanding the most common assembly challenges can help people avoid mistakes, protect their furniture investment, and ensure that completed items remain safe and stable for years to come.

Missing or Incorrect Components

One of the most common issues encountered during flat-pack furniture assembly is discovering that essential components are missing or incorrect.

Although manufacturers typically include all necessary fittings, errors can occur during packaging. Missing screws, brackets, dowels, hinges, or connecting bolts can halt assembly entirely. In some cases, the correct quantity may be supplied, but the wrong size or type of fitting is included.

Problems are not always limited to hardware. Occasionally, furniture arrives with duplicate panels or missing structural sections, making completion impossible without replacement parts.

Experienced handymen are often familiar with a wide range of furniture fittings and fastening systems. They can quickly identify whether a missing component can be safely substituted or whether a replacement part must be obtained from the manufacturer.

This knowledge can save considerable time and prevent unnecessary damage caused by using unsuitable alternatives.

Confusing Assembly Instructions

Poorly written manuals remain one of the biggest frustrations associated with assembling furniture.

Many furniture manufacturers distribute products internationally, and instruction booklets are often translated into multiple languages. As a result, wording can be unclear, diagrams may lack detail, and assembly sequences can become difficult to follow.

Even when instructions appear straightforward, small details are sometimes overlooked. A panel installed backwards early in the process may not become obvious until several steps later, requiring partial disassembly and additional work.

A common example involves drawer units where runners are attached incorrectly. The mistake may not be noticed until the drawers fail to slide properly after the entire frame has been assembled.

Those with experience in furniture assembly often recognise common design patterns and can identify potential issues before they become major problems.

Furniture That Requires Multiple People

Certain pieces of home furniture assembly simply cannot be completed safely by one person.

Large wardrobes, tall shelving units, king-size bed frames, sideboards, and storage cabinets often require multiple people to position, stabilise, and secure components during assembly.

Attempting these projects alone creates several risks. Heavy panels can fall unexpectedly, assembled sections can twist under their own weight, and lifting large components without assistance may lead to injury.

For example, a wardrobe side panel may appear manageable when lying flat. However, once partially assembled, the combined structure can become awkward and unstable when raised into position.

The same applies to office furniture installations involving large desks, conference tables, and workstation systems. These products frequently require careful coordination during assembly to prevent damage to components and surrounding property.

Having sufficient support throughout the process greatly improves safety and accuracy.

Damaged Panels and Incorrect Alignment

One of the quickest ways to ruin furniture is through improper furniture fitting techniques.

When components do not appear to fit together correctly, some people attempt to force them into place. Unfortunately, this often leads to chipped laminate surfaces, cracked panels, damaged fixings, or stripped screw holes.

Alignment problems commonly occur when earlier assembly stages have not been completed precisely. A slight error at the beginning of a project can create larger issues later, particularly when installing doors, drawers, or shelving systems.

Consider a flat-pack chest of drawers. If the main frame is not perfectly square, drawer runners may become misaligned, causing drawers to stick, sag, or fail to close properly.

Correct alignment is essential not only for appearance but also for long-term structural stability. Furniture assembled accurately generally lasts longer and performs better throughout its lifespan.

Wall-Mounted Furniture Challenges

Installing furniture installation systems on walls presents an entirely different set of challenges.

Floating shelves, wall-mounted cabinets, television units, and modular storage systems rely heavily on appropriate fixing methods. The wrong fixing choice can compromise both safety and performance.

Many UK properties contain a mixture of wall types, including plasterboard, brick, blockwork, and stud partition walls. Each requires specific fixings capable of supporting the intended load.

For example, a fixing suitable for a solid brick wall may fail completely if used in plasterboard without additional support. Likewise, shelves carrying books or decorative items place far greater demands on wall fixings than lightweight displays.

Correctly identifying wall construction, selecting suitable anchors, and ensuring level installation are all critical aspects of successful wall-mounted furniture assembly.

Flat-Pack Wardrobes and Large Storage Units

Among all forms of flat-pack furniture assembly, wardrobes and large storage units are often considered the most challenging.

These pieces frequently contain dozens of individual components, numerous fittings, multiple doors, and complex internal storage arrangements. Assembly can take several hours even under ideal conditions.

A common difficulty involves ensuring that the main structure remains perfectly square. Small deviations can create significant problems when fitting doors or adjusting internal shelves.

Sliding wardrobe doors present particular challenges. Even slight alignment issues can prevent smooth operation or cause doors to rub against surrounding panels.

Levelling also plays an important role. Floors in many properties are not perfectly even, and large wardrobes must often be adjusted to compensate for minor surface irregularities.

Failure to address these issues can result in unstable furniture that gradually shifts over time.

Office Furniture Assembly Issues

Modern workplaces increasingly depend on well-designed office furniture assembly to support productivity and comfort.

Office desks, filing cabinets, storage systems, reception furniture, and ergonomic workstations often involve more complicated assembly requirements than residential furniture.

Height-adjustable desks, for example, may contain electrical components, cable management systems, and specialised adjustment mechanisms that require precise installation.

Meeting room furniture frequently involves large surfaces that must be aligned accurately to create a professional appearance.

Incorrect assembly can affect usability, reduce furniture lifespan, and potentially create workplace safety concerns.

For landlords furnishing rental offices or businesses upgrading their workspaces, proper assembly helps ensure that furniture performs as intended while maintaining a professional environment.

Common DIY Mistakes During Furniture Assembly

Many furniture-related problems arise because of avoidable mistakes made during assembling furniture projects.

One common issue involves overtightening screws. Excessive force can strip threads, crack particleboard panels, and weaken connections rather than strengthen them.

Incorrect part placement is another frequent problem. Components that appear similar may have subtle differences, and installing the wrong piece can create complications later.

Skipping instruction steps often causes difficulties as well. Some assembly sequences are designed specifically to ensure proper alignment and stability. Ignoring these steps can lead to structural weaknesses.

Using unsuitable tools presents additional risks. Improvised tools may damage fittings, scratch surfaces, or fail to achieve the required level of precision.

Many people also overlook the importance of checking measurements and orientation before securing components permanently. Taking a few moments to verify placement can prevent significant rework later.

When Furniture Assembly Becomes a Safety Risk

Poorly completed furniture assembly can create genuine safety concerns within homes and workplaces.

Tall furniture items such as wardrobes, bookcases, and storage units may become tipping hazards if not assembled or anchored correctly. This is particularly important in properties with children or pets.

Wall anchoring systems are often supplied with large furniture items for good reason. Proper anchoring helps prevent accidental movement and significantly reduces the risk of tipping incidents.

Structural instability can also develop when fixings are installed incorrectly or when damaged components are used during assembly.

In office environments, unstable furniture may present additional concerns due to frequent daily use and higher occupancy levels.

Recognising when assembly quality affects safety is essential for protecting both occupants and property.

Benefits of Using a Handyman for Complex Furniture Assembly

For larger or more challenging projects, handyman services can provide practical advantages.

Experienced handymen typically possess the tools needed to complete furniture assembly efficiently and accurately. They are often familiar with common furniture systems and can identify potential problems early in the process.

Accurate assembly reduces the likelihood of damaged components, misaligned doors, unstable structures, and unnecessary delays.

Professional assistance can also be particularly valuable when dealing with heavy furniture, wall-mounted units, or complex office installations.

Another benefit involves time savings. Busy professionals, landlords managing multiple properties, and homeowners balancing family commitments may prefer to avoid spending an entire weekend assembling a single wardrobe or storage system.

Most importantly, proper assembly helps ensure that furniture remains safe, functional, and durable over the long term.

Final Thoughts on Preventing Furniture Assembly Problems

While flat-pack products are designed for convenience, furniture installation often proves more demanding than expected. Missing components, confusing instructions, alignment issues, heavy lifting requirements, and wall-mounting challenges can quickly turn a simple project into a time-consuming task.

Many assembly problems stem from rushing the process, using unsuitable tools, or overlooking critical details during construction. Taking time to prepare properly, carefully following instructions, and recognising when a project exceeds DIY comfort levels can prevent costly mistakes.

Whether assembling furniture for a family home, rental property, or office environment, accuracy and safety should always take priority over speed. Well-assembled furniture not only looks better but also performs more reliably and remains secure for years to come.

Understanding the challenges involved allows homeowners, tenants, landlords, and property managers to make informed decisions and avoid many of the common problems that occur during furniture assembly projects.


Common Questions About Furniture Assembly

Why is flat-pack furniture sometimes difficult to assemble?
Flat-pack furniture often includes multiple components and detailed steps that can be confusing. Poor instructions, missing parts, and complex structures make the process more difficult than expected.
What tools are needed for furniture assembly?
Common tools include screwdrivers, Allen keys, drills, spirit levels, and measuring tools. Some items may also require specialist fittings depending on the design.
Can furniture look correct but still be assembled wrongly?
Yes. Even if furniture appears complete, internal misalignment or loose fittings can affect stability and long-term durability.

What Our Customer Say’s

These are some of the responses from our customers who are very satisfied

5 stars rating

Great service, punctual and as expected.

Luz Konak

5 stars rating

Great efficient service, came on time, really conscious of keeping our flat clean and tidy by taping plastic bag to catch the dust from the drilling, didn’t even need to tell him to take his shoes off (we have no shoes policy). Really impressed with the service, definitely use Bob’s Handyman Service again.

Edgar Beesley

5 stars rating

Very good service! They came on time, very happy I used your services!

Shannon Henly

5 stars rating

Good job done. Dishwater installed perfectly. Arrived on time, easy booking and reliable staff.

Bindo

5 stars rating

It was quick, professional executed in every way and done by a very friendly and peasant guy. Thank you. I will definitely use you again and recommend you to others.

Eva Martines

5 stars rating

Bob’s Handyman team did a great job the first time I called them. I would certainly be happy to use their services again.

Jacob Halse

5 stars rating

Great job! I highly recommend them!

Jerry Morison

5 stars rating

Great value for money. Reliable workmen, competitive prices and very efficient. Will use your company again.

John Pearson

5 stars rating

I was very impressed with your service – it was the first time I used it, but it surely will not the last!

Juan Quintas

5 stars rating

Thank you Bob’s Handyman for the amazing job done on my bathroom. Very professional company.

Kemi O

5 stars rating

I would definitely book them again, if I need help!

Maia Penwell

5 stars rating

It was a pleasure to deal with your staff.

Philippa Robertson

5 stars rating

Excellent service! I needed a whole room repainted and the people you sent did a wonderful job. I would recommend you to my friends.

Rebecca Stevenson

5 stars rating

I’ve been using these guys for over an year now and they are brilliant every single time. No matter of its something small or a job that needs a lot of skills they do it professionally. I’ve been recommending them to everyone.

S. Mittal

5 stars rating

I was really pleased with the work that was completed on time. The handyman who came did the jobs quickly and efficiently and left everything tidy.

Sharon Boughton

5 stars rating

I’m very pleased with the carried out work. The handyman was very knowledgeable, worked tidy and quickly and did e great job. Will be recommending your services.

Sheila Shah

5 stars rating

The job was for my parents who were very happy with the person who did the job and would definitely use your services again.

Susan Shyllon

5 stars rating

Your handy man put in extra effort to do the job, which I appreciate very much.

Tomas Lush

Chat