

A toilet that continues to hiss or send a thin stream into the pan is wasting water and signalling that the cistern has not completed its cycle. The fault is usually on the fill side, which controls the incoming water, or the flush side, which should seal the outlet. You can identify which system is responsible without dismantling valves or reaching into moving parts.
First confirm that water is moving
Dry the back of the pan with tissue and wait without flushing. A fresh wet line, ripples or a faint sound confirms flow. In a concealed-cistern toilet, listen behind the access plate. Condensation on a cold pan is different: it forms droplets over a broad surface rather than a defined stream from the rim.
Add a few drops of food colouring to cistern water, keeping it away from bleach products. Do not flush for 20 minutes. Colour appearing in the pan indicates leakage through the flush valve or seal. Clear water running through the internal overflow points more strongly to the fill valve or water-level adjustment.
Know the parts you are looking at
A modern cistern normally contains a fill valve with a float, a central flush valve, and an overflow route incorporated into the flush tower. Older toilets may use a ball float on an arm and a separate overflow pipe. Photograph the arrangement before touching anything and find the model marking if visible.
Do not remove a heavy ceramic lid unless you can place it flat on a padded surface. Dual-flush buttons may unscrew or release in a specific way; forcing them can break the linkage. For a concealed cistern, use only the intended service opening.
Tools and safe preparation
- Torch, dry tissue and a small mirror
- Food colouring for a leak test
- Old towel and shallow container
- Manufacturer’s instructions or a clear photograph of the mechanism
- Gloves for cleaning accessible components
Locate the toilet isolation valve before starting. It is commonly on the small supply pipe beside the cistern. If it is seized, damaged or begins to leak, do not force it. Make sure you also know the location of the property’s main stopcock by following the guide to finding and using an indoor stopcock.
Step 1: watch one complete refill
Flush once with the lid removed and keep hands clear. The float should fall, water should enter, and the float should rise smoothly until flow stops. The final water level should remain below the top of the overflow route and usually align with a moulded level mark.
If water reaches the overflow, gently lift the float. Flow that stops suggests adjustment or a float that is catching. Flow that continues despite the float being fully raised suggests debris or wear in the fill valve. Do not bend plastic arms or improvise weights.
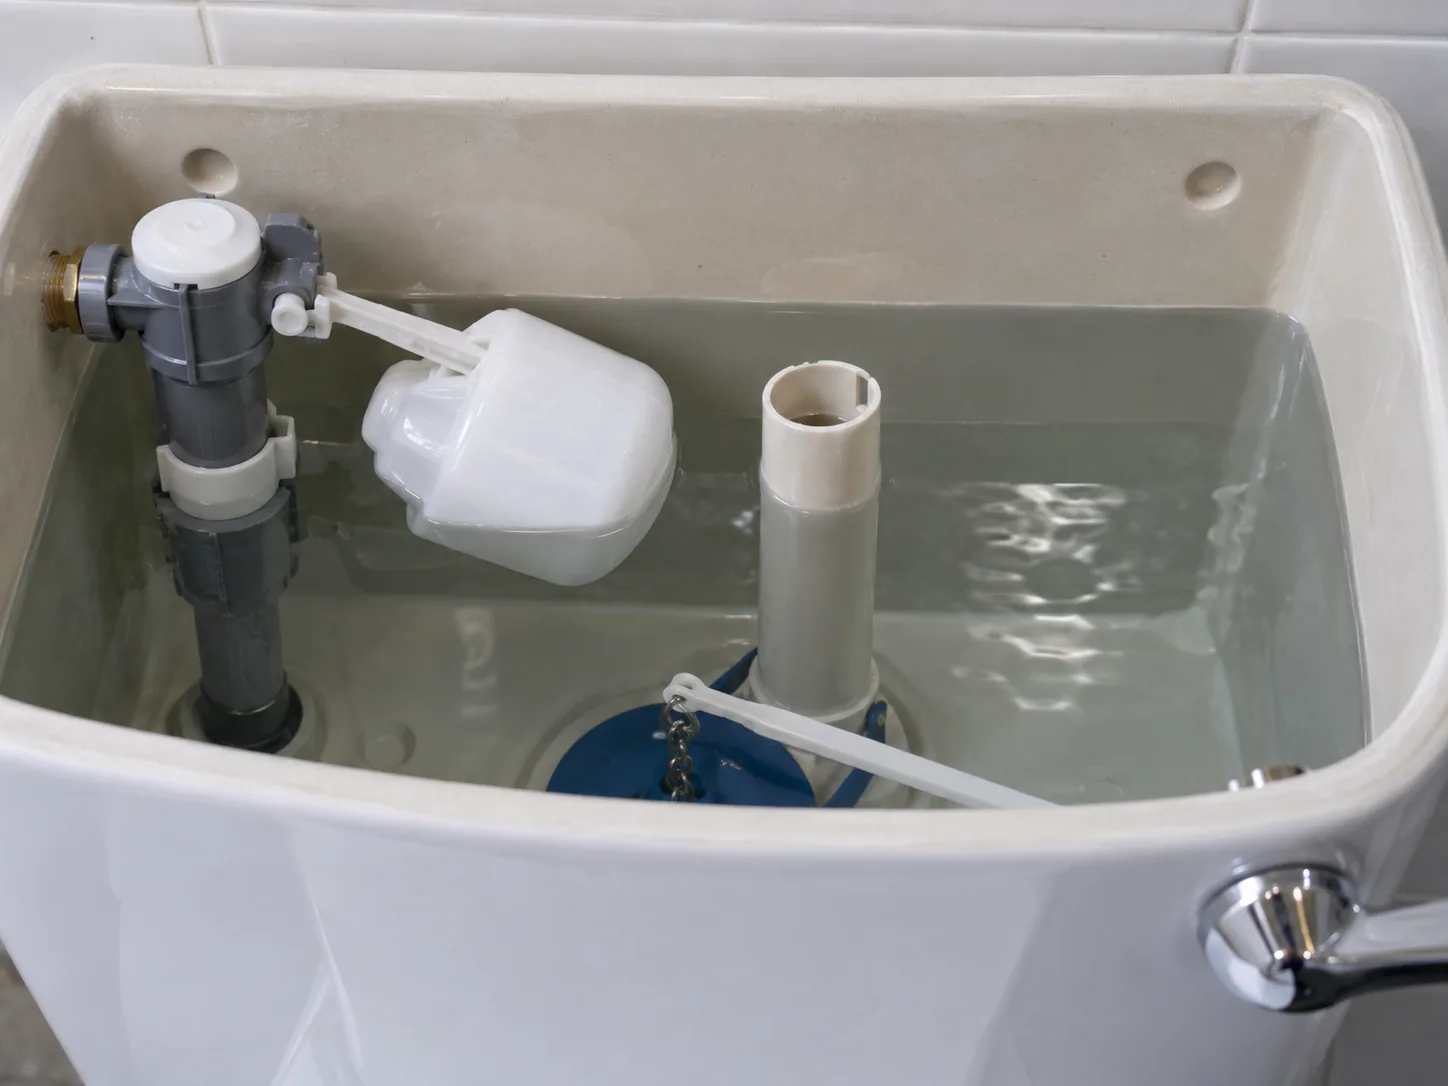
Step 2: check whether the float is obstructed
Look for the float rubbing against the cistern wall, flush tower or cable. A loose valve can rotate and create interference. Also check whether the float has filled with water, which prevents it rising. Restore only adjustments described for that exact valve. If the body is loose at the cistern entry, isolate the supply and arrange repair rather than twisting it from inside, which can disturb the external seal.
Step 3: inspect the flush control
A button, lever or cable that does not return fully can hold the flush valve slightly open. Operate it slowly and confirm there is free play after release. Make sure the cistern lid is seated correctly; an incorrectly fitted lid can press on a button assembly.
If the control returns but the dye test shows leakage, the flush seal may have scale, grit, a blister or distortion. Some towers release with a short twist after the supply is isolated and the cistern is emptied, but designs differ. Follow the manufacturer’s instructions. Never force a brittle fitting.
Step 4: clean only serviceable parts
Where the flush valve is designed for removal, rinse the rubber seal and its seating surface with clean water. Remove loose scale with a soft cloth; sharp tools create a permanent leak path. Replace a swollen, split or hardened seal with the exact part rather than applying grease or sealant.
Fill valves may contain a small diaphragm and filter, but opening them without the correct sequence can release parts or cause a flood when the supply returns. If the instructions are unavailable, replacement or toilet repair is safer than trial-and-error dismantling.
Step 5: restore water and verify the repair
Reassemble the mechanism, ensure the lid controls do not bind, and open the isolation valve slowly. Watch the cistern fill twice. Dry the supply connection and press tissue around it to reveal a seep. Repeat the dye test after the water settles.
Common mistakes
- Turning a seized isolation valve with excessive force.
- Adjusting the float to hide a worn fill valve.
- Using a universal seal without matching its diameter and profile.
- Dropping cistern-cleaning blocks where they obstruct moving parts.
- Overtightening plastic nuts or ceramic fixings.
- Assuming every sound comes from the toilet rather than nearby pipework.
- Leaving a concealed leak unmonitored after replacing the access plate.
When a plumber is the sensible option
Arrange professional plumbing support if the isolator will not close, the supply connector leaks, the cistern is cracked, fixings are corroded, or the mechanism is inaccessible. An intermittently running toilet in a rented property should be reported promptly rather than left to increase the bill or cause hidden damp.
If the toilet shares a boxed-in supply with other fittings, do not remove panels blindly. Screws can be hidden beneath finishes and pipes or cables may sit directly behind them. A small planned access repair is preferable to damaging tiles or creating an uncontrolled leak while trying to reach a low-cost valve.
Where the pan, concealed frame or surrounding finish also needs work, coordinate the repair through a bathroom refurbishment service so the plumbing can be tested before panels and tiles are reinstated.
Finish with evidence, not silence
A quiet cistern immediately after adjustment is not enough. Confirm the water stops below the overflow, the control returns freely, the pan remains dry and all external connections pass a tissue test. Those four checks separate a genuine repair from a fault that has merely paused.

