

A sink that takes a minute to empty usually has a restriction close to the plughole or trap, but the pattern matters. One slow basin points to hair, soap or grease in that branch. Several fixtures gurgling or backing up together suggest a problem farther along the waste system. Starting with the least aggressive checks protects seals and pipework and often clears the fault without corrosive chemicals.
Read the symptoms before taking anything apart
Run a small amount of water and note when it slows. If water pools immediately, inspect the plug mechanism and opening. If it drains normally at first and then rises, the restriction is likely downstream. Gurgling from another fixture, sewage odour or water returning into a bath or shower is a reason to stop and seek plumbing help.
Ask what has gone down recently. Cooking fat and food debris commonly affect kitchens; hair, shaving residue and soap affect bathrooms. A dropped cap or piece of jewellery calls for careful trap removal rather than pushing it deeper.
Safety and materials
- Rubber gloves and eye protection
- Bucket, old towels and a shallow tray
- Plughole brush or plastic drain-cleaning strip
- Sink plunger with a flat cup
- Adjustable grips only if plastic nuts cannot be moved by hand
- Old toothbrush and mild washing-up liquid
- Replacement trap washers of the correct size if needed
Do not dismantle a trap after using chemical drain cleaner: liquid retained in it can cause serious burns. Never mix bleach, acids, caustic soda or proprietary unblockers. If chemicals are already present, keep people away, ventilate and tell any plumber exactly what was used.
Step 1: clean the visible plug assembly
Remove a lift-out strainer or stopper and pull away debris with a plastic tool. Pop-up plugs may unscrew or release from a pivot rod below; photograph the arrangement first. Avoid metal hooks that scratch finishes or puncture flexible pipe.
Clean the narrow space around the plug body, then flush with a kettleful of hot tap water, not boiling water. Boiling water can soften some plastic waste fittings and damage certain sinks. For grease, a little washing-up liquid helps emulsify residue but will not clear a solid obstruction.
Step 2: use a plunger correctly
Block the overflow with a damp cloth so pressure acts on the waste. Add enough water to cover the plunger lip, centre it over the plughole and make several controlled strokes. The aim is alternating pressure, not maximum force. Release and see whether the water forms a clean vortex.
Do not plunge a sink connected to a delicate, loose or leaking trap. Double sinks need the other plughole sealed. Stop if joints move under the basin.
Step 3: remove and clean an accessible trap
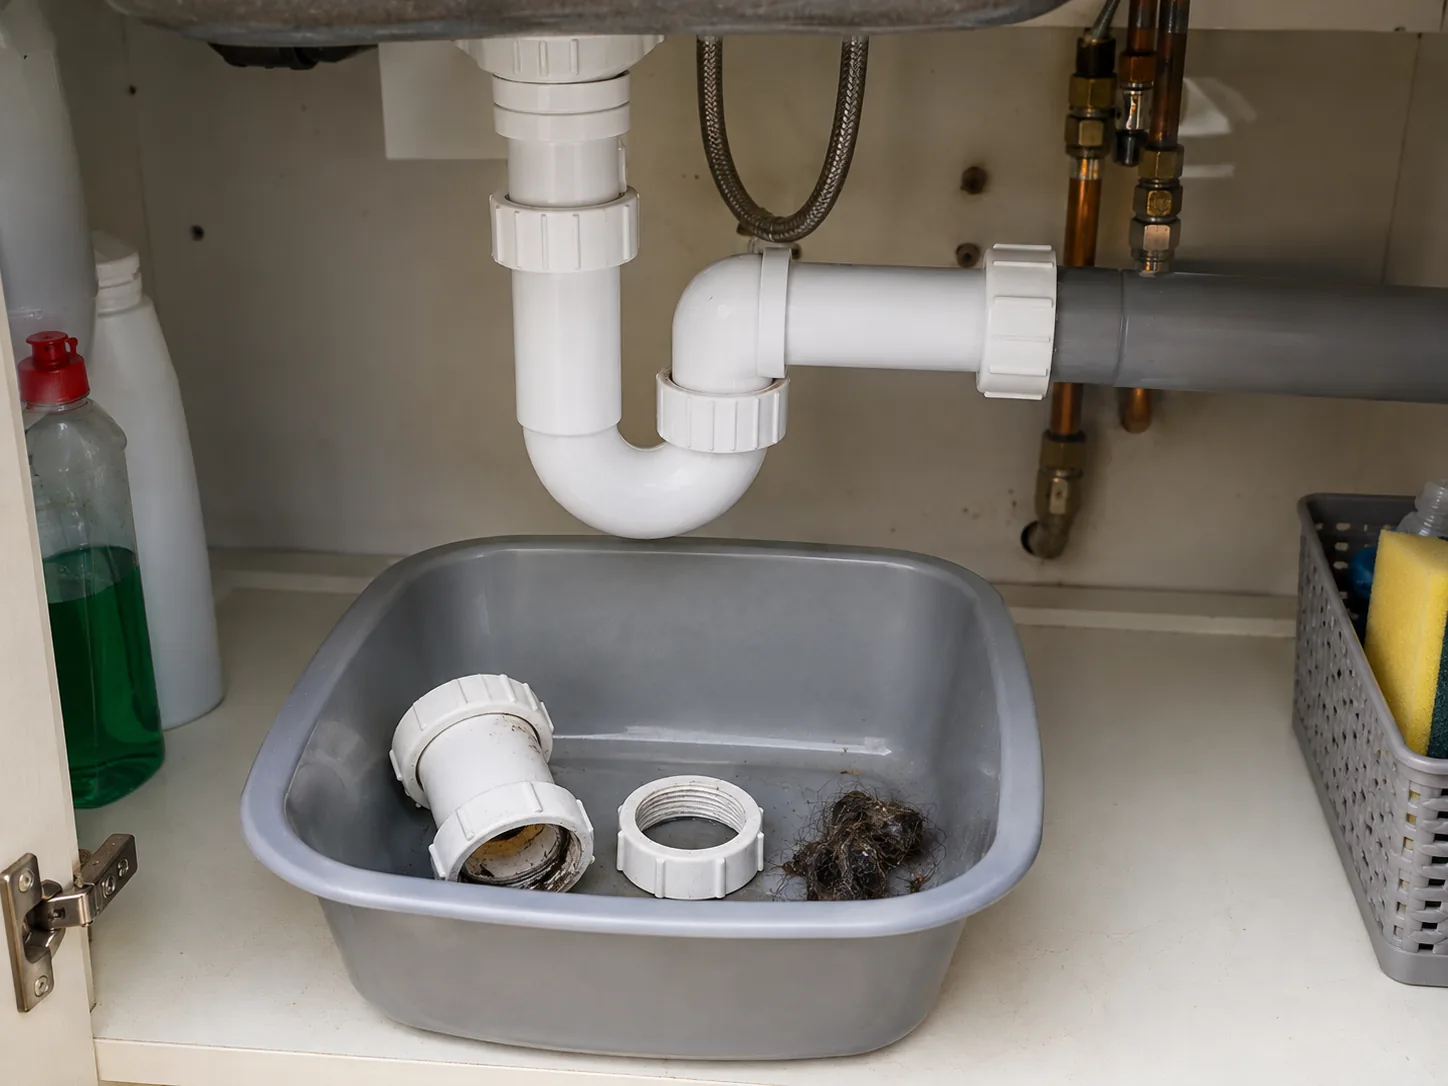
Empty the cupboard and place a bucket directly beneath the trap. Photograph the pipe positions and check that the waste arm is supported. Unscrew plastic slip nuts by hand, holding the trap so it cannot twist the rest of the pipework. Tip the contents into the bucket rather than the sink.
Remove grease and debris with a brush. Check washers for flattening, splits and correct orientation. A bottle trap may have a removable lower cup; a tubular P-trap normally releases at two nuts. Do not force old metal fittings or glued joints.
Step 4: reassemble without overtightening
Clean mating surfaces and position every washer exactly as it came off. Align pipes without strain, start the threads by hand and tighten until snug. Plastic nuts seal by compressing washers; extreme force distorts them and cracks fittings.
Wipe everything dry. Run a cup of water while watching each joint, then half-fill and release the basin to test full flow. Press dry tissue around the nuts; even a small seep shows immediately. Retighten only a fraction if necessary. Persistent leakage needs a new washer or correctly sized trap, not sealant wrapped around the outside.
Step 5: decide whether the blockage is farther away
If the clean trap drains slowly, the branch pipe may be restricted. A small hand auger can be appropriate where the pipe route and material are known, but forcing it around tight plastic bends can separate hidden joints. Do not use a powered machine through domestic fittings without the right equipment and experience.
Recurring kitchen blockages may come from a long, poorly graded or grease-lined run. Multiple affected fixtures can indicate a soil or external drain problem. A blocked-drain service can locate and clear the restriction without repeated chemical treatment.
If an old joint or trap begins leaking during inspection and damages the cupboard, stop using the sink and arrange suitable kitchen repair after the plumbing fault is made watertight.
Troubleshooting after reassembly
The sink drains but now smells
Confirm the trap holds water and has not been fitted at an angle that allows it to siphon. Clean the overflow channel, which can retain organic residue. A smell shared by several fixtures deserves professional investigation.
A slip nut drips
Turn off the tap, place the bucket back and reseat the washer. Check that the pipe enters squarely and far enough. Replace a hardened or damaged seal with the exact type.
The blockage returns within days
Do not repeat the same short-term treatment. The branch may still contain grease or scale, or the pipe gradient may be poor. Record which fixtures are affected and when gurgling occurs; that helps diagnosis.
Habits that reduce future blockages
- Scrape plates and collect cooking fat rather than pouring it away.
- Use a removable hair catcher in bathroom basins.
- Clean stoppers and strainers before flow noticeably slows.
- Keep the cupboard clear so early drips remain visible.
- Never treat wipes, coffee grounds or paint residue as drain-safe.
Once a month, fill the basin with warm water and release it in one go while checking the cupboard below. The larger flow carries light residue through and doubles as an early leak test. It is safer and more informative than routinely pouring strong chemicals into a drain that is still working.
Know when to stop
If the restriction appears alongside an unreliable isolation valve, first read the guide to finding and checking the indoor stopcock. A separate toilet that continues filling is a different fault; use the running-cistern checks rather than treating it as a drain blockage.
A visible plughole obstruction or serviceable trap is a manageable DIY job. Stop when fittings are corroded, pipework moves in the wall, contaminated water is backing up, chemicals are present, or more than one fixture is affected. The safest repair clears the restriction while leaving sound pipes and watertight joints behind.

