
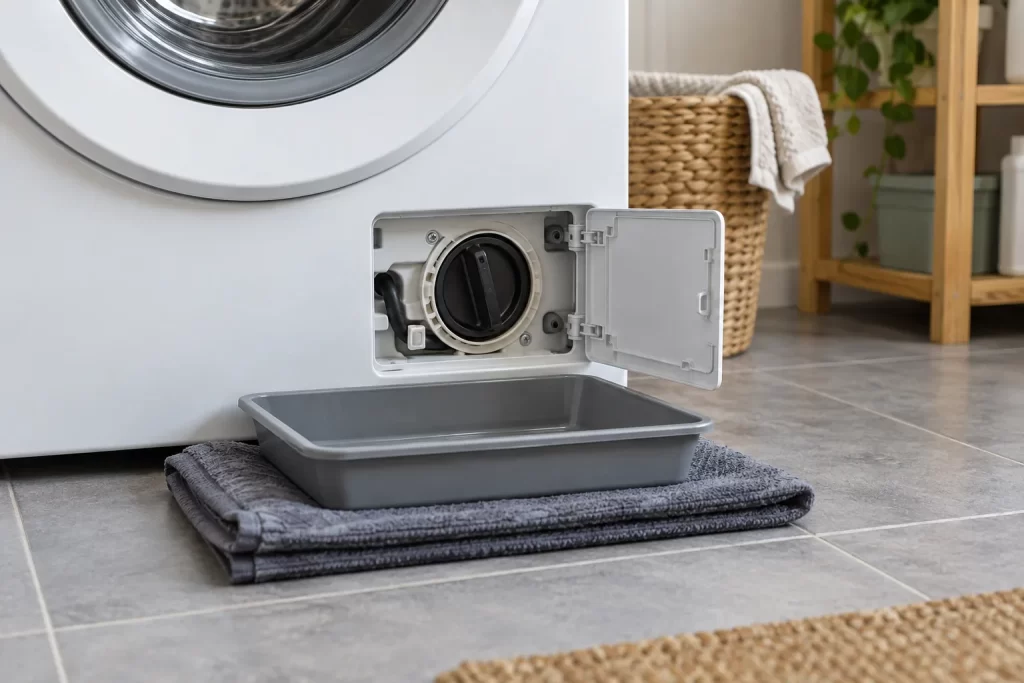
A blocked pump filter can leave water in the drum, interrupt a programme or make the drain pump sound strained. Cleaning it is straightforward only when the appliance has an accessible user-serviceable filter and the remaining water is controlled. Unscrewing the cap without preparation can release several litres across the floor.
Confirm that your model has a serviceable filter
Check the manual or model-specific instructions before opening a panel. Many front-loading machines have a filter behind a low flap, but some designs are accessed elsewhere or are not intended for routine owner removal. Do not prise off a fixed cover or remove cabinet screws.
A drain error can also be caused by a kinked waste hose, blocked sink connection, failed pump or control fault. If the appliance is under warranty, follow the manufacturer’s service procedure.
When not to open the filter
Stop if the machine contains very hot water, there is a burning smell, the floor or plug is wet, or the filter housing is cracked. Do not work on an energised appliance. If water has reached electrical fittings, keep clear and seek qualified help.
If the drum is full and the door remains locked, do not force it. Use the manual’s emergency-drain method. A wet load can be extremely heavy, and opening the door prematurely may flood the room.
Tools and preparation
- Several absorbent towels
- Very shallow tray or baking sheet
- Low-sided containers for repeated draining
- Gloves and a torch
- Soft brush and warm water
- The appliance manual
Switch off at the socket, unplug with dry hands and close the water inlet valves. Let hot water cool. Pull the machine forward only if this can be done without straining hoses; use the safe positioning checks from the guide to levelling a washing machine.
Step 1: protect the floor
Lay towels flat around the front feet and slide the shallow tray below the filter flap. Laminate and timber joints can swell quickly, so have a second person ready to exchange containers. Do not tilt a heavy machine merely to fit a deeper bowl beneath it.
Step 2: use the emergency drain hose if provided
Some machines have a small capped hose beside the filter. Pull out only the length specified, hold the end low over the tray and remove its cap. Drain in stages, refitting the cap before emptying the tray. Keep the hose supported so it cannot spring free.
If there is no hose, loosen the filter cap a fraction until water begins to trickle. Tighten it again whenever the tray fills. Repeat patiently until the flow stops. Never remove the cap in one movement while water remains in the drum.
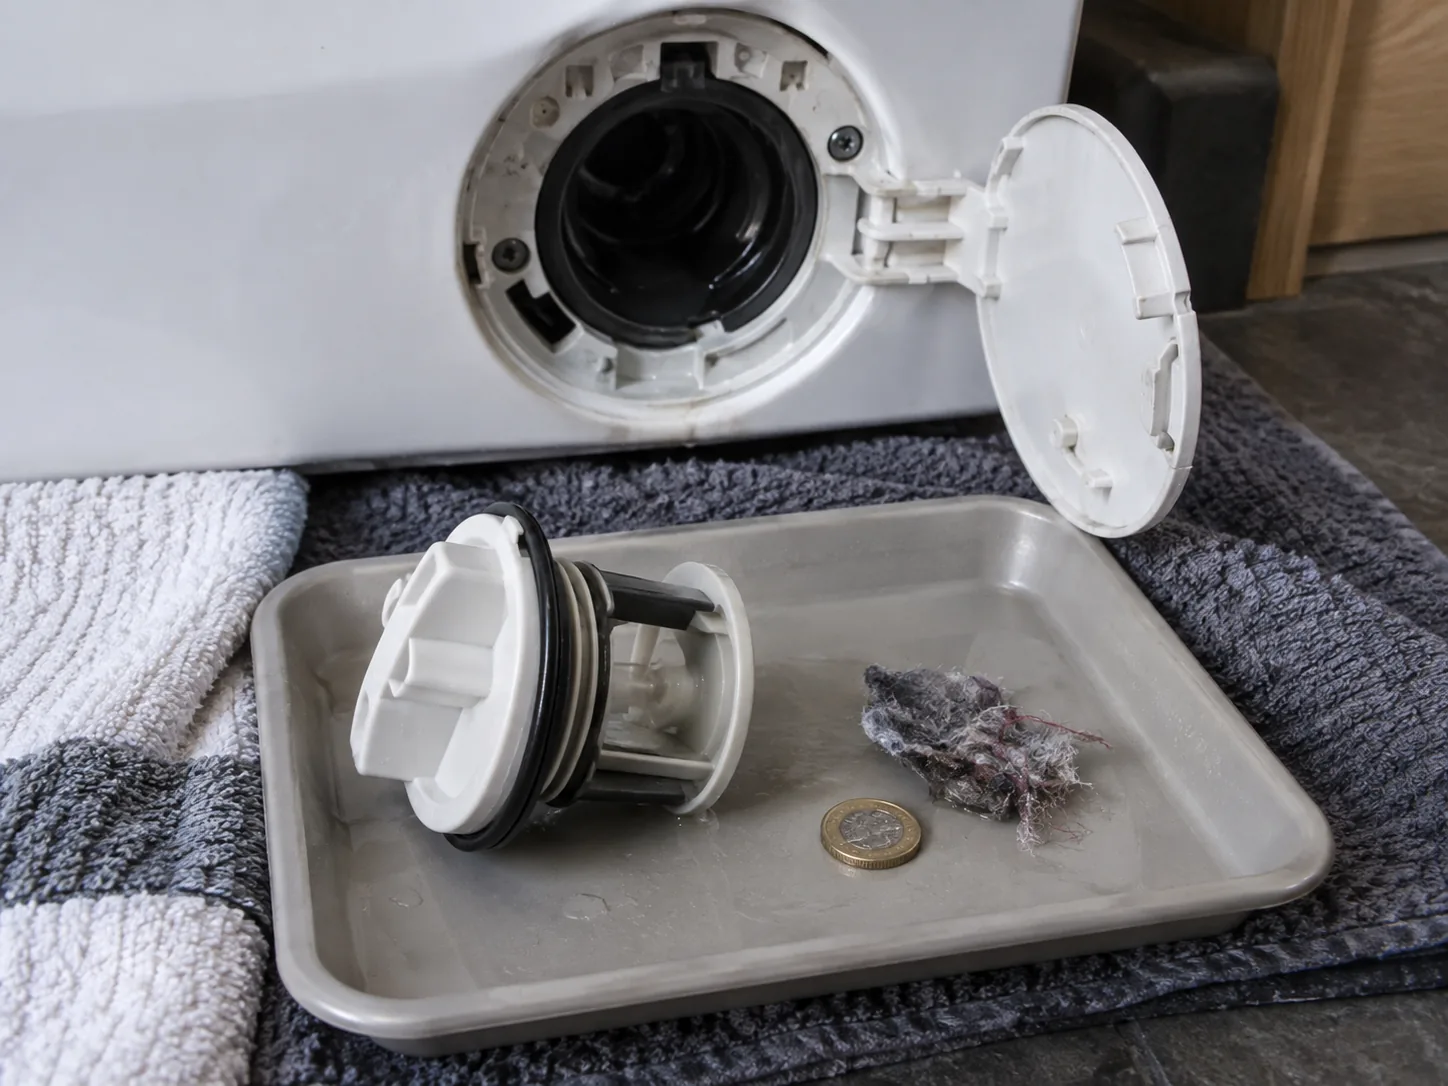
Step 3: remove the filter without forcing it
Turn the cap in the direction shown by the manual, usually anticlockwise. Expect another small release of water. If the cap turns partly and jams, an object may be caught behind it. Rocking or levering the cap can break the housing; arrange washing-machine repair instead.
Step 4: inspect what the filter caught
Remove lint, hair, buttons, coins and other debris. Check the rubber seal for cuts, distortion and embedded grit. Wash the filter with warm water and a soft brush. Do not use boiling water, solvents or sharp tools that damage plastic or seals.
Use a torch to inspect the housing. The pump impeller may be visible behind the filter and often moves in small magnetic steps, but do not push fingers into the opening. Remove only loose objects that are clearly accessible with the machine unplugged.
Step 5: clean the housing and refit
Wipe the seating surface so no thread, grit or hair crosses the seal. Insert the filter squarely and turn it by hand until secure. Cross-threading is a common cause of leaks. Tight is enough; grips can crack the cap or make the next service impossible.
Refit the emergency hose cap and return it to its clip. Close the flap only after the leak test so the housing remains visible.
Step 6: test for drainage and leaks
Open the inlet valves, reconnect power and run the manufacturer-recommended drain or short rinse programme. Stay beside the machine. Watch the filter cap and press dry tissue around it during filling and draining. Stop immediately if water appears.
Listen to the pump. A brief hum as it primes can be normal; prolonged buzzing with no discharge, grinding or repeated drain errors indicates that cleaning has not solved the fault.
Troubleshooting after cleaning
The cap now leaks
Unplug, close the valves and drain again. Check for a trapped fibre, damaged O-ring or crooked thread. Replace the exact seal or filter assembly rather than adding tape or silicone.
The filter was clean but water remains
Inspect the external waste hose for crushing and check the sink spigot or standpipe. If other fixtures drain slowly, follow the guide to diagnosing a slow sink. Do not insert wire into the pump path.
The filter blocks repeatedly
Empty pockets, use laundry bags for small items and check deteriorating fabrics. Recurring rubber fragments, metal swarf or unusual noise need technician assessment.
Common mistakes
- Opening the cap before cooling and draining the water.
- Using one deep bucket that will not fit below the flap.
- Tilting the appliance alone.
- Forcing a jammed cap with grips.
- Leaving grit on the O-ring or cross-threading the filter.
- Closing the flap before a full leak test.
- Assuming every drain error is caused by the filter.
How often should the filter be checked?
Use the manufacturer’s interval rather than an arbitrary monthly routine. Homes that wash pet bedding or heavily soiled workwear may need more frequent inspection. A sudden change in drain time, unusual pump sound or unexplained wet laundry is a better prompt than repeatedly opening a clean filter.
A safe clean ends with a wet test
A blocked standpipe, leaking trap or damaged waste connection is a plumbing fault rather than filter maintenance; use a plumbing service. If the machine still fails to drain with a clean filter and clear external hose, book appliance diagnosis rather than opening the pump housing.
The job is complete only when the cap is correctly seated, the pump discharges normally and the housing stays dry through a test programme. Controlled draining at the start and careful inspection at the end protect both the appliance and the floor.

