Category Archives: Home Improvement Hacks
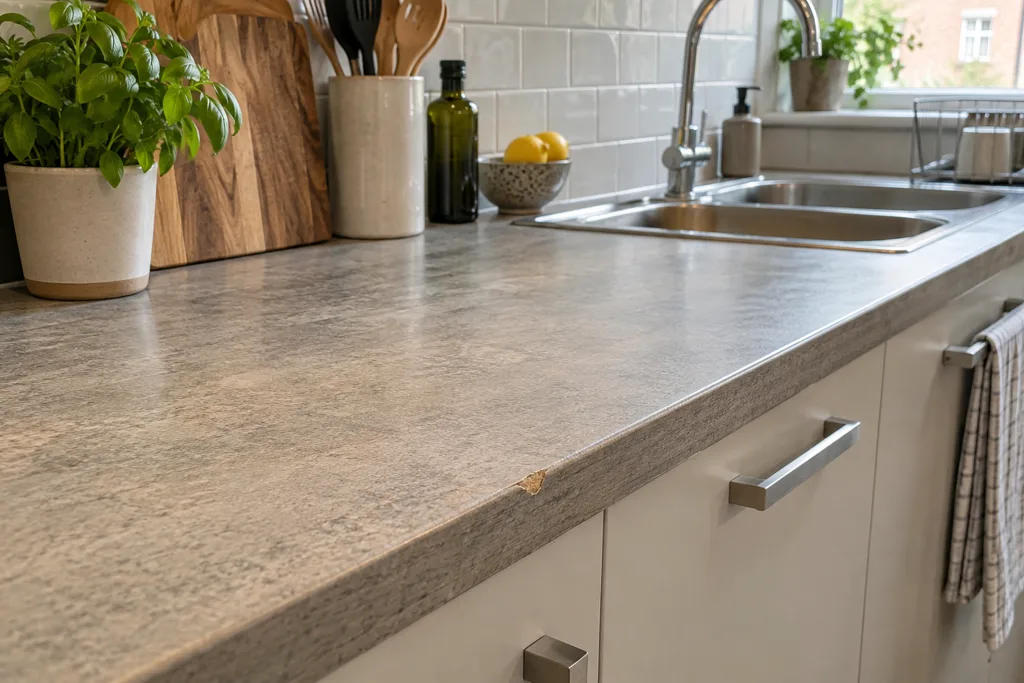
A small chip in a kitchen worktop may be mostly cosmetic. A swollen joint beside the sink is different: water may have reached the core, and a surface patch will not restore its strength. Before buying a repair kit or pricing a new top, identify the material, the cause of the damage and what sits underneath it.
The right answer depends less on how noticeable the mark looks and more on whether the worktop is still sound, dry and safe to use. This guide helps you make that call for common UK kitchen surfaces.
First, find out what you are dealing with
Laminate, solid timber, quartz, granite and solid-surface worktops respond very differently to damage. Laminate is a thin hard-facing layer over a wood-based core; it cannot be sanded back like solid timber. Stone may be hard but can chip at an edge or crack around a cut-out. A solid-surface top may allow a specialist to blend some marks more effectively than a patterned laminate one.
Look at the edge or underside of the worktop if it is accessible. Then inspect the whole affected area, not just the mark. Press gently near a damaged laminate joint: is it raised, soft or crumbly? Check whether a sink or hob cut-out has exposed unsealed material. Look inside the base cabinet for staining, and check the wall and floor below for damp.
If the mark followed a leak, stop the water source before choosing a repair. Our guide to hidden leaks covers clues that are easy to miss, and leak repair help can address the source. A fresh seal over wet material merely hides the problem for a while.
Small chips and scratches: often repairable
A shallow chip away from a joint or cut-out can often be filled and colour matched well enough to be unobtrusive. On laminate, a worktop repair compound can protect the exposed core and improve the appearance, although a patterned surface may never look entirely seamless. Minor surface scratches on some solid timber tops can be sanded and refinished; that approach would damage laminate.
For stone and engineered surfaces, ask a specialist about edge chips or cracks. The repair method and finish depend on the exact material. Avoid trying a general-purpose filler on a food-preparation surface without checking that it is appropriate for the location and manufacturer’s care instructions.
Repair is most attractive when the damage is local, the substrate is stable and the rest of the kitchen is in good condition. It is less convincing when several sections are worn, discoloured or separating at once. Our article on DIY versus professional repairs offers a wider framework for deciding how much to tackle yourself.
Burns and heat marks: depth matters
A faint heat mark may be superficial, especially on timber, but a deep burn can damage the surface permanently. Laminate can blister or discolour when a hot pan is placed directly on it. Sanding the blister flat will remove more of the protective layer and expose the core.
On timber, a small mark may be sanded and refinished if the top is thick enough and the finish can be matched. Deep charring or a mark near a sink joint may make replacement of a section more sensible. Stone and quartz also have material-specific limits; seek the manufacturer’s advice before using abrasives or chemicals.
Swelling beside the sink: usually a bigger problem
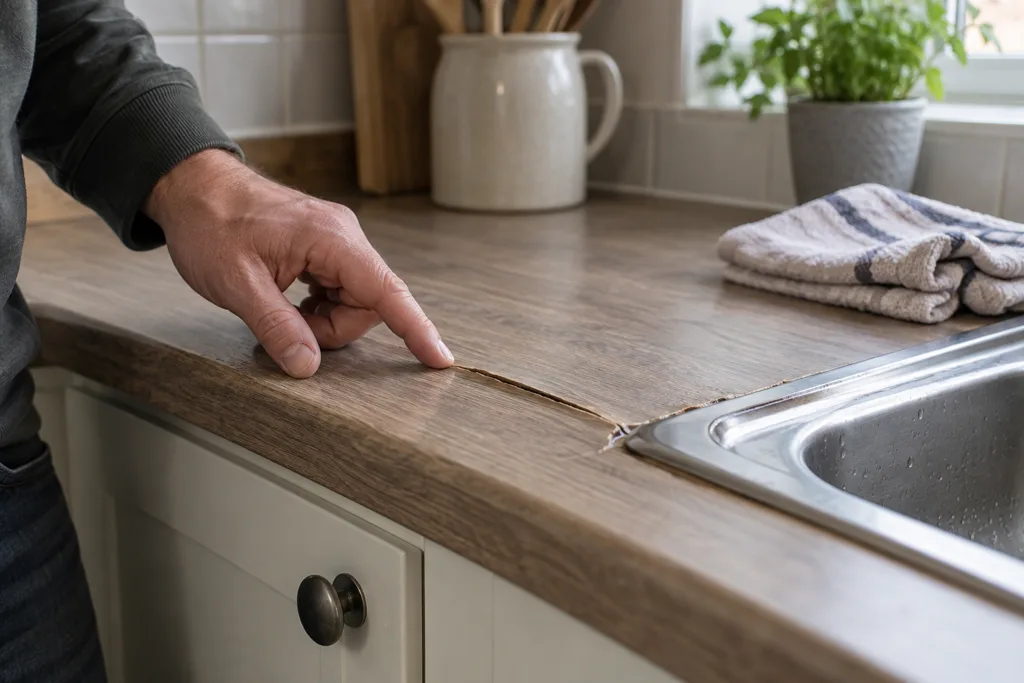
Swelling is common where water has found its way through a failed seal, a cut edge or a joint in a laminate worktop. Once the wood-based core expands, it generally does not return to its original flat, strong shape when dry. A bead of silicone may prevent more water getting in, but it cannot reverse a raised seam or rebuild a soft core.
The first task is to find out where the moisture came from. A loose tap, failed sink seal, leaking waste connection or persistent splash zone each needs a different fix. Dry the area and inspect the cabinet beneath. If the damaged patch is small and structurally sound, a professional may be able to make a limited repair. If the joint has lifted, the sink is no longer properly supported or the core has crumbled, plan for replacement of the affected worktop section.
The article on common plumbing mistakes explains why apparently simple connections deserve care. If pipework or the sink connection needs changing, our plumbing service can assess it. Fixed electrical supplies near the work area should be handled by a qualified electrician where any change is needed.
Cracks, loose joints and movement
A crack that continues through the material, especially near a hob or sink opening, is more concerning than a surface scratch. Repeated movement can make a filled crack reopen. Check whether the base cabinets are level and whether the worktop has enough support at the cut-out or corner.
Loose joints are sometimes repairable if the sections are dry, flat and sound. If one edge has swollen or the cabinets below have shifted, simply pulling the joint tight will not solve the cause. A carpenter can assess cabinet support and the fit of a replacement or repaired section. If the units themselves have been damaged, the decision may expand into a kitchen refurbishment rather than a worktop-only repair.
Repair or replace? A quick decision test
Repair is generally worth exploring when the damage is isolated, dry and superficial; the supporting cabinets are sound; the finish can be matched acceptably; and the worktop still performs its job safely. Replacement is more likely when the core is swollen or soft, cracks affect a cut-out, a joint repeatedly opens, several areas are damaged, or a sink or hob cannot be refitted securely.
Cost is part of the decision, but compare the whole job. A new worktop may require a sink or hob to be disconnected and refitted, cut-outs made, joints formed, splashback edges sealed and cabinets adjusted. A cheap replacement material can become less attractive if those associated tasks are extensive. Conversely, paying for several cosmetic patches on a failing top is rarely good value.
If you are already changing the layout, measure appliance spaces before choosing a replacement surface. For one common layout change, see our guide to fitting a dishwasher in a cupboard space. The position of that appliance affects the length and support of the new top.
What to do before asking for a quote
Take one wide photo showing the full run of cabinets and close photos of each damaged area. Note the worktop material, approximate length, location of the sink and hob, and whether there is any active leak or soft cabinet material. If you have the original product details, keep them handy. A repairer can then tell you whether a local fix is realistic or whether a measured replacement is the better route.
Bob’s can assess the surrounding joinery and coordinate kitchen refurbishment work where a worktop or cabinet section needs changing. The useful first step is a clear diagnosis: fix the cause, confirm the support beneath and then choose a finish that will last.
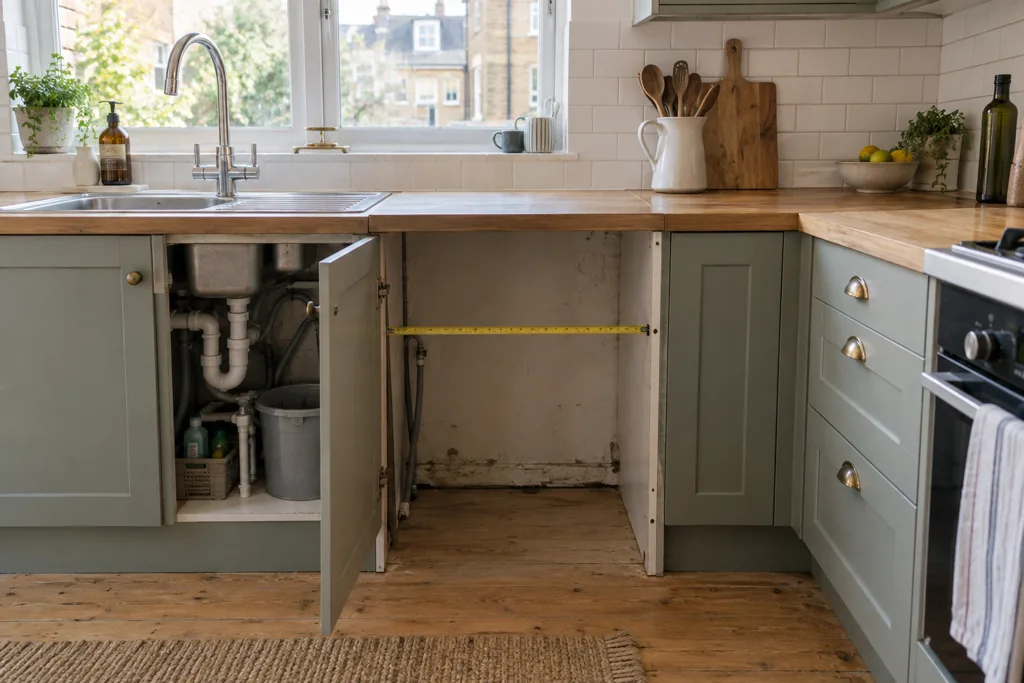
Often, yes. A cupboard beside the sink can be a sensible place for a dishwasher, especially in a small London kitchen where there is no spare floor space. But the cupboard width is only the first measurement. The machine also needs depth, a safe power supply, a water feed, a waste connection and a route for its hoses that does not pinch them when you push it back.
The easiest projects are usually in a standard base-unit run close to the sink. A tight corner, a shallow unit or an awkwardly placed socket can turn the same idea into a more involved kitchen job. Here is how to work out which kind of project you have before buying an appliance.
Start with the machine, then measure the opening
Dishwashers are commonly sold as full-size or slimline models, and as freestanding or integrated models. Their stated width is not a promise that they will fit an opening of exactly that size. Check the manufacturer’s installation drawing for the required niche, minimum height, depth and side clearances. Include the feet, door swing, hoses and the space needed to level the appliance.
Measure the proposed opening at the top, middle and bottom. Older kitchen runs can be out of square, and tiles or skirting may narrow the space near the floor. Also measure from the wall behind the cupboard to the front edge of adjacent doors. A dishwasher that projects beyond the units can obstruct a walkway or catch on a neighbouring door.
Before committing to the appliance, check:
- the clear opening after the cupboard carcass is removed, not just the width of its door;
- whether the worktop remains properly supported when the cupboard comes out;
- the position of pipes, a waste connection and a suitable electrical outlet;
- the path the door takes when fully open, including nearby drawers and handles;
- access to the water isolation valve and electrical isolation after fitting.
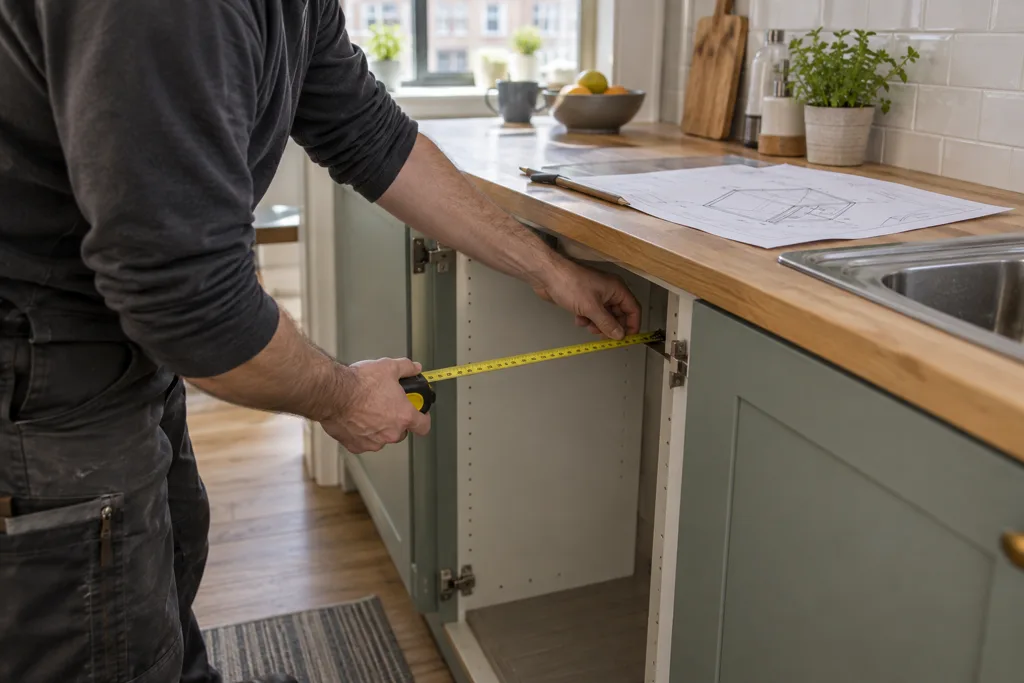
If you are replacing a narrow base unit, a slimline dishwasher may be the practical choice. Trying to squeeze a full-size machine into a narrower gap by cutting structural parts of adjacent cabinets usually creates more work than it saves.
Is the cupboard next to the sink?
That is the most straightforward location in many kitchens. The sink unit often provides a nearby cold-water supply and waste pipe, with enough room to route the dishwasher hoses through a carefully positioned opening in the cabinet side. The details still matter: the waste hose needs the arrangement specified by the manufacturer and the drainage connection must be suitable, secure and accessible.
A cupboard farther away may require new pipework behind units or along a wall. Long, kinked or improvised hose extensions are a poor substitute for a properly planned connection. If the only route crosses behind an oven or blocks a drawer, reconsider the location before ordering the machine.
Water and drainage alterations are work for a competent installer or plumber. If an existing connection is leaking or the cupboard has signs of damp, deal with that first. Our guide to signs of a hidden leak explains what to look for, and plumbing help is available when a connection needs attention.
Power is not an afterthought
Check the appliance instructions and the existing electrical arrangement before deciding where the dishwasher goes. The plug or isolation point should remain usable for maintenance; it should not be crushed behind the machine or left where a leak can reach it. Do not plan on an extension lead trailing across the kitchen.
If a new socket, circuit change or other fixed electrical work is required, have a qualified electrician assess it. The guidance in our article on common DIY plumbing mistakes is a useful reminder that small-looking changes to services can cause expensive damage. Bob’s can arrange qualified electrical work as part of a properly planned installation.
What happens to the cupboard and worktop?
Removing a base cabinet is more than taking off its doors. The carcass may be screwed to its neighbours, fixed to the wall or carrying a portion of the worktop. It can also conceal pipework, a socket or uneven flooring. Once it is out, the adjacent cabinet sides may need finishing and the worktop may need additional support.
An integrated dishwasher normally needs a compatible furniture door and fixing kit. A freestanding model has its own front, so colour and projection become more visible. Check the toe-kick or plinth arrangement too: the dishwasher door must open fully without striking it. Manufacturer diagrams show the space and cut-outs required for that particular model.
If the cabinet run needs adapting, a carpenter can assess the supports and make a neat opening. Where the change is part of a broader layout update, the kitchen refurbishment service covers the surrounding cabinetry and finishes as well as the appliance space. If the worktop is already chipped or swollen, assess that damage before planning a new cut-out.
A practical example: swapping a 600 mm sink-side unit
Imagine a kitchen with a base cupboard beside the sink, a continuous laminate worktop and tiled floor. The cupboard appears to be about 600 mm wide. That does not yet confirm a full-size dishwasher will fit. The installer measures the actual clear width, checks the height beneath the worktop at the lowest point and confirms the floor is level enough for the appliance’s adjustable feet.
Next come the services. Is there an appropriate cold-water connection and waste point inside the sink unit? Is there a suitable, accessible electrical supply? Can both hoses reach without being crushed or crossing a hot appliance? Finally, will the worktop remain supported after the cupboard carcass is removed, and can the dishwasher door clear the plinth?
If all those answers are favourable, the job may be a fairly contained conversion. If the worktop needs cutting, the adjacent cabinets are unstable or services need moving, get the work scoped before buying the dishwasher. A slightly smaller appliance can sometimes save extensive alterations.
When a different position makes more sense
The sink-side cupboard is not always the winner. A corner position may trap the open dishwasher door against another cabinet. A narrow galley kitchen may lose its entire passage when the door is down. An island location can involve more disruptive service runs and floor work. In rented homes, obtain the landlord’s agreement before removing a cabinet or changing fixed services.
Do not overlook the everyday use of the room. You need space to load plates from the sink, pull out baskets and stand in front of the appliance. A technically possible installation can still be frustrating if a drawer cannot open at the same time.
Our older article on keeping a dishwasher running smoothly is about care once the machine is in use. It is worth reading when comparing models with accessible filters and serviceable parts.
Get the opening checked before you order
Take photos of the proposed cupboard, sink unit, floor and nearby socket, then note the opening’s width, height and depth. Keep the exact model number or installation drawing for the dishwasher you want. Those details make it much easier to judge whether the job is a simple fit or needs cabinet, plumbing or electrical changes.
Bob’s dishwasher installation service can assess the fit and arrange the practical work in a London kitchen. If the space is awkward, ask for the cabinet and service changes to be identified first, so the appliance you buy actually suits the room.
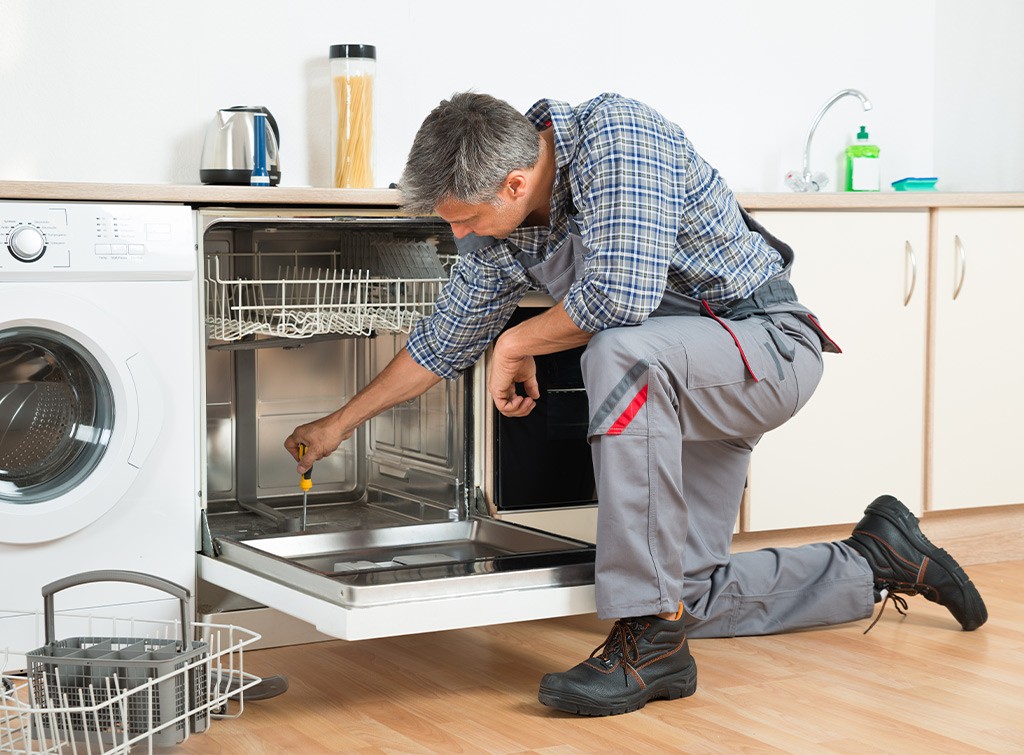
How to Keep Your Dishwasher Running Smoothly: Tips, Tricks, and Useful Advice
A dishwasher is a true lifesaver in the kitchen, but when it starts acting up, it can quickly become a headache. From strange noises to dishes coming out still dirty, there are plenty of issues that can arise. But fear not! With a little know-how and some simple maintenance, you can keep your dishwasher running smoothly for years to come.
1. Start with the Basics: Before you start troubleshooting, make sure you’re using your dishwasher correctly. Always scrape off excess food before loading dishes, and avoid overloading the dishwasher. Use the appropriate amount of detergent and choose the right cycle for your dishes.
2. Check the Spray Arms: The spray arms are responsible for distributing water throughout the dishwasher to clean your dishes. Over time, they can become clogged with food particles or mineral deposits. Remove the spray arms and clean them thoroughly with a brush and soapy water. Make sure the spray holes are clear and free of debris.
3. Inspect the Door Seal: A faulty door seal can lead to leaks and reduced cleaning performance. Check the door seal for signs of wear or damage, such as cracks or tears. If you notice any issues, replace the seal to ensure a tight, waterproof seal.
4. Clean the Filter: Many dishwashers have a filter that traps food particles to prevent them from clogging the drain. If the filter becomes clogged, it can affect the dishwasher’s performance. Remove the filter and rinse it under running water to remove any debris. If necessary, soak the filter in soapy water to remove stubborn buildup.
5. Run a Cleaning Cycle: Even if your dishes look clean, it’s a good idea to run a cleaning cycle every month to keep your dishwasher in top condition. You can use commercial dishwasher cleaners or make your own using vinegar and baking soda. Simply place a cup of vinegar on the top rack of the dishwasher and sprinkle baking soda on the bottom, then run a hot water cycle.
6. Address Common Problems: If your dishwasher is making strange noises, not draining properly, or leaving dishes dirty, there are a few common culprits to consider. Check the drain hose for clogs, inspect the pump for damage, and ensure the water inlet valve is functioning correctly. These issues can often be resolved with simple DIY repairs or by calling in a professional repairman.
7. Know When to Call a Pro: While many dishwasher problems can be fixed with DIY solutions, some issues require the expertise of a professional repairman. If you’re unsure about how to diagnose or fix a problem, it’s best to call in the experts. They have the knowledge and experience to quickly identify and resolve any issues with your dishwasher.
If you are replacing the appliance and considering a different position, check whether a kitchen cupboard can become a dishwasher space before ordering a new model.
Keeping your dishwasher in good working order doesn’t have to be complicated. With a little care and attention, you can enjoy clean dishes and hassle-free operation for years to come. So roll up your sleeves, grab your scrub brush, and get ready to tackle those dishwasher woes head-on!
Working hours
Mon – Sun 8am – 6pm
![Repairman Dishwasher professional]()
 If you are worried that your pet will get bored in your absence, then opting for a cap flap is the best option you have. But most of the people who install a cat flap usually get it done by a professional. The problem with a professional is that you’ll have to burn a hole in your pocket to get the job done. That’s why this guide will help you figure out the ways in which you can easily fit the cat flap all by yourself. Continue reading →
 There is nothing more irritating than noise stealing your sleep throughout the night. No matter how many earplugs or sound machines you try, you just can’t find peace and quiet.
Environmental noise that comes from traffic, airplanes and trains has been a significant challenge for the World Health Organisation, especially in Western Europe. Continue reading →

If you’re a landlord currently renting out your property, you know how much work goes into making a house feel like home. Do you ever feel you don’t have enough time to make the house look how you want it to? Let alone finding the time to get it on the market. Lucky for you, we’ve got some design tips that’ll keep the house looking great, and save yourself lots of work in the future. Continue reading →
Renovations can be tough, especially when you have to deal with a small home. Add functionality and personalise the premises at the same time. Sometimes you have to sacrifice functionality for fancy home decor or the other way around. Continue reading →

The cool house ideas in this list are about aspects such as lighting, storage, decoration and will add value to your home making it more comfortable and functional. Most important of all, they are affordable, each costing under £250. Continue reading →

World Plumbing Day was initiated for the first time on 11 March 2010 by The World Plumbing Council (WPC). Since then, it’s been celebrated all around the globe by people, businesses, and political and social institutions engaged in eco-friendly activities. It’s all about raising awareness on plumbing’s importance to environmental health.
Continue reading →

Home maintenance is not easy, especially when you need specialised equipment, experience and time. Tasks pile up and you end up into an endless list of odd jobs you need to take care of. However, there are a few hacks which will help you tackle some of the small DIY repairs in a matter of minutes. Continue reading →