Uneven cupboard doors can make an otherwise sound kitchen look tired. One door may sit higher than the next, the gap may taper from top to bottom, or two handles may no longer meet at the same level. Modern concealed hinges are designed to correct these small errors, but turning every screw at random usually trades one problem for another.
The reliable approach is to identify the direction of the error, make one small adjustment at a time, and keep checking the relationship between neighbouring doors. This guide covers common European-style concealed hinges fitted to many UK kitchens. Surface-mounted hinges, damaged cabinets and doors that have swollen need a different repair.
Work out whether the door or cabinet is at fault
Stand back and look at the full run of units. If several doors slope in the same direction, check the cabinet and floor with a spirit level; the units may have settled or the worktop may not be level. If only one door is wrong, the hinge or its fixing is more likely to be responsible. Open the door and lift gently at the handle. Noticeable movement at the hinge plate means the screws or cabinet material are loose.
Also check that nothing inside the cabinet is pushing against the door. A bin, pan handle or overfilled shelf can prevent complete closure and imitate a depth-adjustment problem. Clean grease from the hinge and confirm that both hinge arms are fully clipped onto their mounting plates.
Tools and preparation
A well-fitting Pozidriv screwdriver, usually PZ2
Small spirit level or straightedge
Masking tape and pencil
Two-millimetre card spacers for checking consistent gaps
A tray for screws and hinge caps
Wood glue and suitable repair plugs only if a fixing hole is stripped
Empty fragile items from the cupboard and support a large door while working. Do not use a high-speed drill for adjustment screws. Concealed hinge mechanisms are small, and excessive torque can strip the screw or damage the cam.
Learn what the three adjustments do
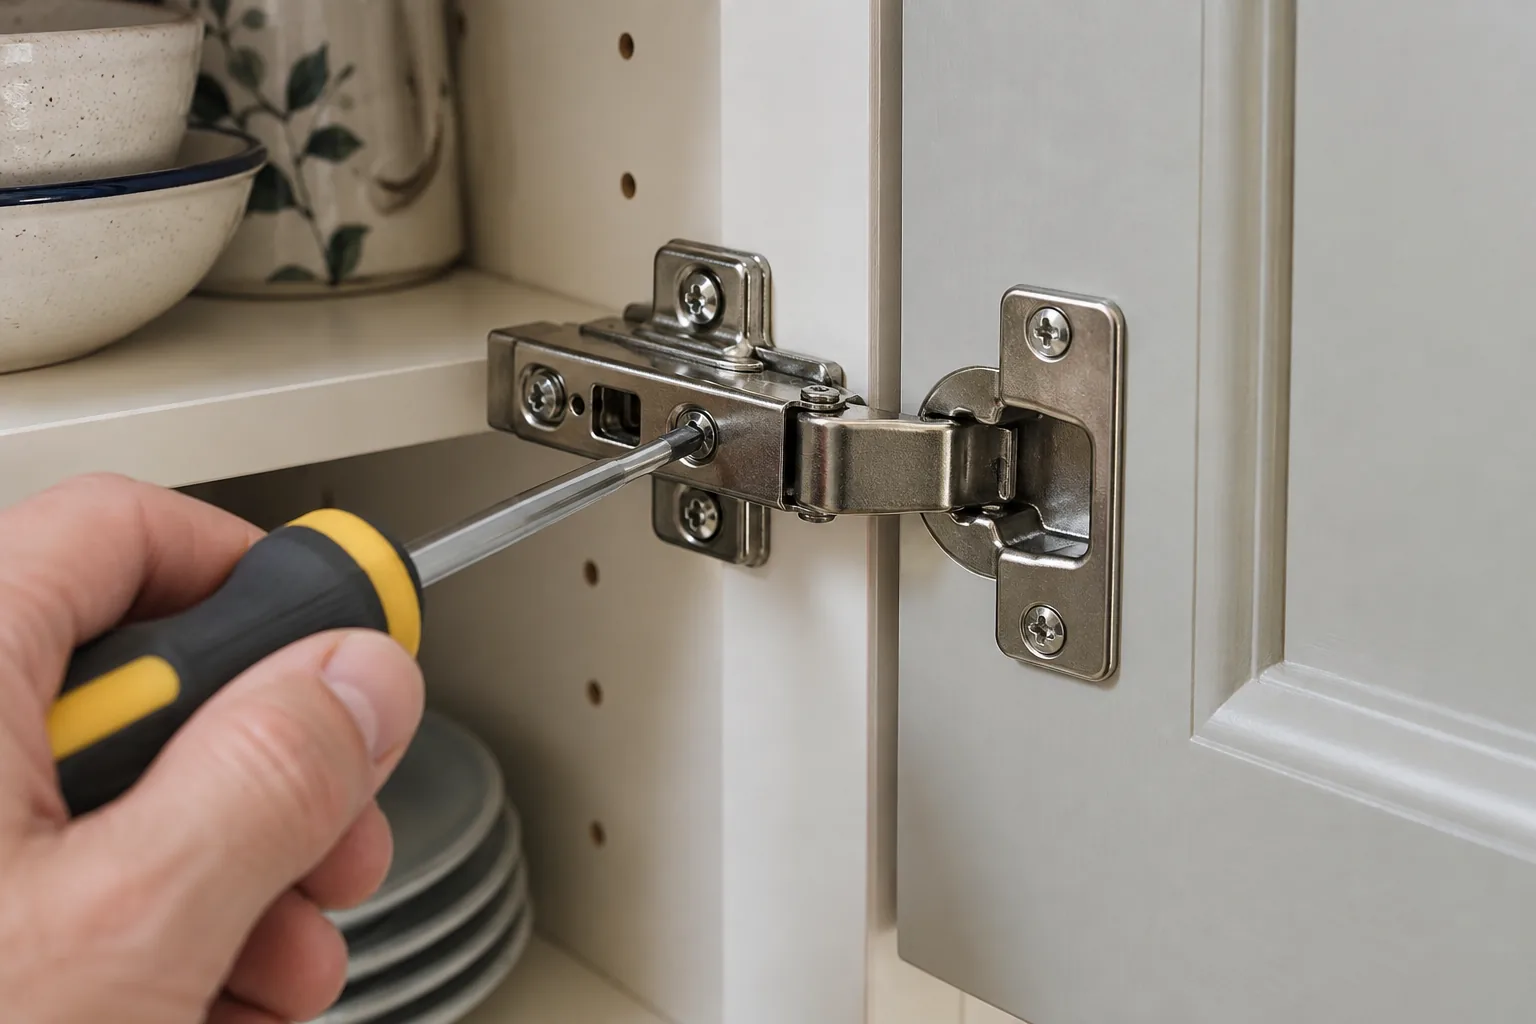
Although hinge designs vary, most concealed hinges provide three directions of movement. The screw nearest the front of the cabinet commonly moves the door sideways. A second screw along the hinge arm alters how far the door sits from the cabinet. Height is often controlled by loosening screws in the mounting plate and sliding the door up or down. Some newer plates have a separate height-adjustment cam.
Do not assume the layout from appearance alone. Turn an adjustment screw only an eighth or quarter turn, close the door and observe the result. If nothing moves and the screw starts to come out, return it to its original position; it may be a fixing screw rather than an adjuster.
Step 1: tighten loose mounting screws first
Before changing alignment, tighten the screws holding the hinge cup to the door and the plate to the cabinet. They should be secure but not forced. Chipboard cabinets are easy to strip. If a plate shifts when the screw is tightened, the hole needs repair. Repeatedly fitting a larger screw can split the board or leave too little material for a lasting fixing.
For minor damage, a purpose-made chipboard hinge repair plate can spread the load over fresh material. It must be fitted squarely or the adjustment range will be lost. A badly broken cabinet side or torn-out hinge cup is better assessed through a furniture repair service.
Step 2: correct the height
Use masking tape to mark the desired top edge, referring to the adjacent door rather than the worktop alone. Support the door from below. Loosen—do not remove—the mounting-plate screws on both hinges just enough for the plate or hinge arm to move vertically. Slide the door a small amount, retighten the top screw lightly, then the lower one, and check the position.
On tall doors with three hinges, loosen all three plates evenly and keep the door supported. If one plate remains fixed while the others move, the hinge arms can be placed under strain. Once the height is correct, tighten all fixings by hand and check that the door still opens freely.
Step 3: make the side gaps parallel
A tapered gap usually needs side-to-side adjustment. Work with the top and bottom hinges as a pair. Moving the top edge one way and the bottom edge the opposite way rotates the door slightly. Make very small turns and close the door after each pair of changes. A card spacer held between adjacent doors makes changes easier to see.
Do not aim for a gap so tight that doors touch. Painted and foil-wrapped fronts need clearance to open without chipping. Check the handle side, the hinge side and the line between double doors. If the adjuster reaches the end of its travel before the gap is straight, recheck cabinet level and mounting-plate position.
Step 4: set the closing depth
When one corner projects beyond the cabinet, use the depth adjustment to move that part of the door in or out. Adjust both hinges if the whole door sits proud. Adjust one hinge only when correcting a twist, and avoid using the hinge to force a warped door flat. A bowed timber or MDF front will continue to load the hinge and may need replacement.
Leave enough space between the door and cabinet for the hinge to move. If the door is pulled too far inward, it may catch the carcase before reaching the closed position. Check bump stops as well: a missing rubber buffer can make one corner appear recessed.
Step 5: test soft-close action and nearby doors
Open the door fully and close it several times. The soft-close mechanism should engage without a knock or hesitation. Some hinges have an on/off switch or separate damper; make sure it was not moved accidentally. Then open neighbouring doors together to confirm the handles and edges do not collide.
If several doors need adjustment after new flooring or building work, the base units may have shifted. Correcting each hinge can disguise a cabinet-level problem while reducing future adjustment range. A kitchen refurbishment professional can check the unit run, wall fixings and worktop support.
Common mistakes
Turning several screws before testing: you lose track of which movement caused the change.
Using an electric driver at full torque: hinge cams and chipboard threads are easily damaged.
Aligning one door in isolation: kitchen fronts must be judged as a complete run.
Forcing a warped door flat: hinge adjustment cannot remove a permanent bow.
Ignoring loose plates: alignment will drift again within days.
Removing mounting screws completely: a heavy door can fall and tear the remaining hinge out.
When adjustment is not enough
DIY adjustment is reasonable when the hinges and cabinet material are sound and the door needs only a few millimetres of movement. Ask for help when a hinge cup has broken out of the door, the cabinet side is crumbling, a tall or glazed door is difficult to support, or the units themselves are no longer level. If the problem began after a door was replaced, the drilling pattern or hinge specification may be incompatible.
Multiple loose fronts, sticking drawers and damaged edge banding can be dealt with together during a handyman visit. For a sticking drawer rather than a door, use the dedicated guide to repairing drawer runners.
Finish with balanced gaps, not perfect measurements
Real kitchens are not laboratory-level, especially in older properties. The goal is an even visual line, reliable closure and hinges that are not under strain. Tighten loose fixings first, correct height, straighten the side gap, set depth last, and test the whole bank of units. That order preserves the available adjustment and makes future fine-tuning straightforward.
A single creak on the stairs can be surprisingly precise: it happens under your left foot, halfway up, every time. The sound often comes from two pieces of timber moving against each other. Finding which pieces move matters more than buying a tube of adhesive or driving in a screw at random.
Stairs also carry people, furniture and daily wear. If a tread visibly dips, feels loose, or has split timber, treat that as a repair job rather than a noise nuisance. This guide helps you describe the problem, make a few safe observations and understand the options a carpenter may consider.
First, locate the movement
Have someone walk slowly up and down while you listen from a safe position beside the stairs. Note the exact step, the part of the tread underfoot and whether the sound occurs on the way up, down or both. Do not crouch beneath an open staircase while someone is using it.
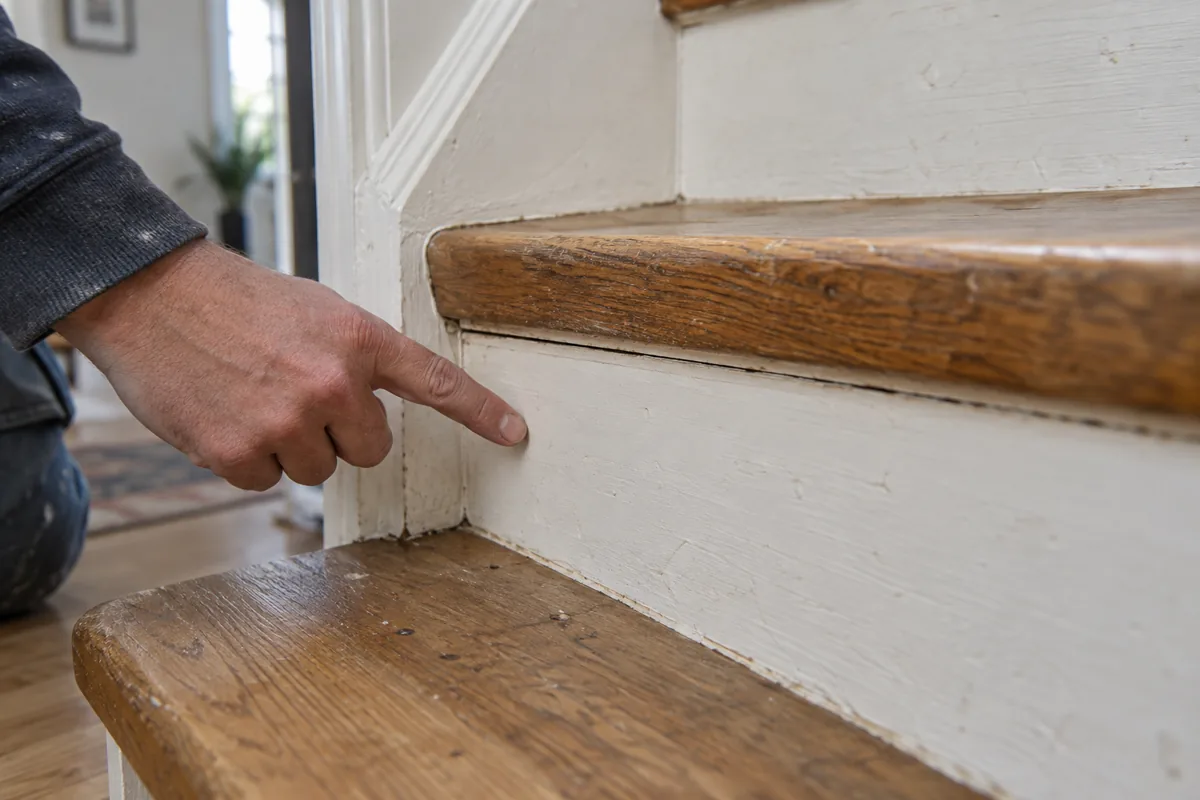
Watch the joint between the horizontal tread and the vertical riser. A narrow line that opens and closes as the step is loaded points to movement at that joint. A tread that flexes across its middle suggests a different issue from a small squeak at one edge. Check for a crack, a loose nosing (the front lip), or a gap along the wall string. Photographs taken without loading the stair can help a tradesperson assess what you have found.
If you can access the underside without removing fixed panels, look for a loose wedge, separated glue block or an obvious gap. Many London staircases are enclosed, so the underside may not be available. There is no need to dismantle a ceiling or fitted cupboard simply to diagnose a creak.
Why an individual step starts to creak
Older timber stairs are assembled from several parts. Treads sit against risers and strings, often held by wedges, blocks, adhesive and fixings. Timber expands and contracts as indoor humidity changes. Years of footfall can loosen an old fixing or open a fine joint. A squeak is the sound of these surfaces rubbing.
The common patterns are:
Tread against riser: the joint moves when weight lands near the front or back of the step.
Nosing or tread board: the front edge shifts or the board flexes. A loose nosing also presents a trip hazard.
Wedge or glue block underneath: an older support has come loose, sometimes making more than one part of the step move.
Stair against the wall string: a gap at the side opens as the tread is loaded.
Do not assume every stair noise is a timber joint. A loose carpet gripper, floor covering or trim can click underfoot too. Move a loose runner aside only if it can be done without damaging its fixings; otherwise, ask the fitter or carpenter to check it.
What is safe to check yourself?
You can map where the noise occurs, photograph visible gaps and look for water marks, cracking or loose trim. Keep the staircase clear and use the handrail normally. If a runner has lifted, secure access to the stairs and arrange its refitting. Avoid experiments with a loaded step if you already feel movement.
This is different from a creaky board in a room. Our guide to squeaky floorboards explains a floor problem, but stair treads rely on a tighter assembly and are exposed to a concentrated load at their front edge. Screwing through carpet or filling the top joint with sealant can hide the symptom without restoring support. A misplaced screw may miss sound timber, damage a concealed service or leave a sharp fixing where feet land.
If the staircase is solid and the noise is mild, keep notes for a routine visit rather than pulling it apart. If the step drops, rocks, or has a split across the walking surface, restrict use and ask for a prompt inspection. The same applies if several neighbouring steps begin moving together.
What a proper repair may involve
The repair depends on access and the failed joint. From beneath, a carpenter may be able to refit or replace a wedge, resecure a block, strengthen a tread-to-riser connection and address a failed fixing. With an enclosed staircase, the work may need to be approached carefully from above, sometimes lifting a covering or removing a small piece of trim. The aim is to make the step stable, not merely quiet.
Where timber is cracked, wet or substantially worn, replacing a component may be more reliable than reinforcing a failing piece. A good assessment considers how that tread joins the string and riser, and whether the adjacent steps share the problem. Bob's carpenters can assess timber joinery; for a broader set of small repairs during one visit, see the odd jobs service.
The flooring and tiling team may be relevant if the noise is actually from a landing surface rather than the stair assembly. If a rail is also loose, mention it separately when booking. A handrail repair and a moving tread have different causes and should each be inspected.
Carpet, paint and access can change the plan
Fitted stair carpet makes it hard to see joints or fixings. Tell the carpenter whether you want the covering preserved and whether it was recently fitted. A tread may have creaked before carpeting, but the covering can also introduce a separate squeak at a gripper or edge. Do not make holes in a new runner in the hope of finding the timber below.
Painted stairs create another practical issue: opening a joint or removing a trim piece may disturb the finish. Ask what access is needed and whether making good is included. If you are arranging several property repairs, the handyman visit checklist is useful for gathering photos, access details and a clear list of concerns.
Moisture deserves special attention. A new creak after a leak may indicate swelling or weakening, and the water source needs addressing first. Read the site's guide to signs of a hidden leak if there are stains, a musty smell or unexplained dampness nearby. Drying and timber assessment should precede any cosmetic filling.
Repair or replace the stair?
One localised creak in an otherwise firm staircase usually calls for a targeted inspection and repair. Widespread movement, repeated cracking, decay, or treads that have already been patched several times can change the calculation. Replacement may also make sense during a larger refurbishment, but it is rarely the first answer to one noisy step.
Ask the tradesperson to explain which component moved, how it will be secured and whether the repair requires access to the underside. That gives you a practical way to compare quotes. The cheapest way to silence a stair for a week is not necessarily the repair that will keep it stable.
A creak is useful information: identify its location, look for movement and treat any loose tread as a safety issue. If the staircase needs attention, book a carpentry assessment and share the step number, photos and whether the underside is accessible. That detail helps the visit start with the right tools and a realistic repair plan.
A skirting board can look sound from across the room and crumble when you press a fingertip into its lower edge. After a leak, the visible stain is only part of the decision. The board, wall and floor all need to dry, and the source of water must be fixed before anyone paints over the mark.
Some skirting can be kept with careful preparation. Swollen MDF, soft timber and persistent damp usually need a different approach. Here is how to assess the damage without turning a small repair into a repeat job.
Stop the water before assessing the finish
Start by establishing where the moisture came from. A single plumbing incident, rain driven beneath a doorway and condensation behind furniture can produce similar marks but need different remedies. If a pipe, tap or fitting is still leaking, arrange to find and fix the leak first. If the source is unclear, our guide to signs of a hidden leak explains clues such as recurring stains and a musty smell.
Take photographs before cleaning or removing trim, particularly in a rented property or if an insurer is involved. Move furniture away to let air circulate. Wipe up standing water and follow the advice of a relevant professional if sockets, wiring or a major escape of water are involved. A soaked wall or floor may need a broader water damage repair assessment.
Do not judge the board while it is wet. Timber may shrink back as it dries, though distortion can remain. MDF is less forgiving: once fibres have swollen, the edge rarely returns to a crisp, paintable profile.
Identify the board and the type of damage
Most modern homes use painted softwood or MDF skirting. In older London properties you may find taller, more decorative timber profiles, sometimes built up from several mouldings. Knowing the material helps you judge the repair.
Surface stain only: the paint has marked, but the board stays firm and flat. Once fully dry, cleaning, stain blocking and repainting may be enough.
Small local dent or open joint: sound timber can often be filled or refixed before decorating, provided no damp remains.
Swollen lower edge: common with MDF. It may feel fuzzy or raised and usually calls for replacement of the affected section.
Soft or crumbling timber: points to decay or prolonged moisture. The damaged material needs removing, and the wall and floor behind it should be checked.
Board lifting from the wall: fixings or plaster may have failed. A replacement board alone will not solve a damp or unsound backing surface.
Press gently with a fingertip, not a tool that could gouge the material. Compare the affected area with a dry section. Note any gap at the wall or floor and whether the floor covering is lifting. A stain travelling along several metres of skirting suggests a larger moisture problem than a short mark beside a repaired pipe.
Give the wall and floor time to dry
This is the part most likely to be rushed. A wall can feel dry to the touch while moisture remains behind the skirting, in plaster or beneath a floor covering. Painting too early traps the problem and may lead to peeling paint, mould or another swollen board.
Keep the room ventilated and heated sensibly. A dehumidifier can help after a larger incident, but drying time depends on the amount of water, material and ventilation. If the affected area is extensive, or damp keeps reappearing, get a moisture assessment. The site also has advice on dealing with mould, which is worth reading if growth appears around the wall. Cleaning visible mould without fixing persistent moisture will not settle the underlying issue.
If floorboards, laminate or carpet were wet, mention that when arranging the repair. The flooring and tiling service may be relevant where the floor edge has also lifted or warped. A skirting board can hide the perimeter of a damaged floor; it should not be used to conceal a problem that still needs drying.
When a repair makes sense
Keep the board if it remains firm, straight and securely attached after the area dries. A localised paint stain may need a suitable stain-blocking primer before repainting. A minor open mitre or gap can be refixed and filled once the wall is sound. Small dents in dry timber are usually straightforward to make good.
Match the existing finish carefully. New paint on one metre of old white skirting may show as a brighter strip, so you may prefer to repaint the full run between natural breaks. Our guide to why paint peels and how to fix it covers preparation issues that matter here too. If the wall has a tide mark, that surface may need separate stain blocking and redecoration.
Filler is for a sound, dry surface. It is not a cure for mushy MDF, rotten timber or an ongoing leak. Likewise, a bead of caulk along a wet joint can make the gap look tidy while leaving moisture behind it.
When replacement is the better option
Replace a section when MDF has visibly swollen, timber is soft, the profile has warped, or fixings no longer hold in sound material. The joiner should inspect the exposed wall and floor edge after removing the damaged piece. If the plaster or substrate is damp, let it dry and repair it before fitting new skirting.
Matching an older profile can be the tricky part. A standard modern board may sit awkwardly beside a deep Victorian moulding. A carpenter can assess whether a matching length is available or whether a discreet join and shaped trim will be needed. In some rooms it is neater to replace the entire short wall run than to splice a tiny piece in a prominent spot.
Where the repair follows a larger escape of water, coordinate the order: leak fixed, moisture checked, wall or floor made sound, then skirting fitted and decorated. This prevents the finished trim from being removed again to tackle a hidden problem. If the repair is part of several jobs, use the handyman booking checklist to record the leak date, affected rooms and materials.
A practical decision for your room
Once the source is fixed and everything is dry, the decision is mostly about material condition. Firm, flat skirting can be prepared and repainted. Raised MDF fibres, soft timber, significant warping or repeated damp call for removal and inspection. If you are unsure, photograph both the damage and a sound section of the profile before seeking a quote.
Bob's carpentry service can assess a damaged board and plan a matching repair or replacement. Tell the team if the leak is still being investigated, so the trim work can be scheduled after the moisture problem is resolved.
To provide the best experiences, we use technologies like cookies to store and/or access device information. Consenting to these technologies will allow us to process data such as browsing behaviour or unique IDs on this site. Not consenting or withdrawing consent, may adversely affect certain features and functions.
Functional
Always active
The technical storage or access is strictly necessary for the legitimate purpose of enabling the use of a specific service explicitly requested by the subscriber or user, or for the sole purpose of carrying out the transmission of a communication over an electronic communications network.
Preferences
The technical storage or access is necessary for the legitimate purpose of storing preferences that are not requested by the subscriber or user.
Statistics
The technical storage or access that is used exclusively for statistical purposes.The technical storage or access that is used exclusively for anonymous statistical purposes. Without a subpoena, voluntary compliance on the part of your Internet Service Provider, or additional records from a third party, information stored or retrieved for this purpose alone cannot usually be used to identify you.
Marketing
The technical storage or access is required to create user profiles to send advertising, or to track the user on a website or across several websites for similar marketing purposes.