

Poor washing is often blamed on detergent when the dishwasher cannot circulate or drain water properly. A film of grease on the filter, blocked spray holes, a folded door seal or an incorrectly loaded tall plate can all reduce performance. Regular owner maintenance should clean accessible parts without opening the cabinet, pump or electrical systems.
Read the manual and let the machine cool
Filter locks, spray-arm clips and self-cleaning systems vary. Find the model instructions before pulling any part. Finish the cycle, switch off, unplug if the plug is accessible with dry hands, and allow hot components to cool. Turn off the local water valve if you will move the appliance, but routine internal cleaning should not require movement.
Stop and arrange dishwasher repair for burning smells, repeated electrical trips, damaged wiring, water below the cabinet or a door that will not latch securely.
What you need
- Soft washing-up brush and old toothbrush
- Warm water and mild washing-up liquid
- Wooden cocktail stick or soft plastic pick
- Microfibre cloths and an old towel
- Torch and gloves
- The manufacturer’s approved dishwasher cleaner if required
Avoid wire, sharp needles, abrasive powder and strong household drain cleaner. They can enlarge spray holes, damage stainless steel and seals, or leave hazardous residues.
Step 1: remove the lower rack and map the parts
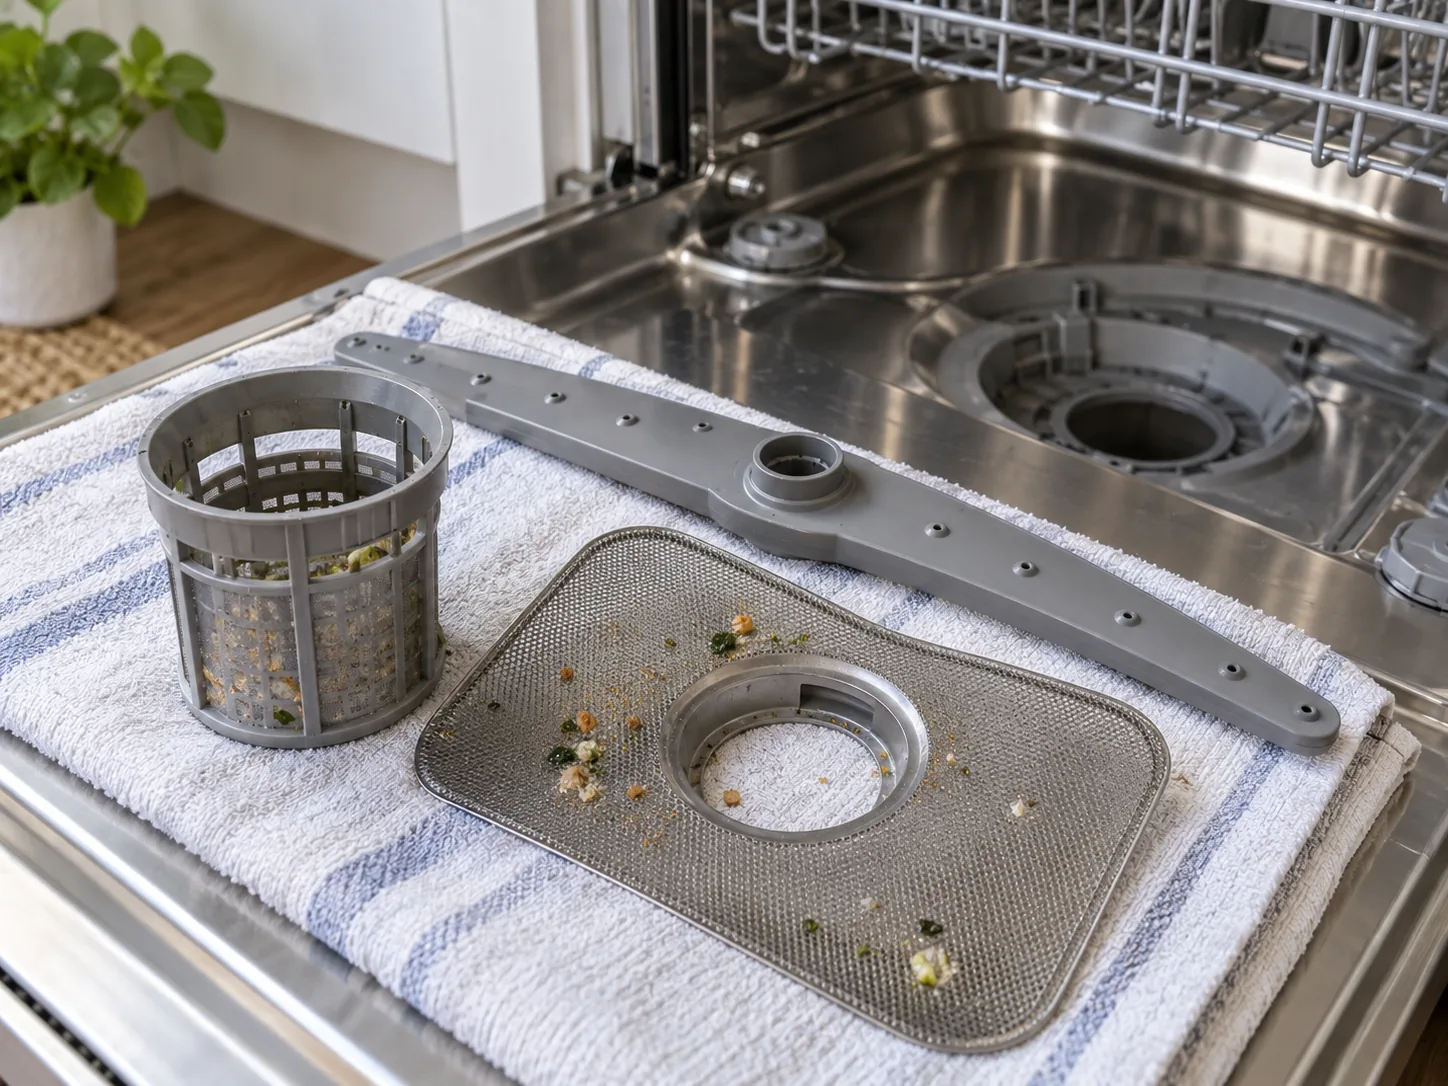
Slide out the lower rack and photograph the base. Identify the cylindrical filter, flat mesh, lower spray arm, salt cap and any covers that the manual names. Do not confuse the salt reservoir with a drain. Remove loose glass fragments with gloves, never bare fingers.
Step 2: lift out and wash the filter
Unlock the filter in the marked direction and lift it vertically so debris does not fall into the sump. Separate components only as instructed. Rinse under warm running water and brush both sides of the mesh. Pay attention to grease around the locking tabs.
Inspect for split mesh, distorted plastic and a damaged O-ring. A torn filter allows debris to reach the pump and must be replaced with the correct part. Wipe the accessible sump opening, but do not remove fixed covers or reach into the pump.
Step 3: clear the spray arms
Rotate each arm by hand before removal and note any contact with dishes or the rack. Release it according to the manual. Hold it under a tap and check that water exits all holes. Use a wooden or soft plastic pick to loosen visible particles, then flush them out rather than pushing them deeper.
Check the central bearing and seam for cracking. When refitted, the arm must rotate freely and sit at the correct height. A warped arm that strikes the rack should be replaced.
Step 4: clean the door seals and edges
Wipe the gasket with warm mild solution, working into folds without pulling it from the channel. Clean the lower door edge and hinge area where residue collects outside the main wash. Inspect for splits, hardening and a section that will not remain seated.
Do not coat the seal with oil or petroleum jelly unless the manufacturer specifies it. A leaking door can also result from an unlevel appliance, damaged hinge, excessive foam or a spray arm directing water incorrectly.
Step 5: clean dispensers and rack tracks
Remove hardened detergent from the dispenser lip and confirm the lid opens freely. Wipe rinse-aid spills, which can create excess foam. Clear food fragments from rack wheels and tracks so the rack seats fully; a rack left forward can obstruct the door or spray arm.
Step 6: refit in the right order
Place the flat screen correctly, insert the filter and turn it until the lock marks align. An unlocked filter can lift during washing. Refit each spray arm and spin it through a full turn. Replace the rack and check that tall items cannot touch it.
Step 7: run a controlled test
Restore power and run the cleaning programme or an empty hot cycle only if the manual recommends it. Use an approved cleaner at the stated dose; never combine cleaning chemicals. Stay nearby at the beginning and end, then inspect the floor, door corners and cabinet sides for moisture.
Open carefully after the cycle because steam can burn. Confirm that water has drained from the sump to the normal residual level and that the filter remains locked.
Troubleshooting common symptoms
Food remains on the upper rack
Check the upper spray arm, confirm its water connection engages when the rack is pushed in, and avoid nesting bowls. Low water pressure or a failed circulation pump needs professional diagnosis.
Water remains in the base
A small designed amount can protect pump seals, but a deep pool with debris suggests drainage trouble. Check the filter and visible waste hose for kinks. If the connected sink is also slow, use the slow-draining sink checks. Do not pour drain cleaner into the dishwasher.
The door leaks only during a cycle
Stop the machine. Check for excess foam, an item trapped in the gasket and a spray arm split along its seam. A persistent leak may involve the inlet, pump or internal hose and needs appliance service.
Common maintenance mistakes
- Running the machine without the filter locked in place.
- Using metal objects to enlarge spray holes.
- Pulling a fitted gasket out merely to clean it.
- Mixing bleach, descaler and proprietary cleaners.
- Ignoring small glass pieces in the sump.
- Assuming more detergent cures poor circulation.
- Moving a built-in machine without isolating services.
Choose frequency from use and evidence
Inspect the filter after a heavily soiled load and clean it at the interval in the manual. Hard-water homes may need approved descaling; soft-water homes may not. Scrape large food scraps, load so arms can rotate and replenish salt and rinse aid only as the appliance and local water conditions require.
Finish with rotation, lock and leak checks
Water backing up from the sink connection or leaking at the shared waste needs a plumbing check, not further cleaning inside the dishwasher.
Good dishwasher maintenance leaves the filter locked, both spray arms turning freely, the door seal clean and the floor dry after a test. If performance remains poor after those checks, further dismantling is unlikely to be useful or safe—record the symptoms and arrange a model-specific diagnosis.

