
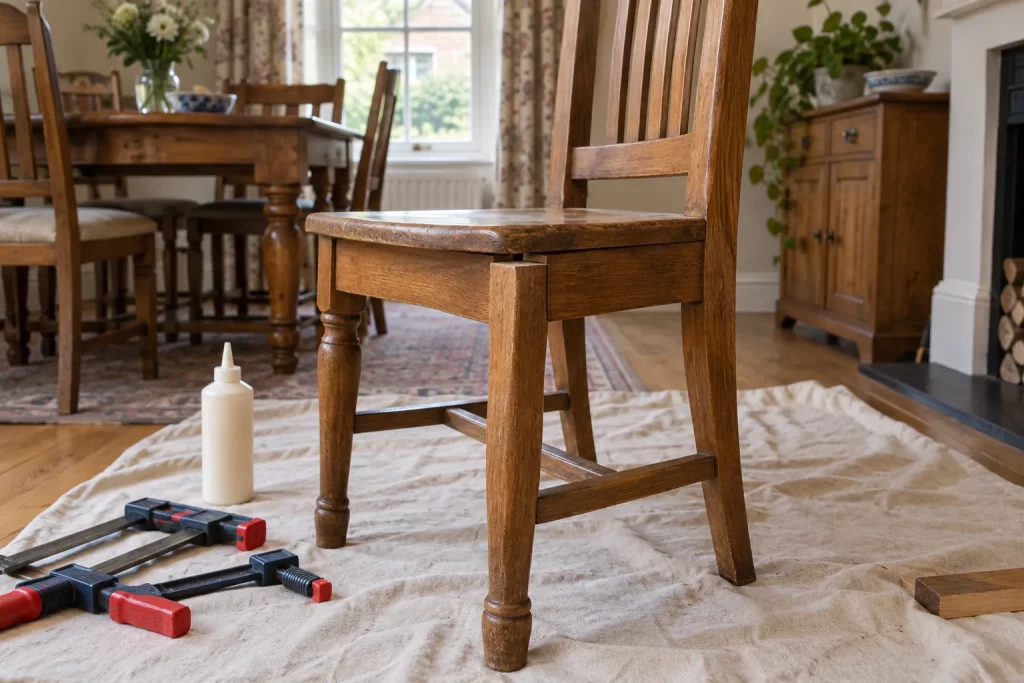
A chair can wobble because one joint is loose, several rails have worked free or a leg has split. Driving extra screws through the outside may stop movement briefly but can split the timber and weaken the original joinery. A sound repair finds the moving joint, removes failed adhesive and clamps the chair square while fresh glue cures.
Do not use the chair until it is assessed
Place it on a flat hard floor and remove any loose seat cushion. Press diagonally across the seat with your hands while keeping body weight off it. Watch each leg-to-seat and rail-to-leg joint. Mark movement with low-tack tape. A wobble caused only by one short leg is different from a joint that opens under load.
Stop if a leg is cracked along the grain, a joint has missing timber, the seat frame is split or the chair is valuable, antique or unusually constructed. Those repairs need professional furniture repair.
Identify how the chair is joined
Traditional chairs often use mortise-and-tenon or dowelled joints. Modern furniture may use corner blocks, screws, cam fittings or metal brackets. Upholstery can hide structural fixings. Do not dismantle a joint until you understand how it was assembled and can return it to the same position.
Photograph all four sides and label rails discreetly with masking tape. Measure diagonals across the leg positions; matching measurements help confirm squareness during clamping.
Tools and materials
- Woodworking clamps long enough for the chair
- Padded blocks or clamp protectors
- Soft-faced mallet
- Scraper, small chisel and stiff brush
- Good-quality wood adhesive suited to the timber and indoor use
- Square, tape measure and damp cloth
- Ratchet strap only where appropriate and used with corner protectors
Avoid expanding polyurethane glue as a substitute for a well-fitting joint; foaming does not restore missing wood. Do not inject glue into a closed joint and expect it to reach sound timber.
Decide whether partial dismantling is possible
A joint that opens several millimetres by hand may be separated carefully. Support adjacent rails and tap near the joint with a padded mallet, alternating sides. Never twist one rail as a lever. If the joint will not release with moderate controlled force, do not split the chair apart merely to add glue.
Several loose joints may need to come apart as one frame section. Label orientation and lay components in order. Photograph old wedges or pins before removal.
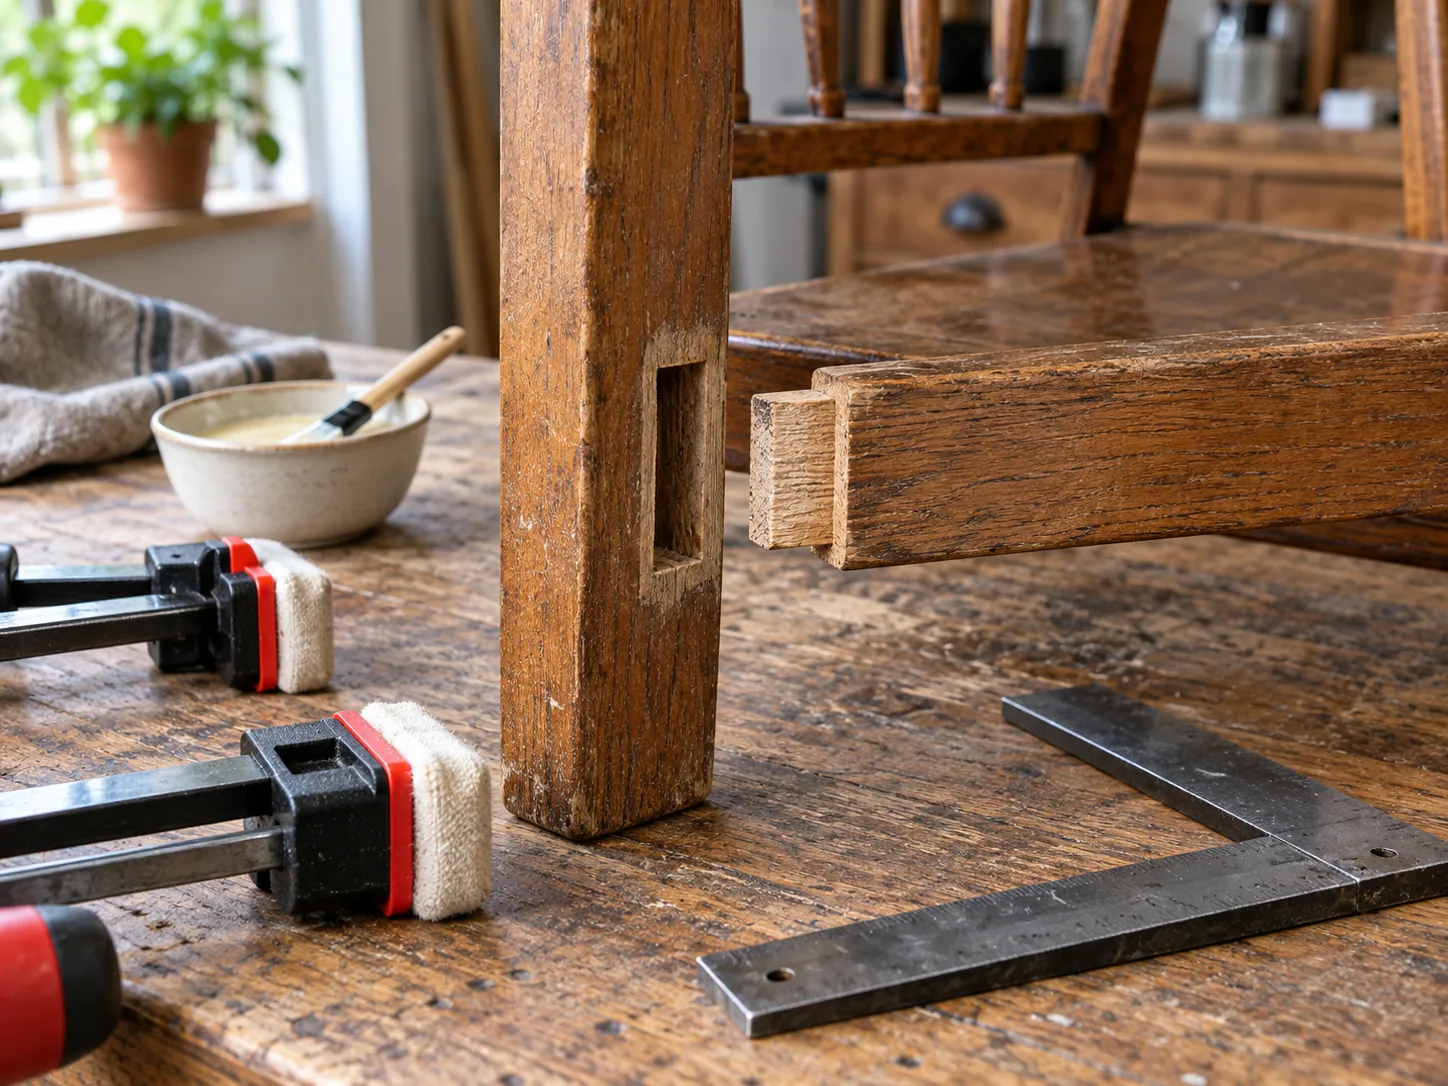
Step 1: clean old adhesive from mating surfaces
Fresh glue bonds to timber, not a thick skin of failed glue. Scrape softened residue carefully without reducing the tenon or widening the mortise. A joint that was originally hide-glued may require a conservation-compatible method. Keep sharp tools moving away from hands and finished edges.
Dry-fit the cleaned joint. It should enter fully with hand pressure or gentle mallet taps and have little side play. A loose tenon needs a fitted timber repair; filling the void with more glue will not make it structural.
Step 2: plan the clamps before gluing
Assemble the chair dry with pads and clamps in position. Check that pressure will close joints along their axes rather than bend rails sideways. Protect every finished surface. Measure diagonals and confirm all feet sit on a flat reference surface.
Work within the adhesive’s open time. If the whole frame cannot be aligned calmly before glue begins to skin, repair it in logical sections or seek carpentry support.
Step 3: apply a controlled film of glue
Coat both clean mating surfaces with a thin, even film, reaching the shoulders and sides without filling the mortise like a cup. Reassemble immediately and seat the joint fully. Wipe squeeze-out with a damp cloth while avoiding excessive water on old finishes.
Step 4: clamp square, not merely tight
Tighten clamps gradually in sequence. Watch each joint close and compare diagonals. Place the chair on the flat surface and confirm all four feet touch. Extreme pressure can bow rails, crush fibres and squeeze out too much adhesive; use only enough to close sound joints.
Step 5: allow full cure
Leave the chair undisturbed for the product’s stated clamp and cure times at a suitable room temperature. Do not “test” it by rocking before cure. Remove clamps, clean any remaining residue with a finish-safe method and inspect each shoulder for a complete closure.
If the chair still rocks on the floor
Move it to another known-flat surface. A rigid chair that rocks without joints moving may have unequal leg lengths or a twisted frame. Confirm the frame is square before shortening anything. Adding felt pads can compensate for a tiny floor irregularity but should not hide a structurally twisted chair.
Repairs to avoid
- Driving long screws through legs into end grain.
- Adding metal angle brackets where they split thin rails.
- Pouring glue into a joint without cleaning it.
- Using nails to pin a moving mortise-and-tenon joint.
- Clamping so hard that rails bow.
- Sanding or planing a leg before checking frame twist.
- Sitting on the chair before the adhesive has cured.
When the joint needs new timber
A tenon that has lost material can be rebuilt or replaced, and a damaged mortise may accept a fitted insert. These are precise repairs: the grain direction, shoulder location and final dimensions carry the load. Screws, filler and glue-soaked sawdust are not equivalent. Chairs used by children, older people or anyone with limited mobility deserve a conservative safety decision.
Protect the finish during structural work
Old varnish, wax and painted surfaces can mark under clamps even when the pressure seems light. Use clean cork, leather or timber pads larger than the clamp jaws, and place protective film between squeeze-out and absorbent pads. Test cleaning methods out of sight. If the finish lifts, becomes cloudy or transfers colour to the cloth, stop before enlarging the damage.
Do not refinish the entire chair simply because one joint was repaired. Local colour matching and conservation of an aged surface may require specialist judgement.
If the chair came as a knock-down kit rather than traditional joinery, consult its instructions or use a furniture assembly service; proprietary bolts and inserts need a different repair from glued timber joints.
Prove the repair gradually
For chipboard or proprietary connector damage, use the separate guide to repairing flat-pack fixings. A sticking wooden drawer has different wear points, covered in the guide to checking drawer runners.
After full cure, press the empty chair diagonally and inspect the joints. Apply load gradually while another person watches for movement. Listen for clicks and recheck after several uses. A durable chair repair is quiet, square and supported by close-fitting timber—not by hidden excess glue or external hardware.

