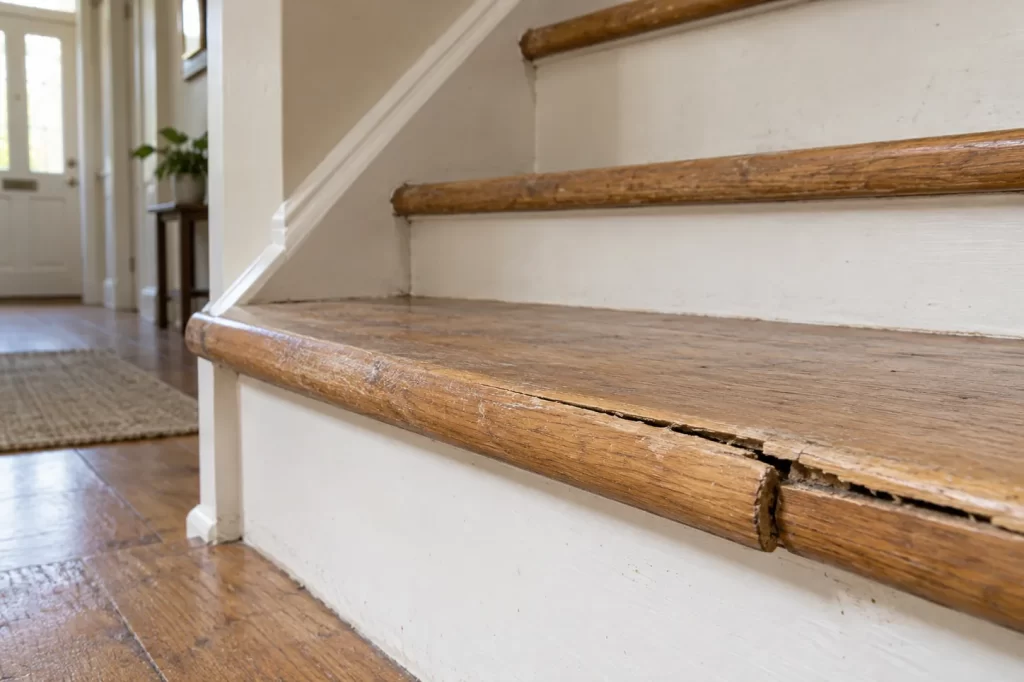
The nosing is the front edge of a stair tread, often projecting a little beyond the riser below. It receives repeated foot traffic and is the part your foot may meet as you climb. A split or loose nosing therefore deserves more attention than a superficial mark in the finish. If a piece lifts, flexes or presents a sharp edge, keep people off that step where possible and arrange a sound repair. Filling the line and painting over it will not restore a load-bearing edge.
A damaged nosing is a different problem from a stair that creaks underfoot or a loose handrail. Those faults may coexist, but the immediate question here is whether the front of the tread still supports a normal step. The published article on creaking stair treads explains noise from the wider stair structure; the loose handrail guide addresses the separate support people hold for balance.
Identify what has split
Look at the step in good light from above and from the side. Some stairs have a solid tread with a rounded front edge. Others have a separate strip or applied nosing. A crack in a thin finish, a split in that applied strip and a fracture running back into the main tread are not equivalent. The repairer needs to know which piece carries weight and where the split ends.
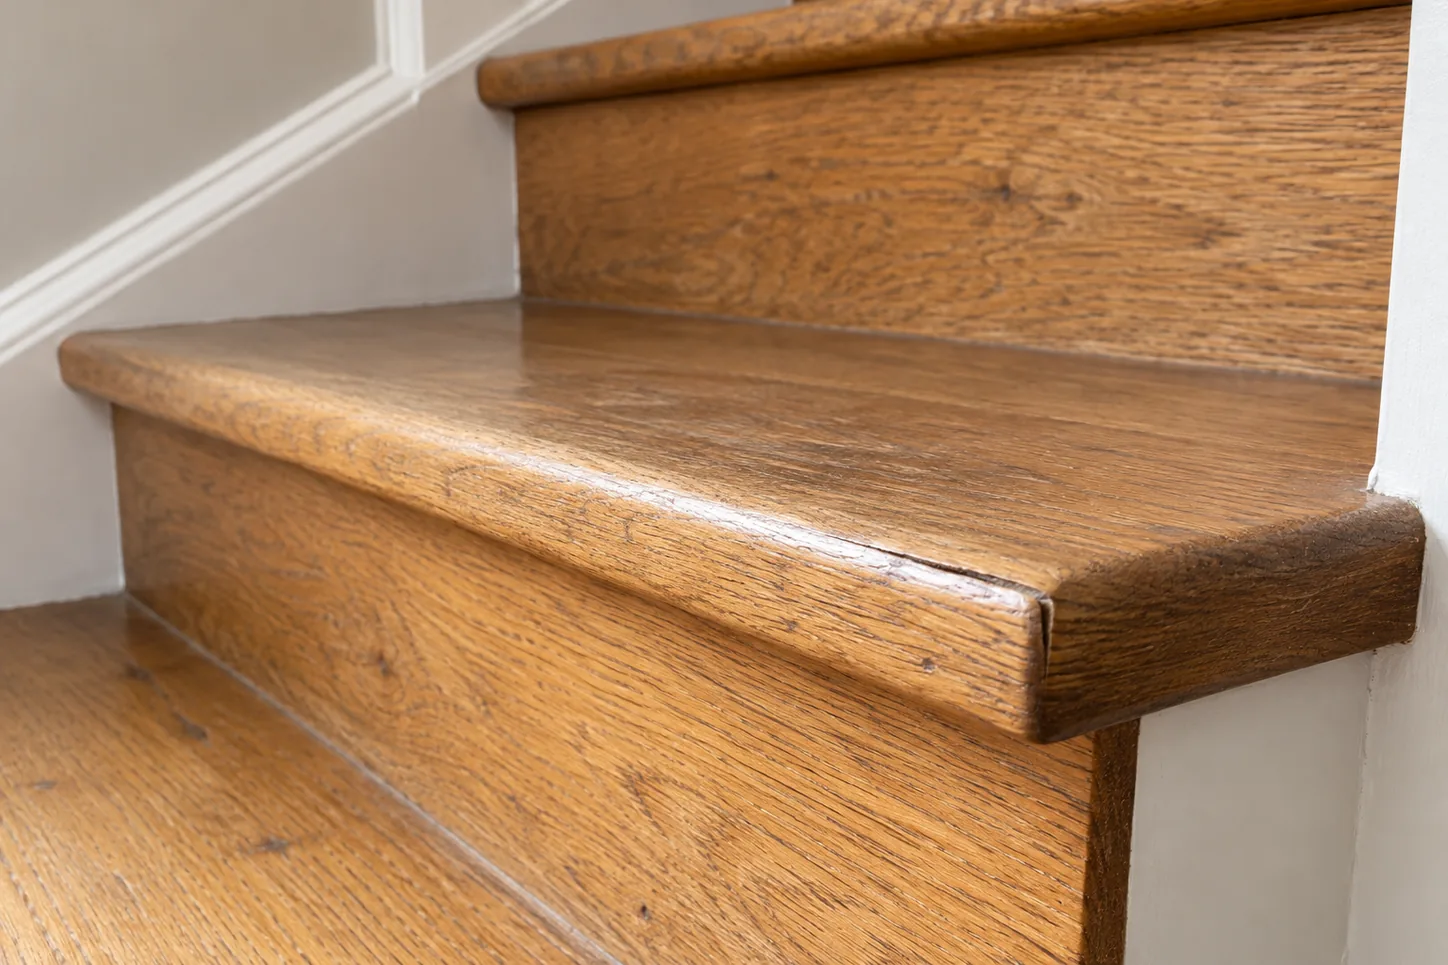
Photograph the damage without stepping on it. Include one wider view showing which step is affected and a close view of the edge. Look for a piece hanging down, a visible gap between nosing and tread, splinters, missing screws or a worn groove where a carpet or stair runner once sat. If the staircase is carpeted, a raised or moving edge may be felt before it is visible. Do not pull back a fixed runner without understanding how it is attached.
Check neighbouring steps too. Similar cracking on several nosings may point to widespread wear, poor earlier repairs or a change in moisture conditions. A single break after an impact can be more local. Dark staining or soft timber suggests water or decay that may extend beyond the visible crack. Record it, but do not probe deeply into a step people still need to use.
Decide how to limit use safely
If the nosing moves or a fragment could detach, avoid the staircase until it has been assessed where another route exists. In a home with only one stair route, do not improvise a block that creates a new trip hazard. Keep the step clear, turn on adequate lighting, warn other occupants and arrange prompt repair. A household member who relies on a handrail, mobility aid or steady footing may be particularly affected by a changed tread edge.
Do not tape a loose piece down and treat it as fixed. Tape can conceal movement and lose adhesion under foot traffic. Likewise, a temporary mat can curl at the damaged edge. If the stair is in a communal or managed building, report it to the responsible manager; access and temporary controls may need to be arranged for everyone who uses it.
Avoid testing the edge with your body weight. A light visual and hand inspection from a safe position can show movement, but a cracked tread may fail suddenly. If it extends into the main tread, the whole step may need support or replacement rather than just a new rounded edge.
Why the front edge fails
Repeated wear can loosen the connection between an applied nosing and the tread. Old screws may lose grip, adhesive may fail, or the timber may split along the grain. Heavy impacts, such as dropping furniture on the stair, can fracture an otherwise sound edge. Carpet tacks, old nail holes and earlier cuts can create weak points.
Moisture is another factor. Timber expands and contracts as humidity changes, while a persistent leak can soften fibres. Painting the surface does not correct water entering from above or behind. If staining is present, find the source before replacing timber. A new nosing fixed to damp or decayed material may soon loosen.
Some stairs have decorative overhangs or profiles that look similar but are part of different constructions. An open-riser staircase, a closed string stair and a stair built from engineered components can require different repair methods. Do not cut off the projecting edge to make it flush without assessing how the tread was designed and how the rise and going would be affected. A seemingly small change can alter how the stairs feel underfoot.
What a sound repair involves
The first job is to establish whether the underlying tread and riser are stable. A carpenter can inspect the split, any fixings and the connection to the stair structure. If the main tread is sound and only a separate applied nosing is damaged, replacing or securely refixing that section may be possible. The replacement needs an appropriate profile, material and fixing method so it does not create a lip above the tread.
If the split runs into the tread, a local cosmetic repair may not be enough. The step may need a more extensive timber repair or replacement. The repair should restore the load path and a consistent walking surface, not merely hide a gap. Screwing a small metal angle across the front can make the edge catch shoes and may not strengthen the underlying wood. Filling a void with hard compound does not make loose fibres sound.
Where a stair runner or carpet covers the step, it may need to be lifted and refitted properly to inspect and repair the nosing. Staples and gripper rods can be sharp; take care rather than pulling at the covering. The finished repair should keep any carpet edge secure and maintain visual contrast or slip resistance where the staircase design requires it.
Check the finished step in context
After repair, the nosing should sit firmly without a proud lip or sharp edge. Compare its shape and projection with neighbouring steps. A single oddly shaped edge can catch a foot even when it is structurally sound. Check under normal lighting from both directions, because a shadow can hide a new change in level.
The stair should not flex at the repaired edge under ordinary use. However, do not conduct an extreme load test yourself. Ask the repairer what was replaced, what condition was found beneath it and whether other steps need watching. A repaired finish may need curing time before heavy use or cleaning; follow the product and trade guidance given for that specific job.
If the original failure was caused by furniture impacts, use enough help and suitable handling when moving large items on the stairs. Do not rest heavy objects on one nosing while turning a corner. Keep the stair dry, clean spills promptly and check any recurring cracks before they widen.
When to call a carpenter
Arrange carpentry repair if the edge lifts, the crack extends into the tread, fasteners have pulled out, timber is soft or several steps are affected. The site’s handyman repairs page can be a route for assessment of smaller property defects, but a moving stair edge needs a repair appropriate to its load and construction. Describe exactly which step is damaged and whether it is the rounded strip or the tread itself.
The safest rule is simple: treat movement at the front of a step as a functional defect. Identify the component, restrict use sensibly, then repair the supporting timber and final profile together. A tidy coat of paint is the last stage, not the fix.