
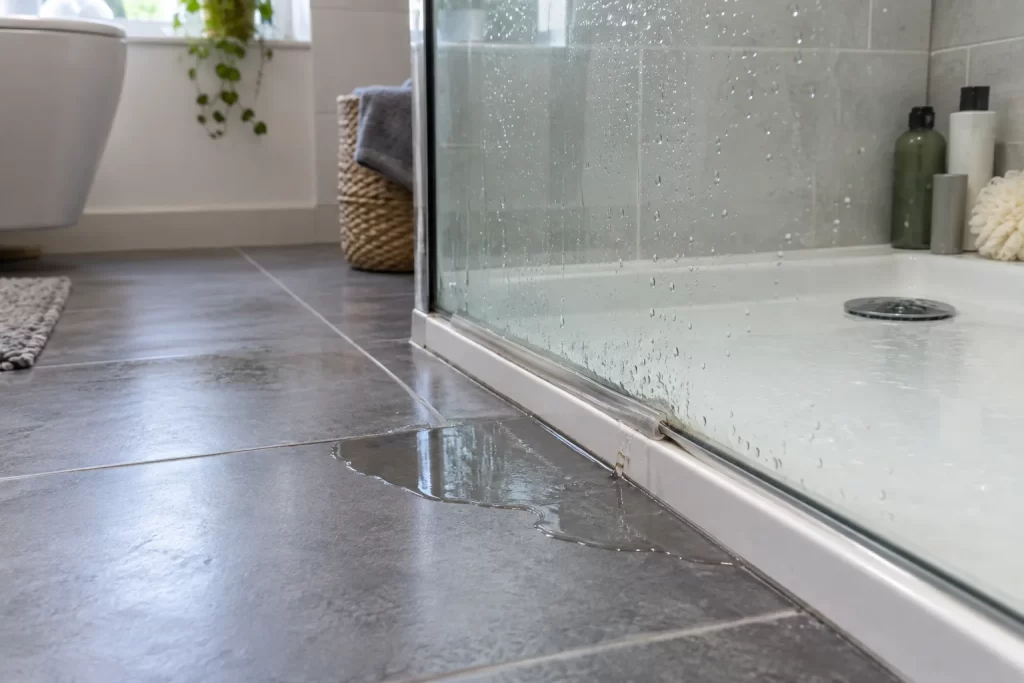
Water outside a shower screen does not automatically mean the whole enclosure needs resealing. It may be passing beneath a worn bottom seal, escaping at the hinge end, overflowing a blocked drainage channel or being directed through a gap by the shower spray. Applying silicone everywhere can trap water inside the frame and make the leak harder to trace.
The practical repair begins with a controlled test. This guide covers common bath screens and framed or semi-frameless enclosures in UK bathrooms. Cracked glass, unstable trays, concealed pipe leaks and extensive water damage require professional attention.
Dry the area and map the water path
Do not test while the floor and frame are already wet. Dry the glass, tray, seals and surrounding tiles. Place strips of dry tissue at the bottom corners, hinge side and outer frame. Run the shower at modest flow, directing water at one section at a time. Start low and work upwards.
Note which tissue becomes wet first. Water can travel along a frame before dripping far from the entry point. Repeat the test with nobody in the shower, then consider whether a user’s body or spray direction changes the result. A screen may be sound but too short or poorly positioned for a powerful shower head.
Check these common leak points
- Split, hardened or shrunken bottom sweep seal
- Gap between the vertical seal and bottom seal
- Blocked weep holes or frame drainage channels
- Failed external silicone where the wall profile meets tiles
- Loose hinge or screen alignment
- Tray movement opening the wall joint
- Spray passing around the free edge rather than through a failed seal
Also run water into the tray without wetting the screen. If water still appears outside, investigate the tray, waste and plumbing rather than the glass seal.
Tools and materials
- White cloths and tissue for testing
- Soft brush, non-scratch pad and bathroom cleaner
- Plastic scraper and sealant-removal tool
- Replacement seal matched to glass thickness and profile
- Sanitary silicone where the manufacturer specifies it
- Tape measure and sharp seal-cutting tool
- Gloves and eye protection
Toughened glass must not be drilled, cut or heavily struck. If the panel is chipped at an edge, cracked or loose, stop using it and arrange specialist replacement.
Step 1: clean seals and drainage routes
Soap scale and hair can hold a flexible seal away from the tray. Remove detachable seals where the design permits and clean their grooves. Use a soft brush on frame channels and locate any weep holes that let water return to the shower side. Do not block them with silicone.
Rinse and dry everything before retesting. Cleaning alone can restore a seal that was distorted by debris, and it provides a clear view of splits and permanent flattening.
Step 2: inspect screen alignment
Close the screen slowly. The bottom seal should meet the bath or tray consistently without folding under itself. The free edge should meet a magnetic or vertical seal evenly. If the gap tapers, the panel or wall profile may be out of alignment.
Some screens allow minor hinge adjustment, but glass is heavy and unforgiving. Support the panel and follow the manufacturer’s instructions. Do not loosen several hinge fasteners at once. A loose wall profile, cracked tile fixing or sagging bath needs broader bathroom repair.
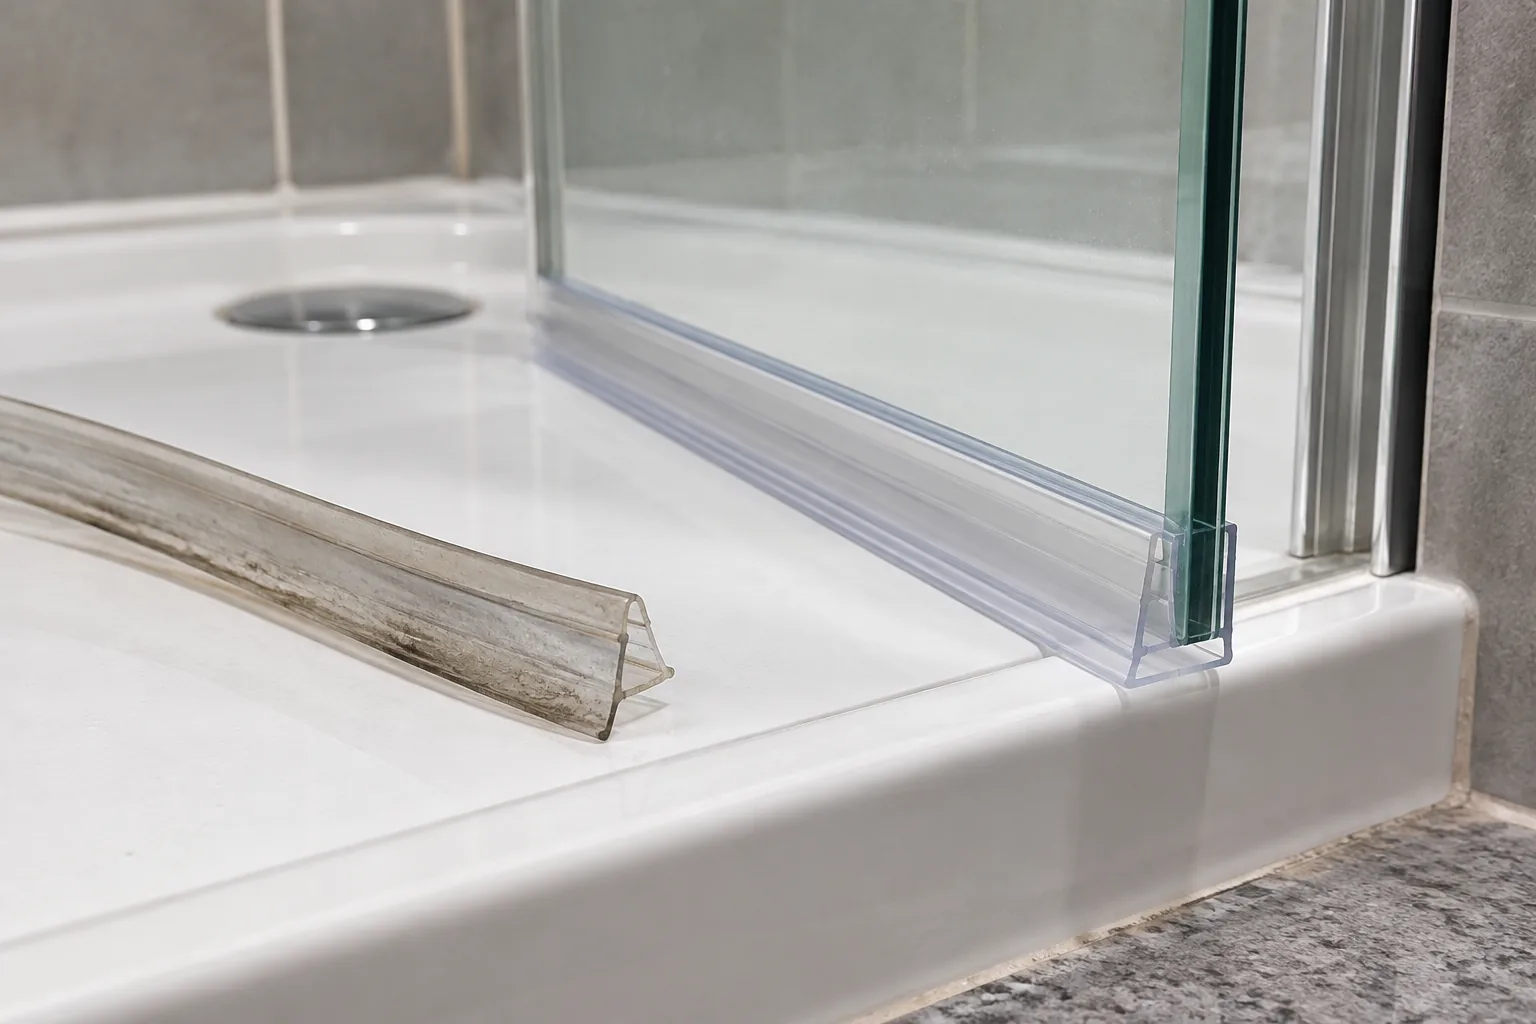
Step 3: replace a worn bottom seal
Measure the glass thickness accurately and photograph the old seal profile before buying a replacement. Similar-looking seals have different fins, drip rails and gripping channels. Remove the old seal in the direction recommended for the screen; avoid twisting against the glass edge.
Clean and dry the glass. Cut the new seal to length with a square end or the profile required at the hinge. Push it on evenly without tools that could chip the glass. At the free end, the drip fin should direct water inward and must not catch the tray as the screen opens.
Step 4: deal with failed silicone selectively
Most framed enclosures are sealed on the exterior of wall profiles so water entering the frame can drain back inside. Sealing internal edges or drainage holes can trap water. Check the screen instructions before removing silicone.
Where an approved exterior joint has failed, remove all old silicone, clean and dry the surfaces, then apply a continuous sanitary bead. The preparation principles are the same as replacing bath silicone. Let it cure fully before testing.
Step 5: test in controlled stages
Begin with water directed only at the tray-to-screen junction. Then test the vertical frame, hinges and free edge separately. Keep tissue outside each point. This staged method confirms the repair and avoids mistaking splash from another area for a seal failure.
Finally test normal use, including the usual shower-head position. If water passes around the open edge, a different seal profile, deflector or screen arrangement may be needed rather than more silicone.
Check again after the first few showers
Leave a dry cloth outside the enclosure for the next two or three uses and inspect the repaired joint afterwards. A slow leak may only appear when warm water, movement and a longer shower combine. If the same area becomes damp again, stop adding sealant and revisit the alignment, drainage and tray movement checks.
Common mistakes
- Sealing internal frame joints and blocking drainage.
- Buying a seal without measuring glass thickness or profile.
- Testing before silicone has cured.
- Assuming water near the screen cannot come from the waste.
- Adjusting unsupported glass or overtightening hinges.
- Ignoring movement in the bath or shower tray.
- Using harsh abrasive cleaners that scratch clear seals and finishes.
When it is not a screen-seal repair
Water appearing when the screen remains dry suggests plumbing, grout or tray failure. Cracked grout can admit moisture behind tiles and should be addressed using the guide to repairing shower grout. A waste leak is a job for plumbing support.
Replace rather than adjust glass with chipped edges, cracks or loose safety hardware. Extensive staining below the bathroom, swollen flooring or soft wall material may need water damage assessment.
Trace first, seal second
A dry staged test is more valuable than a cartridge of silicone. Identify the first wet point, restore drainage, replace the seal with the correct profile and reseal only the joints intended by the screen design. That keeps water on the shower side without blocking the routes designed to carry it there.

