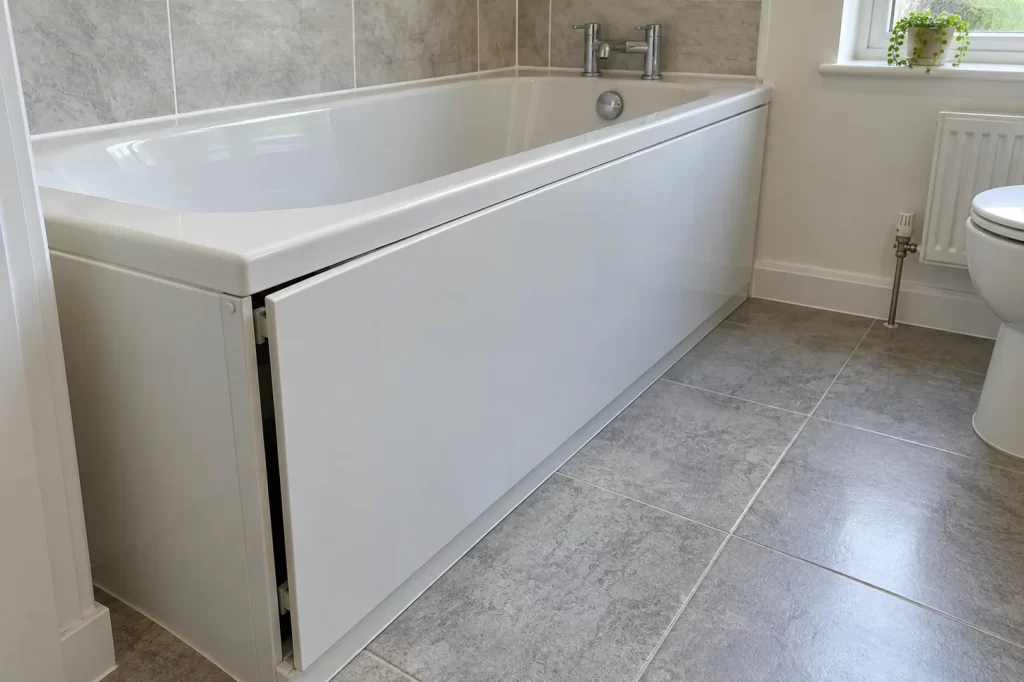
A loose panel beneath a bath or beside a service void may look like a small cosmetic defect. Its purpose, however, is often to keep plumbing or other fittings accessible. A repair should make it secure while preserving that access. Before refixing a panel in a rental property, identify how it is meant to come off, check for moisture behind it and record enough detail for the right repair to be planned.
The advice here is practical maintenance guidance, not a statement of legal responsibility between tenant, landlord and managing agent. Follow the property’s reporting and access arrangements. Where water is leaking, a panel is only the cover over the problem; deal with the active water issue first.
Work out whether it is meant to be removable
Look for a narrow even joint around the panel, exposed screw caps, magnetic catches, push clips or a small finger recess. A bath panel often has clips at its upper and lower edges. An access hatch elsewhere may be fixed with screws. Do not assume a panel should be glued to the wall because it has pulled away. It may need to be opened in future to inspect a waste connection, valve or service joint.
Take a wider photograph showing where the panel sits, then a close one of the loose edge. If it is still mostly attached, support it while checking the fixings. A large panel can fall forward suddenly, chip a tile or strike a foot. Avoid pulling a single loose corner: that can crack plastic or laminated board and break sound clips at the other end.
Compare the panel with surrounding finishes. A sealed tile face with an inconspicuous access hatch may be part of a waterproofing detail. Cutting sealant or pulling tiles to “inspect” it can create a leak path. Where the removal method is unclear, ask the owner or a competent fitter for the original arrangement rather than forcing it.
Check the hidden space for moisture
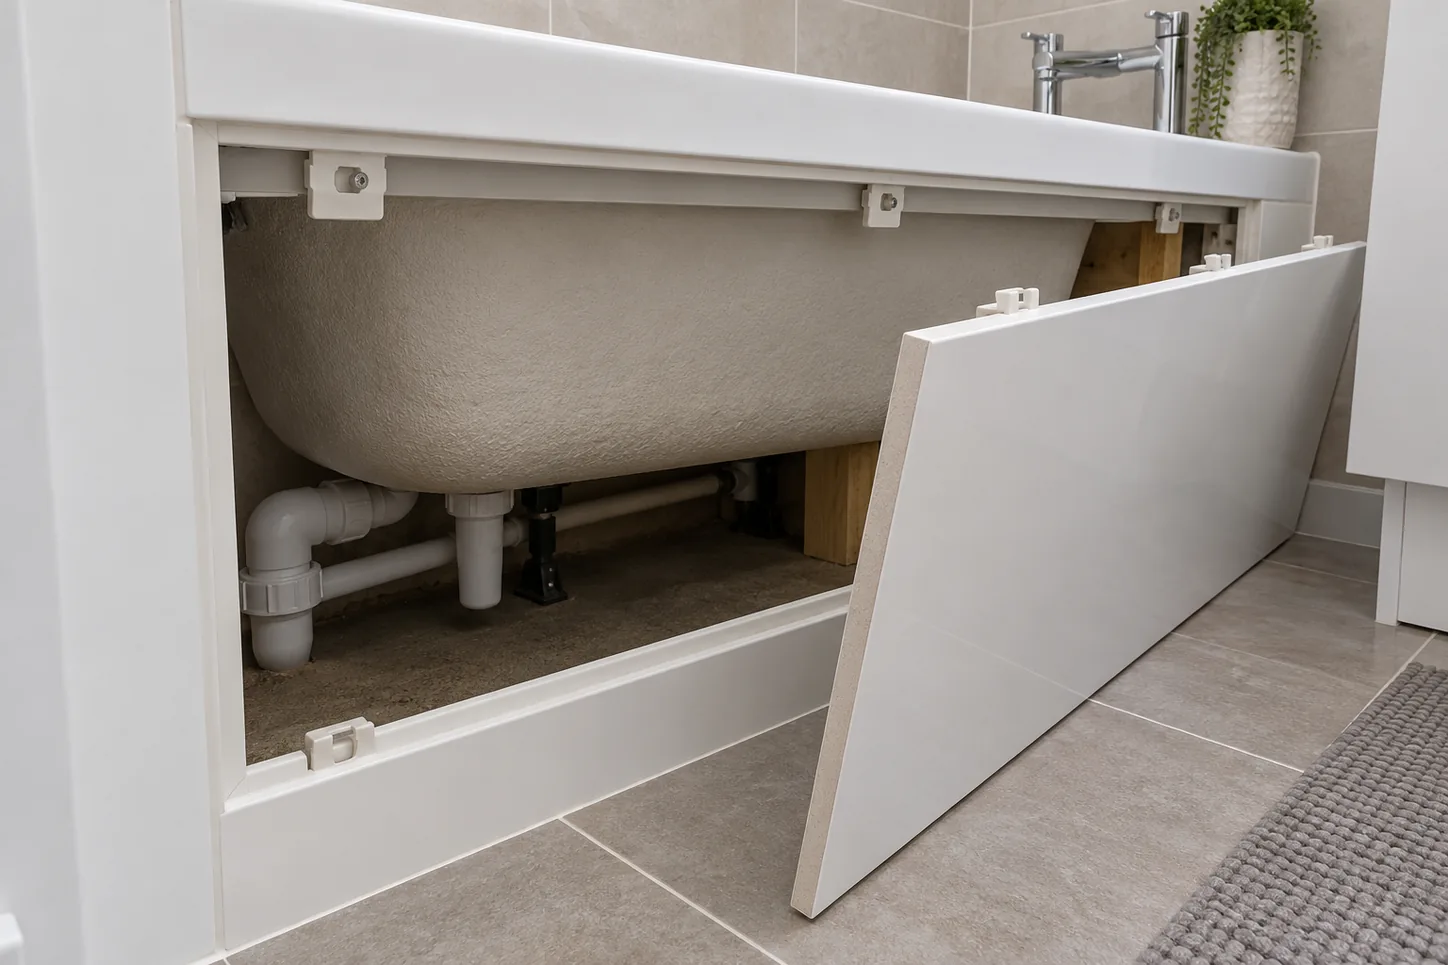
If the panel can be opened safely as intended, look behind it with a torch. Dry dust is normal. Water droplets, dark staining, swollen board, a musty smell or softened timber call for further investigation. Do not reach into an unknown space or disturb pipework. Note whether the visible moisture is near the bath waste, supply pipes or floor, but do not infer a source from one stain. Water can travel along surfaces before it appears.
Photograph the condition before drying or cleaning it, then report an active leak promptly through the property’s normal channel. The existing article on signs of a hidden water leak offers a broader checklist. A new clip will not solve a panel that is falling away because its timber backing has swollen or the floor beneath it is damp.
Check the panel itself. Laminated chipboard can swell along an unsealed bottom edge where bathroom cleaning water sits. A plastic panel may crack at a fixing point but remain otherwise usable. Timber battens can loosen from the wall or become soft after repeated leaks. The correct material repair depends on what is sound after the moisture source has been dealt with.
Identify the failed fixing
Many panels use small spring clips or a batten along the base. A missing clip, loose screw or bent bracket may let one edge project. Compare both ends. If the sound end has a matching component, it can help identify what is missing, but avoid taking it apart without a reason. Photograph any part number or profile before seeking a replacement.
If screws have pulled from a timber batten, check whether the timber still grips. Repeatedly inserting a larger screw into softened wood is not a durable repair. If the wall plug has come loose, the substrate and hidden services must be assessed before choosing a new fixing position. Bathroom walls and floors can conceal water pipes, electrical cables and waterproofing layers; do not drill on guesswork.
An access panel may also be pushed out by something inside the void. A pipe or flexible hose resting against its back can prevent it seating and should not be forced out of the way. The panel may have been cut too tightly against the bath or floor. Where there is a clear obstruction, document it rather than trimming or moving plumbing yourself.
Record useful dimensions before ordering parts
Measure the panel’s height and width, but also note its thickness, finish, edge profile and the location of each fixing. A replacement clip must match the batten or frame and allow the panel to be removed as designed. Record whether the panel lifts, slides or pulls forward to release. If the instructions or original installer details are available, use those rather than relying on a visually similar part.
A single photo of a white panel is rarely enough for a contractor to bring a matching component. Include a close view of the surviving clip, the failed fixing and the edge construction, with a ruler for scale. Keep the images free of private possessions where possible; a repair report needs the fault, not a full record of someone’s bathroom. The between-tenancy repair checklist covers whole-property preparation, while this task is a focused panel assessment.
In an occupied property, arrange inspection access through the normal channels and explain whether the bathroom can still be used safely. Do not leave a loose panel leaning where it can fall or obstruct a route. If it can be removed without damaging the finish, store it flat and protected until repair; document where it is kept.
Refit without sealing away access
Once the void is dry and the backing sound, replace damaged clips or battens with compatible parts. Align the panel so its edges sit neatly without pressing hard against the bath or floor. Test that it engages positively, then confirm it can be released by the intended method. A panel that needs excessive force to remove may break during the next leak inspection.
Only use sealant where the panel system and waterproofing arrangement call for it. Running a continuous bead around a removable access panel may make the next inspection destructive. Conversely, leaving a required wet-area joint open can allow splashed water into the void. The correct detail depends on the design, so consult manufacturer instructions or a bathroom fitter if uncertain.
After refitting, run the bath or shower only if there was no active leak and it is safe to test. Look for new moisture at the access point over the following days. If the panel loosens again, investigate movement in the backing, an unsuitable clip or a continuing water problem rather than adding more adhesive.
Where the panel sits close to a shower, note whether water regularly splashes onto its face or lower edge. A narrow gap can admit repeated splashes even without a pipe leak. That distinction helps the fitter choose the right edge treatment and material, while preserving the opening method. Check that any floor covering beside the bath remains firmly fixed and dry. A panel repair should not leave a raised edge or loose trim that someone could catch with a foot when stepping out of the bath.
When the job needs a specialist
The site’s handyman repairs page is relevant for an intact panel needing sound minor fixings. Where bath surrounds, waterproofing or damaged backing must be rebuilt, bathroom refurbishment is the broader service route. Arrange plumbing attention separately for a suspected active leak. Explain whether the panel is designed to be removable, what lies behind it and whether any material is damp.
A good panel repair restores three functions: it stays in place during ordinary use, it protects the opening appropriately and it can be opened when hidden fittings need inspection. Keeping those functions together matters more than making a loose edge disappear for a week.